How to Use Disk Management to Create VHD in Windows 10 and 11?
This guide explains how to create a VHD using Disk Management in Windows 10 and 11, including how to attach, initialize, and understand the difference between VHD and VHDX.
By Irene / Updated on October 23, 2025
About Virtual Hard Disk (VHD)
A Virtual Hard Disk (VHD) is a digital file that functions like a physical hard drive. It holds all your files, folders, and system data in one place. You can store a VHD anywhere on your computer or transfer it using a USB drive, which makes it portable and convenient to share.
VHDs are widely used to create virtual machines and make data management simpler. There are four main types of VHDs: fixed, dynamic, differencing, and pass-through. Each type offers unique advantages for storage capacity and performance.
Using a VHD allows you to create virtual machines, back up or recover data, and run several operating systems without changing existing disk partitions. A VHD can have a fixed or expandable size, depending on your system or virtualization tool settings.
Microsoft Hyper-V supports both the VHD and the newer VHDX formats. The VHDX format supports up to 64TB, improves performance, and helps protect data from corruption caused by power outages. If you no longer need a VHD, you can easily detach it without deleting the file.
How to use Disk Management to create VHD?
Creating a Virtual Hard Disk (VHD) in Windows is simple with the built-in Disk Management tool. A VHD lets you store data, install another OS, or use it as a virtual drive without extra software. Follow these easy steps to create one:
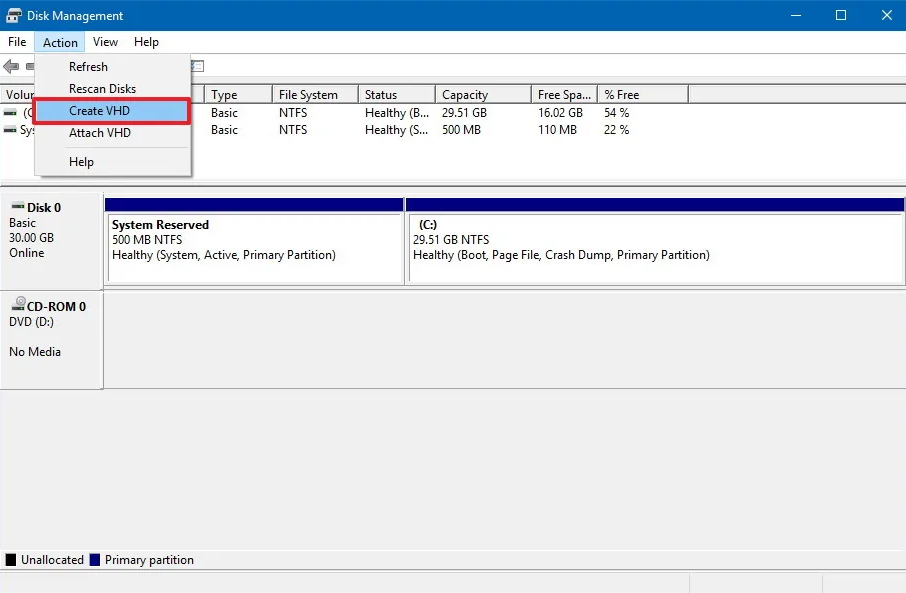
Step 1. Right-click the Start menu and select Disk Management to open the tool.
Step 2. In the top menu, click Action and choose Create VHD.
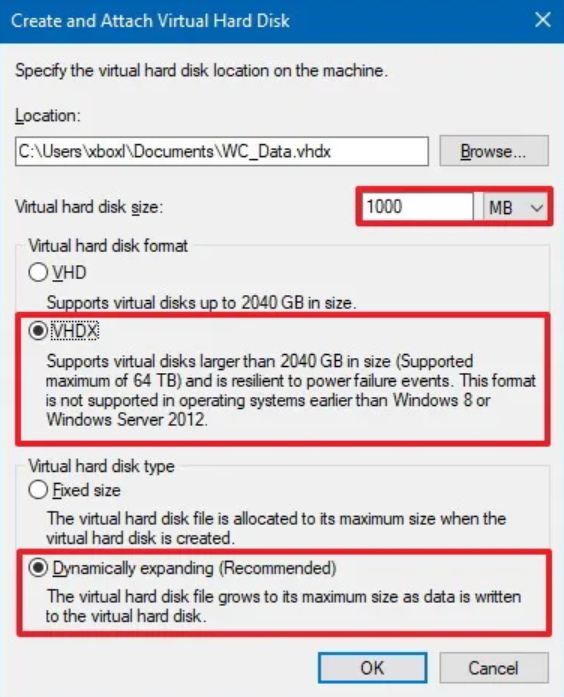
Step 3. Click Browse to select a location to save the VHD file, then enter a file name.
Step 4. Choose the VHD or VHDX format and set the virtual disk size as needed.
Step 5. Select Fixed size or Dynamically expanding based on your preference, then click OK.
Step 6. After the VHD appears in Disk Management, right-click it and select Initialize Disk to start using it.
This method is quick, safe, and ideal for creating a virtual drive for backups, testing, or extra storage.
Error: A Virtual Disk Provider for the specified file was not found
When using Disk Management to create a VHD, you may encounter the error “A Virtual Disk Provider for the specified file was not found.” This usually happens when the system cannot locate the component needed to read the virtual disk file. Common causes include an incorrect file path, missing permissions, or a stopped Virtual Disk Service.
To fix this issue, first check the VHD file path and make sure it is correct. Then, ensure your user account has both Read and Write permissions. If the error continues, try restarting the Virtual Disk Service or scanning your system for corrupted files using DISM or SFC tools.
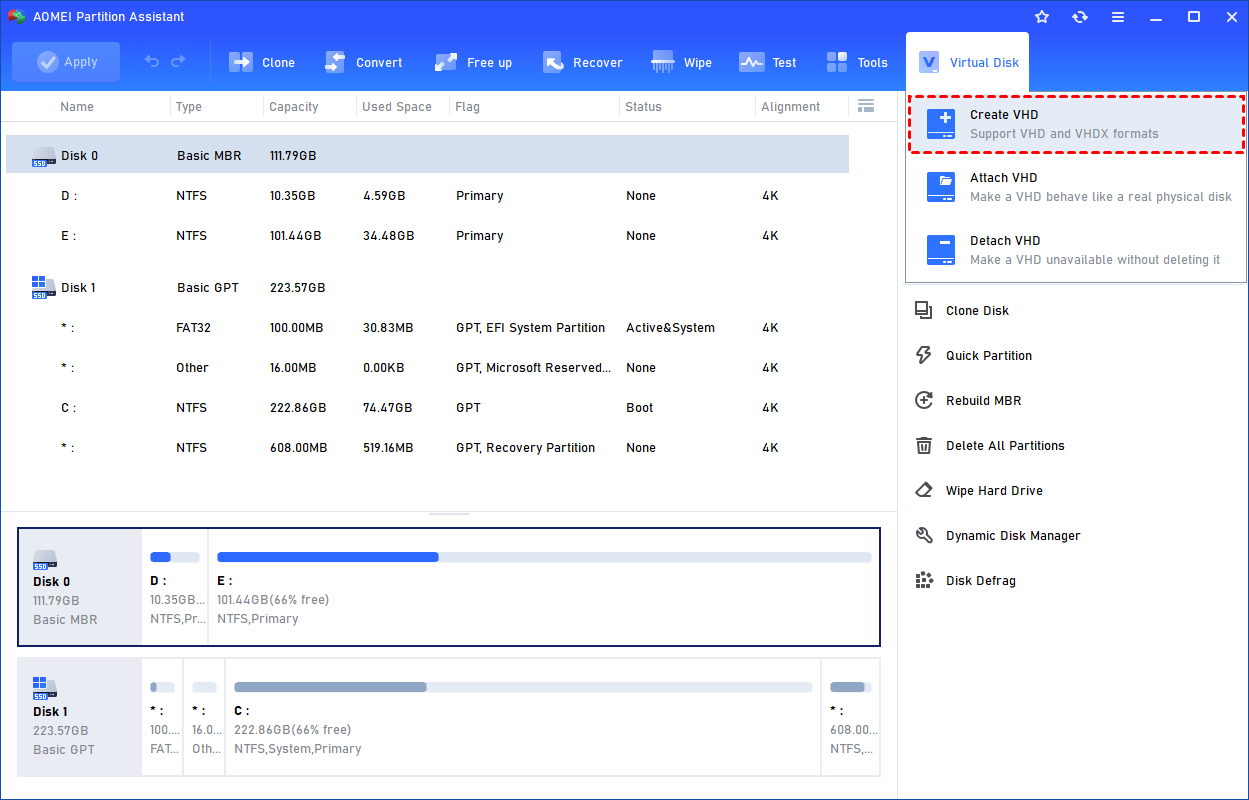
If these methods do not solve the problem, you can use a reliable alternative, AOMEI Partition Assistant. Its Virtual Disk feature allows you to easily create, attach, and detach virtual disks on your computer without errors.
Before you start: Download and install AOMEI Partition Assistant on the Windows computer where you want to create or manage virtual disks. This tool provides a simple and powerful way to handle VHD and VHDX files. To access the Virtual Disk feature, upgrade to AOMEI Partition Assistant Professional, Server, or higher editions.
The Best Windows Disk Partition Manager and PC Optimizer
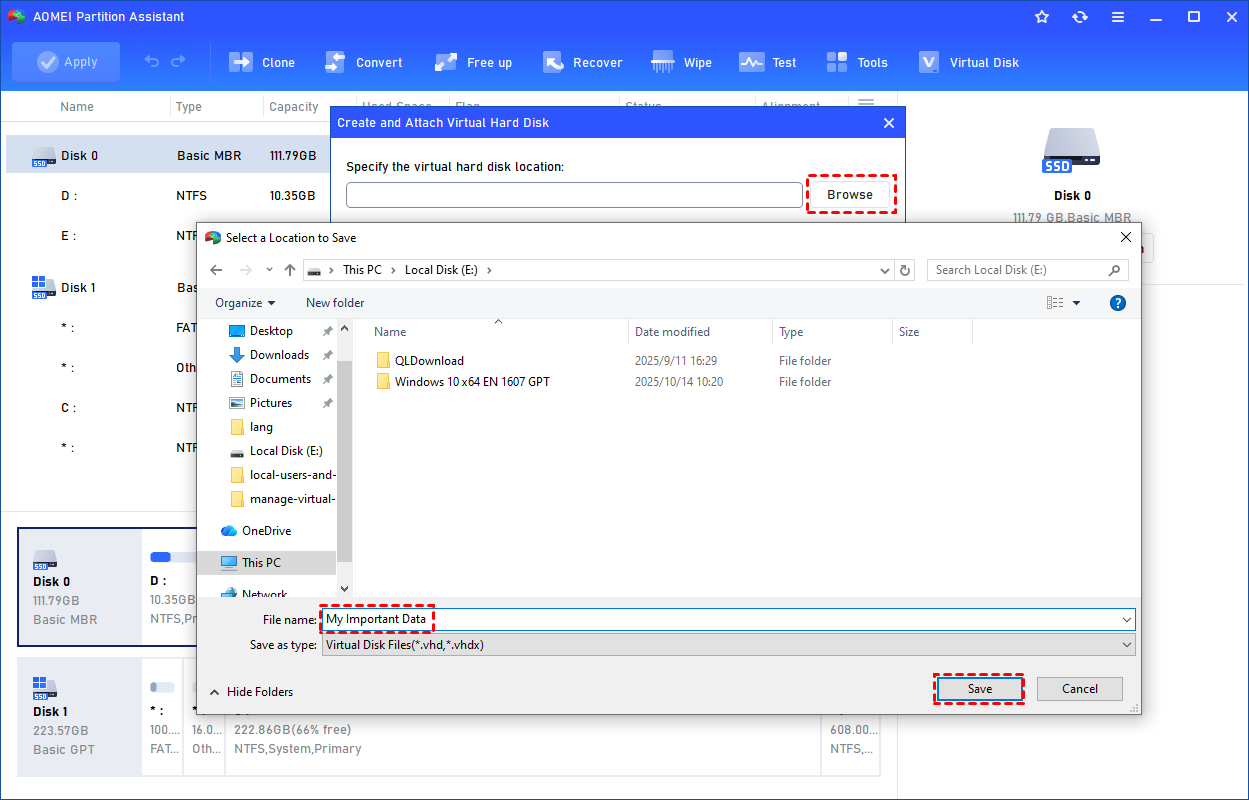
Step 1. Click the tab "Virtual Disk", you will see 3 options available for VHDs: create VHD, attach VHD, and detach VHD. Select the "Create VHD" option after clicking the "Virtual Disk" tab.
Step 2. You can specify the virtual disk location and size.
Optionally, you can click the "Advanced" option to set the virtual hard disk format and type. (By default, the VHDX format and the Dynamically expanding type are checked.)
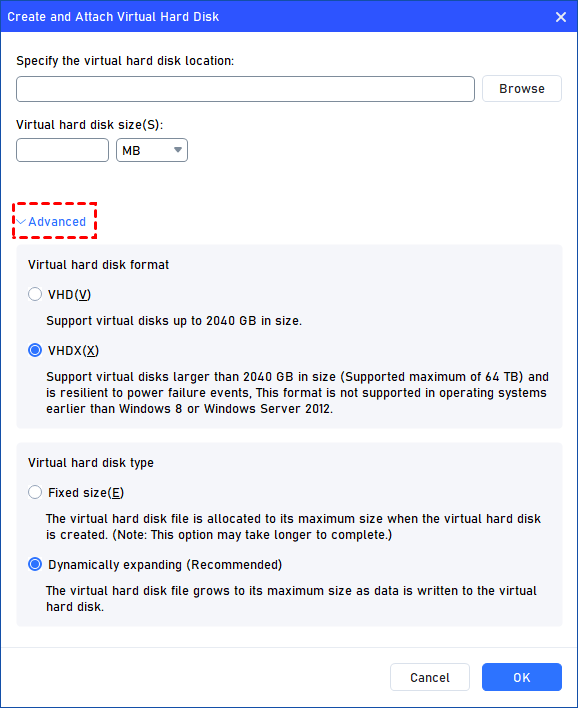
Virtual hard disk format: VHD and VHDX are supported.
For VHD, it supports virtual disks up to 2040GB in size.
For VHDX, it supports virtual disks larger than 2040GB in size. (Up to 64TB) This format is not supported in operating systems earlier than Windows 8 or Windows Server 2012.
Virtual hard disk format: Fixed size and Dynamically expanding are supported.
For fixed size, the virtual hard disk file will be allocated its maximum size when it is created. So it will take much longer to create.
For Dynamically expanding, the virtual hard disk file will grow to its maximum size as data is written to it. (Recommended)
Click "Browse" to select a location to create the VHD. Please enter a file name for the virtual disk and click "Save".
Step 3. Once the virtual disk location and size are set up, you can click "OK" to start creating the VHD.

Step 4. After the reload process is finished, you will see that the VHD has been created successfully. It will be attached automatically.
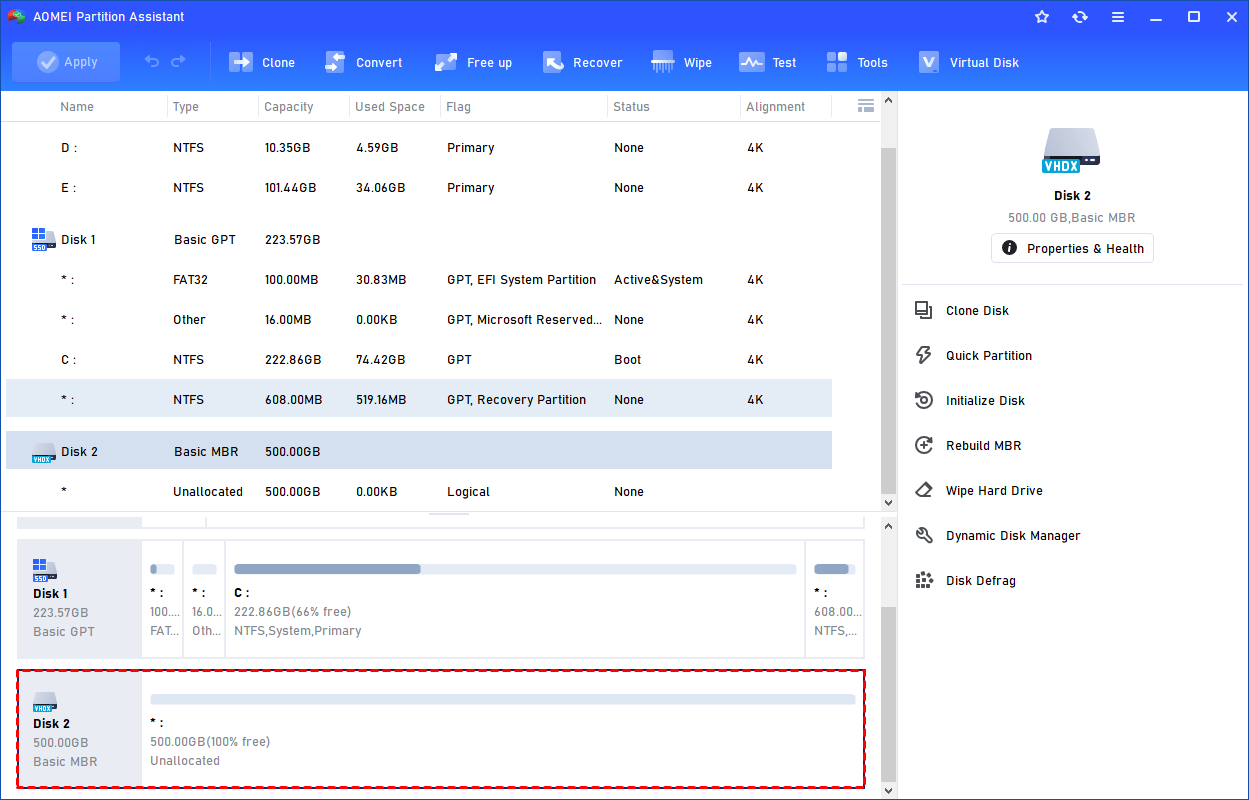
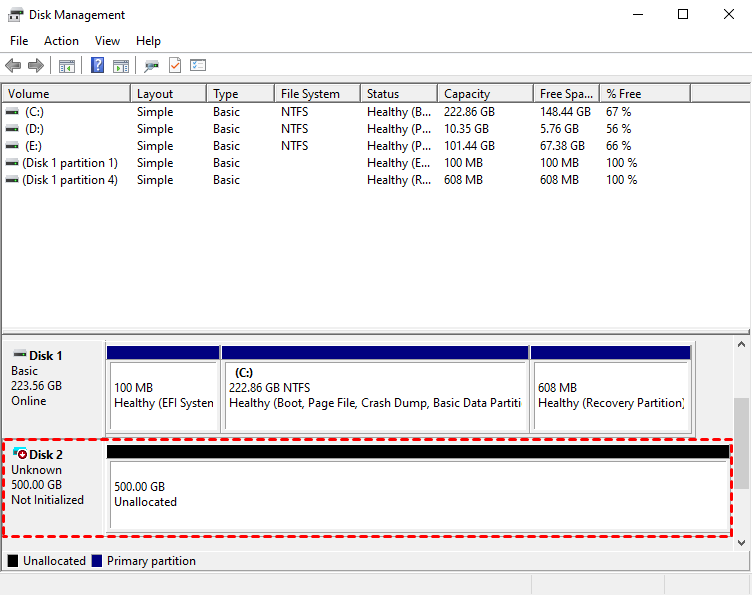
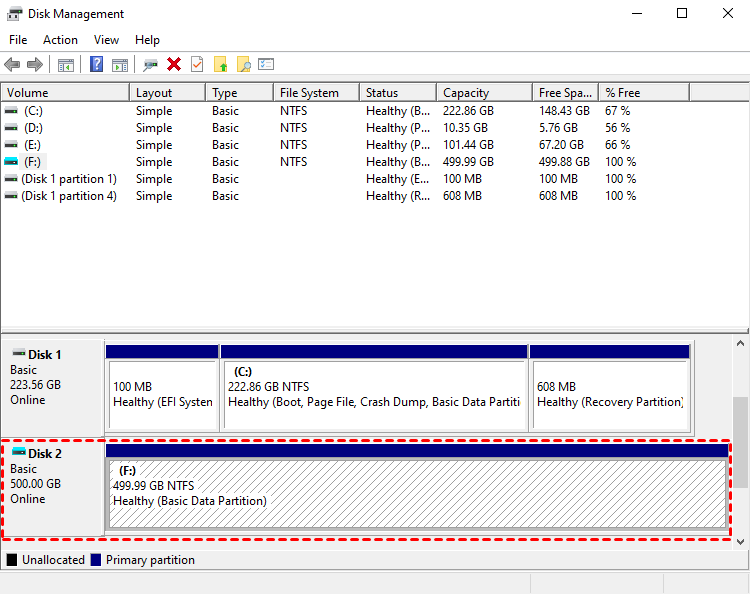
You can also view the VHD in Windows Disk Management.
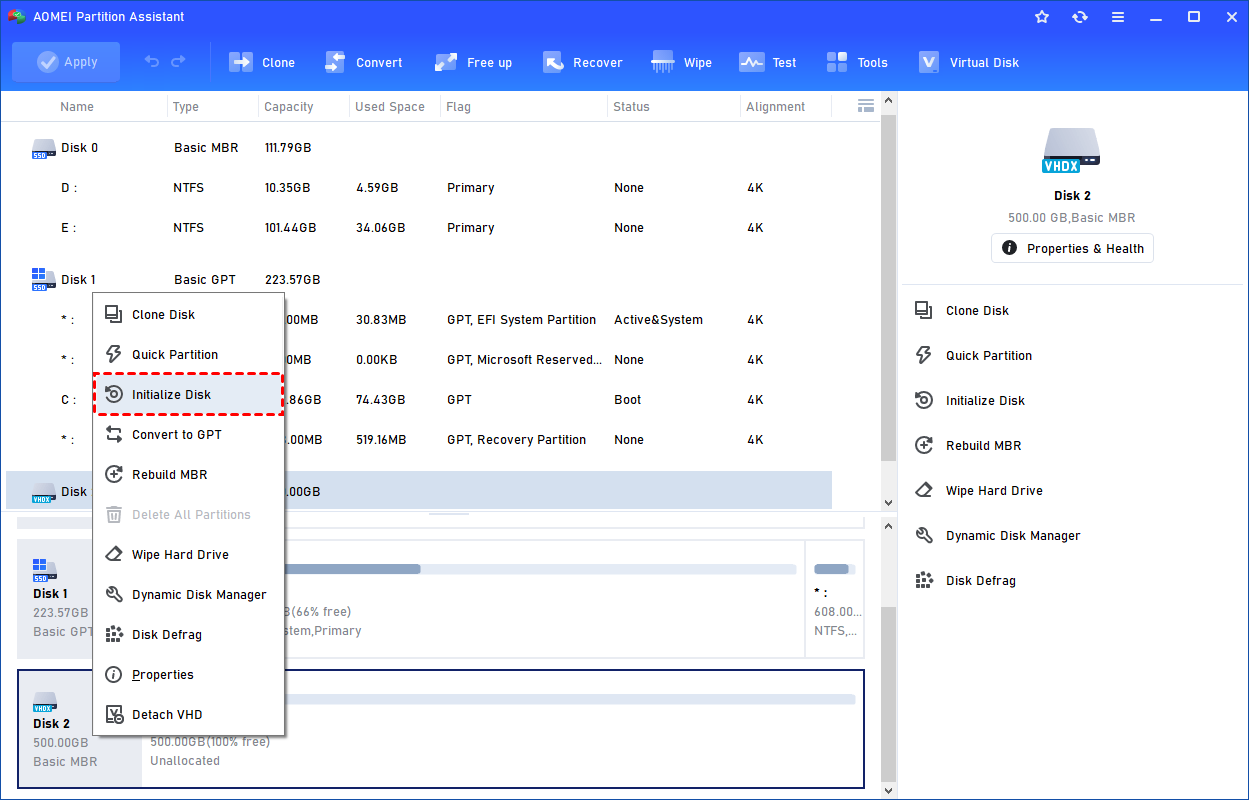
The created VHD will be uninitialized so it is empty without any data or file system. To make it useful, you need to initialize the disk, create a partition, and assign a drive letter.
You can initialize the drive in Partition Assistant.
Or, initialize it in Windows Disk Management.

Then, you can create a partition and assign a drive letter for the partition. Finally, you can use the VHD normally.
Conclusion
Using Disk Management to create Virtual Hard Disks (VHDs) in Windows is a simple and effective way to store data, test systems, or run multiple operating systems. The Disk Management tool makes it easy to create and initialize a VHD for daily use. However, if you encounter errors such as “A Virtual Disk Provider for the specified file was not found,” switching to AOMEI Partition Assistant is a great solution. With its Virtual Disk feature, you can easily create, attach, and detach VHD or VHDX files without technical issues. This tool provides a more stable and user-friendly experience for managing virtual disks efficiently.
The Best Windows Disk Partition Manager and PC Optimizer

