How to Check SSD or HDD Health with S.M.A.R.T Windows 11/10
In this article, you will get two powerful methods to check SSD or HDD health with S.M.A.R.T on Windows 11/10. Besides, you can also learn how to optimize your drive if S.M.A.R.T shows a bad result.
By Hedy / Updated on March 25, 2026
Why need to perform S.M.A.R.T test?
I'm trying to debug hardware issues, and my first target is the SSD hard drive. However, the drive does not have SMART enabled, and pretty much all recommendations for checking SSD health include using SMART-related tools.
S.M.A.R.T. stands for Self-Monitoring, Analysis, and Reporting Technology. It’s a monitoring system built into most modern hard drives and SSDs. Performing a S.M.A.R.T. test is essential for several important reasons:
1. Detect early signs of drive failure
S.M.A.R.T. tests help identify problems before they lead to catastrophic failure. Parameters like reallocated sectors, read errors, and spin-up time can indicate an aging or failing drive.
2. Prevent data loss
By detecting potential issues early, S.M.A.R.T. testing gives you time to back up your data before the drive becomes unusable. It's a proactive step to avoid losing valuable files, photos, or work.
3. Ensure system reliability
Hard drive issues can lead to random freezes, crashes, and system instability. Regular S.M.A.R.T. checks help ensure your storage is healthy, which contributes to the overall stability of your computer.
4. Improve troubleshooting accuracy
If your system is slow or acting abnormally, a S.M.A.R.T. test can help rule out (or confirm) whether the drive is the culprit. This helps you troubleshoot more efficiently.
5. Support automated health monitoring
Many operating systems and third-party tools can automatically monitor S.M.A.R.T. data and alert you if any attribute goes beyond safe limits. This automation helps you stay ahead of potential problems.
Running a S.M.A.R.T. test is a smart move. It helps you catch signs of disk trouble early, secure your data, and maintain a reliable system. Whether you're a casual user or managing multiple computers, integrating S.M.A.R.T. checks into your routine is a simple way to safeguard your digital life.
How to check SSD or HDD health with S.M.A.R.T
Keeping your hard drive in good condition is essential for data safety and system performance. One of the most reliable ways to monitor drive health is through S.M.A.R.T. checks. Below are two proven methods to evaluate the health status of your hard drive effectively.
Method 1. Perform S.M.A.R.T. test via CMD
The Command Prompt is a powerful built-in tool in Windows that can handle a variety of disk-related tasks, including partition management, formatting, and changing drive letters. It also offers a quick way to run a basic S.M.A.R.T. diagnostic test. Follow these steps:
Step 1. Click the Windows icon, type cmd in the search bar, and choose Run as administrator from the results.
Step 2. In the Command Prompt window, type the following command and press Enter:
wmic diskdrive get status
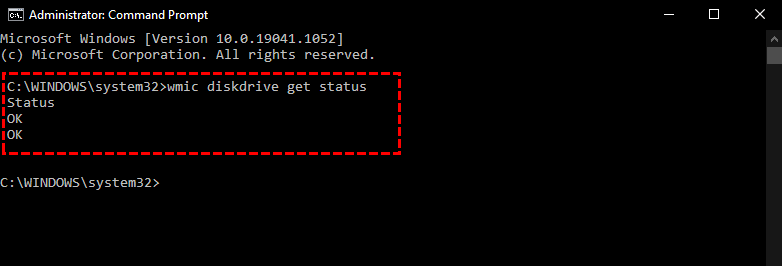
Step 3. Check the output:
• If it displays OK, your hard drive is functioning properly.
• If it shows Pred Fail, your drive may be experiencing issues and should be checked further or replaced.
Method 2. Make S.M.A.R.T. test with a powerful software
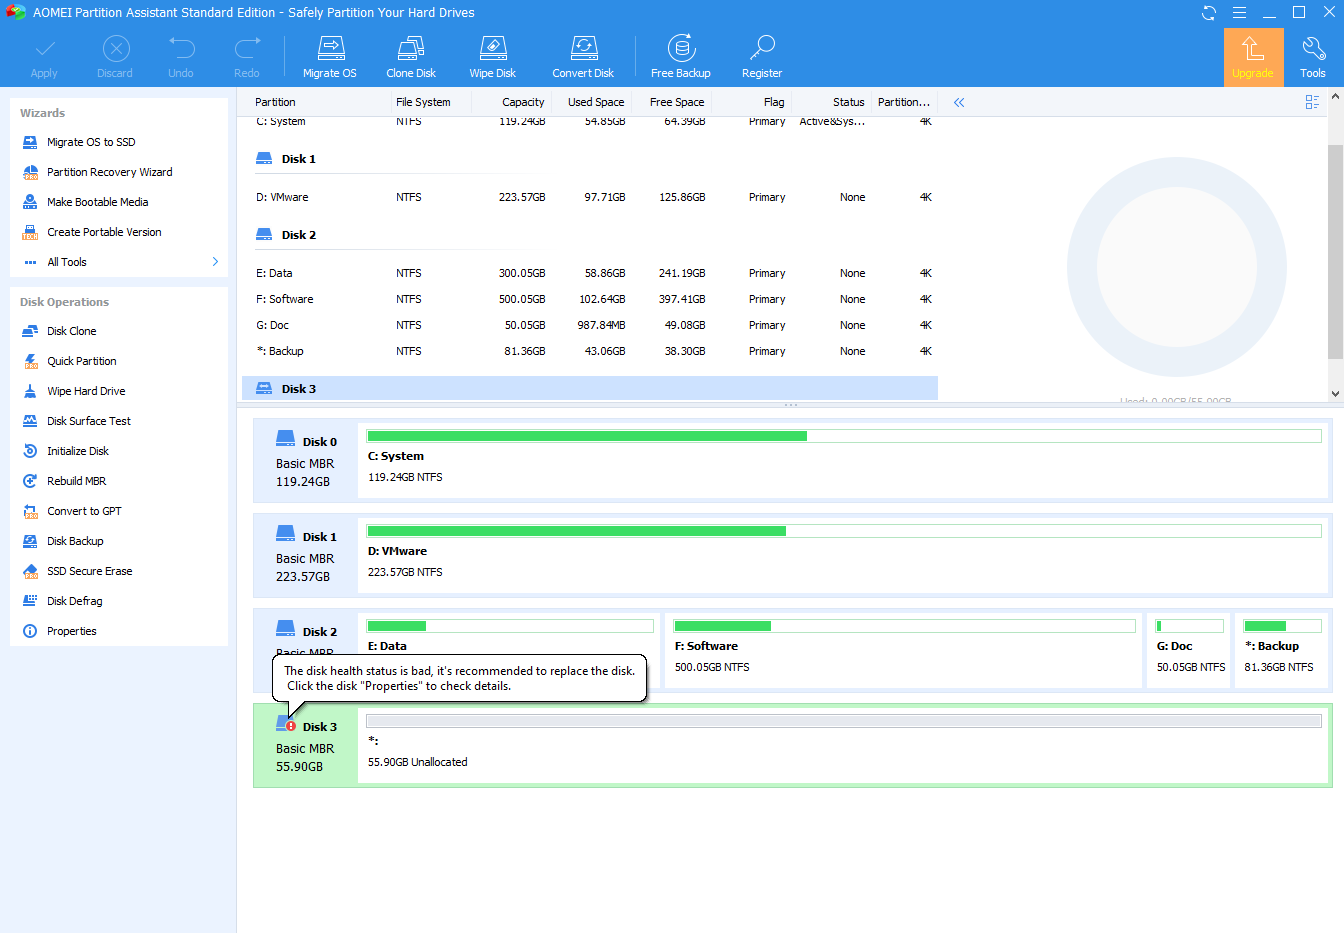
Beyond using Command Prompt, a more user-friendly and feature-rich option is AOMEI Partition Assistant - a trusted tool designed to test and manage your hard drive with ease.
Here’s why it stands out as one of the most effective S.M.A.R.T. test utilities available:
◉ Fully compatible with Windows 11, 10, 8.1, 8, and 7.
◉ Capable of checking the S.M.A.R.T. status of your drives while also helping to repair issues such as bad sectors and fragmented files.
◉ Offers a clean and intuitive interface, making it accessible for both beginners and advanced users.
◉ Provides clear visual guides along with step-by-step text instructions for better understanding.
◉ Comes packed with extra disk management features—from wiping drives and merging partitions to cloning entire disk partitions.
Let’s walk through how to run a S.M.A.R.T. test using this powerful tool.
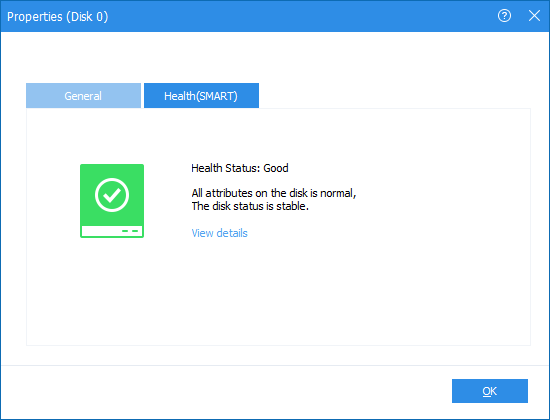
Step 1. Download and install this hard drive S.M.A.R.T. test software. Right-click the target drive, click "Properties", and "Health(SMART)".
Step 2. The result "Health Status: Good" means that your hard drive is healthy.
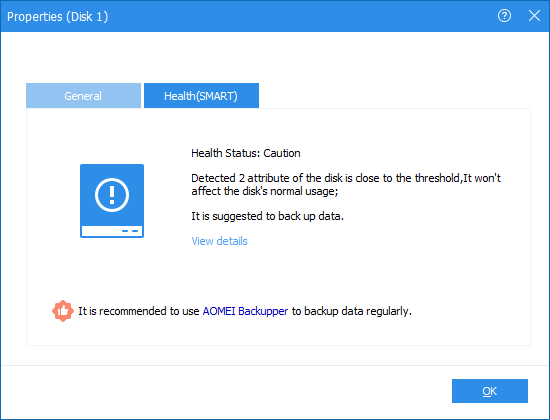
Step 3. If the result is "Caution", you can still use it normally. But you’d better make a data backup.
Step 4. If you see its health status shows Bad, you should find out the errors and repair them.
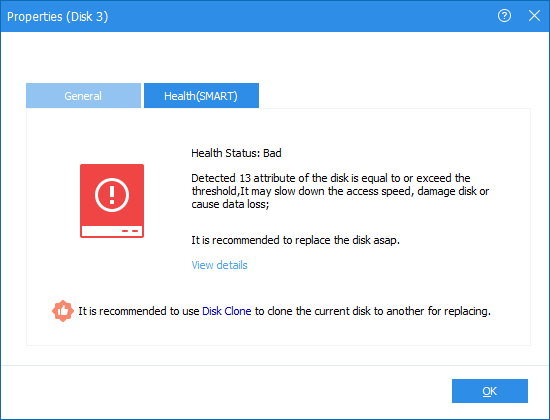
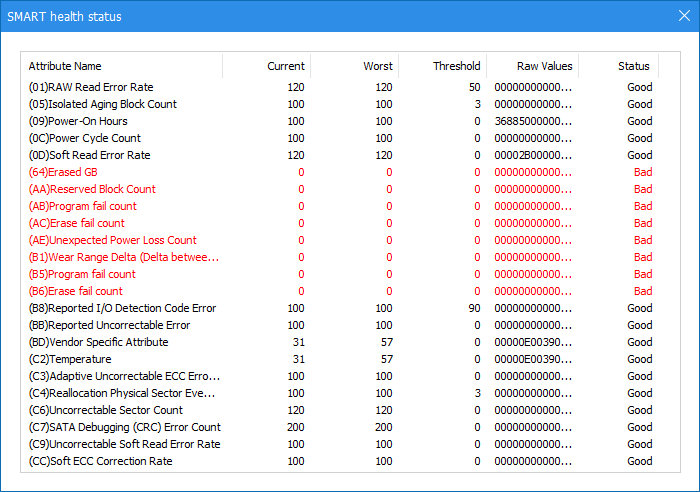
Step 5. If the result is bad, click the "View details" option to see the detailed information.
What to do if your hard drive or SSD is bad?
If your S.M.A.R.T. test returns a bad status, it’s a clear warning that your hard drive may be failing. Issues like bad sectors, file system errors, or fragmentation could be affecting performance, or worse, putting your data at risk. To safeguard your files and extend the life of your drive, AOMEI Partition Assistant is also a good choice.
It is a powerful disk manager that offers many features to fix hard drive issues. If the S.M.A.R.T. test shows a bad status, consider the following three options:
Method 1. Check partitions
A bad sector is a section of the hard drive that becomes damaged and can no longer store or retrieve data properly. When these sectors go unrepaired, they can cause serious problems. Your system may struggle to read from the disk, trigger file corruption errors, or in more severe cases, lead to blue screen crashes.
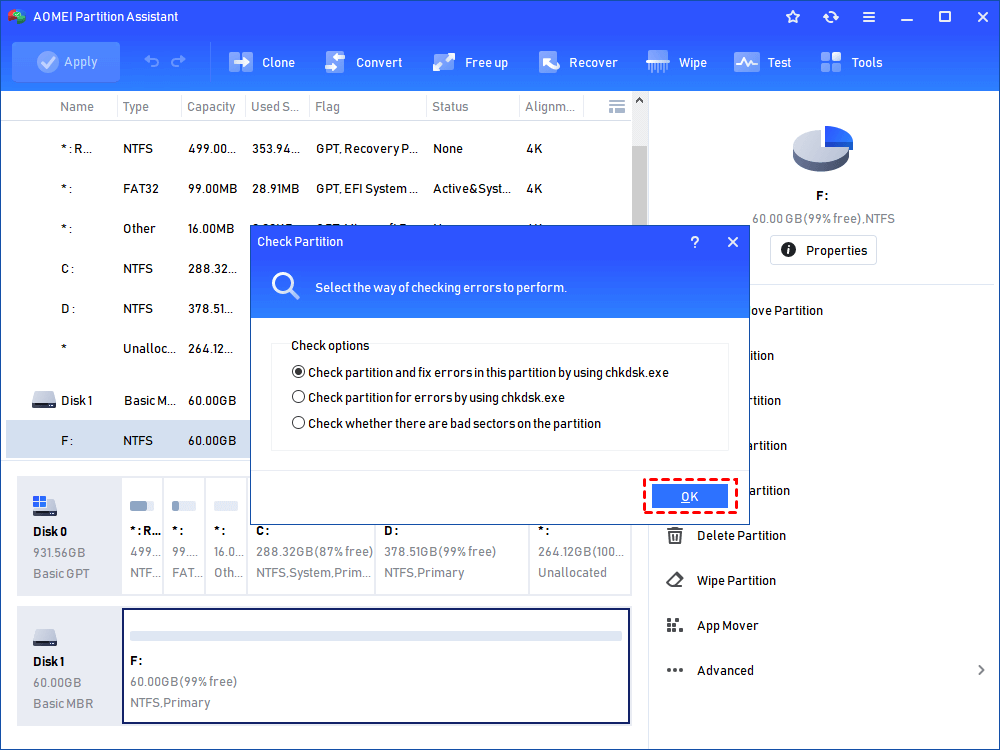
Step 1. Right-click the drive you decide to check and click "Check Partition".

Step 2. There're three methods to check the partition, click the "Check partition and fix errors in this partition by using chkdsk.exe" and "OK" in order.
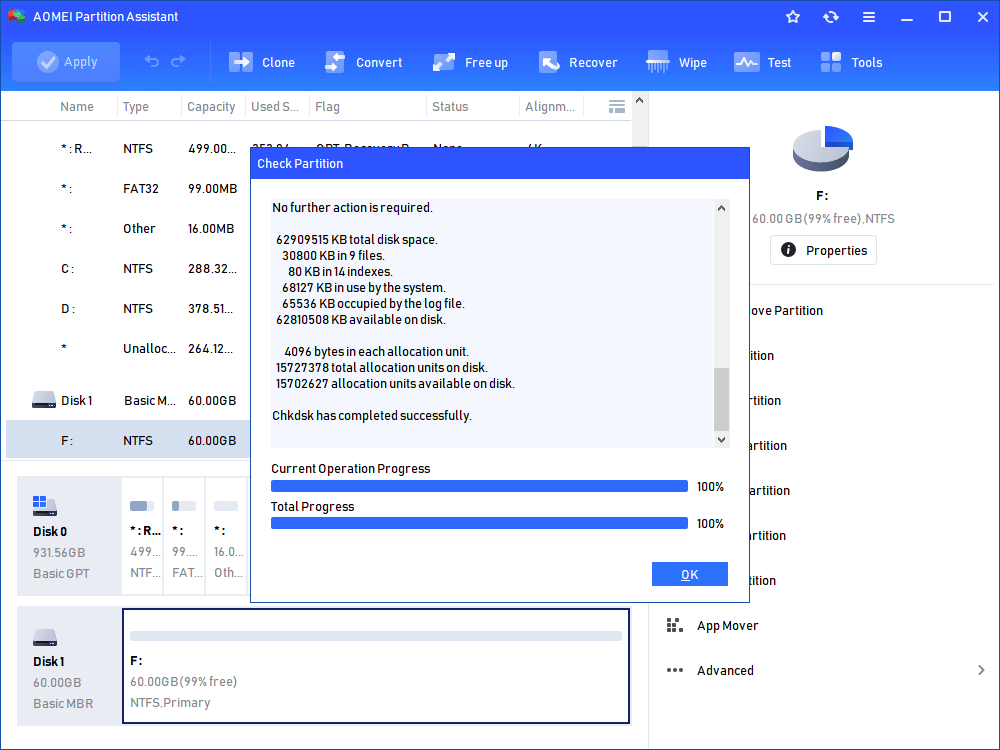
Step 3. Click "OK" when the bad sectors on the target hard drive are repaired.
Method 2. Defrag the hard drive
When your hard drive becomes overly fragmented, data is scattered across different locations, making the system work harder to access files. This fragmentation not only slows down performance but can also degrade your computer’s overall health over time.
To restore speed and efficiency, it's essential to defragment the hard drive regularly, especially if you're using a traditional HDD. This process reorganizes fragmented data, allowing for smoother and faster access, ultimately extending the life of your storage device.
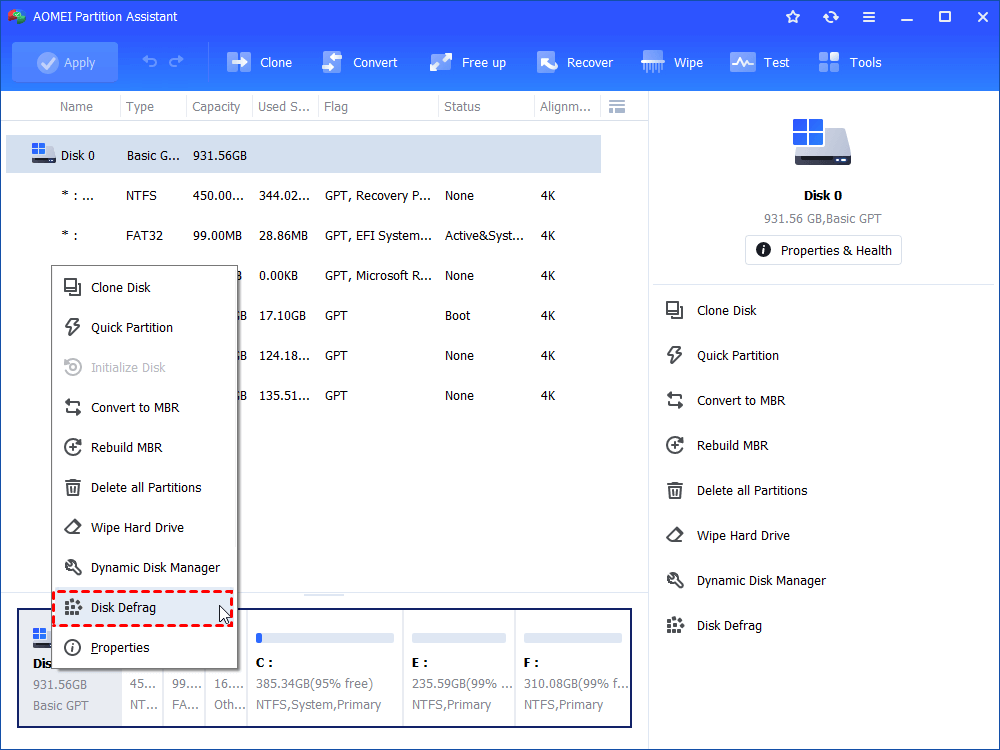
Step 1. Right-click on the drive with bad SMART status and click "Disk Defrag".
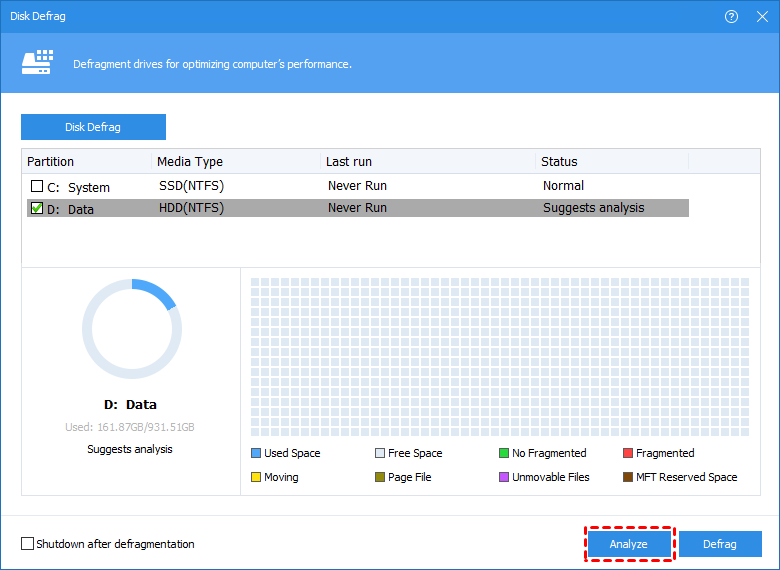
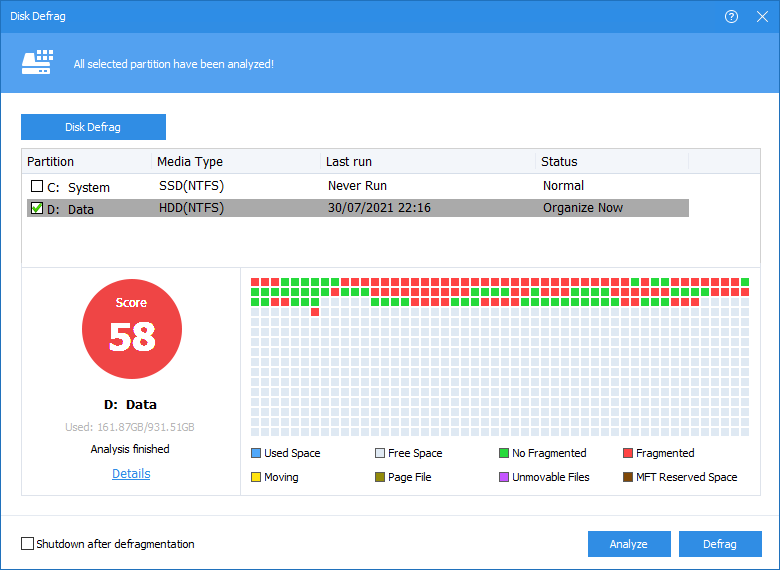
Step 2. Select the partition on the target hard drive and click "Analyze".
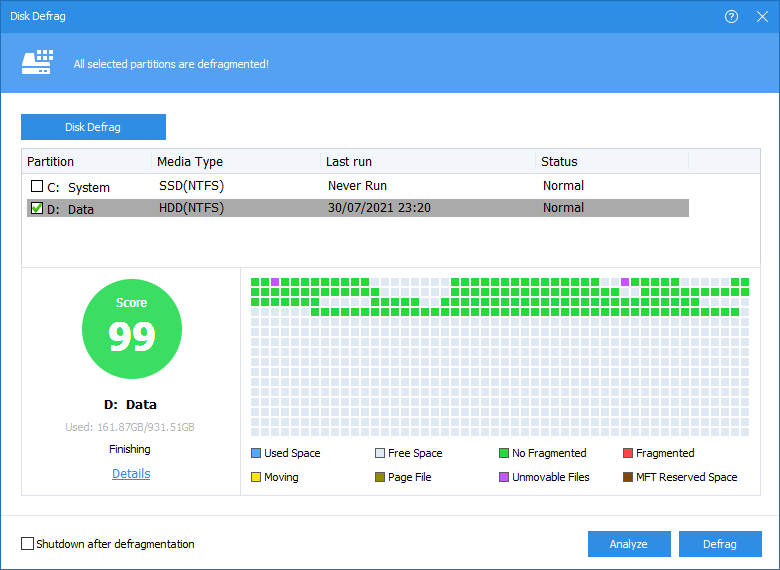
Step 3. In the new window, check the target drive and click "Defrag".
Step 4. It will defrag the disk, please wait patiently.
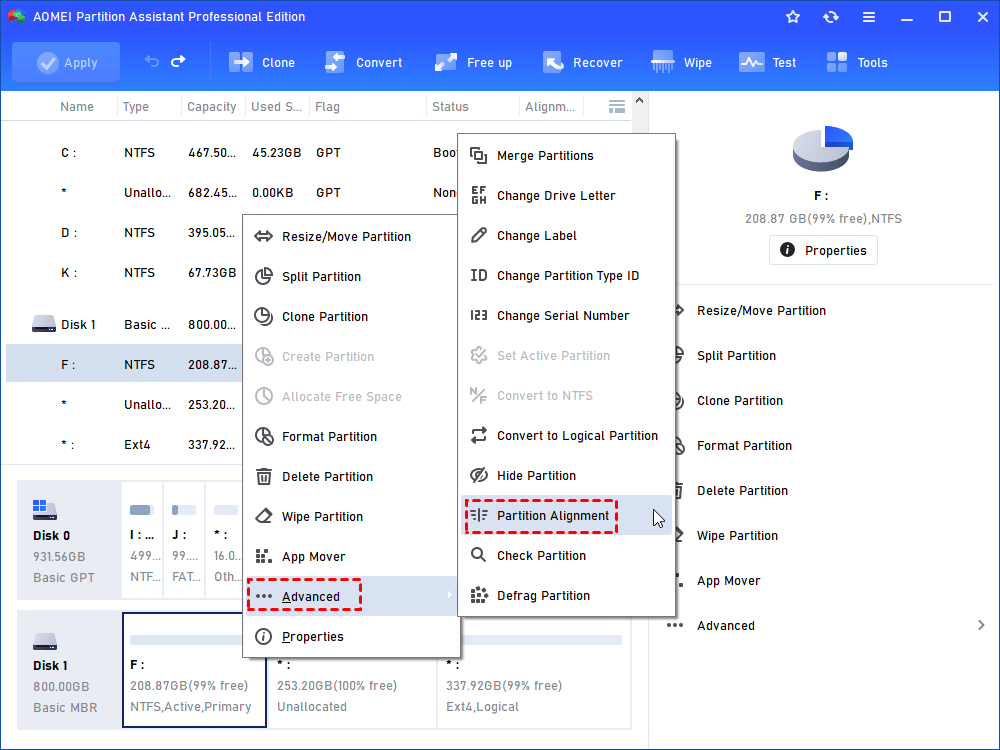
Method 3. Perform 4K alignment on SSD
Unlike HDDs, Solid State Drives (SSDs) handle data differently. Using traditional "Disk Defrag" on an SSD is not recommended—it can actually reduce the lifespan of the drive due to unnecessary write operations.
To safely and effectively improve SSD performance, AOMEI offers a dedicated "Partition Alignment" feature. This tool is designed to align the 4K sectors on your SSD, which helps optimize data access and significantly boosts speed.
With just a few simple steps, you can enhance your SSD’s efficiency without compromising its durability.
Step 1. On the main interface, right-click a partition from the SSD, then select "Advanced" and "Partition Alignment".
Step 2. In the "Partition Alignment" window, select "4096 Sectors".
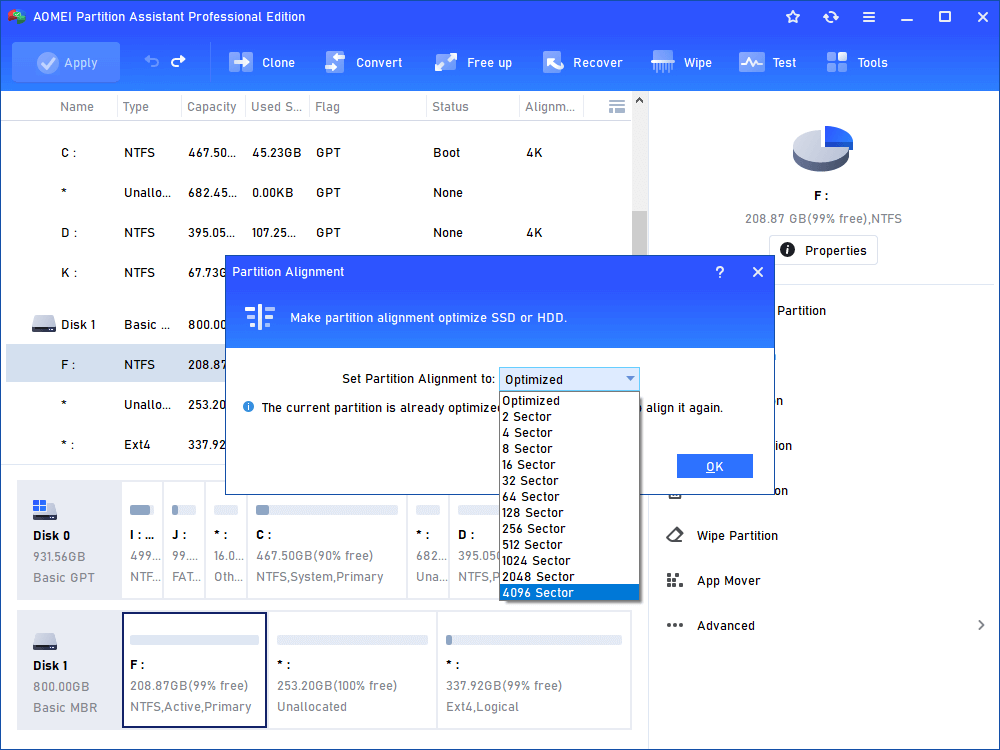
Step 3. Click "OK" and "Apply" to start aligning the target partition. Repeat the above operations to align the remaining partitions.

Conclusion
In this guide, we've outlined two reliable methods to check SSD or HDD health with S.M.A.R.T - one through the built-in Command Prompt tool, and the other via the powerful third-party utility, AOMEI Partition Assistant. If the test shows your drive is in poor condition, we’ve also provided effective solutions to help you address issues like bad sectors and file fragmentation.
For users looking to take their disk management even further, AOMEI Partition Assistant includes a range of advanced features such as allocating free space to C drive from other partitions, transferring installed programs to a different drive, and converting a primary partition into a logical drive.

