DiskPart: Create FAT32 Partition in Windows 11/10/8/7
Looking for how to use DiskPart create FAT32 partition on Windows 11/10/8/7? This article provides step-by-step instructions. Additionally, this post elaborates on the DiskPart create partition size limits and provides a free DiskPart alternative to create FAT32 partition without size limits.
By Hedy / Updated on March 18, 2024
What is FAT32 system partition?
A FAT32 system partition refers to the 32-bit version of the File Allocation Table (FAT) file system. This file system specifies how data is stored and arranged on a hard drive, including file names and specific permissions. Prior to the advent of the New Technology File System (NTFS) in 1993, Windows operating systems such as Windows 95 primarily used FAT32, and NTFS did not gain traction until the release of Windows NT.
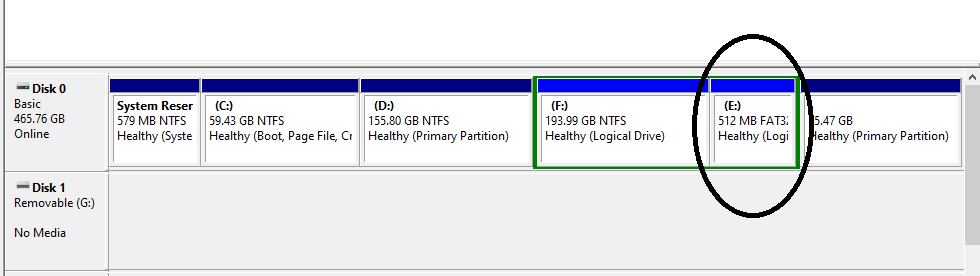
For devices that require broad compatibility, including memory cards, USB drives, and external hard drives, the FAT32 file system is commonly used. It is compatible with all Windows versions as well as Mac, Linux, game consoles, and other devices equipped with USB ports. When pursuing maximum compatibility and the ability to play files smaller than 4 GB on a variety of devices, it is recommended to configure the system partition as FAT32.
How to use DiskPart create FAT32 partition
Although Disk Management provides the ability to create FAT32, exFAT, and NTFS partitions, experienced users often choose to use DiskPart create FAT32 partitions because of its ability to perform more advanced partitioning tasks and greater control over disk and partition management. Here is a step-by-step guide to create fat32 partition using DiskPart:
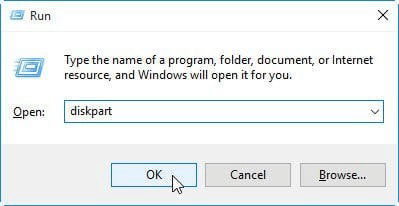
Step 1. Press the Windows + R keys together, type diskpart in the Run box, and then press Ctrl + Shift + Enter together to run as administrator.
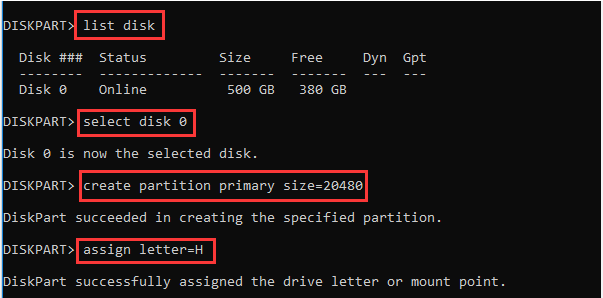
Step 2. At the DiskPart prompt, enter the following commands to create a primary partition on the hard drive, pressing Enter after each command:
list disk (This displays all disks on the computer.)
select disk 0 (replace "0" with the disk number on which you want to create the partition.)
create partition primary size=20480 (The specified size is in MB, which means creating a 20.48GB primary partition.)
assign drive letter=H (Replace "H" with the desired drive letter.)
Step 3. After creating a partition with a specified size and drive letter, enter the following command and press Enter to set the partition to FAT32:
format fs=fat32
Step 4. Type exit and press Enter to exit the command prompt.
Once completed, verify in Disk Management that the 20.48GB FAT32 partition was successfully created.
Virtual Disk Service error: The volume size is too big.
It can be frustrating to encounter the "Virtual Disk Service error: The volume size is too big." message when trying to create FAT32 partition DiskPart to format a hard drive larger than 32 GB to the FAT32 file system.

Even Disk Management is of no help in this case as the FAT32 option is not available for drives over 32 GB.
This limit stems from Microsoft's specification that FAT32 partitions cannot exceed 32 GB in size, prohibiting formatting beyond this threshold using built-in Windows tools.
Therefore, users who want to use DiskPart create FAT32 partitions larger than 32 GB must consider converting FAT32 file system to NTFS or exFAT.
However, although these file systems support larger partition sizes, they may lack the broad compatibility of FAT32, especially with older devices or non-Windows operating systems.
Free DiskPart alternative to create FAT32 partition without size limits
Fortunately, there is a solution in the form of third-party free software such as AOMEI Partition Assistant Standard, known for its user-friendly interface and comprehensive features. With the help of this tool, users can easily break the DiskPart create partition size limit, then create partitions larger than 32 GB using FAT32, NTFS, or exFAT file systems, and even format a 500GB hard drive to FAT32 if necessary.
Moreover, DiskPart and DM create partitions based on existing unallocated space on the hard drive. So you have to delete the partition in advance and this can cause data loss. But the AOMEI Partition Assistant Standard doesn't require you to do so. As long as there is free space on the existing partition, you can create FAT32 partition directly from the space without deleting the partition, preserving the data integrity.
Here's how to use AOMEI Partition Assistant Standard Edition to create a FAT32 partition larger than 32GB:
Step 1. Install and launch AOMEI Partition Assistant Standard, select the desired partition with remaining space, or create a new partition from an existing partition.
Step 2. Right-click on the partition and select Create Partition from the context menu.
Step 3. Specify the partition size (Slide the slider or input the number to set the partition size to the size you want), drive letter in the subsequent window. Then you can set the file system (select FAT32), partition label, and partition type as you like.

- ★Tips:
- If you here set the drive letter as "None", the partition will be hidden.
- If you are creating partitions on an SSD, tick the "SSD partition alignment" checkbox to align the partition(s).
Step 4. Preview the action and click Apply, then click Proceed to perform the pending action.
By following these steps, you will successfully create a FAT32 partition larger than 32GB, overcoming limitations imposed by Windows native tools.
Final words
Guess now you have learned how to use DiskPart create FAT32 partition on Windows 11/10/8/7. If you want to create a FAT32 partition larger than 32GB, you can use the free alternative - AOMEI Partition Assistant Standard Edition to overcome the size limit.
If you want to unlock more advanced features like resizing recovery partition, securely allocating free space to C drive, and cloning BitLocker encrypted disks, upgrade to its Pro version and manage your computer in a more powerful way!

