How to Fix Failed to Read Sector When Cloning A Hard Drive?
If you encounter the Failed to Read Write Sector error, it usually means there are bad sectors on your drive. You can use an alternative that allows you to clone a disk with bad sectors.
By Irene / Updated on June 20, 2025
What is the Failed to Read/Write Sector error?
When trying to clone a disk or transfer data with Acronis, you may see a “Failed to Read/Write Sector” error. This means the software can't access some parts of the drive properly, which also shows clone failed error 9 in Macrium Reflect. There are several possible reasons behind this issue. Understanding them can help you fix the problem more easily. Here’s a simple table to explain the common causes:
| Reason | Explanation |
|---|---|
| Hardware issues | The disk may be physically damaged or defective. |
| Loose or faulty cables | A bad or loose connection can stop data from being read or written. |
| Software problems | The disk cloning tool may be broken or outdated. |
| Drive incompatibility | Old firmware or drivers might not work well with your current system. |
| Disk errors | Bad sectors on the source or target disk can interrupt the process. This is the most common causes of Failed to Read/Write Sector error. You can go to there to check test bad sectors on hard drive. |
| Low system resources | Not enough RAM or CPU can cause the cloning process to fail or freeze. |
When this error is caused by bad sectors or unstable conditions, it's important to try an alternative that can handle these problems better like AOMEI Partition Assistant. Unlike some other tools, it supports disk cloning even when bad sectors are present. It also offers more reliable performance and better compatibility with different drives and systems. By using AOMEI, you can avoid many common read/write errors and complete the cloning process more smoothly.
How to clone a disk with bad sectors
If your disk has bad sectors, regular cloning tools may fail or stop halfway. In this case, AOMEI Partition Assistant offers a better solution. It has a "sector-by-sector clone" feature that allows you to clone the entire disk, including areas with bad sectors, to another hard drive. This helps ensure that your data is transferred safely, even if the source drive is damaged.
AOMEI Partition Assistant works well with Windows 7, 8, 10, and 11. It provides several cloning options—you can clone an entire disk, a single partition, or even your system. After the clone, it can automatically align partitions to improve the read and write speed of your new drive. Even if you're not familiar with disk tools, its clear instructions make it easy for beginners to use.
Besides cloning, AOMEI also offers useful features like checking and repairing bad sectors and optimizing disk performance. With this all-in-one tool, you don’t have to worry about disk errors getting in your way. It makes the entire process more stable and reliable, saving you time and effort.
The Best Windows Disk Partition Manager and PC Optimizer
Step 1. Open the installed AOMEI Partition Assistant, click "Clone" in the main interface, and select "Clone Disk".

Step 2. Choose the hard disk that you need to clone as the source disk like SSD and click "Next".

Step 3. Select the destination disk to store the data on the source disk, and then click "Next".

Step 4. Then, you can check the source and destination disk in the next window choose "Sector to Sector clone", and click the "Confirm" button to continue if there is no problem.

Here, you can also click the "Settings" button to adjust the partition size on the destination disk or tick "4k alignment" to Optimize the performance of SSD if the target disk is an SSD drive.

Tip: If you want to clone Windows to a smaller drive, the "Clone without resizing partitions" button will be greyed out. Then, a Note about how to boot OS from the destination disk will pop up. Read and keep it in mind.
Step 5. After returning to the main interface, check the pending operation and click "Apply" and "Proceed" to commit the operation.

When the process is over, you can use the new hard drive to replace the old hard drive. If you keep both drives on your computer, you probably need to enter BIOS Settings to change boot drive.
Your computer can be booted from the destination disk after cloning the system disk. You just need to enter BIOS to set it as the prior boot device.
Now, you need to set the new drive as the first boot drive
Step 1. Restart the computer, when you see the first screen, press the functional key (F2, F3, F4, F5, ESC) to enter "BIOS Setup".
Step 2. Select "Change boot order", and change the cloned hard drive to the top of the listed drives.

Step 3. Press “F10” to save and leave. If the cloned hard drive won't boot, you can check if the boot mode (BIOS and UEFI) and the boot connection are correct.
Other methods to fix failed to read sector when cloning hard drive
Besides bad sectors, there are other factors will cause that disk cloning has failed. You can use the following 2 methods to fix the issue as well.
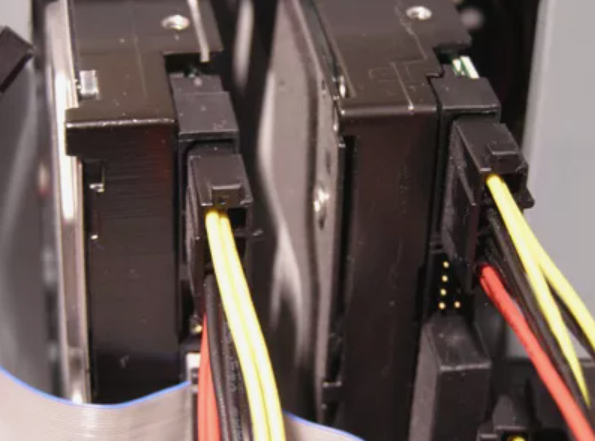
Fix 1. Check the cable connection
A loose or damaged cable can often lead to errors when you're trying to copy data from an external hard drive. One common example is the Failed to Read Write Sector error, or read failed 23. This happens when the connection between your computer and the drive isn’t stable or secure, interrupting the data transfer process.
To fix the issue, start by checking the cable connection. Make sure it’s firmly plugged in, and inspect both ends for any dust or dirt—clean them if needed. If everything looks fine but the error still shows up, try using a different cable. Over time, cables can wear out or become faulty, and replacing them is often a simple and effective solution.
After confirming that the connection is stable, you can proceed with your data copying. If the connection seems fine but you still encounter issues, there are further troubleshooting steps you can take to resolve the problem.
Fix 2. Disable antivirus software
An antivirus program provides real-time protection to shield your PC from viruses and malware attacks. However, there are times when it mistakenly identifies some cloning software as a potential threat. This can disrupt their operation, resulting in error messages such as the Failed to Read Write Sector error. To resolve this issue, you need to temporarily disable your antivirus software. You can follow the provided steps to turn off this antivirus program.
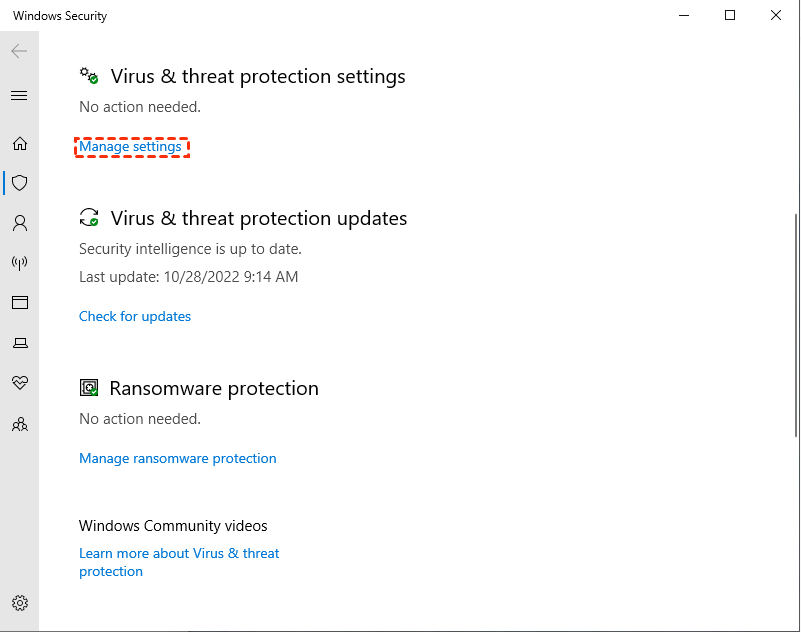
Step 1. In Windows 11/10, click the search icon, look for Windows Security, and open it.

Step 2. Click on Virus & threat protection, then choose Manage settings under Virus & threat protection settings.
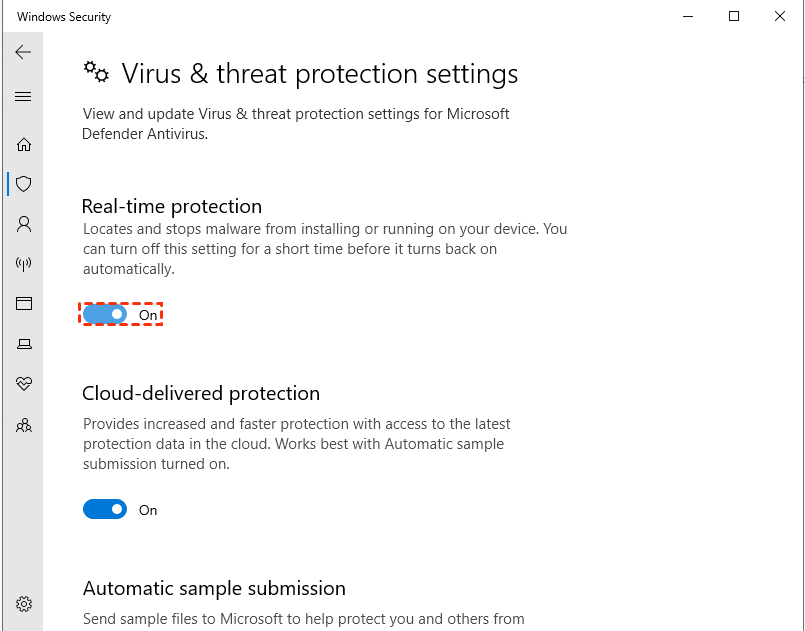
Step 3. Turn off Real-time protection by switching the option from On.
Conclusion
The “Failed to Read/Write Sector” error is a common issue that can occur during disk cloning, especially when using tools like Acronis or Macrium Reflect. It often points to problems such as bad sectors, unstable cable connections, outdated software, or low system resources. Among these, bad sectors are the most frequent cause and can seriously disrupt the cloning process.
To avoid such failures, it's important to use a reliable tool that can handle disks with errors. AOMEI Partition Assistant stands out by offering features like sector-by-sector cloning, 4K alignment, and built-in tools to check and repair bad sectors. It ensures a smoother and more successful cloning experience, even for beginners.
The Best Windows Disk Partition Manager and PC Optimizer
By following the steps provided and checking basic hardware and software factors like cable connections and antivirus interference, you can greatly reduce the chance of errors. With the right tool and preparation, cloning a disk—even one with issues—can be simple and effective.

