How to Format NVMe for Windows 10 Install Safely and Easily
Want to format NVMe for Windows 10 install but don’t know how to do it safely? This post will show you the best way to format NVMe drive and clean install Windows.
By AOMEI / Updated on May 12, 2023
Can I format NVMe for Windows 10 install
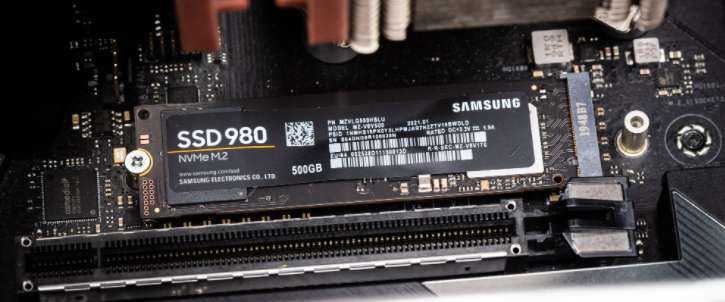
This is my first time using PCI storage. I want to do a fresh install of Windows 10 on an NVMe drive (980), but I want to make sure it's formatted before installing Windows 10. Can I format NVMe before installing it on the motherboard?
- Question from Tom’s HARDWARE
About NVMe M.2 - What you should know
As we know, SSD is faster than HDD. But among SSD, NVMe SSD is favored by users. Because NVMe SSD are solid state drives with a Non-Volatile Memory Express interface, this means that data is transferred through the PCI Express (PCIe) interface on the computer's motherboard. This allows a more direct connection between the drive and the motherboard, avoiding the need for internal data to pass through the Serial Advanced Technology Attachment (SATA) controller.
Because of its low latency, low power consumption, and high performance. Therefore, more and more users tend to use faster NVMe SSD to install Windows 10 or Windows 11.
What format should NVMe be for installing Windows 10?
In most cases, we will use NTFS format to install Windows. The NTFS format is the most reliable compared to another file system. Because it has no restrictions on the size of partitions and the size of a single file. Unlike the FAT32 format, which can only support partitions up to 2 TB and a single file no more than 4 GB. So, if you want to use NVMe SSD on Windows 10, NTFS is the best file system format.
Tip: If you are going to install Windows 10 on a removable flash device, we can choose FAT32 format because it is more compatible. But for removable flash devices larger than 32 GB, we can use either NTFS or exFAT. Because Windows does not support formatting FAT32 devices larger than 32G.
What to do before formatting NVMe for Windows 10 install?
Before formatting begins, you need to do some preparations. You can refer to the following points:
●Formatting an NVMe SSD means erasing all data on the NVMe SSD. Therefore, if there is important data on your NVMe, please back up it in advance.
● Enable TRIM to guarantee NVMe performance. Because SSD takes time to clean up data marked as deleted before adding new data, SSD are slower to write. TRIM technology is to let Windows tell the SSD data blocks are unnecessary and can be deleted, and then automatically erase. This will improve the write speed of the SSD.
● Prepare a SATA to USB cable, use it to connect the NVMe SSD to the PC and ensure that it can be detected.
How to format NVMe SSD for Windows 10 install
Formatting is not difficult. If the NVMe SSD is brand new, you should initialize the SSD and create a new partition on it first. After that, you can format it. In the following part, I will introduce 3 effective ways to format NVMe drive.
▶ Method 1. Format NVMe by Disk Management
As a built-in tool on Windows, Disk Management can help users to complete tasks such as Extend/Shrink/Delete/Format Volume.
Step 1. Open Disk Management first.
Step 2. Find your NVMe in Disk Management, right-click Initialize Disk, and initialize it to MBR. Then right-click and select Create New Volume to create a partition.

Step 3. After that, right-click on the partition you created and click Format.
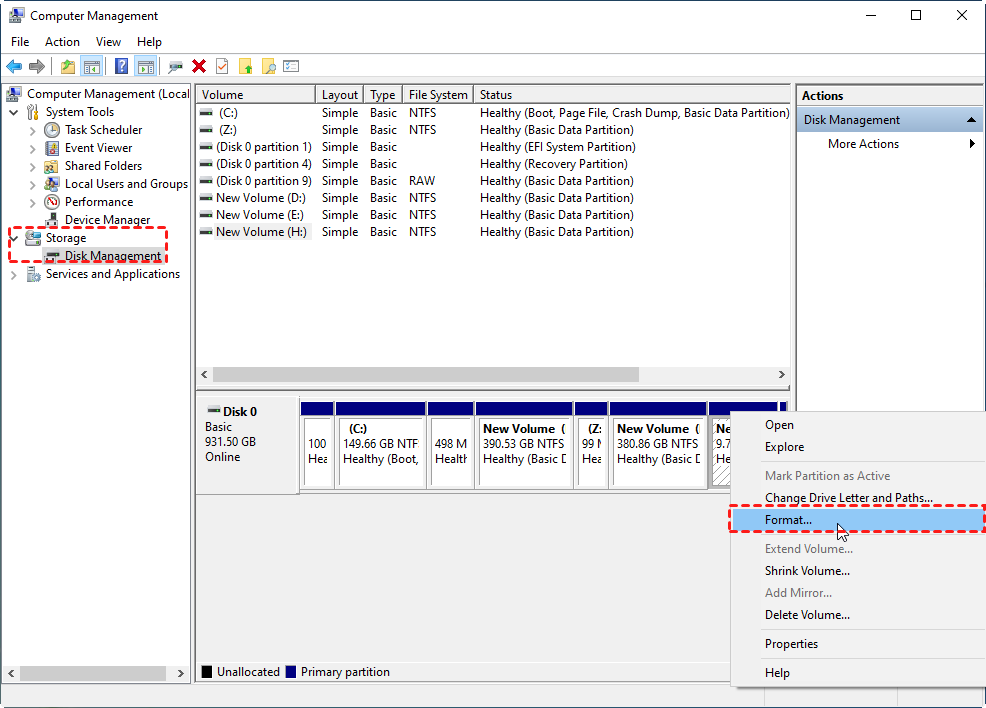
Step 4. In the pop-up window, choose to format the File system as NTFS and click OK.
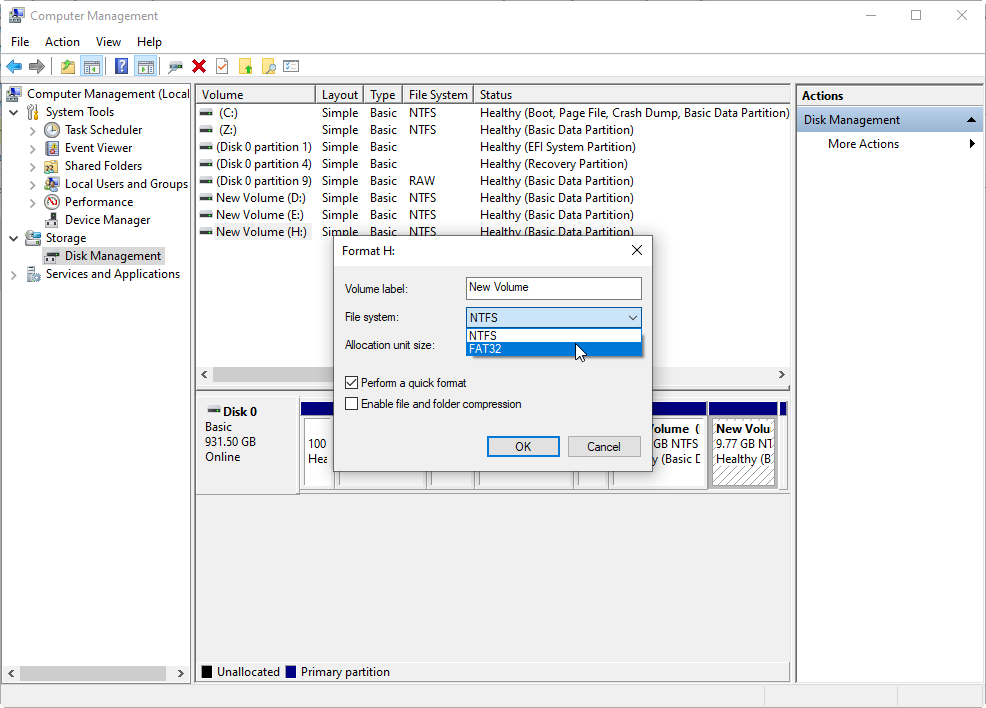
Step 5. After a while, formatting NVMe is done.
▶ Method 2. Format NVMe using Diskpart
If you prefer to use the command line to format the drive, the Diskpart will be the first choice. Please refer to the following steps:
Step 1. In the search box, enter "CMD", right-click Command Prompt in the listed results, and select "Run as administrator".
Step 2. In the Command Prompt window, type "diskpart" and press Enter. Then, type the following commands in order, pressing Enter after each command.
✍ list disk
✍ select disk X (X refers to the number of your disk that will be formatted)
✍ create partition primary
✍ format fs=ntfs quick
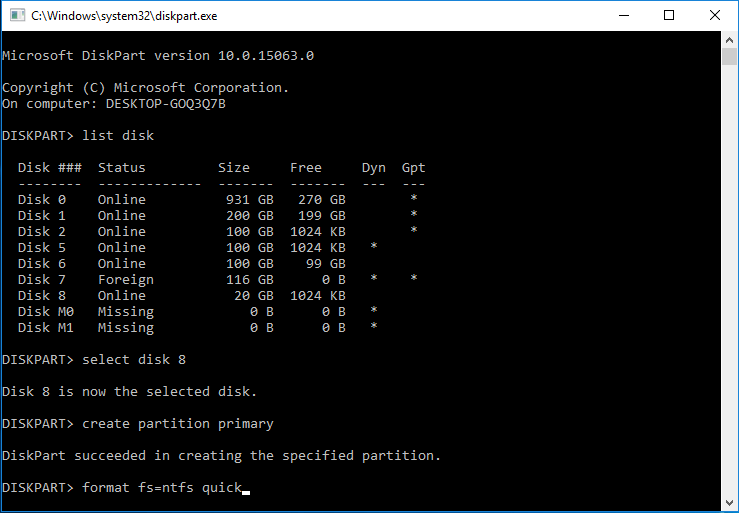
Step 3. After successfully formatting NVMe to NTFS, close the Command Prompt window. Then, assign it a drive letter in Disk Management and you can access it.
▶ Method 3. Use free disk format tool to format NVMe
If you want an easier way to format your SSD, then I recommend you to use AOMEI Partition Assistant Standard. This is a very powerful disk partition manager with many useful features. And can help you solve various disk problems in a safe and quick way.
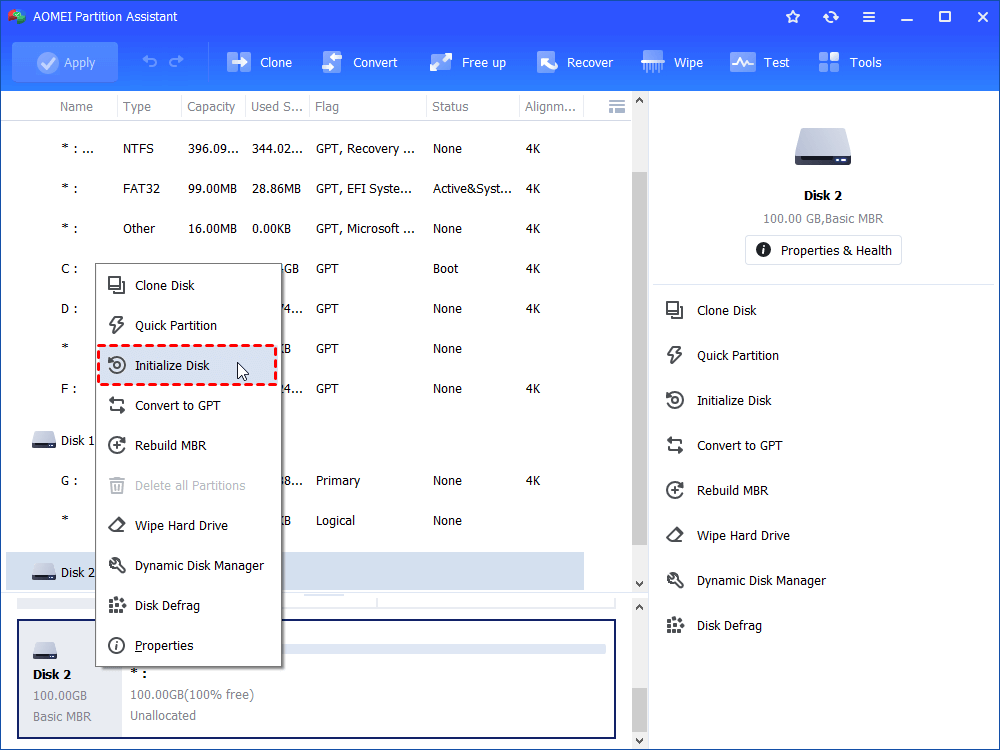
Step 1. Start AOMEI Partition Assistant Standard. Select the disk to initialize, right-click on it. Then, select Initialize Disk from the menu.
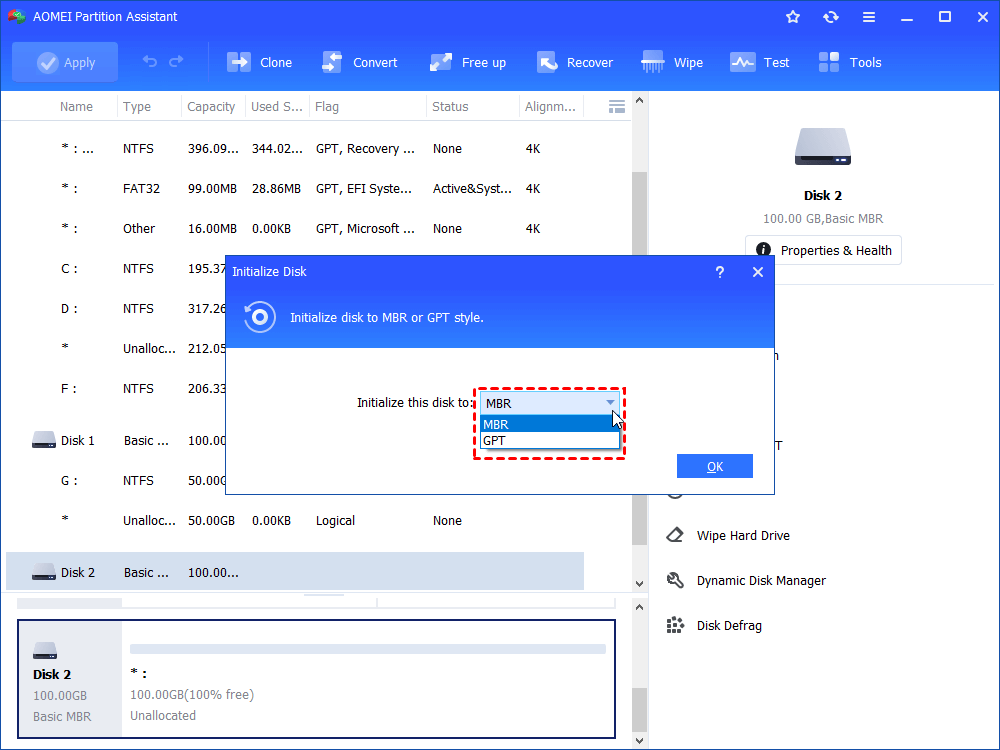
Step 2. Select to initialize disk to MBR and click OK.
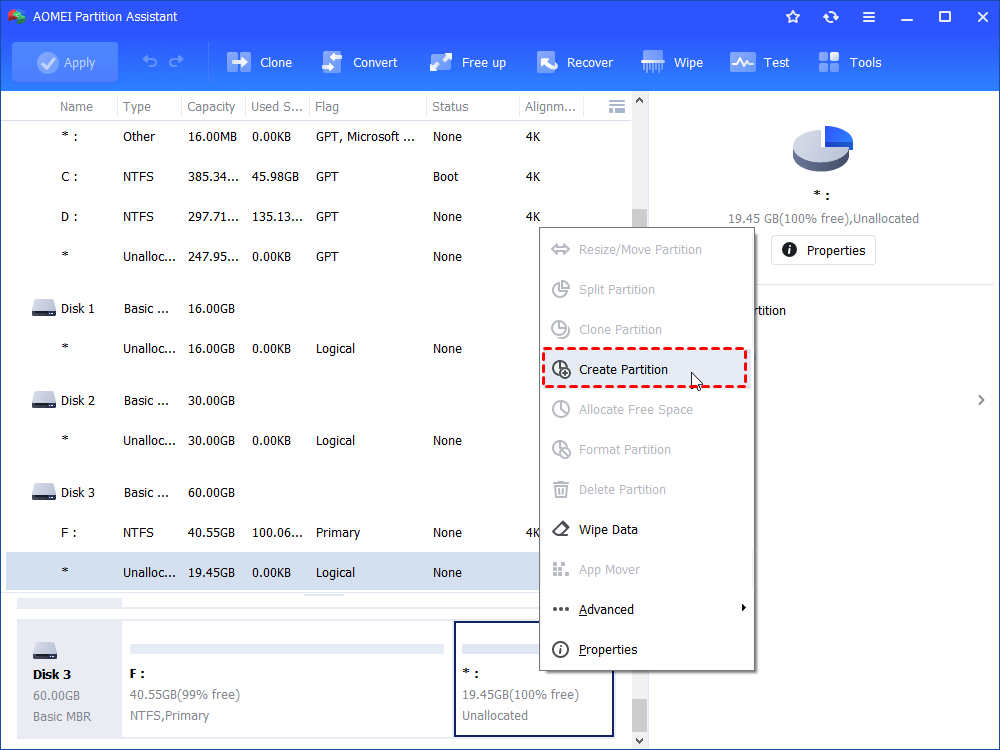
Step 3. Right-click the unallocated space, select Create Partition, and click OK.
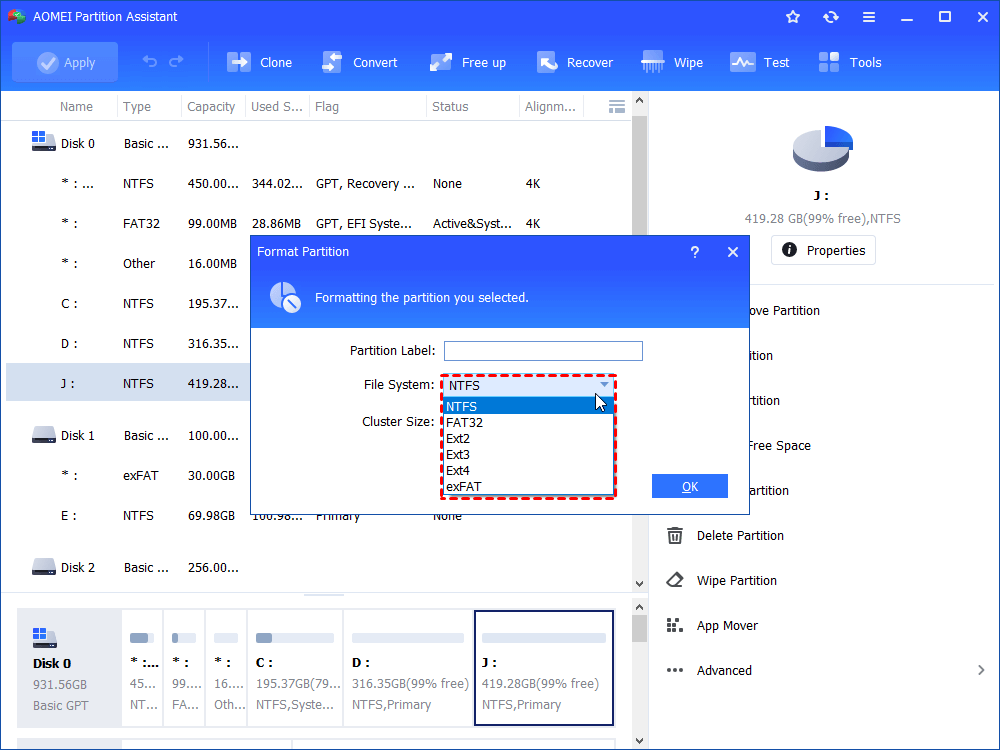
Step 4. Right-click the created partition, select Format Partition.
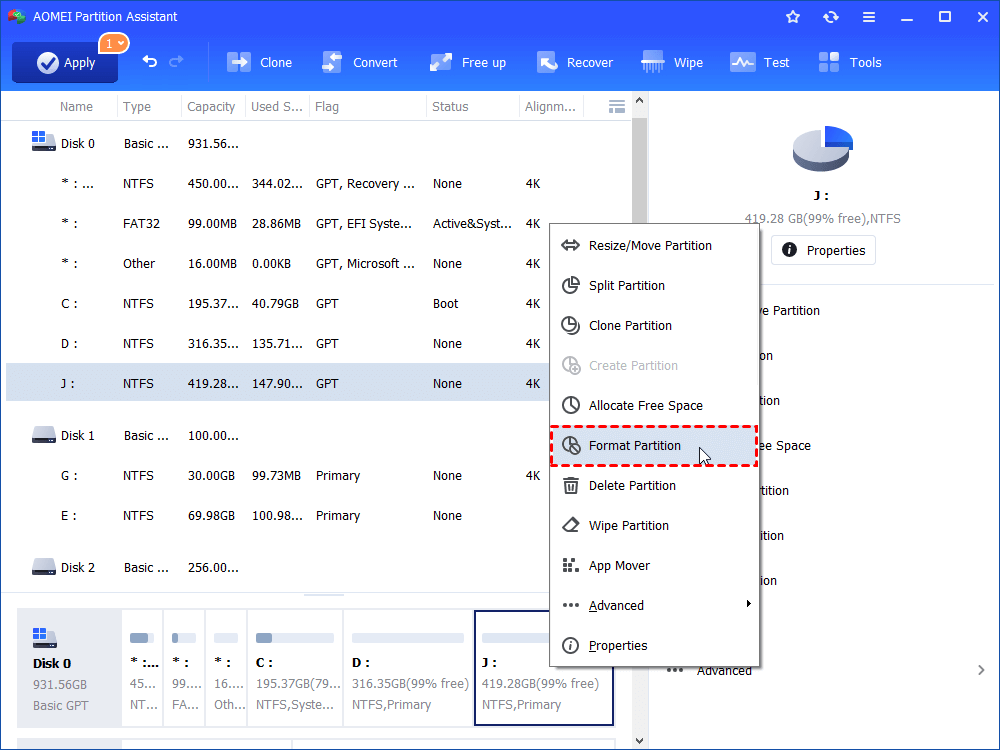
Step 5. Then, format it as NTFS and click OK.
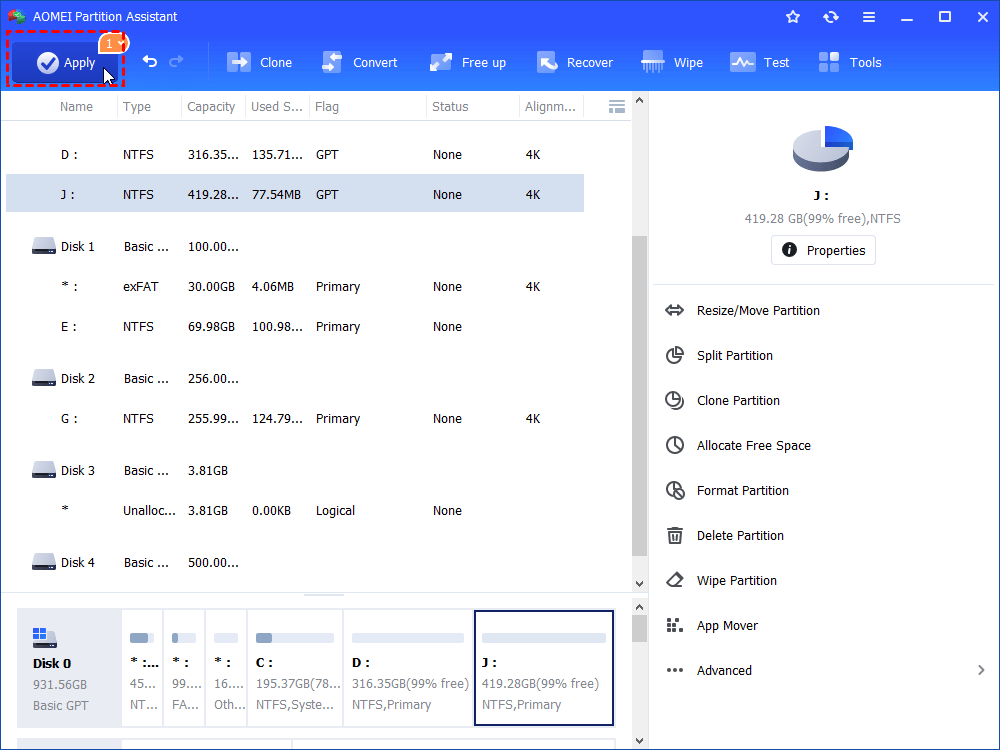
Step 6. Click Apply on the toolbar to commit the operation.
Warning: If you plan to format an NVMe SSD that already has a system installed, then you can only do this in a WinPE environment by making a bootable WinPE media. Because Windows does not support formatting the system partition while it is turned on.
How to Install Windows 10 on NVMe SSD
Before performing a clean installation of Windows 10 on an NVMe SSD, please do the following:
✎ An empty USB drive (minimum 8 GB) used to create Windows installation media.
✎ Take out the old hard drive and connect the NVMe SSD.
Step 1. Download the Windows Media Creation Tool from Microsoft on another PC and run it.
Step 2. In the Windows 10 Setup screen, choose "Create installation media (USB flash drive, DVD, or ISO file) for another PC" and click "Next".

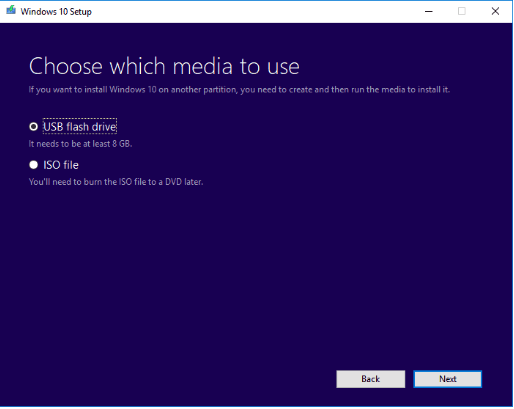
Step 3. You will see a screen asking you to choose the media to use. Here we select “USB flash drive”. Click“Next”and follow the onscreen instructions to create a bootable USB drive for installation.
Step 4. Insert the bootable USB into the computer, which you need to install Windows 10. Then, change boot order and reboot it from the installation media.

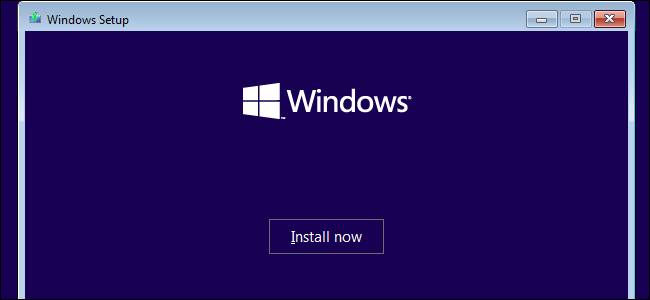
Step 5. Once the PC successfully boots from the USB drive, Windows 10 will automatically enter setup mode. Select the language and other preferences, and then click on “Next” > “Install now”.
Step 6. After the installation is complete as required. Restart your computer and set NVMe as boot drive.
Note:
✐ You may face an error message when installing Windows: Windows cannot be installed to this disk. The selected disk is of the GPT partition style. This means that your current boot mode is BIOS, but the system disk is a GPT disk, and the partition style does not match the boot mode. You need to convert system disk from GPT to MBR or change the boot mode from BIOS to UEFI.
✐ Besides, you can wipe the old system disk and use it as a data disk.
Conclusion
This is the full guide about format NVMe for Windows 10 install. With all the details we explained to you, now you can try installing Windows 10 on NVMe SSD. AOMEI Partition Assistant has more advanced features you can try if upgrade to Professional Version, such as SSD 4K alignment, migrate Windows 10 to NVMe SSD without reinstallation, clone Windows 10 from HDD to SSD, etc.

