How to Move Not Copy Files in Windows 11/10
Why need to move files instead of copying when you need to change file location? On this page, you will know how to move not copy files in Windows 11 or 10 step by step.
By Hedy / Updated on June 13, 2025
Why want to move files instead of copying?
Moving files instead of copying them can be beneficial for several practical reasons:
1. Saves storage space
When you copy a file, you create a duplicate, which uses additional disk space. Moving a file transfers it from one location to another without creating a second copy, helping you avoid filling up your storage unnecessarily.
2. Faster process (on same drive)
On the same drive, moving files is typically faster because the system only updates file pointers rather than duplicating data. Copying involves reading and writing the full file, which takes longer.
3. Reduces confusion
Having multiple copies of the same file can lead to version confusion. Moving a file ensures there’s only one version in the desired location, making it easier to manage and update.
4. Better for organization
Moving files can be part of an organized workflow—for example, moving completed documents into an archive folder. This keeps your working directories clean and focused.
In short, moving files is ideal when you're relocating data and no longer need the original in its previous location. Copying is better when you want to back up or duplicate content.
How to move not copy files in Windows 11
Moving files instead of copying them helps keep your folders organized and saves disk space. Here are three simple methods to move files in Windows 11:
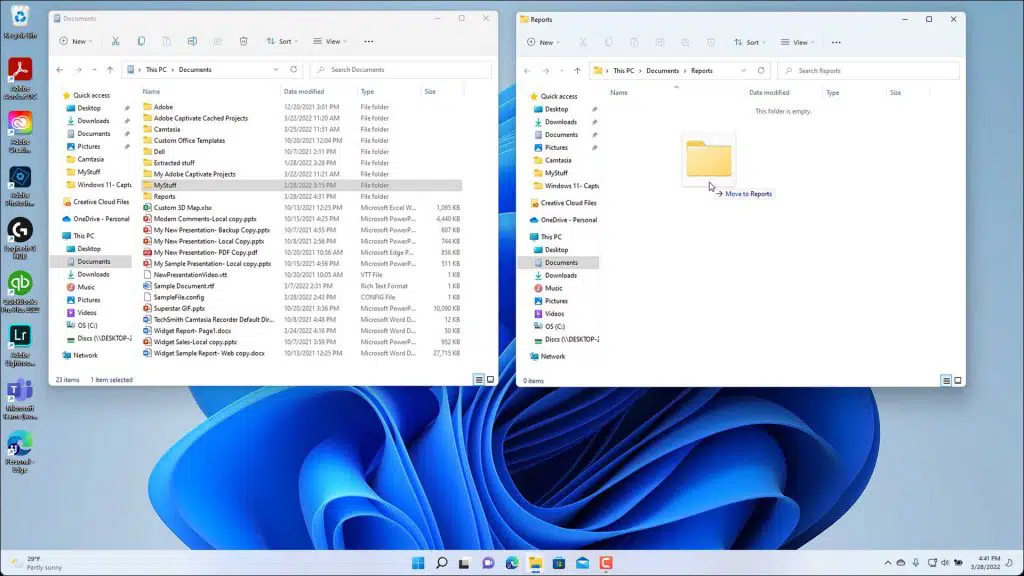
Method 1. Drag and drop with right mouse button
Most people know about drag-and-drop, but did you know the right-click method gives you options?
Step 1. Select the file or folder.
Step 2. Drag it to the new location while holding the right mouse button.
Step 3. Release the button and choose Move Here from the menu. It’s like getting a little pop-up butler asking you what you want to do.
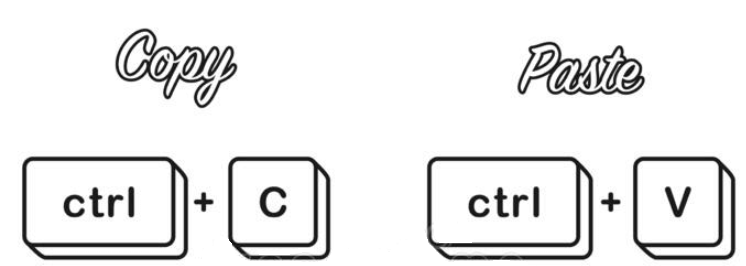
Method 2.Cut and paste
If you prefer keyboard shortcuts or menu commands, the cut and paste method is ideal. Here’s how to do it:
Step 1. Right-click the file and choose Cut (or press Ctrl + X).
Step 2. Go to the destination folder.
Step 3. Right-click and choose Paste (or press Ctrl + V).Simple, direct, and no duplicates left behind.
Method 3. Using a third-party file mover
Sometimes, Windows' built-in options may not be sufficient, especially when moving large numbers of files or dealing with complex folder structures. In such cases, third-party file movers come in handy.
Whether you're organizing data, freeing up space, or preparing for system upgrades, AOMEI Partition Assistant offers user-friendly options to move files between partitions, drives, or even different disks. Its intuitive interface guides you step by step, making it ideal for beginners and advanced users alike.
Beyond just moving files, the tool ensures that system files and large folders are transferred properly, which is especially helpful when managing OS partitions or migrating data to a new SSD.
With AOMEI Partition Assistant, you gain more than just a file mover — you get a full-featured solution for keeping your storage organized, efficient, and optimized.
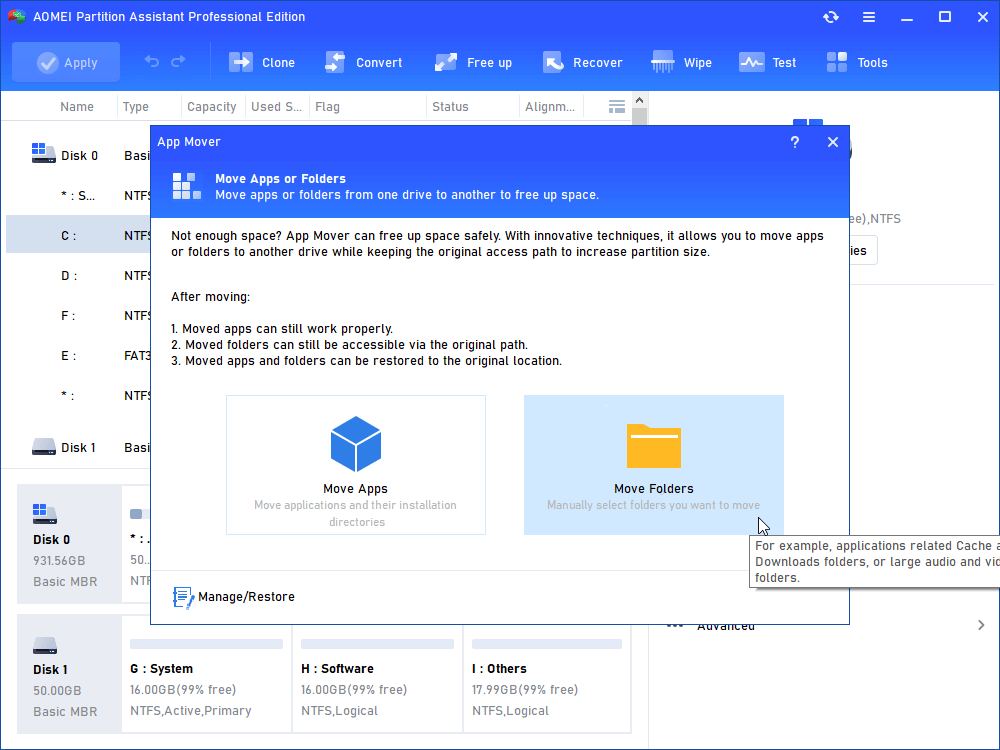
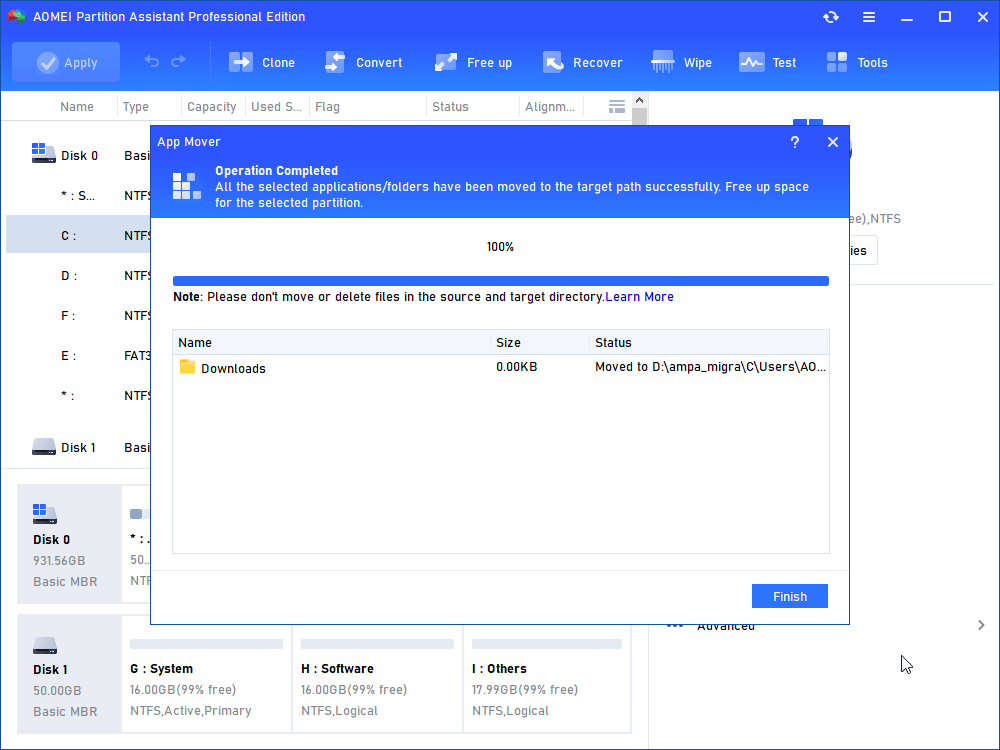
Step 1. Install and launch AOMEI Partition Assistant. Click “Free up” in the top toolbar and select “APP Mover”.

Step 2. In the new window, click “Move Folders”. (If you want to move installed program, just click "App Mover".)
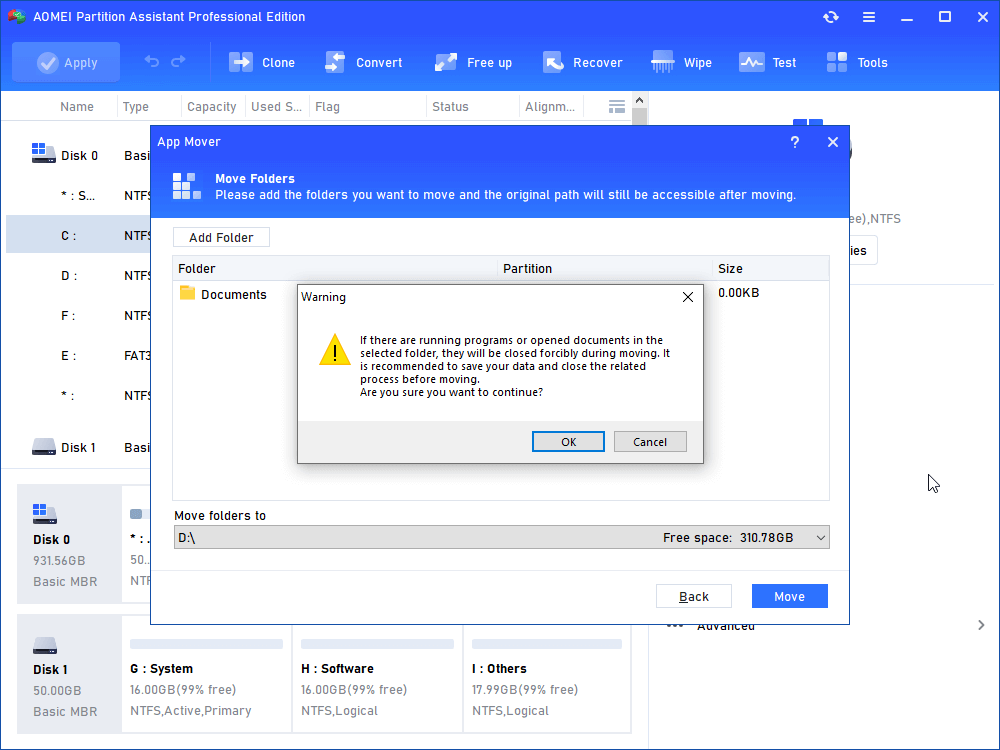
Step 3. First, select the folder to move. Then, select the new drive and click Move.

Step 4. You will see a pop-up message confirming the force closing of the running programs when the move starts. Click OK to start the process.
Step 5. Wait for a while and click "Finish" to complete the action.
Conclusion
Moving files instead of copying them helps save disk space, speeds up transfers (especially on the same drive), and keeps your folders clean and organized. How to move not copy files in Windows 11? You can easily move files using drag-and-drop with the right mouse button, the cut-and-paste method, or reliable third-party tools like AOMEI Partition Assistant.
For more complex tasks, it also offers powerful features like transferring your operating system to an SSD, allocating free space from partitions, converting the system disk format between MBR and GPT, removing large files, and more.

