How to Resize Disk Partition in Windows 11 without Losing Data
Are you looking for a free way to resize Windows 11 disk partition? Fortunately, this post will show you how to resize disk partition in Windows 11 without losing data, including using Windows built-in tool and a third-party utility.
By AOMEI / Updated on October 28, 2024
Resizing or moving Windows 11 partitions allows you to create more space and better organize your data storage. Resizing disk partition is not a difficult task, but there can be screw-ups. For this reason, we'll give you a detailed guide on how to manage partition sizes, including extending partitions and shrinking volumes in Windows 11.
Continue reading and we will provide a full guide, including how to change partition size in Windows 11 without formatting.
How to Resize Partition in Windows 11 with powerful Partition Manager
AOMEI Partition Assistant is a market-leading disk partition management software that can help you resize partitions on Windows 11, 10, 8, 7, XP, and Vista easily, even BitLocker partitions. And this partition magic complements Disk Management and Diskpart flaws perfectly when extending and shrinking volumes. It's 100% safe, so you don't need to worry about any data loss.
Besides resize partition, it also allows users to copy partition, wipe the partition, format partition, delete the partition, and more. Please download this software to see how to resize disk partition in Windows 11.
Tip: If you want to resize disk partition on Windows Server 2022, 2019, 2016, 2012 (R2), 2008 (R2), and 2003, please switch to Server Version.
▶ Extend Partition with two ways
The extend partition feature is suitable for users who want to know how to increase partition size in Windows without formatting. Download AOMEI Partition Assistant and resize partition Windows 11.
1. Resize and Move partition
✍ This method works when there is adjacent unallocated space next to the target partition.
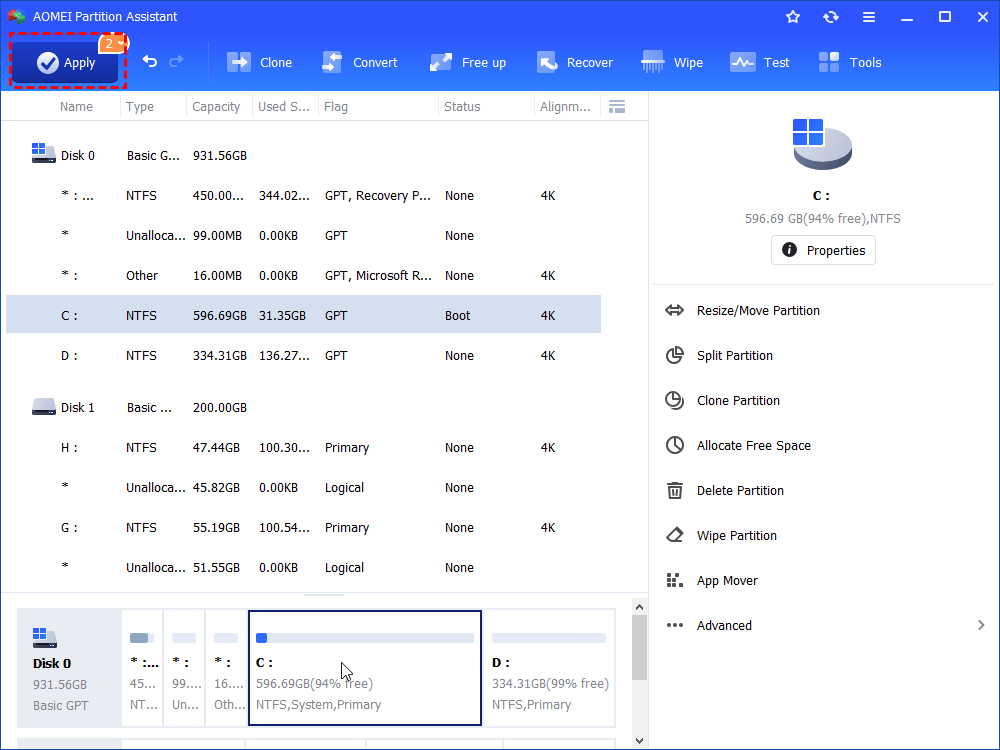
Step 1. Install and launch AOMEI Partition Assistant. Right-click the target partition and select “Resize/Move Partition”.
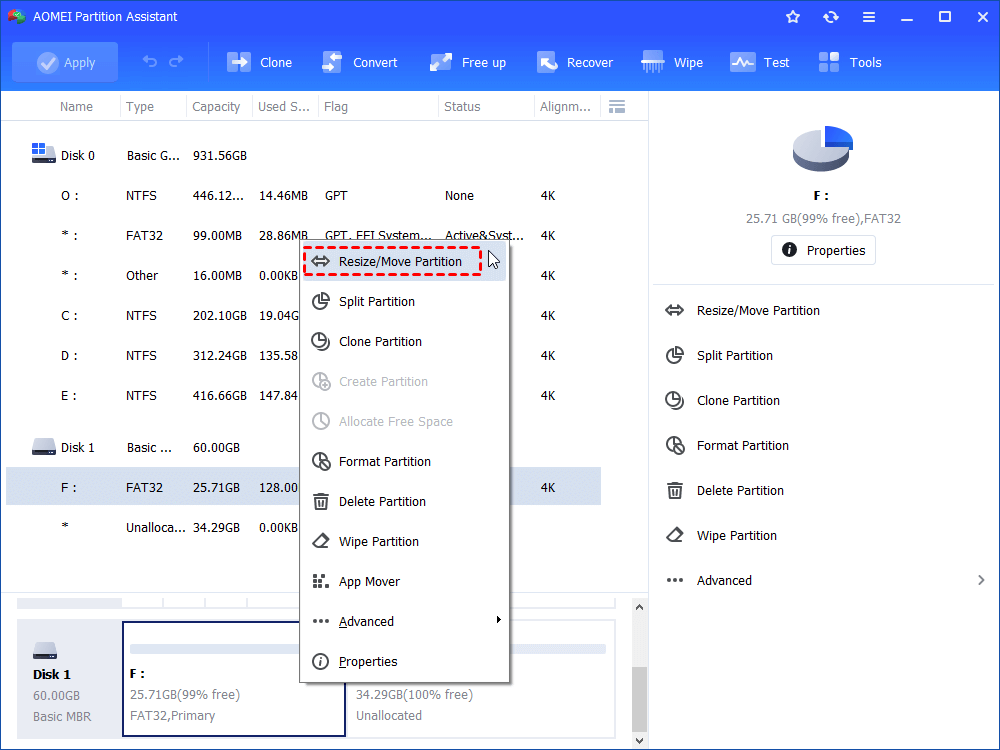
Step 2. Now, you find there’s a segment of white bar next to the green bar. The white bar is the unallocated space. Drag the ring to the right to fulfill the white bar. After finished, click on “OK”.
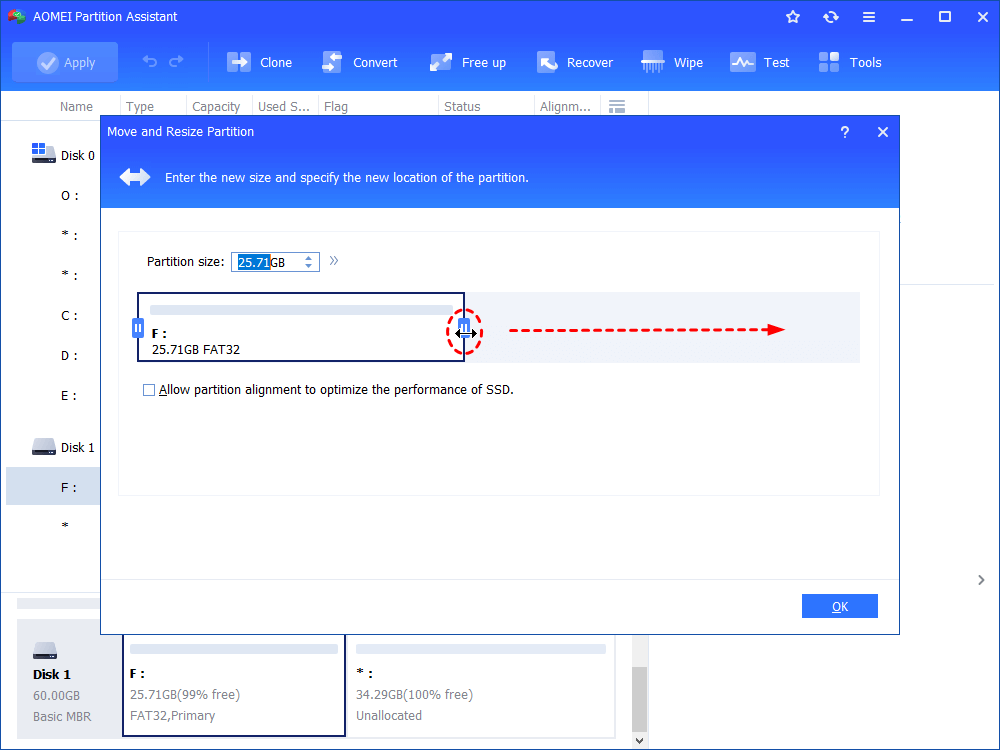
Step 3. Click “Apply” to submit the operation.

2. Merge Partition
✍ When the unallocated space and the target partition are not adjacent, the partition can be extended by merging.
Step 1. Right-click the partition you wish to extend and select "Advanced"> “Merge Partitions”.
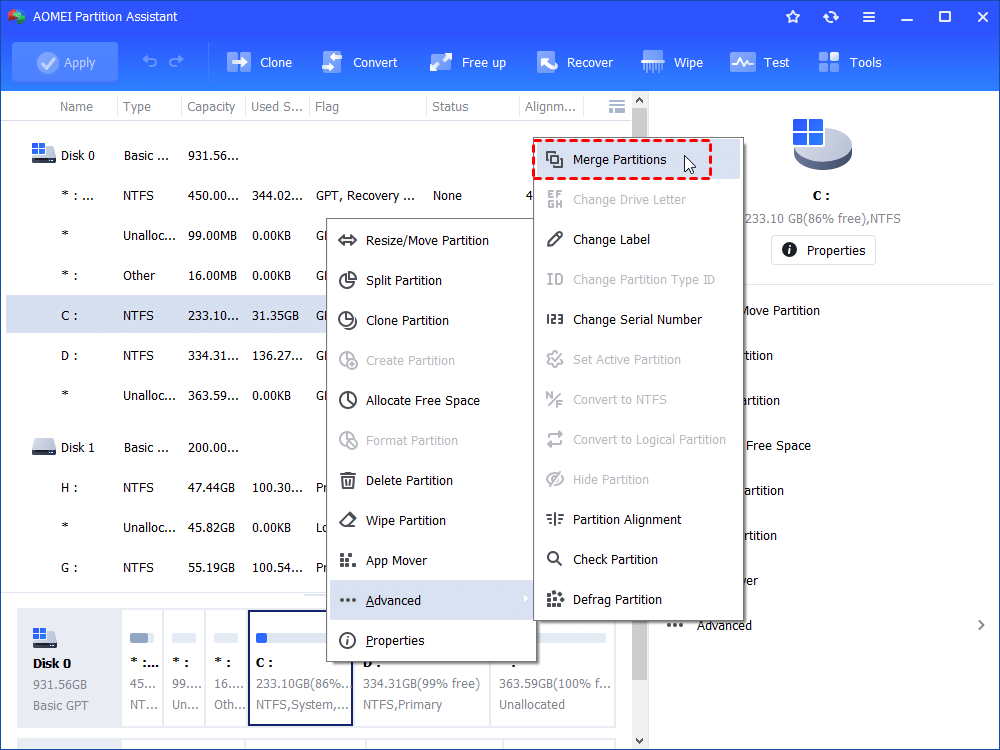
Step 2. Tick the unallocated space and click on “OK”.
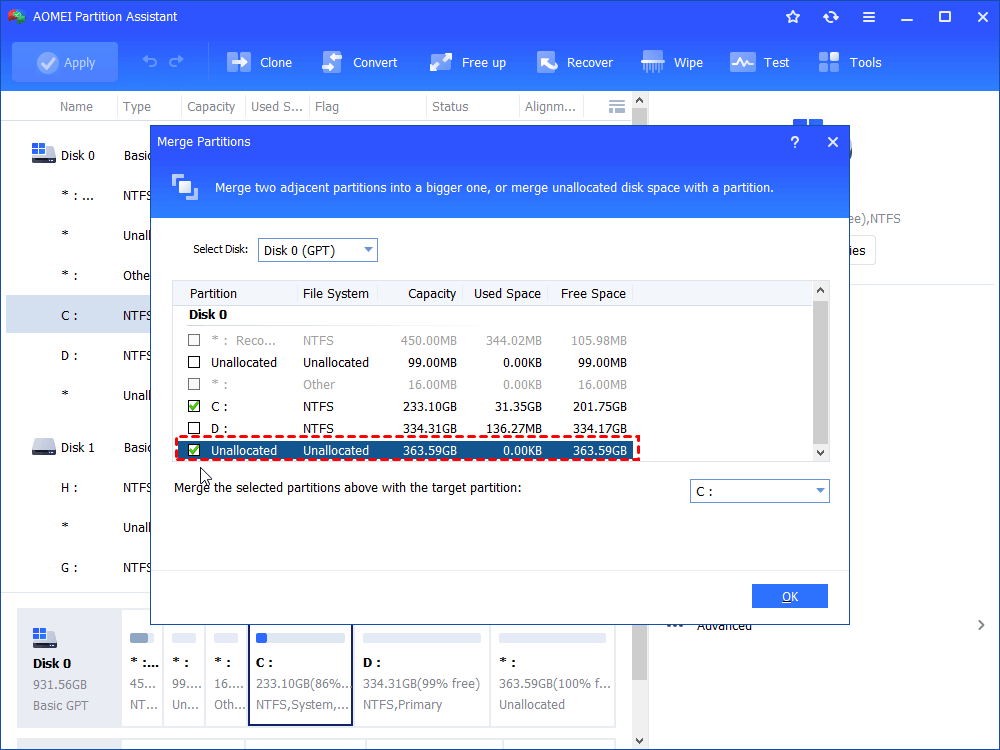
Step 3. Click on“Apply” to commit the pending operation.
▶ Shrink Partition
If you want to change partition size in Windows 11 without formatting, you can use AOMEI Partition Assistant to resize partition and split partition. Click the download button and try the full-featured tool:
1. Resize Partition
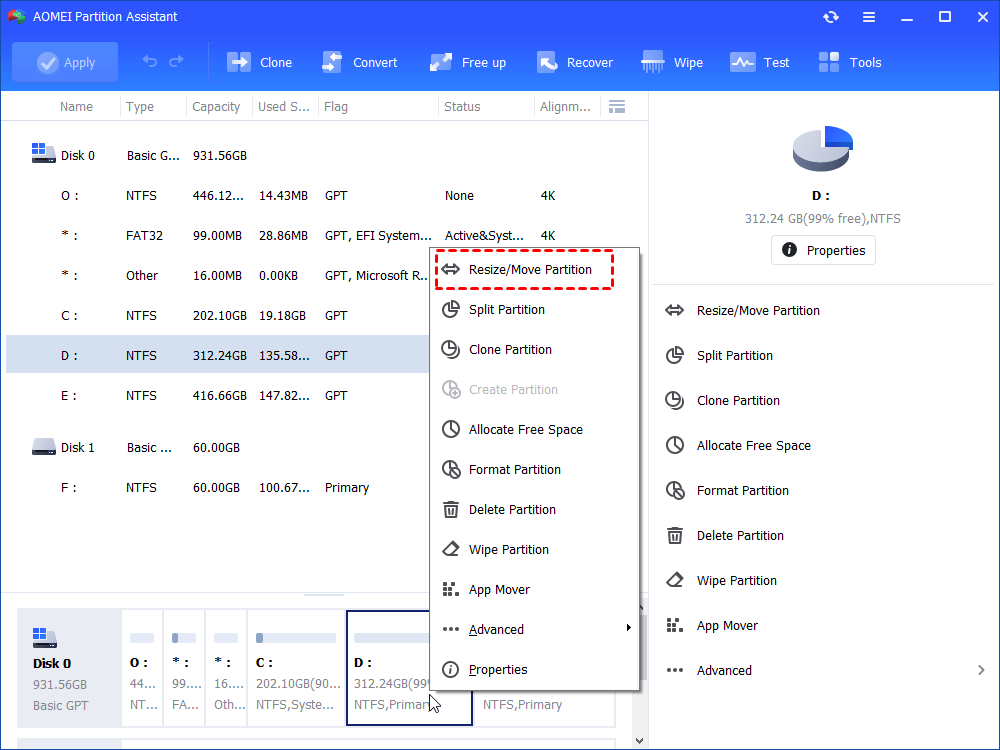
Step 1. Right-click the partition you wish to extend and select “Resize/Move Partitions”.
Step 2. In the following window, determine the size you want to reduce by dragging the arrow on the right. When done, click OK.

Step 3. After returning to the main interface, click "Apply > Continue" to start the shrinking process.
2. Split partition
If you want to shrink a large partition to create a new partition, you can also use AOMEI Partition Assistant to directly use "Split Partition" function.
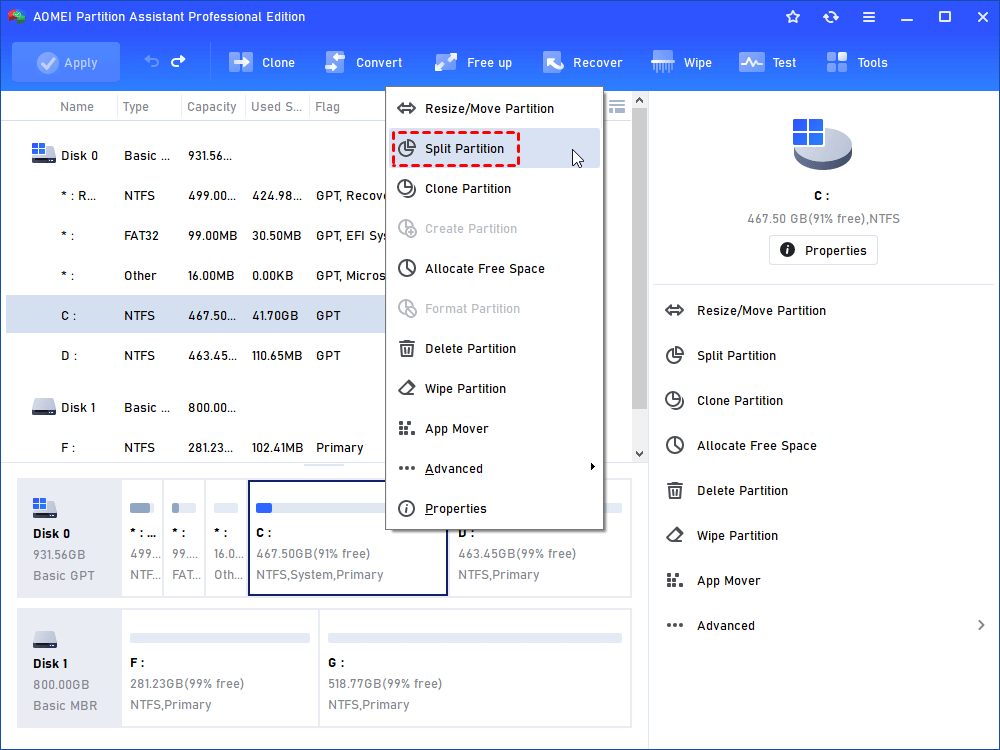
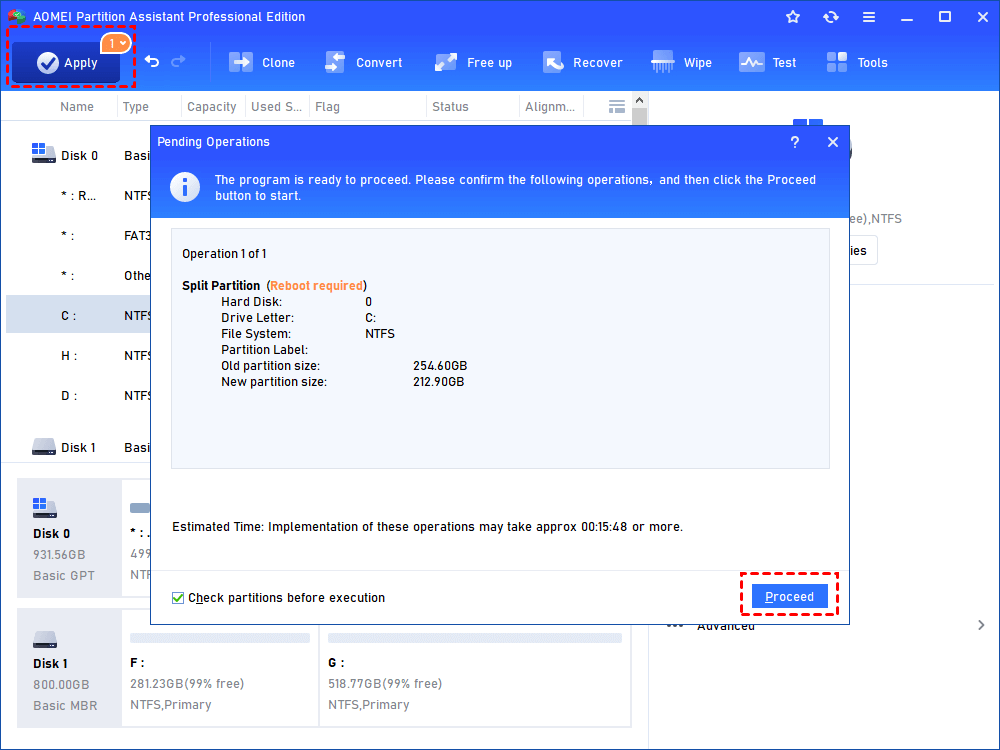
Step 1. Right-click the C partition and select “Split Partition”.
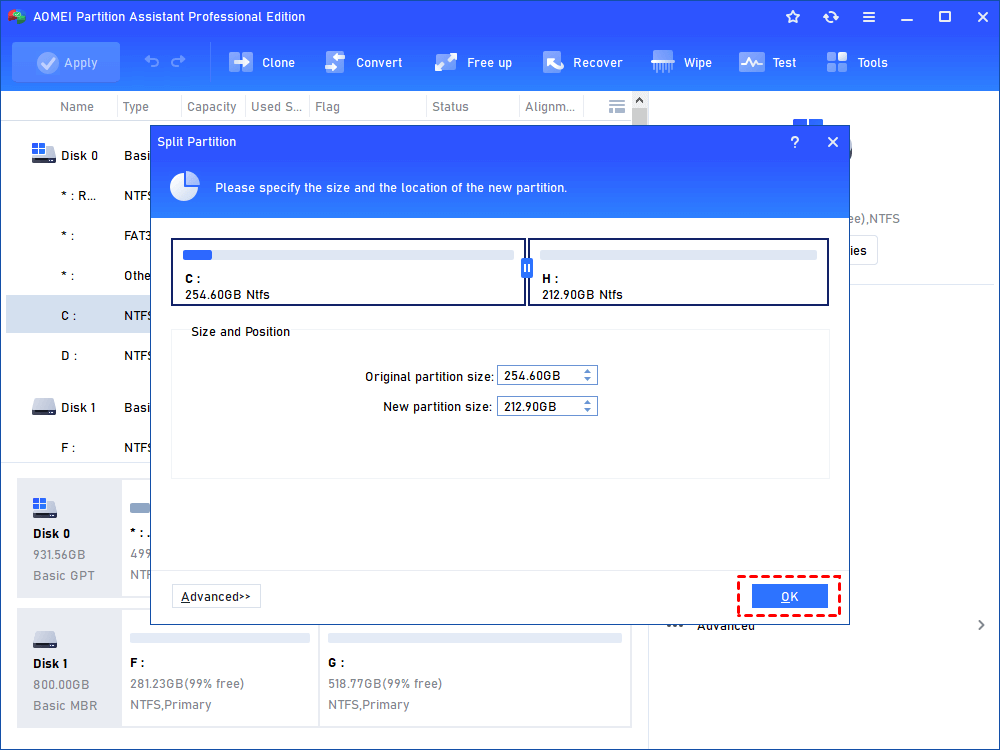
Step 2. In this window, you can specify the size and location of the new partition, and click “OK”.
Step 3. Back to the main interface, click “Apply” and “Proceed” to commit the pending operation.
How to Resize Disk Partition Windows 11 with Windows Built-in Tools
After reading the content above, you should understand the reasons why resize partitions in Windows 11. So now, back to the topic - how to resize partition on Windows 11? I'll first introduce you to two Windows built-in tools first: Disk Management and Diskpart.
▶ Solution 1. Resize partition size on Windows 11 with Disk Management
Disk Management is a commonly used tool for managing disks. It can help users extend volume, shrink volume, format volume, delete volume and so on.
│ Extend Partition
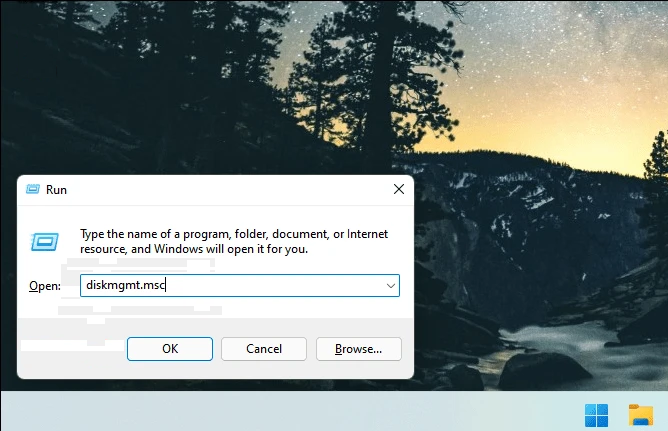
Step 1. Press “Windows + R”, type “diskmgmt.msc” and hit Enter to open Disk Management.
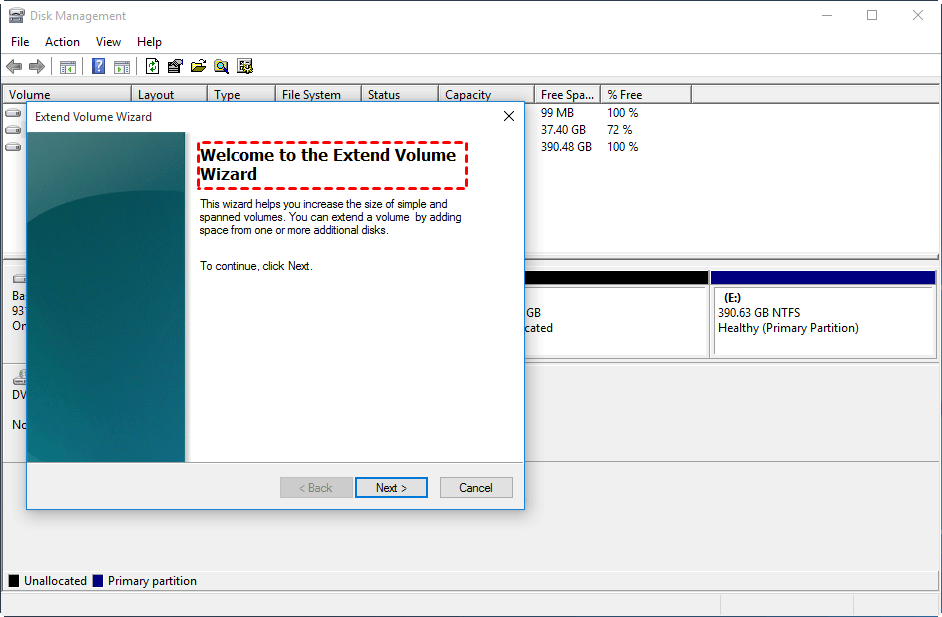
Step 2. Right-click on the partition you want to extend and select “Extend Volume”.
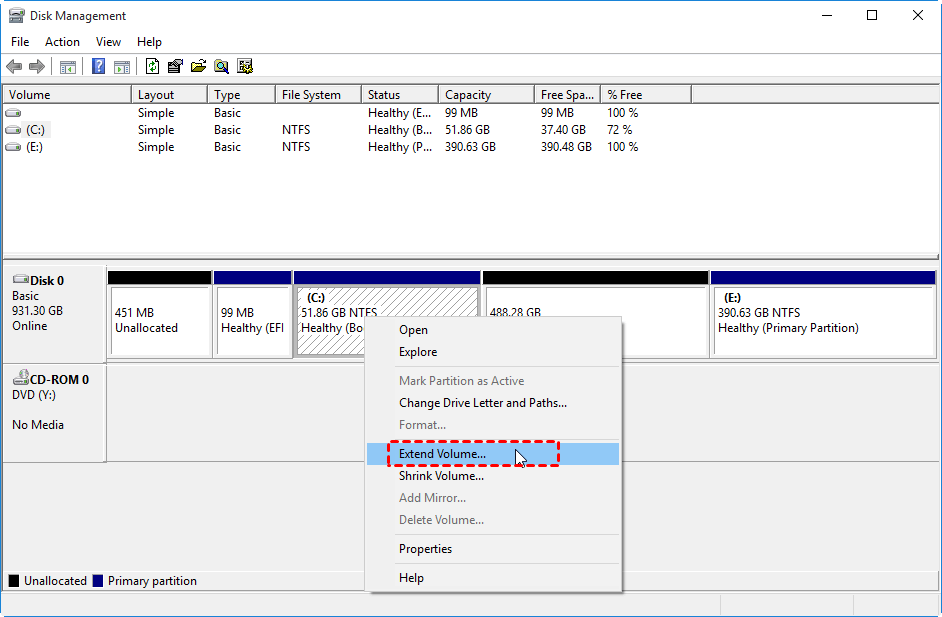
Step 3. Follow the prompts to complete the remaining steps.
Warning: To use Disk Management to extend a partition, there should be an unallocated space adjacent to the partition you want to extend and the target partition should be in NTFS or RAW. Or, “Extend Volume” will be greyed out.
│ Shrink Partition
Step 1. Open Disk Management in the same way.
Step 2. Right-click on the partition you want to extend and select “Shrink Volume”.
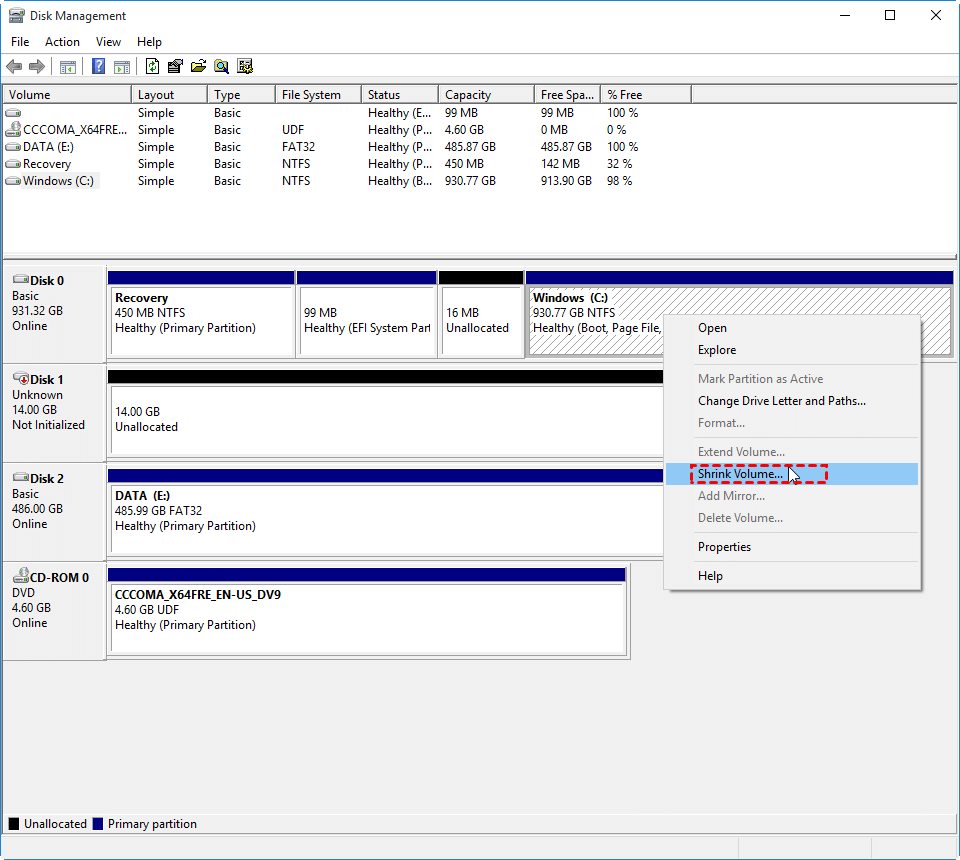
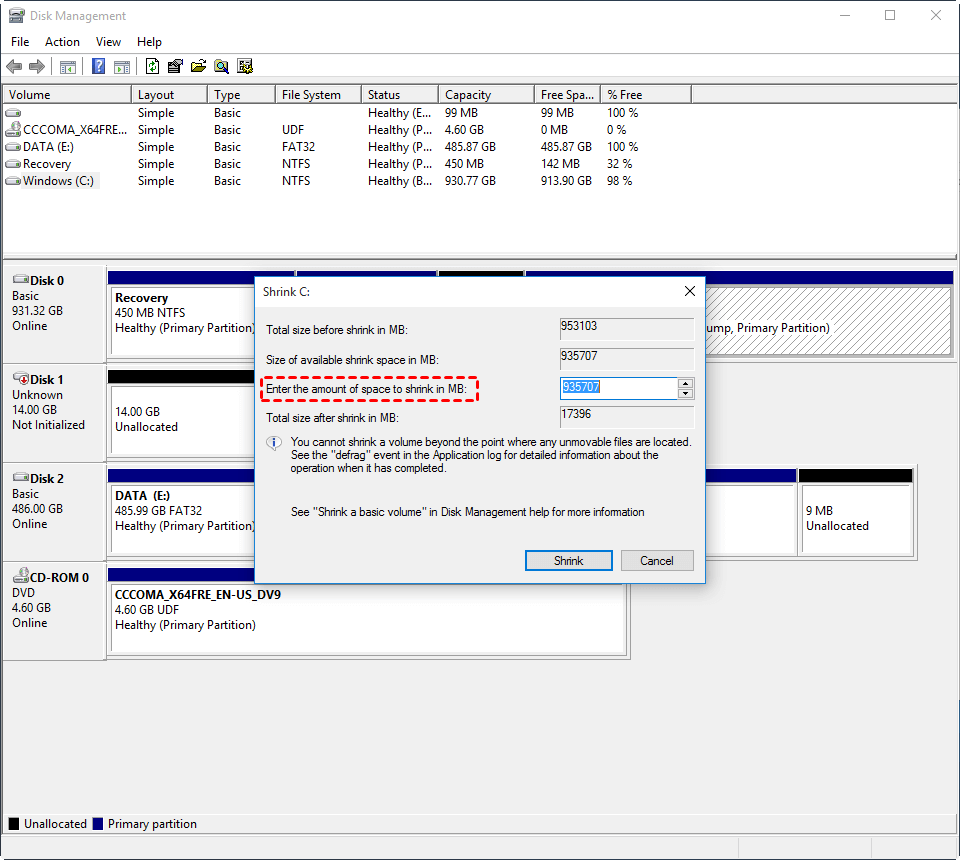
Step 3. Enter the size you want to shrink, and then click "Shrink".
Warning: "Shrink Volume" will be greyed out if the target partition is not NTFS and RAW, and the target partition has no space to shrink.
When you meet the Windows 11 extend volume greyed out, you'd better try the wise partition manager - AOMEI Partition Assistant.
▶ Solution 2. Resize partition size on Windows 11 via Diskpart
If you are a professional user with computer experience, you can also use DiskPart to resize disk partition in Windows 11.
Warning: To extend partition with Diskpart, the unallocated space should be on the right side of the target partition and adjacent to it. Meanwhile, the partition is supposed to be in NTFS or FAT32.
│ Extend Partition
Step 1. Press “Windows + R”, type “diskpart” and hit Enter to open Diskpart.
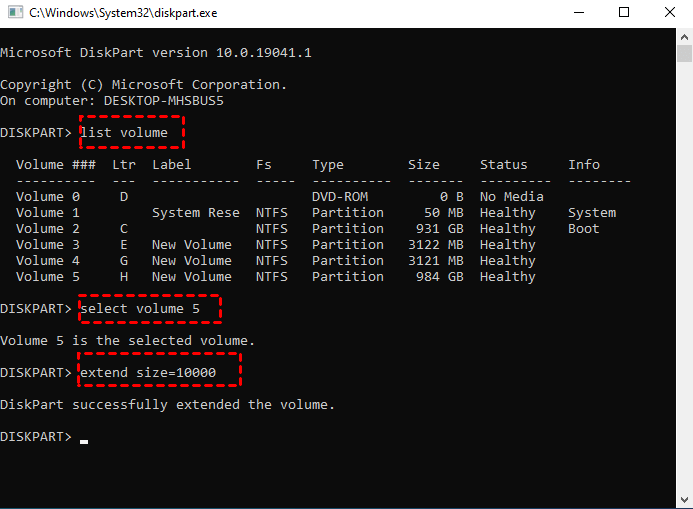
Step 2. Type “list volume” and hit “ENTER”.
Step 3. Type “select volume x” and hit “ENTER” (“x” represents the target partition).
Step 4. Type “extend size=xxxx” and hit “ENTER”(“xxxx” refers to the amount of storage to be added).
│ Shrink Partition
Step 1. Press “Windows + R”, type “diskpart” and hit Enter to open Diskpart.
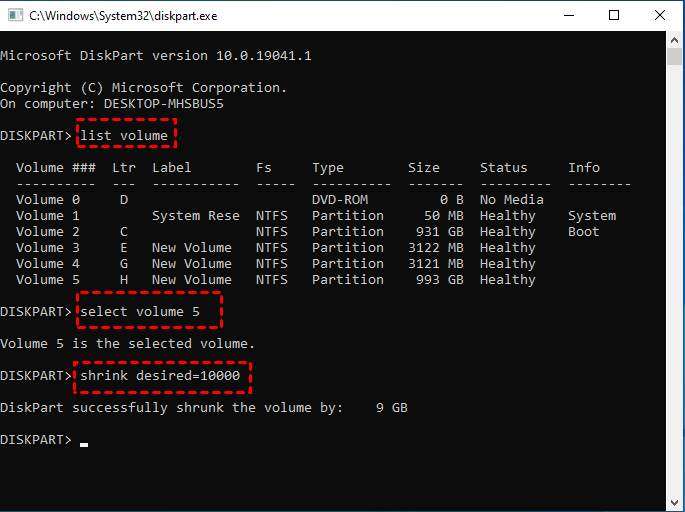
Step 2. Type “list volume” and hit “ENTER”.
Step 3. Type “select volume x” and hit “ENTER” (“x” represents the target partition).
Step 4. Type “shrink desired=xxxx” and hit “ENTER”(“xxxx” represents the amount of storage to be shrunk).
As you can see, Disk Management and Diskpart can help resize partitions. However, both tools have certain limitations. If you want to avoid these problems, you need to turn to a reliable third-party tool.
Why should we resize partition in Windows 11?
Resize partition refers to extending or shrinking a partition. Usually, users need to resize partitions in Windows 11 for the following two situations:
- Since Microsoft released Windows 11, many Windows users have upgraded to Windows 11 for the experience. But some users may only set up a system partition (C drive) when they first installed Windows 11. In this situation, they have to shrink the C drive and use the unallocated space to create a new partition for data storage.
- Another situation is that the user did not allocate enough space to the system drive(C drive) when installing Windows 11 for the first time. As more and more applications are downloaded and installed, the C drive space will become smaller and smaller, and even the C drive will receive an error: low disk space warning, which affects the running speed of Windows 11.
To avoid these troubles, we need to resize the disk partition in Windows 11. Fortunately, this article aims to show you how to resize disk partition in Windows 11 with 3 ways step by step.
Conclusion
Now, do you know how to resize disk partition in Windows 11? This article shows you how to use Disk Management and Diskpart to resize partitions. In addition, a powerful third-party tool, AOMEI Partition Assistant, is also mentioned. I believe there is always one that can help you solve the problem.
It is worth mentioning that if there is no unallocated space on the disk that can be used for merging or resizing, then you can try the Allocate Free Space feature of AOMEI Partition Assistant, which allows you to allocate free space from one drive to another. Or move installed programs from C drive to D drive through the App Mover. Many more features are waiting for you to unlock.

