Full Guide: How to Shrink Windows Partition for Dual Boot?
Here is a comprehensive guide about how to shrink Windows partition for dual boot. If you can't shrink partition in Disk Management, you can get its best alternative to easily adjust partition size.
By Irene / Updated on January 14, 2025
User case: can't shrink Windows partition for dual boot!
Help Shrinking Windows Partition for dual boot! I want to install Ubuntu Linux. When I attempt to shrink the primary Windows partition, it gives me this error message. "There is not enough space available on the disk to complete this operation". It says there is 484000 MB of available space to shrink, but when I try it, it gives that error. I have tried defragging the hard drive to no effect. I haven't seen anyone else with this issue online. What can I do?
- Question from Microsoft Community
Shrinking a Windows partition is often necessary for dual booting because it creates free space on the hard drive for installing another operating system, such as Linux. This process allows each operating system to have its own dedicated storage without overlapping or interfering with each other.
By reducing the size of the Windows partition, users can free up unused space while keeping their existing data and ensuring Windows continues to function properly. It’s a practical way to make efficient use of the available disk space and prepare the computer for running two operating systems side by side.
Generally, Disk Management is the common method to shrink Windows partition for dual boot. However, it is easy to encounter errors like the Shrink Volume button greyed out, or showing error message like the user from Microsoft Community. In the next part, you will know the reasons and get an easy solution.
How to successfully shrink Windows partition for dual boot with immovable files?
This happens because Windows Disk Management cannot shrink a partition beyond certain immovable system files, such as the page file or hibernation file. These files may be located in the middle or near the end of the partition, blocking further shrinking. To work around this limitation, the best solution is to use a powerful and user-friendly partition manager such as AOMEI Partition Assistant.
AOMEI Partition Assistant has been a trusted tool for partition management for years, offering practical features to address common partition-related challenges. For example, its "1-Click Adjust Space" feature allows you to safely resize partitions by bypassing immovable files. It supports both NTFS and FAT32 file systems and works with all versions of Windows, including Windows 11, 10, 8, and 7 (both 32-bit and 64-bit). With this tool, you can easily resize partitions by simply dragging their edges, making it easy to manage your disk. Additionally, it enables you to adjust multiple partitions simultaneously, streamlining the process and saving you time.
The Best Windows Disk Partition Manager and PC Optimizer
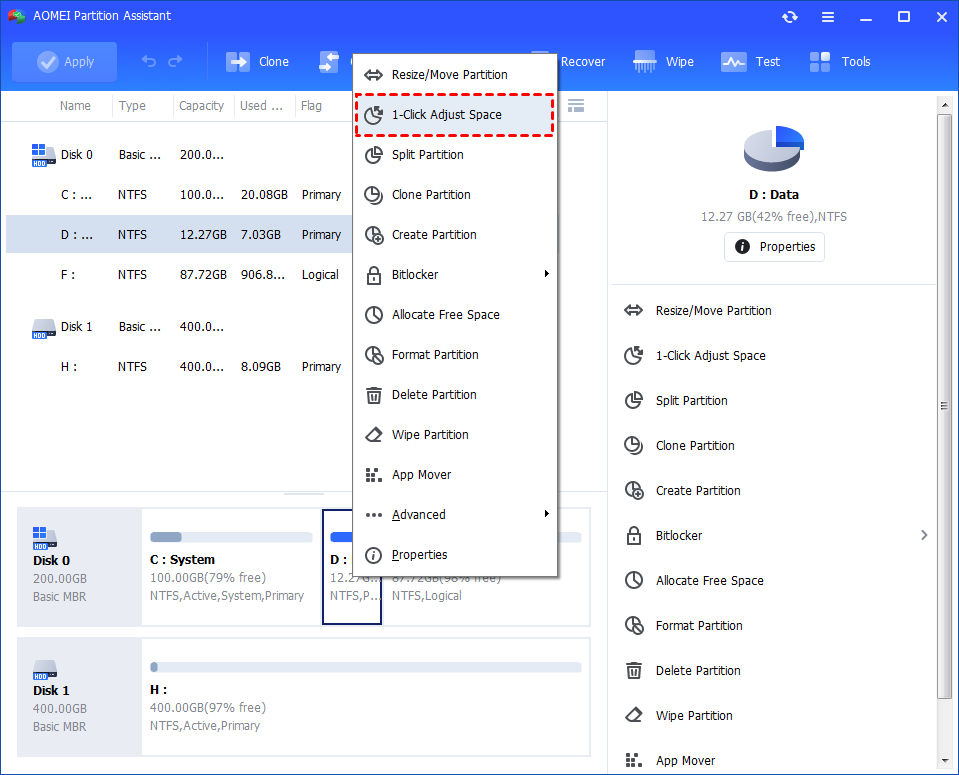
Step 1. Install and launch AOMEI Partition Assistant. Right-click a partition (here is D: partition) you want to adjust space and select "1-Click Adjust Space".
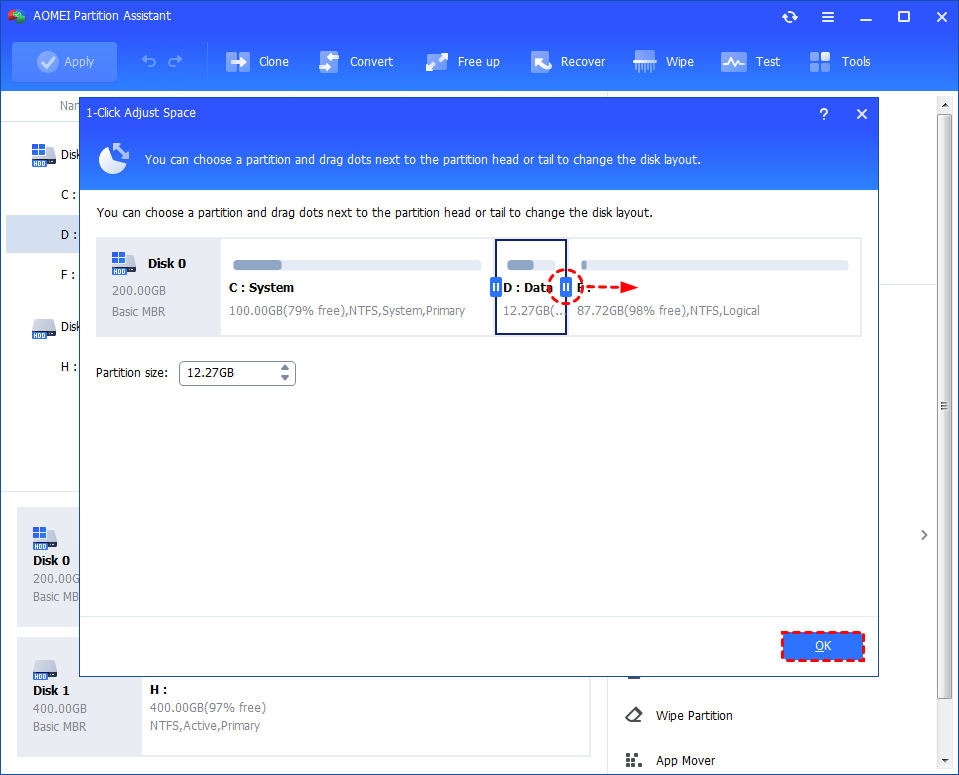
Step 2. If you want to use the space on F: to expand D:, you can simply drag the dot near the partition F: head backward to shrink the partition F: and enlarge the partition D: at the same time. Then click "OK".
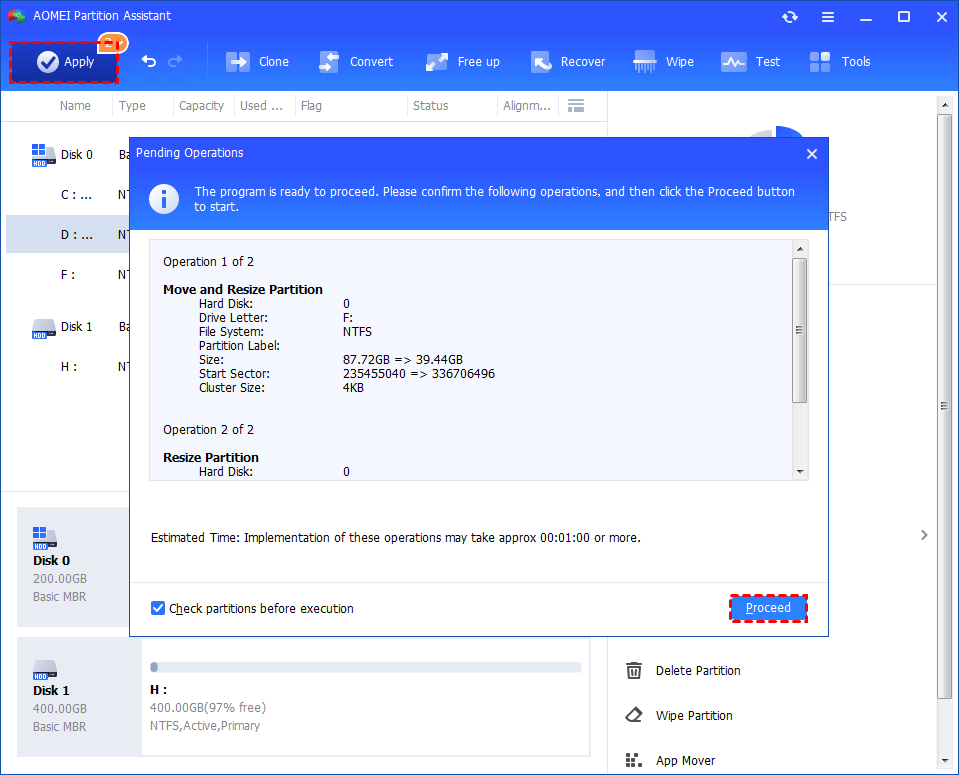
Step 3. You can preview the operation by viewing the "Pending Operations". To commit the "Pending Operations", please click "Apply" and "Proceed".
Step 4. The process will start and you can check the progress. It might take time to finish the operation.
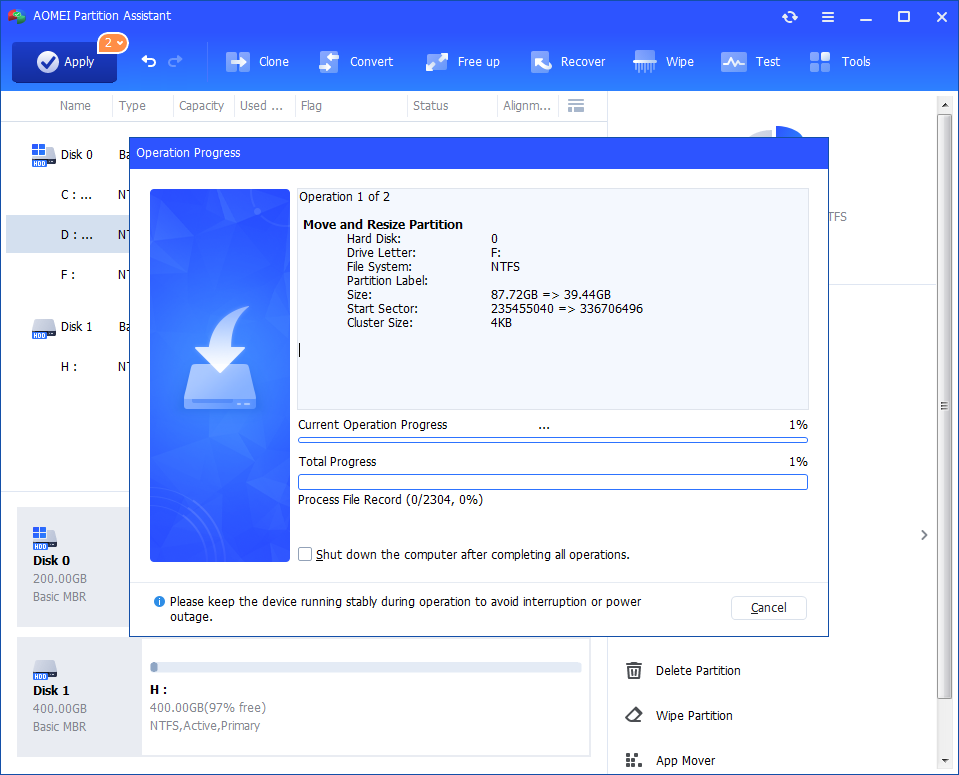
Step 5. Wait for the operation to be finished. After it is completed successfully, you will find D: is enlarged and both D: and F: are adjusted.

AOMEI Partition Assistant also offers features for partition SSD for dual boot for 2 different operating systems. If you want to extend Windows drive, you can read to get more solutions.
Bonus tip: What to do if the dual boot fails?
System instability is a common cause of dual boot failures. If you encounter this issue, AOMEI Partition Assistant offers Boot Repair feature that can help automatically diagnose and resolve it.
The Best Windows Disk Partition Manager and PC Optimizer
Step 1. Download and install AOMEI Partition Assistant on a functional PC, then connect a USB drive to it.
Step 2. Select Recover > Boot Repair from the main interface.

Step 3. Choose the create a bootable disk option to generate WinPE bootable media.

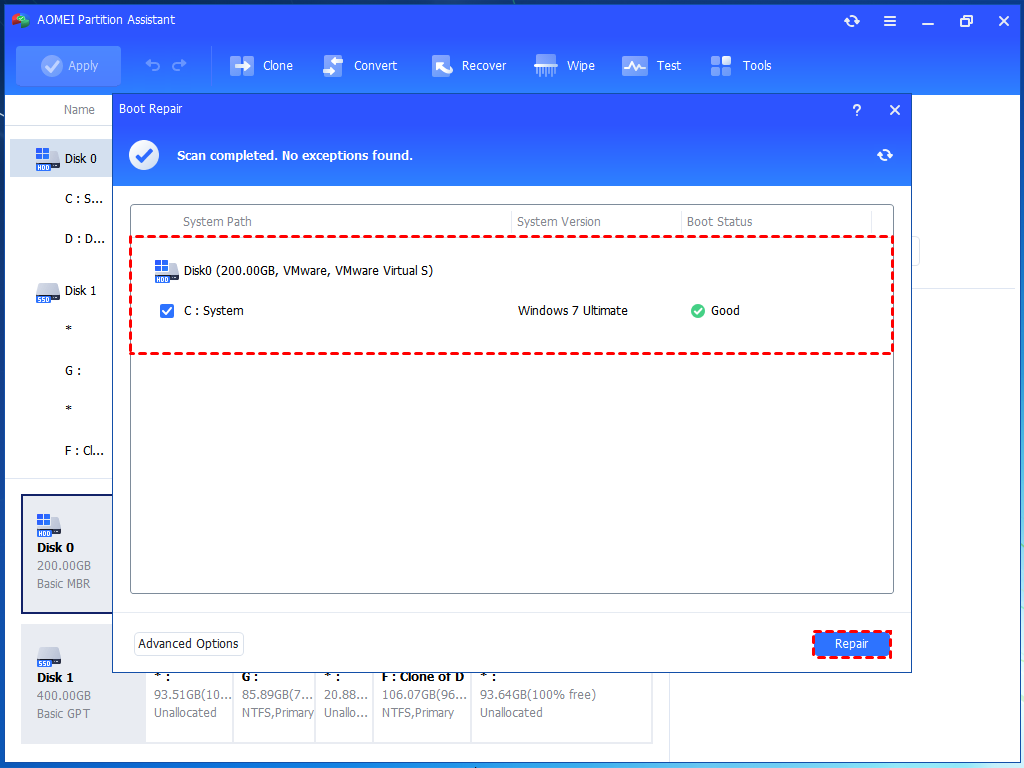
Step 4. Connect the drive to the malfunctioning computer and try to start it. Once you log in successfully, it will automatically load the Boot Repair tool and initiate the boot entries scanning process.

Step 5. Once the process completes, all boot entries will be displayed. Select the entries that you want to repair and click the Repair button.
Step 6. After the repair is successful, remove the bootable USB drive and reboot the PC from the original system drive.

Conclusion
If you can't shrink Windows partition for dual boot,a simple solution is to use a tool like AOMEI Partition Assistant. It helps you resize partitions easily and bypass these problems. By following a few simple steps, you can free up space for another operating system and set up a dual boot without any issues. For Windows Server users, the handy tool also provides the Server edition.

