How to Dual Boot Windows 11 and Linux on Separate Hard Drives
Setting up a dual boot Windows 11 and Linux on separate hard drives might seem daunting for those who have no experience in installing an operating system. Don't worry, this tutorial will explain it in detail and help you complete the process in a very simple way.
By Hedy / Updated on April 7, 2025
Is it better to dual boot on separate hard drives?
If I dual boot install both Ubuntu and Windows, is it better to install them on two different hard drives than different partitions on the same hard drive?"
- Question from Ask Ubuntu
Of course, it's generally considered more efficient and organized to dual boot Windows 11 and Linux on separate hard drives than to install them on different partitions of the same hard drive. For example, dual booting Windows 10 and Windows 11 in the same drive. When you choose a different drive for each operating system, it has several advantages:
❤ Placing each operating system on its dedicated hard drive results in a less cluttered partition table.
❤ Giving each operating system more space and providing better performance, depending on the drive's capacity.
❤ Managing partitions becomes less complex, reducing potential confusion.
❤ Backing up and restoring data becomes simpler. You can easily back up data from one drive without involving another drive.
Preparations for dual booting Windows 11 and Linux
Before we dive into the steps for dual booting Windows 11 and Linux on separate hard drives, it's important to ensure that you have the following:
☞ A computer already running Windows 11 on a hard drive.
☞ Extra hard drive allocated specifically for Linux Ubuntu installation.
☞ Bootable USB (at least 8 GB) or CD/DVD containing Linux installation media.
☞ Comprehensive backup of all important data. While ideally, this process won't delete any data, it's prudent to take precautions just to be on the safe side.
☞ Ensure that you have approximately 50 GB of free space on both drives for an optimal experience.
How to dual boot Windows 11 and Linux on separate hard drives
Once you've completed the necessary groundwork, you can follow these four parts on how to dual boot Windows 11 and Linux. In this guide, we'll assume that Windows is installed on your PC, as is the case for most users.
Part 1. Create a partition for Linux installation
In preparation for installing Linux, designated partitions must be created on the secondary hard drive. Please consider the following guidelines:
① A new secondary drive must be initialized before it can be used. This involves creating partitions on the drive.
② If it is a previously used drive, make sure it has a partition of 50GB to 100GB depending on the specifications of different Linux distributions.
③ If the used second drive contains only one partition, it would be better to generate an additional partition for the Linux installation as the existing partition data will be erased during the installation process.
To create a new partition customized for Linux, you can resort to Disk Management or a more powerful third-party tool.
Method 1: Create a partition via Disk Management
Creating partitions using Disk Management requires unallocated space on the disk. If unallocated space is not available, you can shrink the primary partition to allocate additional space first and then create a new primary partition from the generated space. Specific steps are as follows:
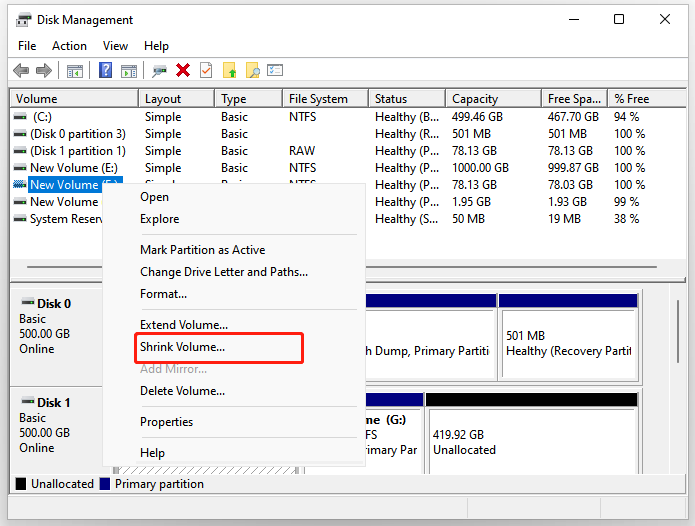
Step 1. Right-click the "Start" menu at the bottom and select "Disk Management" from the context menu.
Step 2. In the Disk Management window, right-click the primary partition that has enough free space and select "Shrink Volume".
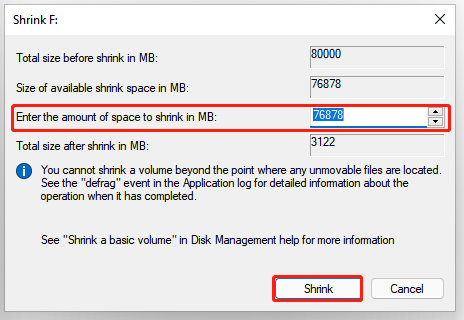
Step 3. Specify the desired amount of space to shrink in the box provided, and click "Shrink". This operation will generate the necessary unallocated space.
Step 4. Right-click the newly created unallocated space next to the resized volume and select "New Simple Volume".
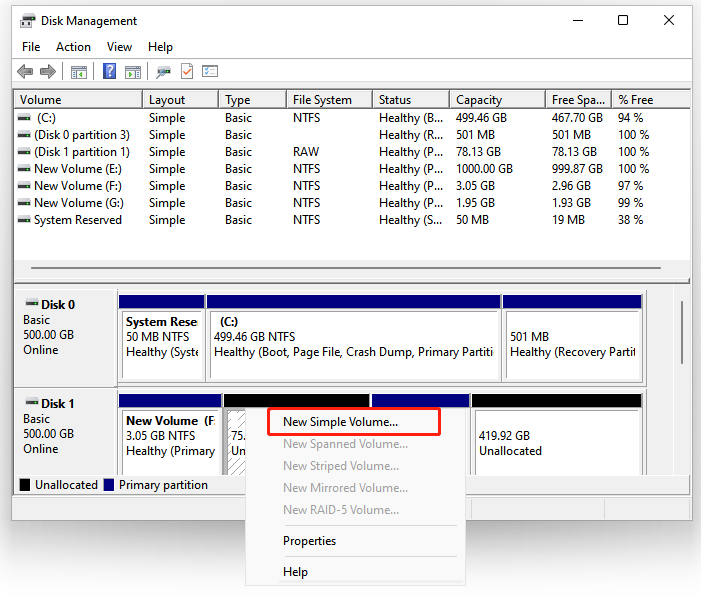
Step 5. Click "Next" to continue and set the simple volume size to its maximum available value. Then, click "Next".
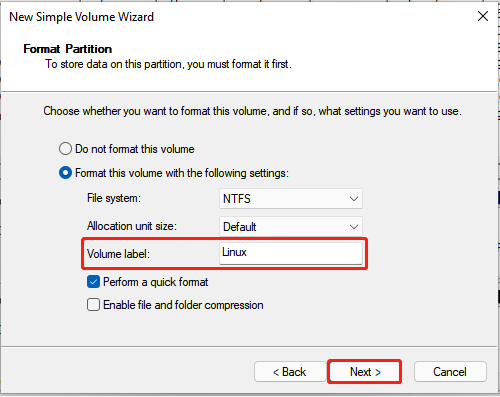
Step 6. Assign a drive letter to the new partition and label it "Linux". Finally, click "Finish" to end the process.
Method 2: Create a partition via third-party software
Of course, Disk Management in Windows has its limitations, especially the lack of support for certain file systems such as FAT16, FAT32, and exFAT, which is limited to NTFS. Additionally, users may encounter issues such as shrink volume button being grayed out even when space is available, making volume shrinking difficult.
To work around these limitations, it is recommended to use a free and powerful partition manager such as AOMEI Partition Assistant. The software supports moving and resizing multiple file systems such as FAT16, FAT32, and exFAT, which is limited to NTFS. Notably, it can also resizing encrypted partition and directly create one partition on the existing partition.
Step 1. Install and launch AOMEI Partition Assistant. Right-click the target partition (for example, D:) in the main console and select "Resize/Move Partition".
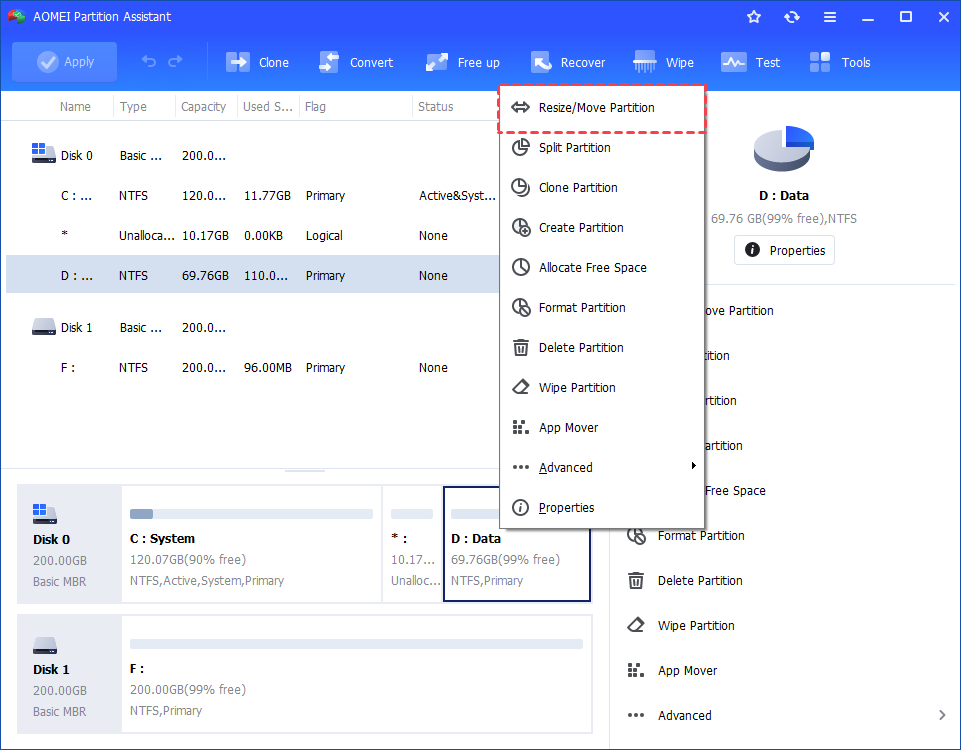
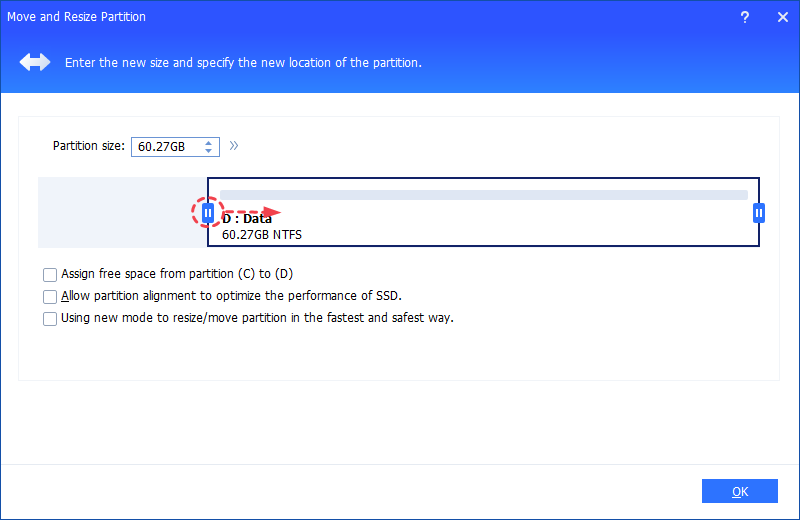
Step 2. Resize the partition and drag the partition border left or right to shrink the partition. Click "OK" to generate unallocated space.
Step 3. Right-click on the unallocated space and select "Create Partition" from the right panel.
Step 4. Access "Advanced" settings to specify information about the new partition, including drag the both edges to specify the partition size. Then click "OK" to continue.

Step 5. Click "Apply" > "Proceed" to save the changes.
This way, a new partition is successfully created to install Linux on second SSD.
Part 2. Make a bootable Linux USB drive
When installing both operating systems, USB drives are typically used. Follow these steps to create a bootable USB drive:
Step 1. Visit the official Ubuntu download page, select the desired version, and click "Download".
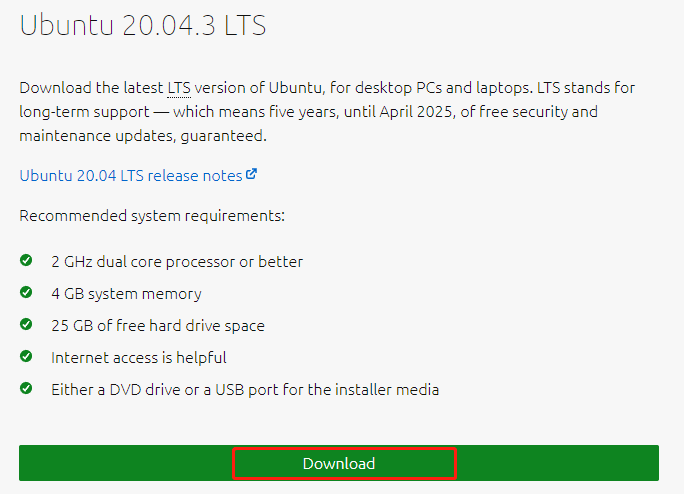
Step 2. Save the downloaded ISO file. Then you should have a file with the ISO file extension.
Step 3. Plug the USB drive into your Windows PC.
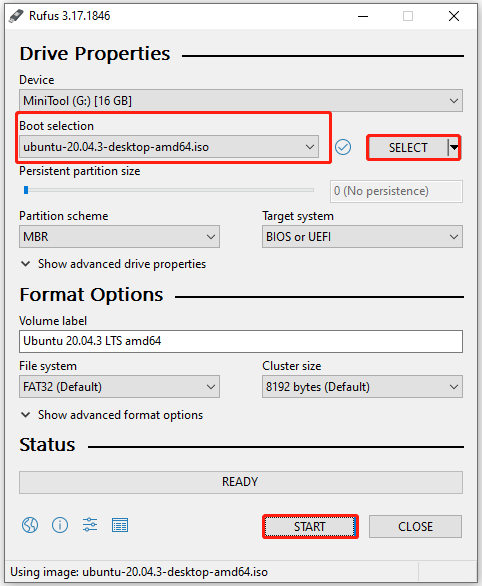
Step 4. Launch Rufus and select the USB drive from the device drop-down menu.
Step 5. Select the downloaded Linux ISO file.
Step 6. Confirm the correct settings and click "Start" to initiate the process. Click "OK" in the pop-up window to confirm.
Once completed, you will have a bootable Linux USB drive, paving the way for setting up a dual boot Windows 11 and Linux on separate hard drives in the subsequent steps.
Part 3. Install Linux on the partition
To install Ubuntu on the newly created partition, follow these steps after inserting the bootable Linux USB drive:
Step 1. Restart your computer and press the "F2, F10, F12, Delete, or ESC" key to access BIOS setup (BIOS hotkeys vary by PC brand).
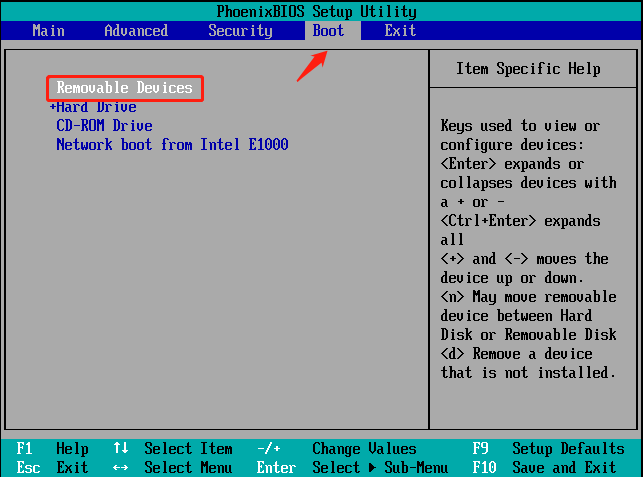
Step 2. From the listed drives, use the arrow keys to prioritize the USB device as the first boot device.
Step 3. Press "F10" to save changes and exit.
Step 4. Your computer should boot from the USB drive. Select Ubuntu from the boot menu and press "Enter" to continue.
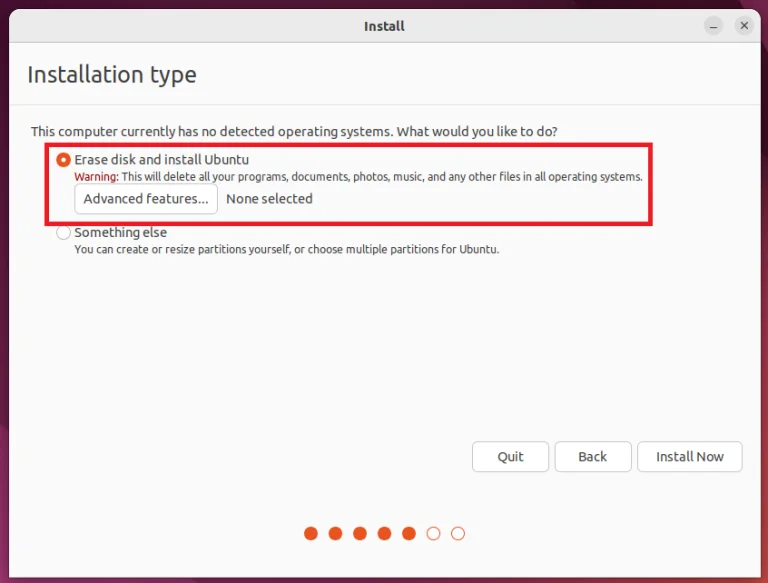
Step 5. Select your language preference and continue until you come across the "Erase disk and Install Ubuntu" option. Click "Install Now".
Step 6. On the subsequent screen, select the hard drive to install Ubuntu on.
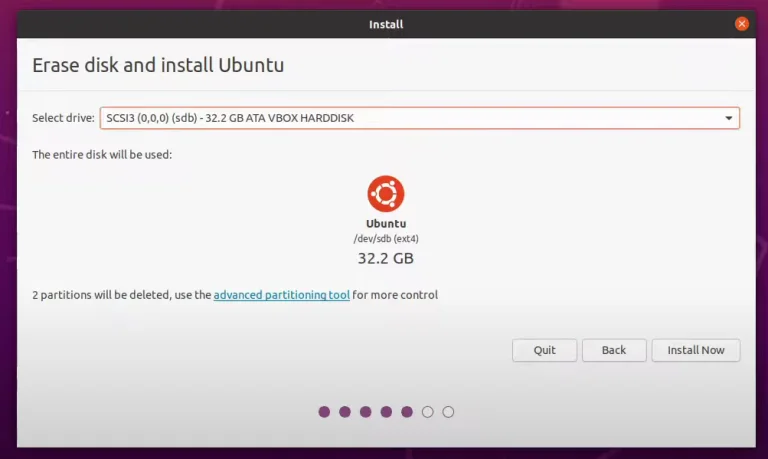
Step 7. A warning prompt will appear indicating that the partition has been formatted - click "Continue".
Step 8. Customize settings such as time zone and login details before starting the installation.
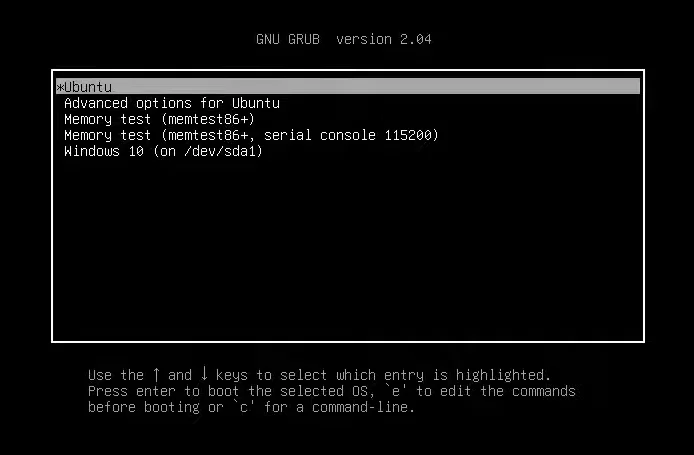
Step 9. Once the installation is complete, the GRUB boot loader menu will appear, allowing selection of an operating system.
- Notice:✎...
- If your computer's primary OS is Ubuntu, the installation steps would be "insert Windows bootable USB drive and restart >> enter the boot menu >> select a USB device as the boot drive >> select the second hard disk to install the Windows operating system >> follow the on-screen instruction to complete the installation".
Now you have set up a dual boot Windows 11 and Linux on separate hard drives. Please note that each time you start your computer, you will need to select your desired operating system.
Part 4. Set up Windows 11 and Linux dual boot
After booting into GRUB, you can choose between Windows 11 and Ubuntu OS. This way you have set up a dual boot Windows 11 and Linux on separate hard drives.
Please note that each time you start your computer, you will need to select your desired operating system. You can set one OS as default if you find it troublesome.
Further reading: Back up the Windows system to protect system data safe
As has been mentioned above, considering the complexities involved in setting up a dual boot Ubuntu Windows 11, it's wise to create a backup of your critical data to an external hard drive. One of the best system backup methods is to clone your OS which will copy every bit of information from your system. So how to clone the Windows system without reinstalling the OS?
There is no built-in cloning tool in Windows, so you need to choose reliable third-party cloning software. In the part of creating a partition for Linux, we recommend the AOMEI Partition Assistant to help you.
Apart from these basic partition management features, AOMEI software can also unlock more advanced features such as "Migrate OS" to clone Windows 11 OS to MBR/GPT HDD/SSD disks without reinstalling everything.
Let's explore how to clone Windows 11 using PA Pro without reinstalling the operating system:
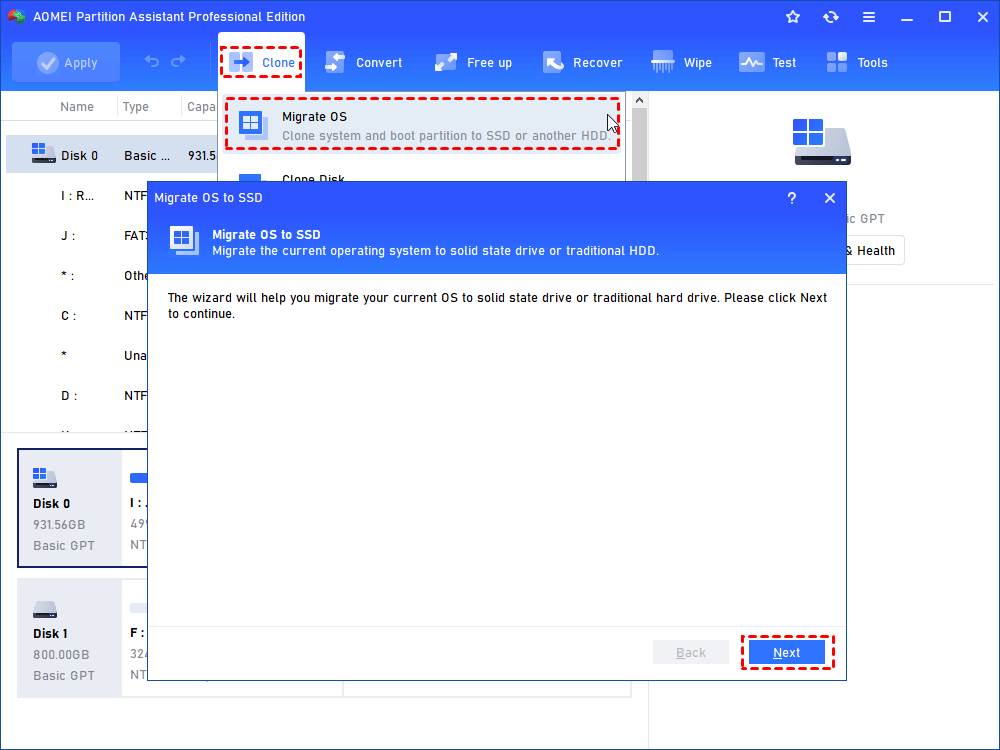
Step 1. Connect the external hard drive to your computer. Install and launch AOMEI Partition Assistant. In the main interface, navigate to "Clone" > "Migrate OS" and then click "Next" to continue.
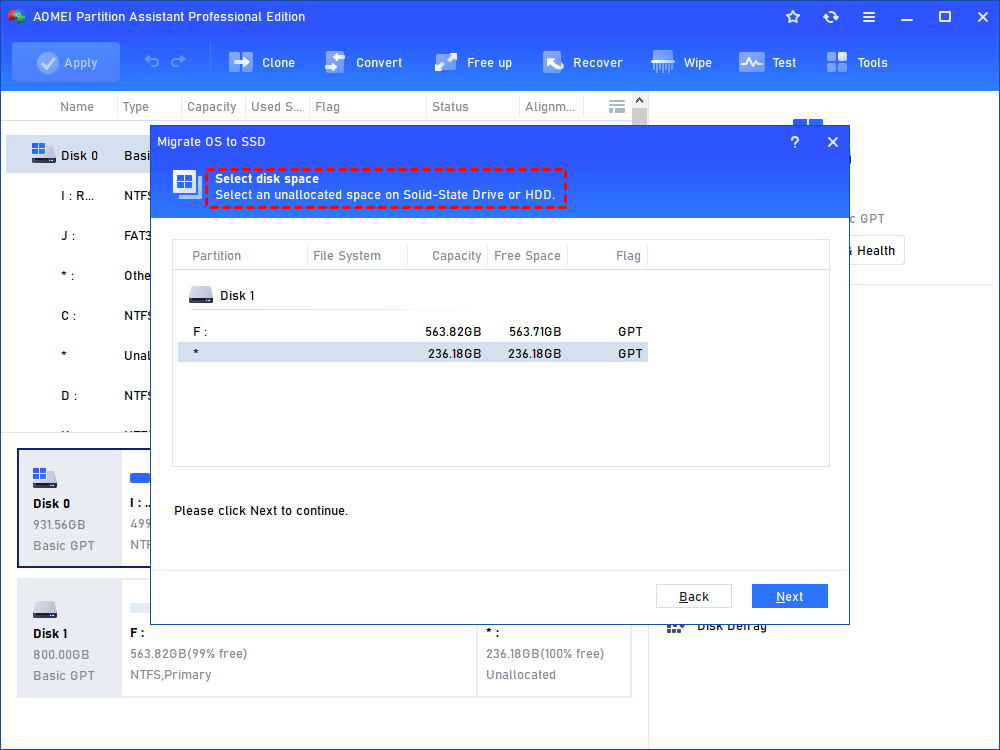
Step 2. Select a partition or unallocated space on the target disk (for example, a GPT SSD connected to your computer). Click "Next".
Step 3. Adjust the size, location, and drive letters of the partitions on the new disk as needed. Then, click "Next".

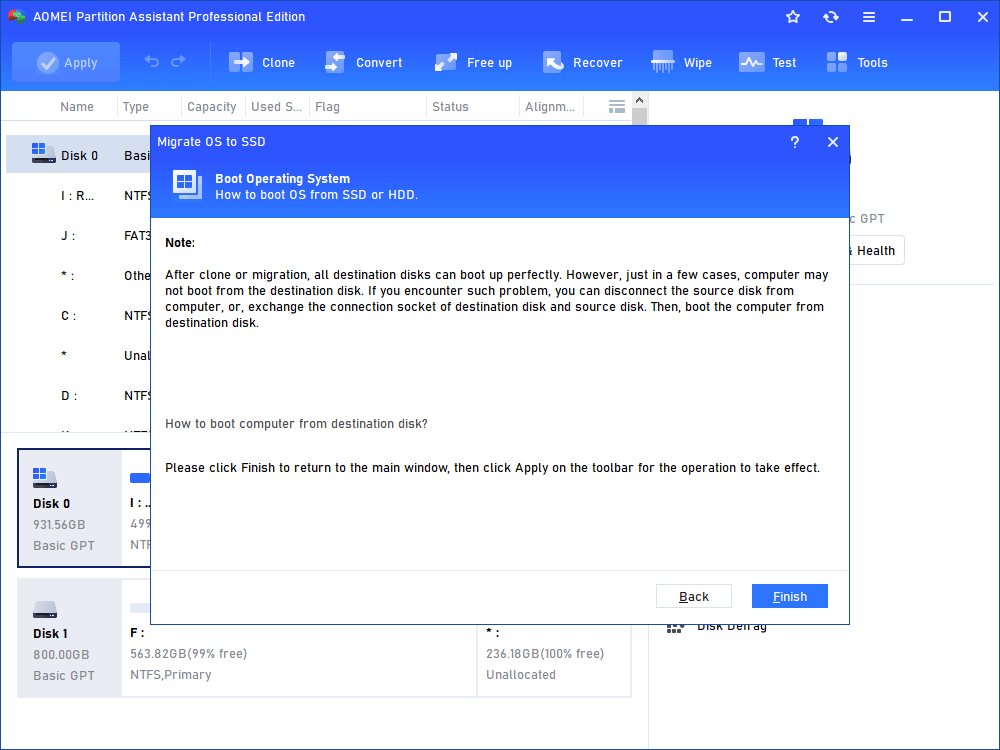
Step 4. Review the instructions for booting the operating system from the SSD or HDD. When finished, click "Finish".
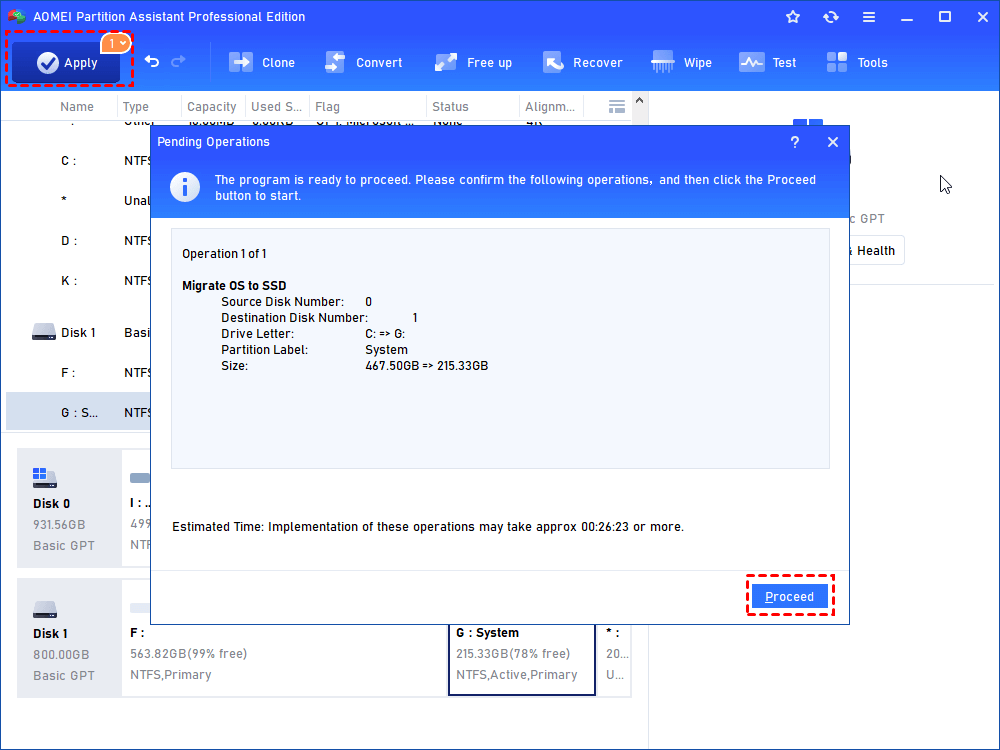
Step 5. Verify the planned actions in "Pending Actions". If everything looks correct, click "Apply" to perform the cloning process.
Once completed, your Windows 11 operating system will be successfully cloned, ensuring data security and providing a backup solution in case of any unforeseen issues during the dual-boot setup process.
FAQs
Can I have two hard drives with different operating systems?
Yes, you can have two hard drives with different operating systems. This setup is known as a dual-boot configuration. Each drive operates independently, and you can choose which OS to boot into during startup. This method keeps the systems separate and reduces the risk of software conflicts, offering flexibility for using different platforms like Windows and Linux on the same computer.
Do you need two drives for dual-boot?
No, you don’t need two drives for dual-boot. You can install multiple operating systems on a single drive by creating separate partitions for each OS. However, using two drives can improve performance and organization, and make it easier to manage or remove one OS without affecting the other. It's especially useful when each OS requires significant space or different file systems.
Is it possible to have both SSD and HDD?
Yes, it’s absolutely possible to have both an SSD and an HDD in the same computer. Many systems use SSDs for the operating system and essential applications due to their speed, while using HDDs for storing large files like videos, photos, or backups. This setup combines speed with storage capacity, offering a balance between performance and cost-efficiency.
Conclusion
Believe you have learned how to set up a dual boot Windows 11 and Linux on separate hard drives from this article. Follow the step-by-step guide to use two operating systems on one PC.
However, for the sake of data security and integrity, you are suggested to use AOMEI Partition Assistant to clone and back up your Windows OS before proceeding. Besides resizing partitions, cloning the system, and copying the disk, this versatile manager also enables users to allocate free space to C drive to increase capacity and convert to GPT disk without losing data. Don't hesitate to try it! Windows Server users can resort to the Server edition.

