Windows 10 Disable Low Disk Space Warning| Let’s Do It
When you’re confused by Windows 10 disabling low disk space warning, this tutorial will be helpful for you. You can know what is low disk space warning and some practical methods to disable it.
By AOMEI / Updated on February 25, 2025
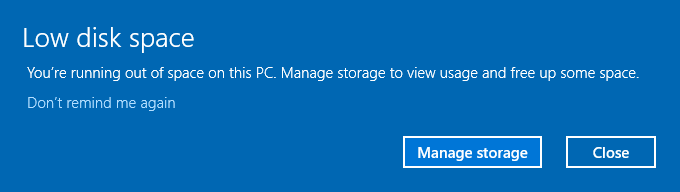
How do I remove low disk space warning popup?
Since my computer upgraded last night to the new edition of Windows, I am getting a constant pop up that says I have low disk space on local drive I. How can I disable the low disk space warning on Windows 10? Thanks so much.
- Question from tenforums.com”
What is low disk space warning?
To notice the users, the Windows system will pop the Low disk space warning when there is only 200 MB, 80 MB and 50 MB space are left. To prevent continuously receive such a warning, the users can take measures to free up the disk at once.
Generally, the warning can help users avoid some PC problem caused by low disk space of C drive, such as computer freezes, system crashes, etc. But if the warning is about other partitions like recovery partition, it can be annoying.
Therefore, in the next part, we'll share some methods to perform Windows 10 disabling low disk space warning.
Solved: Windows 10 disable low disk space warning
Although the low disk space warning is useful for us to manage the disk, when the target drive is not the C drive, you may need to disable it to avoid seeing it all the time. In this section, you can learn 2 methods to stop this warning.
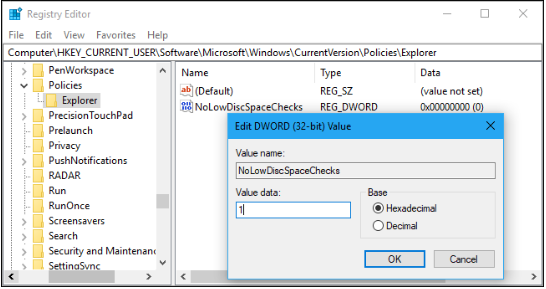
✦ Method 1. Run Registry Editor
Registry Editor is a Windows database, it stores the important files about the system hardware, installed programs, the settings and all accounts on the PC. So if you want to disable low disk space warning on Windows 10, you can run the Registry Editor.
Step 1. Press "Windows + R", then input "regedit" and press "Enter".

Step 2. In the Registry Editor window, turn to the path “Computer\HKEY_CURRENT_USER\Software\Microsoft\Windows\CurrentVersion\Policies\Explorer”.

Step 3. Right-click on the empty area on the right panel, then click "Add" and choose "DWORD (32-bit) value".

Step 4. In the new popped window, input "NoLowDiscSpaceChecks" under the Value name, then set the "Value data" to 1 and click "OK".
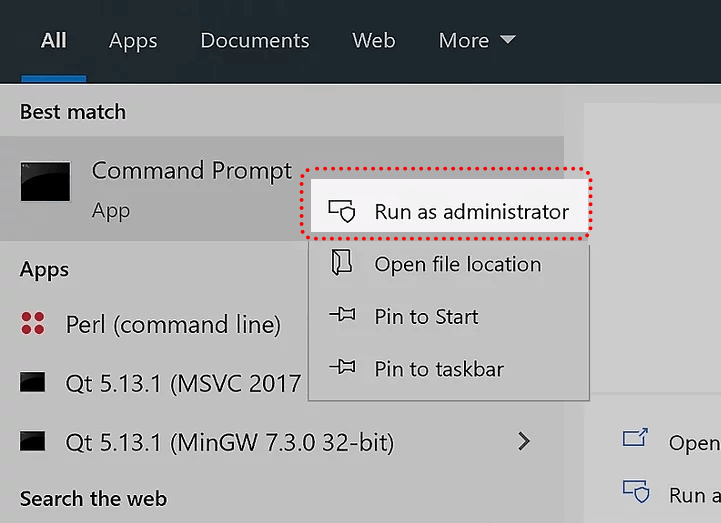
✦ Method 2. Delete the drive letter
There may be some system errors, they caused the hidden partition be aligned the wrong drive letter. So you can disable the warning by deleting the drive letter.
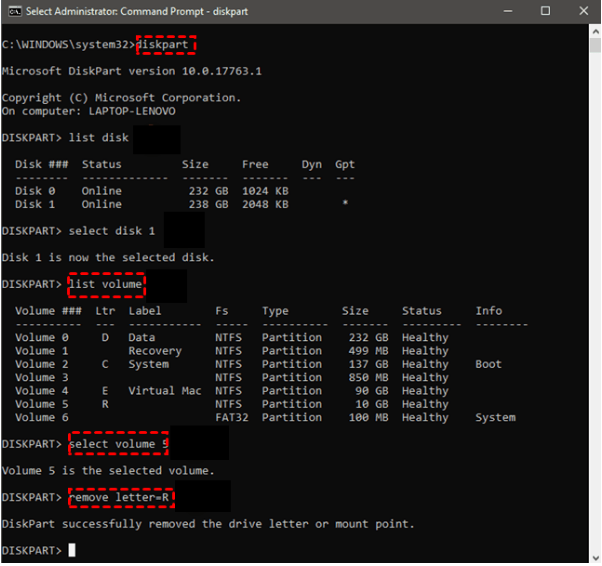
Step 1. Press "Windows", then input "cmd" and select "Run as administrator".
Step 2. In the following interface, type the commands below and press "Enter" each time.
• diskpart
• list volume
• select volume # (The "#" refers to the target drive letter.)
• remove letter=R
How can you completely solve the low disk space warning
Although you can try the mentioned methods to make the low disk space warning invisible, this problem cannot be solved from the root. Besides, when the C drive is full, you need to fix the warning by freeing up it.
Therefore, in this part, we'll show you how to disable low disk warning Windows 10, releasing the drive with little free space.
✿ Solution 1. Extend the target drive
The low disk space warning appears when the drive is full, so you can try to extend it. Here, you can try a reliable disk managing tool- AOMEI Partition Assistant Standard. You can use it in Windows 11/10/8.1/8/7/Vista/XP PC.
With the help of this tool, you can easily extend the drive without formatting. Based on different conditions, three functions are produced to easily extend the partitions, including Resize Partition, Merge Partition and Allocate Free Space.
Let's see how does it works.
★ Scenario 1. Extend the drive with adjacent unallocated space
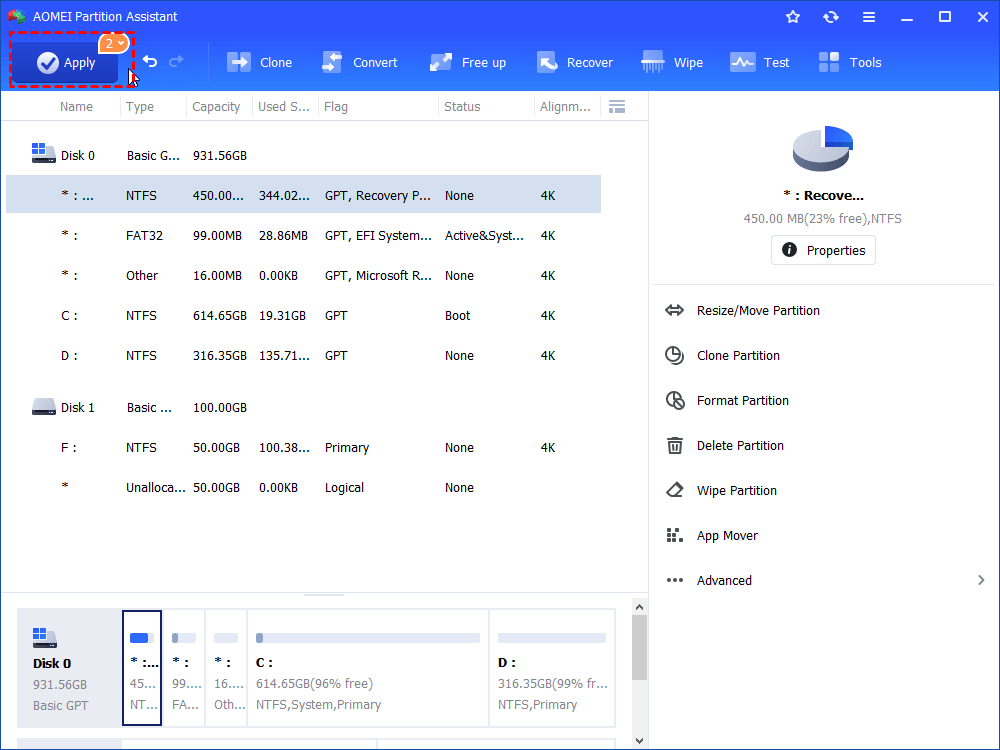
When there's adjacent unallocated space near the target drive, you can directly use the “Resize Partition” function. Here, we take the C drive as an example.
Step 1. Install and open this brilliant tool, right click the target drive and click "Resize/Move Partition".
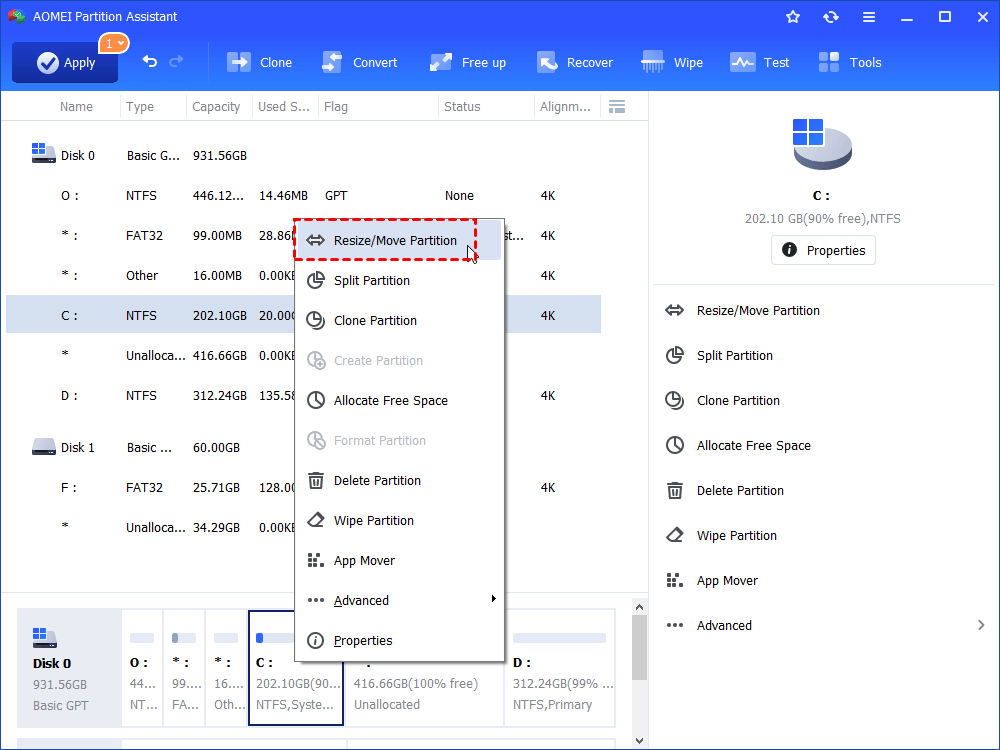
Step 2. In the "Move and Resize Partition" window, drag the little circle to set the size of the drive, click "OK".
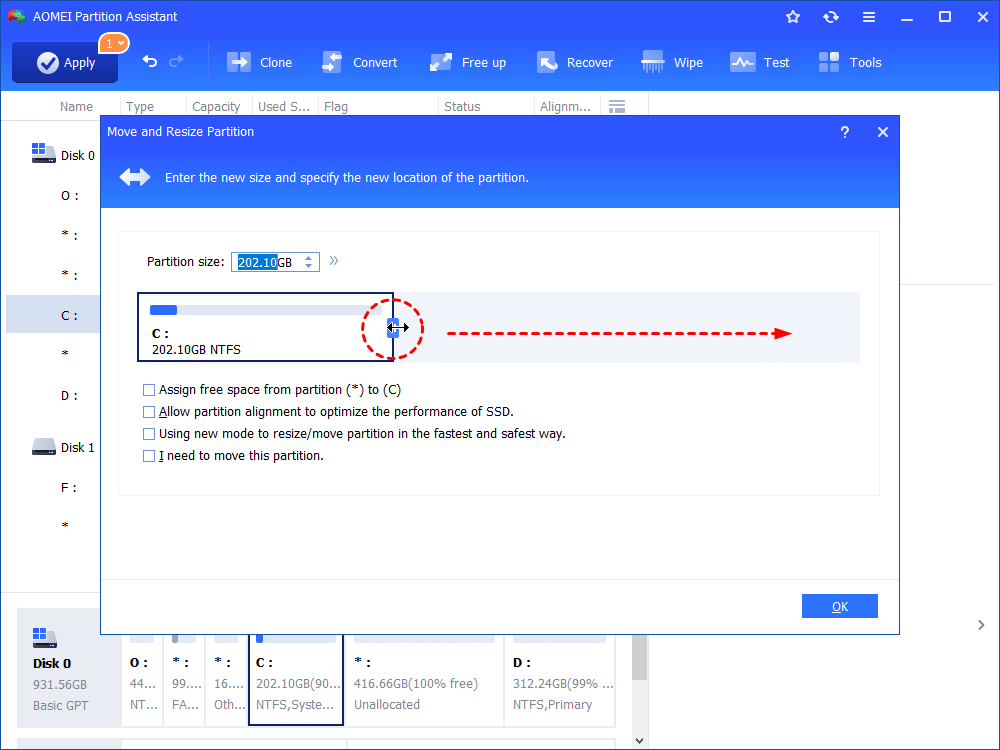
Step 3. Click the "Apply" to extend the drive without much free space.
★ Scenario 2. Extend the drive without adjacent unallocated space
When the unallocated space isn’t adjacent with the target drive, you can try to merge them.
Step 1. In the main interface of AOMEI Partition Assistant, right-click the drive and click "Advanced", then select "Merge Partition".
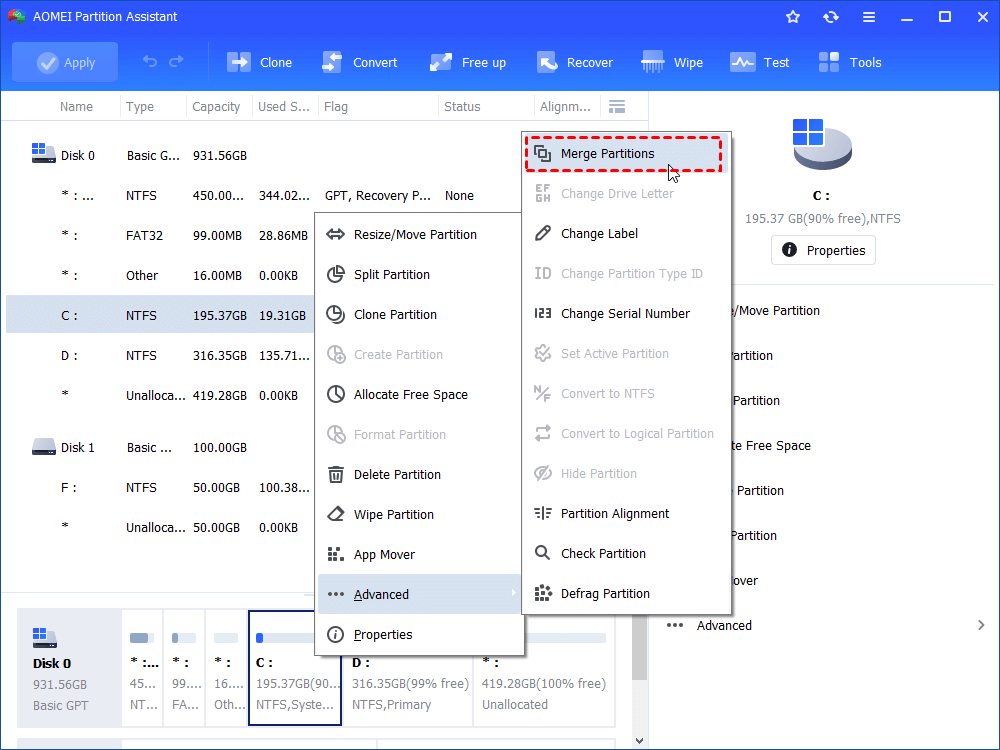
Step 2. Then tick the drive and the unallocated space, click "OK".
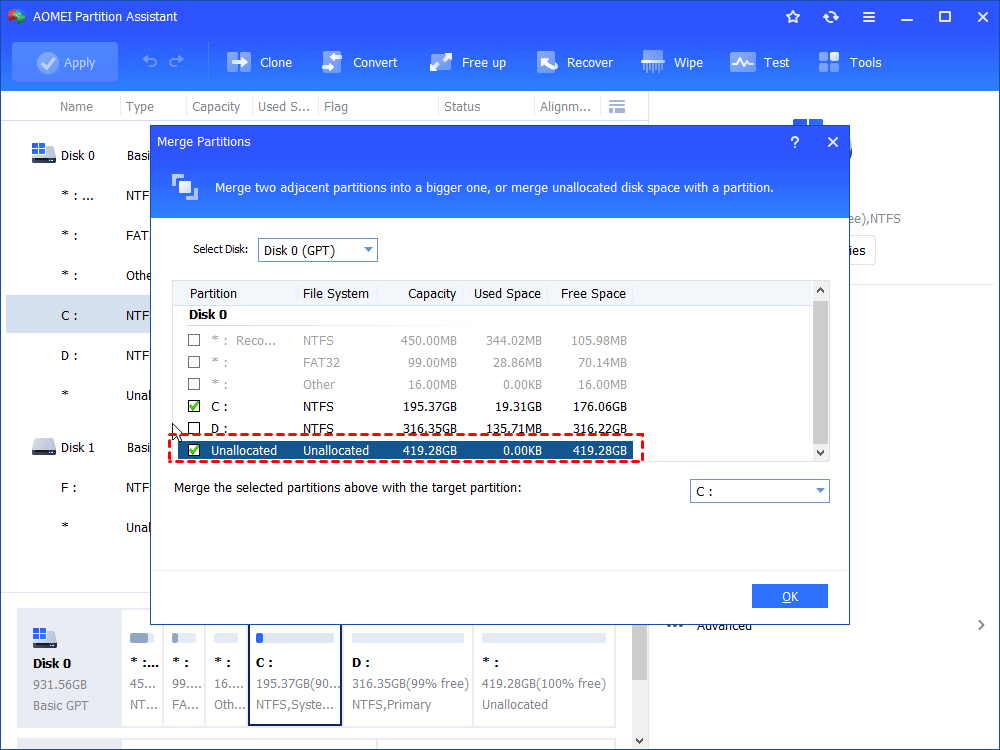
Step 3. Click "Apply" and "Proceed" to start merging the unallocated space to the target partition.
★ Scenario 3. Extend the drive without adjacent space
If there’s no unallocated space on the hard drive, don't worry, the "Allocate Free Space" feature can easily fix it, allocating any free space on the hard disk to the target drive. Just turn to the Professional Version, you can enjoy this powerful function.
Step 1. In the main interface, right-click any drive with much free space, then click "Allocate Free Space".

Step 2. In the small window, change the allocated space and select the target drive, then click "OK".

Step 3. Click "Apply" and "Proceed" to start this drive extending task.

✿ Solution 2. Turn on the Storage Sense
To totally fix the low disk space warning, you can turn on the Storage Sense, It can automatically clean up the disk.
Step 1. Open the Windows Settings and click "System" on it.
.png)
Step 2. Select "Storage" and then turn on "Storage Sense". Click "Configure Storage Sense or run it now" to see more information.
.png)
Step 3. In "Configure Storage Sense or run it now" window, you can set the specific time to run this function.
.png)
✿ Solution 3. Clean up all unwanted files
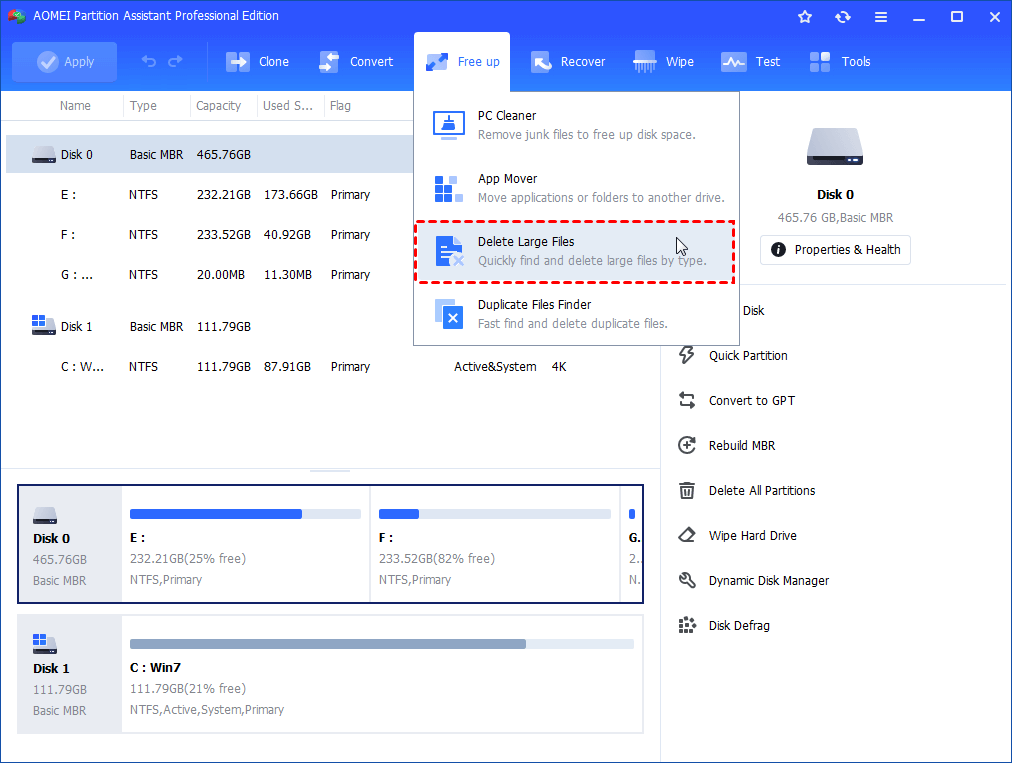
Once there're many files and folders stored on the disk, you may continuously receive the low disk space warning. Therefore, you can remove unwanted large files with AOMEI Partition Assistant.
Step 1. Open the professional version of this tool, click "Free up" and "Delete Large Files".
Step 2. Click "Start Scan", then you can find all large files on the PC.
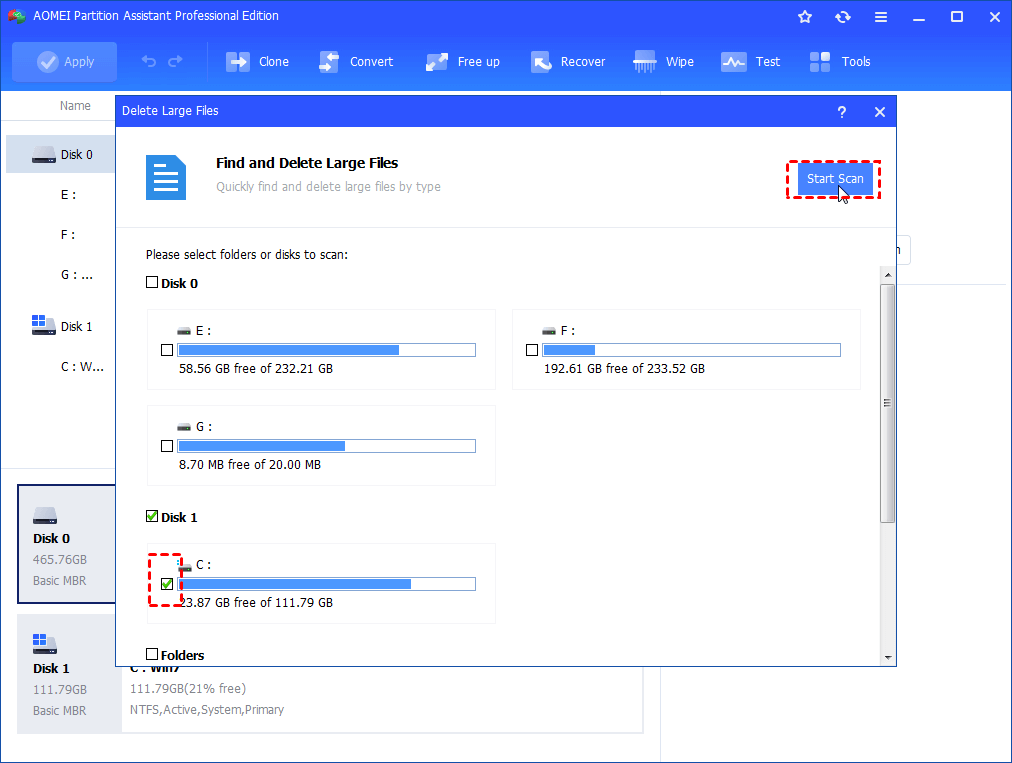
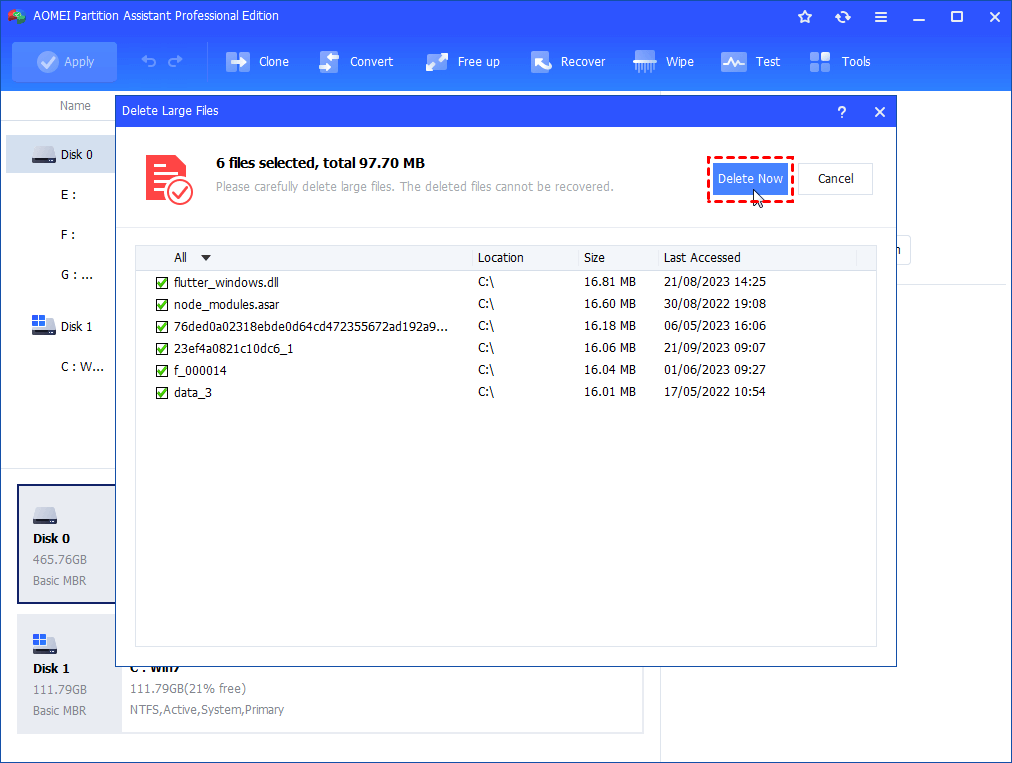
Step 3. Select the unwanted large files and click "Delete".
![]()
Step 4. Click "Delete Now" to delete all of the unwanted files.
✿ Solution 4. Optimize the disk
The file defragment can not only slow down your PC, but also occupy some free space, so you need to optimize your disk on time.
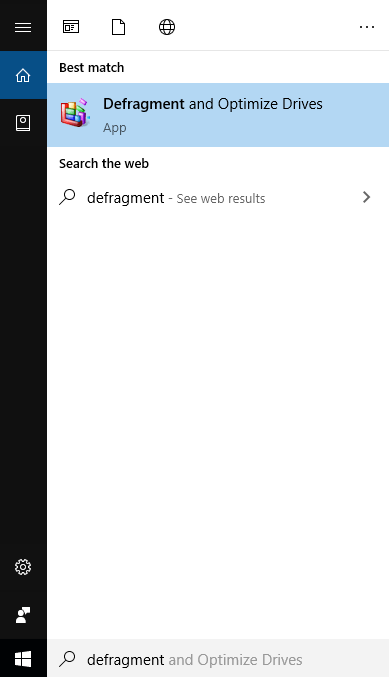
Step 1. Click the "Windows" button, then input "defragment and optimize drives" and press "Enter".
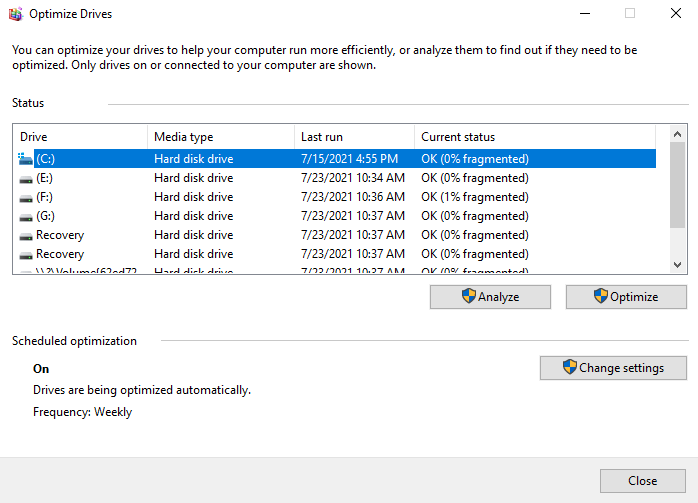
Step 2. In the new window, choose the target drive and click "Optimize".
✿ Solution 5. Move applications to another drive
If you receive the low disk space warning, you can choose to uninstall some applications on it. But for some users, they are unwilling to perform this operation. Then you can try to move installed programs to another drive.
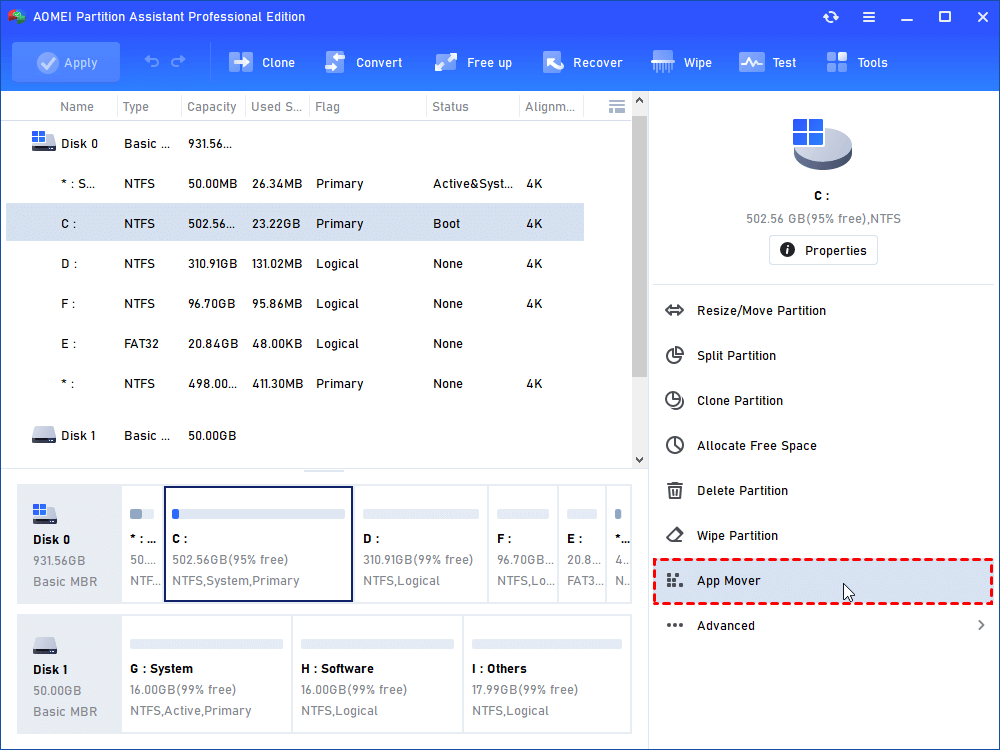
Step 1. Click "Free up" and "App Mover" in turn.
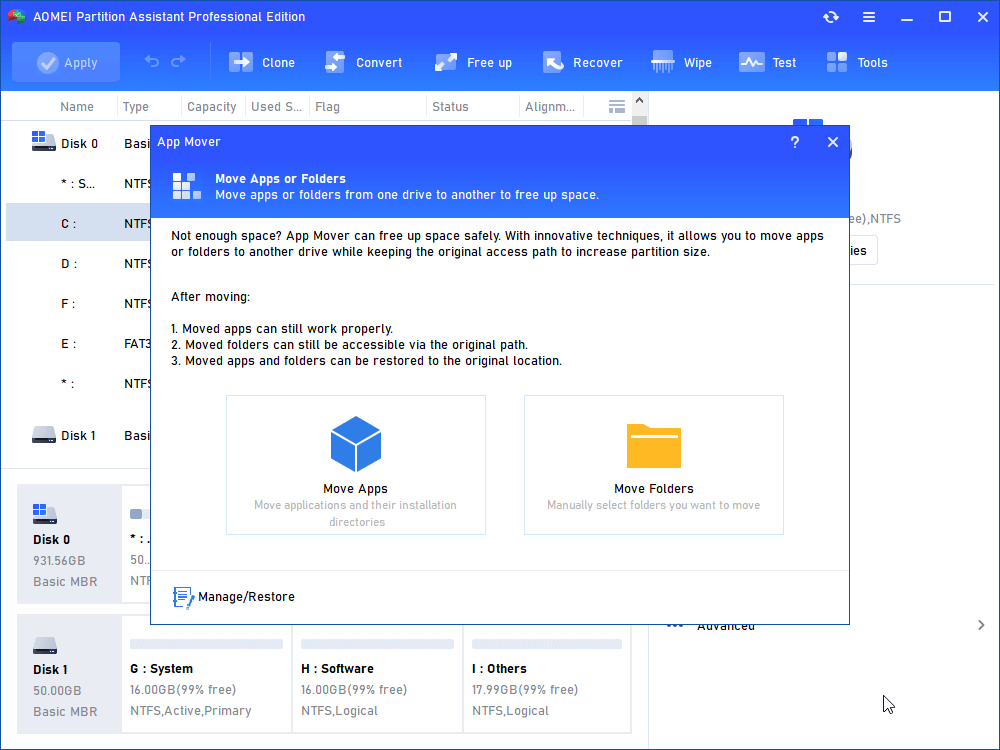
Step 2. Then select the "App Mover", if you want to move folders, you can choose "Move Folders".
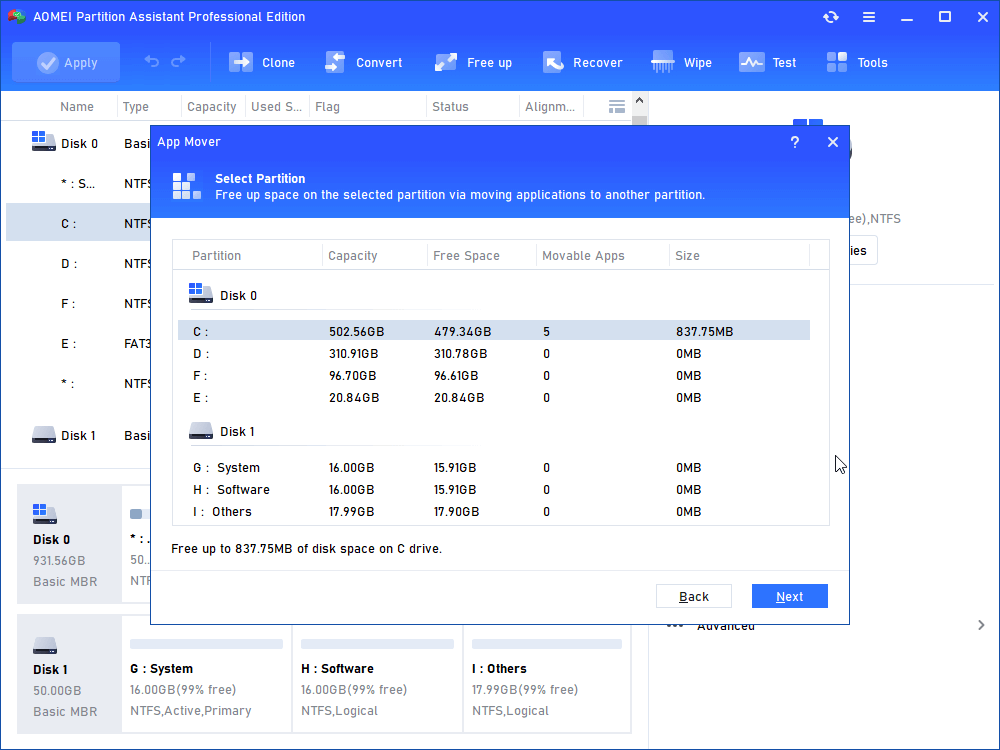
Step 3. In the new popped window, select the target drive and click "Next".
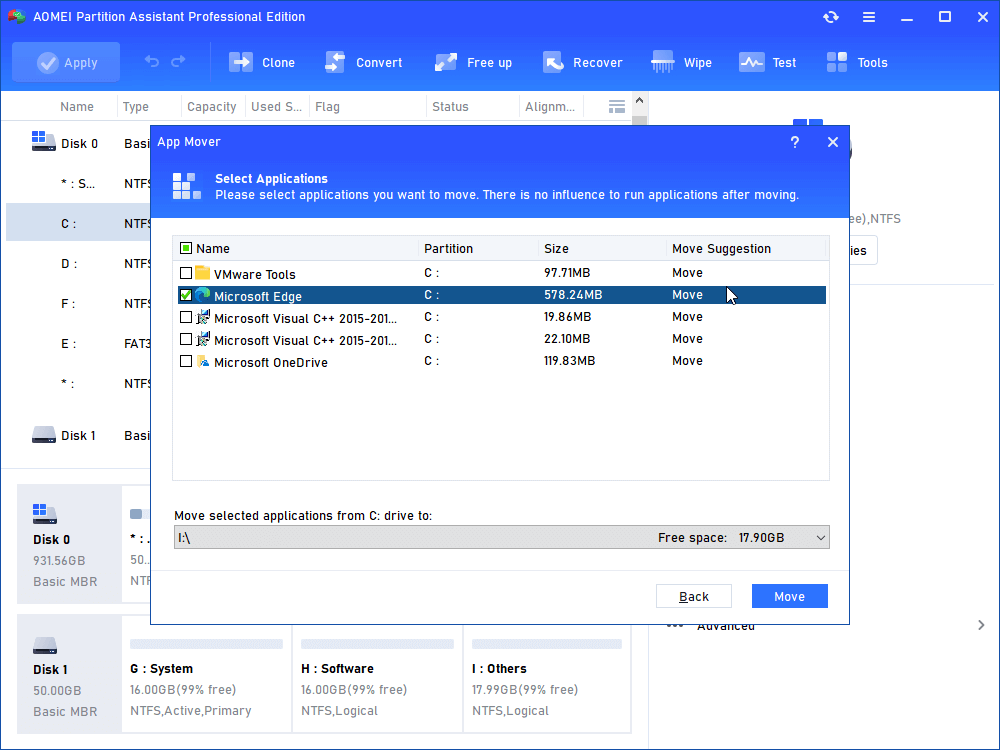
Step 4. Select the programs you want migrate and the destination partition, then click "Move".
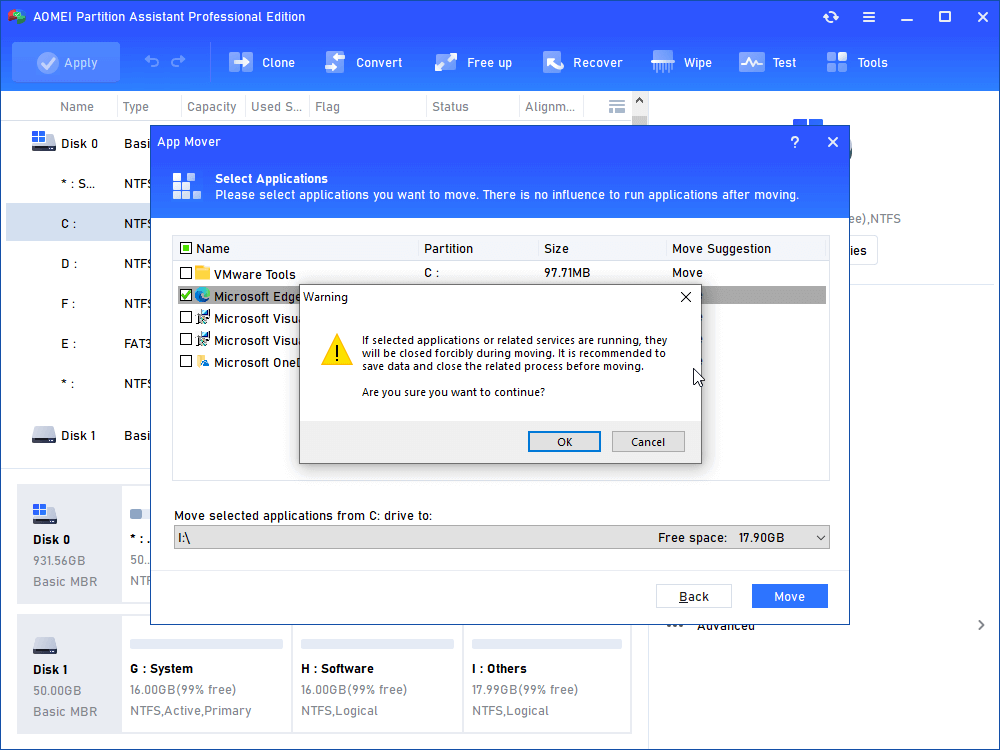
Step 5. A notice will pop out, then click "OK".
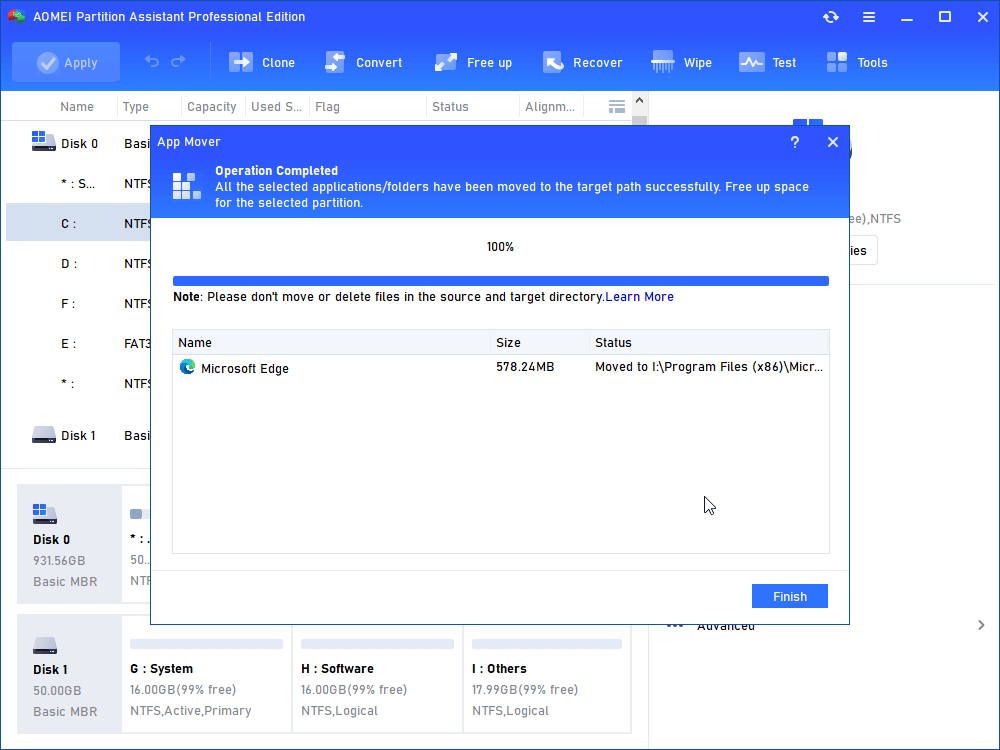
Step 6. When you see the progress bar become 100%, click "Finish".
✿ Method 6. Upgrade the current hard drive
You can also try to upgrade the current hard disk to a larger one. Here is the detailed process.
Before you do: To make sure the PC can recognize the new disk, you should initialize this disk first.
Step 1. Install and launch AOMEI Partition Assistant, click "Clone" in the main interface, and select "Clone Disk".

Step 2. Choose the hard disk that you need to clone as the source disk and click "Next".

Step 3. Select the destination disk to store the data on the source disk, and then click "Next".

Step 4. Then, you can check the source and destination disk in the next window or change to "Sector to Sector clone", and click the "Confirm" button to continue if there is no problem.

Here, you can also click the "Settings" button to adjust the partition size on the destination disk or tick "4k alignment" to improve the reading and writing speed of the SSD if the target disk is an SSD drive.

Step 5. After returning to the main interface, check the pending operation and click "Apply" and "Proceed" to commit the operation.

Tip: If the hard drive include the Windows OS is moved, you need to change the boot drive.
Conclusion
In this post, we have shared the process to perform Windows 10 disable low disk space warning. If you want to completely remove the low disk space warning, you can try the AOMEI Partition Assistant mentioned.
By the way, to solve the low disk space warning in Windows Server, you can try the Server Edition, which has the same functions and produce the chance for Windows Server users.

