What to Use for Windows PC Backup?
What to use for Windows PC backup if you want to back up your system to avoid accidents on your computer, you can check this article to see if you can find some helpful methods.
By Lucas / Updated on February 20, 2025
In today’s digital age, ensuring the safety of your data is more important than ever. Whether you're a professional, a student, or a casual user, losing important files due to hardware failure, malware, or accidental deletion can be devastating. This article will guide you through the essentials of backing up your Windows PC, including why it’s necessary, the tools available, and step-by-step methods to back up.
Why Do You Need to Back Up Your PC?
Backing up your Windows PC is not just a precaution—it’s a necessity. Data loss can happen unexpectedly due to hardware malfunctions, software corruption, viruses, or even manual errors. Without a proper backup, recovering lost files can be time-consuming, expensive, or sometimes impossible. A reliable Windows PC backup ensures that your important documents, photos, and system files are safe and can be restored quickly in case of an emergency.
💡 What to use for Windows PC backup?
Windows provides built-in tools like File History and Backup and Restore (Windows 7) to help users back up their files. However, these tools may not always meet the needs of advanced users or those looking for more comprehensive solutions. That’s where third-party Windows backup software comes into play. We will all show you in detail.How to Backup PC Windows: 3 Effective Methods
If you’re using Windows 10,11, you have several options to back up your system or crucial files. Below, we’ll explore three methods, including using native Windows tools and third-party software.
Method 1: Using Windows Backup and Restore
Windows comes with built-in tools that make it easy to back up your files and system. Backup and Restore enables users to generate system image backups. It is capable of backing up Windows 10 before upgrading to Windows. It offers the ability to store data in an internal or external hard disk, DVD, or network location.
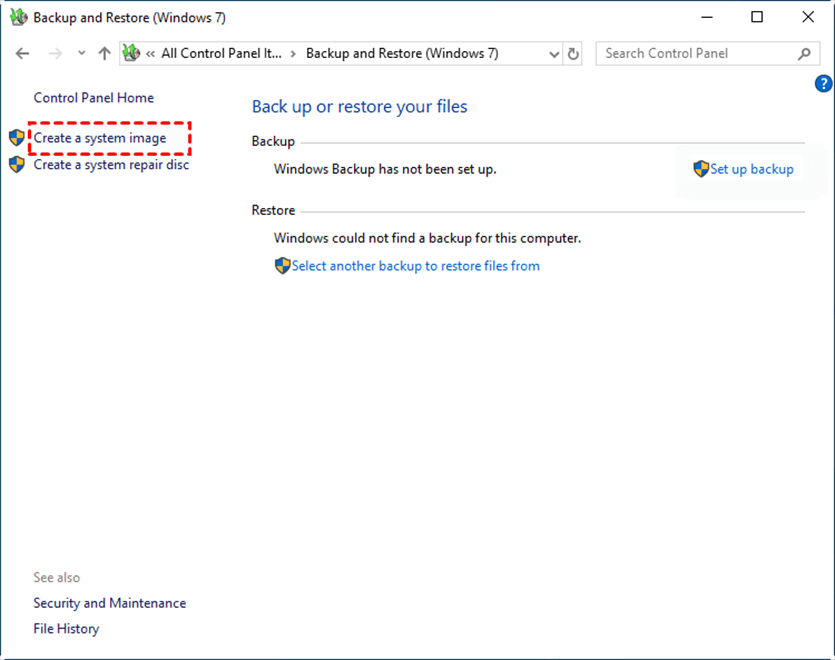
Search for the control panel in the start bar and open it. Click Backup and Restore under System and Security.
Step 1. In the Control Panel Home on the left, select “Create a system image”. Then, it will scan the storage devices on the computer and list them.
Step 2. After that, choose one of the three options to save the backup data. Take the first type as an example, and then click “Next”.
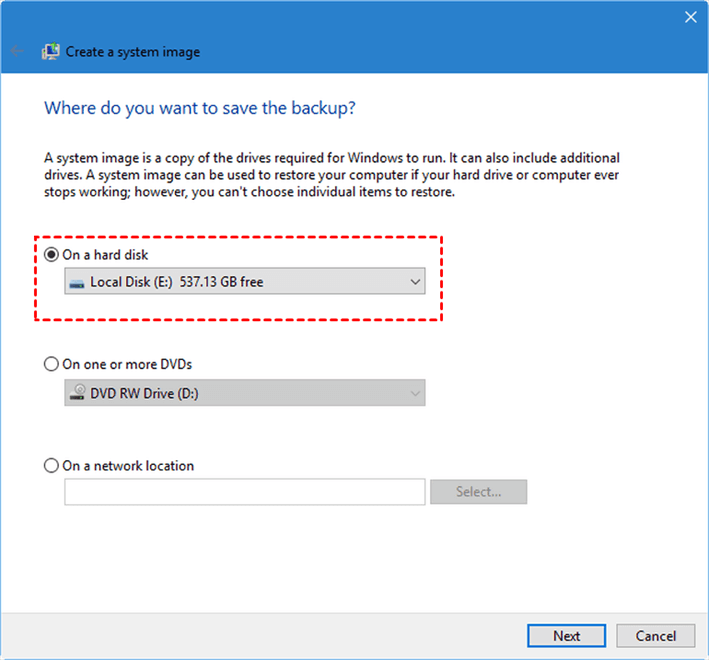
Step 3. The drive required to run Windows is selected by default. You can add other drives to be backed up, and then click Next.
Step 4. Confirm your backup settings and click “Start Backup”.
Method 2: Use File History for Windows PC backup
One method of safeguarding your files is to utilize the File History tool in Windows. It generates additional copies of your files from locations such as your desktop, documents, music, photographs, and videos. As a result, you accumulate numerous backups. Therefore, these backups can be utilized to retrieve your files if they are lost, damaged, or deleted.
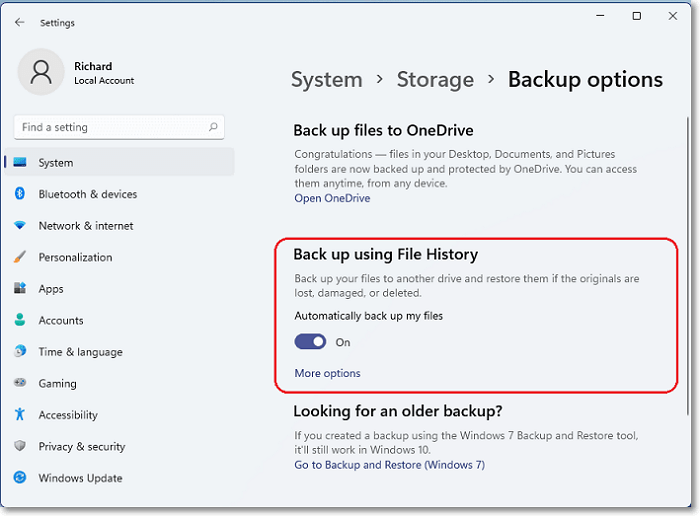
Step 1. Let's start by connecting an external hard disk. Open the Backup Options window under System and click on Storage. Then, click on Advanced storage settings. Now, pick "Add a drive" from the Backup using the File History menu.

Step 2. Turn on the "Automatically back up my files" option. Just click On it.
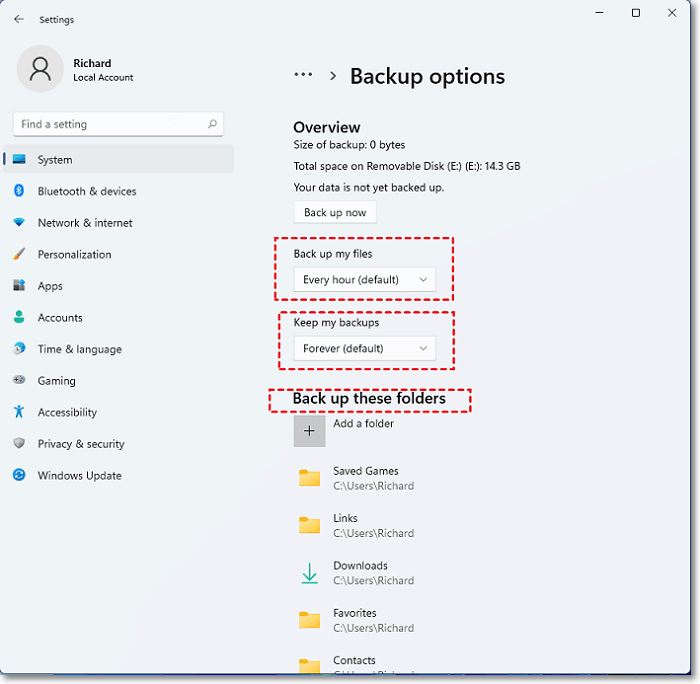
Step 3. Now, you can pick "More options." Here, you can choose how often, how long, and what kinds of backups you want File History to keep.
- Three options:
- Back up my files: File History automatically saves your files every hour by default. However, you can change this. You have several choices, from every 10 minutes to every 24 hours.
- Keep my backups: By default, backups are kept forever. But you can decide. Choose to save them for one month up to two years before they're removed.
- Back up these folders: If you wish to add more folders to your backup, simply click on "Add Folder." This will show you a list of all available folders. And if you decide you don't want a specific folder in the backup anymore, just pick it and click on "Delete" to remove it from the backup list.
Step 4. Once you're done, remember to save your changes and then leave. After that, click on "Backup now". Whenever you connect the drive to your computer, Windows 11 will take care of backing up your files automatically.
Tip: How to restore the backup via File History
- Step 1. Go back to the Backup options in File History and click on the last choice at the bottom that says "Restore files from a current backup".
- Step 2. Then, you'll find arrows pointing left or right. Use them to find the backup version you need. Or, you can use the search bar to look for your files.
- Step 3. Choose "Restore" from the menu. If you prefer, click on the gear symbol and pick "Restore" instead.
Method 3: Using Disk Clone Software for System Backup
Normal users who lack a computer background may encounter difficulties with Method 1 and Method 2. The primary focus of File History is on personal files, such as documents, pictures, music, and videos, rather than complete system images, which typically include critical system settings, configurations, and applications. This method is ineffective for backing up Windows operating systems.
If you require comprehensive system backup and calamity recovery should investigate more potent third-party backup solutions. AOMEI Partition Assistant Professional is capable of satisfying your requirements. It offers advanced features like disk cloning, system migration, and partition management. It’s particularly useful for creating a complete backup of your system disk.
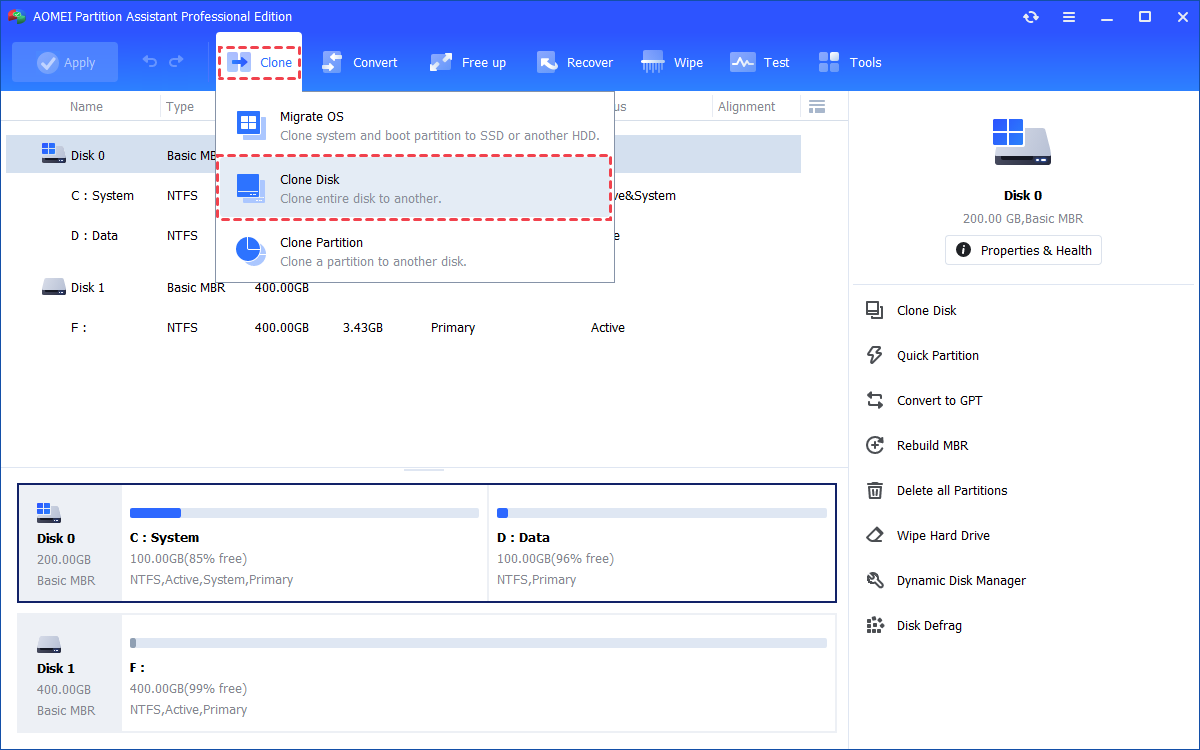
Step 1. Install and launch AOMEI Partition Assistant, click the "Clone" main tab and select "Clone Disk". (You can also right-click the Disk you want to clone and select the "Clone Disk" tool to run disk clone.)
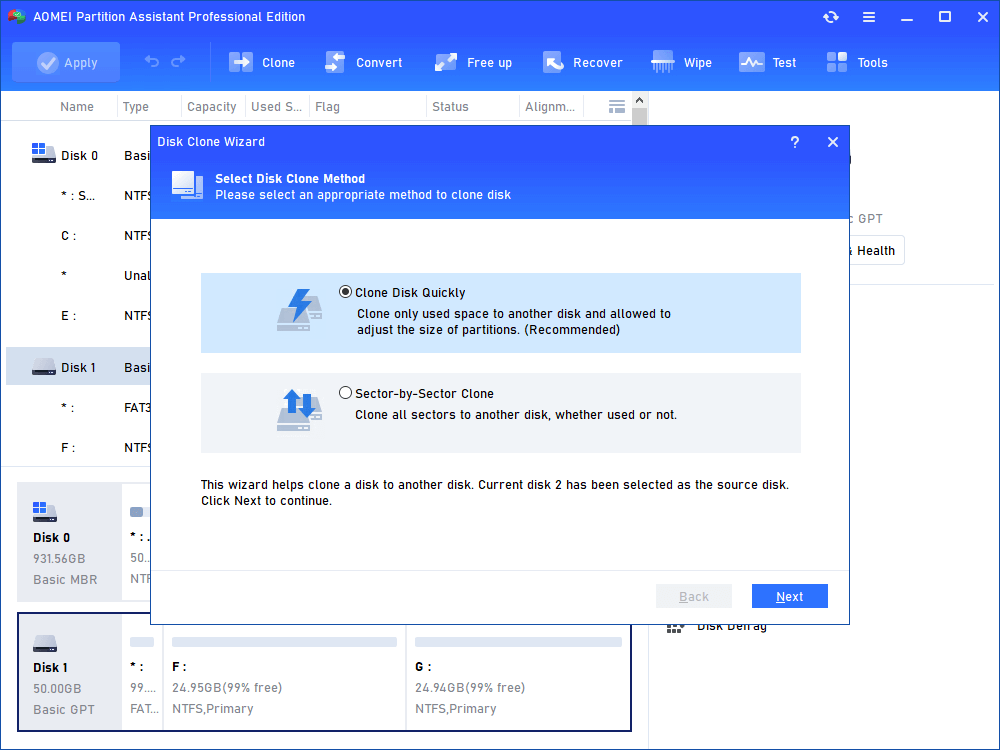
Step 2. Choose the hard disk that you need to clone as the source disk and click "Next".
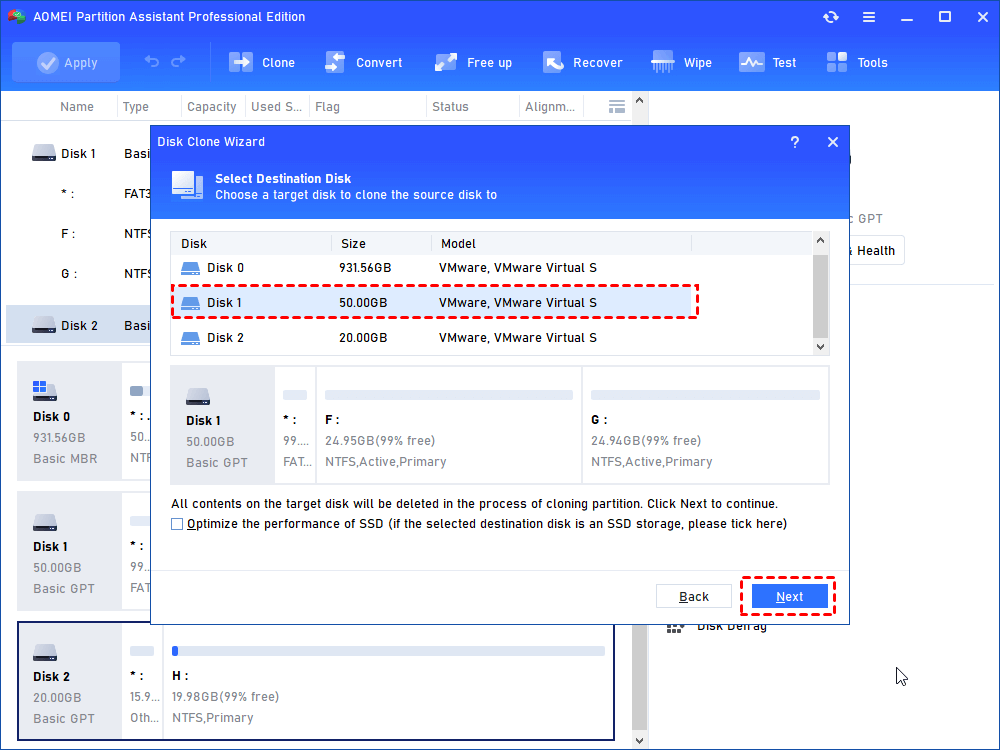
Step 3. Select the destination disk to put the data of the source disk on, and then click "Next".
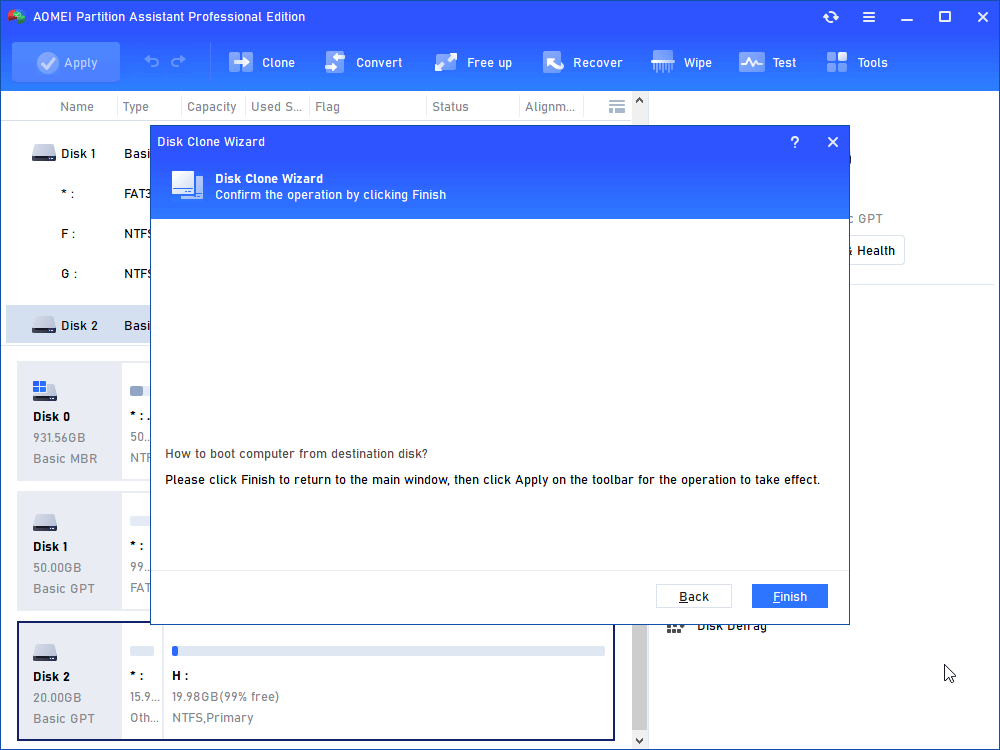
Step 4. Then, you will enter the Confirm interface where you can check the source and destination disk. After all is set, you can click the "Confirm" button to continue.
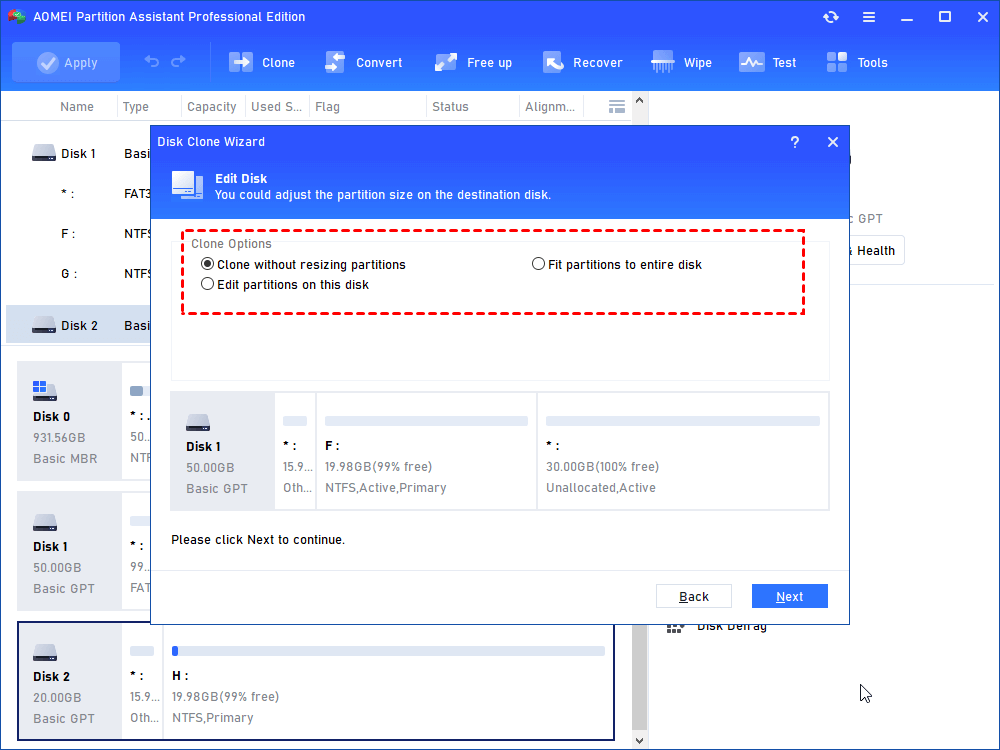
In lower left corner of the window, you can click the "Settings" button to adjust the partition size on the destination disk. There are three options for you:
Clone without resizing partitions: all partitions will be cloned to the target disk as the original partition size. It is available when the target disk is larger than the source disk. If it is smaller, this option will be grayed out.
Fit partitions to entire disk: all partitions will be cloned to the target disk and take up its full capacity according to the original partition size proportion.
Edit partitions on this disk: you can change every partition size on the target disk as you need.
After finishing the adjustment, please click "Save".

- All data on this selected destination disk will be wiped out after you save the operation to physical disk. If there is important data on the destination drive, please make a backup in advance.
- If you clone to a smaller SSD, the first option is grayed out. If you select Sector-by-Sector Clone, it is unable to adjust the size on the destination disk.
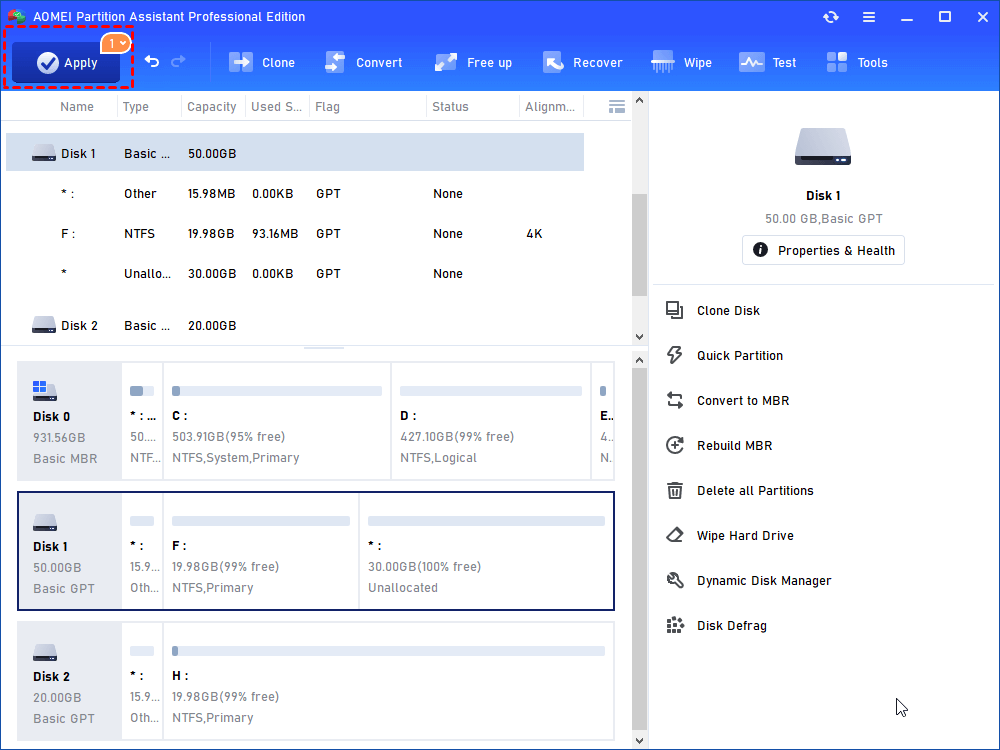
Step 5. You can preview the disk cloning operation by viewing the "Pending Operations". To commit the "Pending Operations", please click "Apply" and "Proceed".
Step 6. The cloning process will start and you can check the cloning process.
If you are cloning the system hard drive to another hard drive, to successfully boot from the destination hard drive and avoid the embarrassing moment that cloned SSD won’t boot, please do as below:
Step 1. Restart your computer, long press the "F2" key (perhaps other keys like DEL), and access the BIOS environment.
Step 2. Change the boot order and set the cloned hard drive as the first boot drive in BIOS.
Step 3. Press "Enter". Now you should boot the computer from the cloned hard disk successfully.
Note: if you want to clone only the C drive or boot-related partitions to another hard drive, its “Migrate OS to SSD" feature can be helpful, which only transfers the OS partition to another hard drive and allows you to boot from it smoothly.

Ending
Now you know what to use for Windows PC backup. Backing up your Windows PC is a critical step in protecting your data and ensuring peace of mind. Whether you use built-in tools like File History and Backup and Restore, cloud solutions like OneDrive, or advanced software like AOMEI Partition Assistant Professional, the key is to choose a method that suits your needs and stick to a regular backup schedule.
FAQs about Windows PC backup
1. How often should I back up my Windows PC?
The frequency of backups depends on how often your data changes. For most users, a weekly backup is sufficient. However, if you frequently work with critical files, consider daily or real-time backups using tools like File History or third-party software.
2. Can I use an external hard drive for Windows PC backup?
Yes, an external hard drive is one of the most common and reliable options for backing up your Windows PC. It’s portable, offers large storage capacities, and can be used with both built-in Windows tools and third-party software like AOMEI Partition Assistant Professional.
3. What’s the difference between a system image and a file backup?
A system image is a complete copy of your entire system, including the operating system, installed programs, and personal files. It’s ideal for restoring your PC to a previous state. A file backup, on the other hand, only includes specific files and folders, making it suitable for recovering individual documents or media.

