

Why Removing Useless Files Is Strongly Advised for Faster PC Performance
Accumulated useless files on your personal computer can significantly degrade system performance. That’s why removing useless files is strongly advised for a faster, smoother computing experience. Read this guide to learn how to delete useless files from your PC now!
By Gia / Updated on July 10, 2025
Why Removing Useless Files is Advised
Over time, your computer accumulates a large number of files. While many are essential, a significant portion eventually becomes "useless." These include temporary files, old system logs, leftover data, duplicate files, and more. At some point, the "removing useless files is advised" message pops up, which indicates your PC’s performance is starting to drop.
Removing useless files brings several key benefits:
Free Up Disk Space: Useless files can take up gigabytes of space. When your C: drive is too full, your system doesn’t have enough room to work efficiently.
Boost System Speed and Responsiveness: A cluttered drive makes it harder for your system to find the files it needs, which slows everything down.
Reduce System Overhead: With fewer unnecessary files, tasks like virus scans, disk indexing for search, and system backups complete much faster.
Prevent System Errors: Old or corrupted files can cause software errors, system instability, or even crashes.
In short, removing useless files is strongly advised to help your PC run faster and more smoothly.
How to Remove Useless Files from a Computer
Now that you understand why it's so important, let's dive into how to remove useless files from a computer. There are several methods available. Select the one that best suits your needs.
Method 1. Delete Useless Files Using Software
For a comprehensive approach to cleaning your PC, using specialized software is highly recommended. PartitionAssistant Cleanup is a powerful and versatile disk management tool that offers robust features to help you delete useless files and optimize your PC's performance. It is designed to scan and remove useless files safely and efficiently. Furthermore, its ability to identify and help you manage large files can free up significant chunks of space you might not even know were being wasted.
- Why use PartitionAssistant Cleanup?
- Safe and Accurate Scanning: Performs a thorough scan without deleting essential system files, ensuring your PC runs smoothly and safely after the cleanup.
- User-Friendly Interface: Features a clean and intuitive interface, making it suitable for all users.
- Wide Compatibility: Works seamlessly on Windows 11, 10, 8.1, 8, 7, and Servers, making it a versatile solution for most PC users.
Free Up Disk Space To Keep Your PC Running Smoothly and Efficiently
Here's how to use PartitionAssistant Cleanup to remove useless files from a PC:
➤ Remove Junk Files
Step 1. Install and launch PartitionAssistant Cleanup. Click the "Clean Junk Files" tab.

Step 2. Click the "Scan Now" button to start the process of scanning junk files.

Step 3. After the scan process is finished. All system junk files (including recycle bin files, temporary files, log files, invalid shortcuts, and so on) and registry junk files (including DLL registry, system registry, and program registry) will be displayed.

You can also click the button behind to view the junk files details.

Step 4. And, you can click the button behind to locate the file.

By default, the program will select some junk files to clean up, for example, temporary files, log files, and so on. You can also manually check to select more or uncheck to deselect fewer listed junk files. Or, click "Select All" to select all junk files to clean up if you need to clean up all.
Step 5. After selecting junk files that are not needed anymore, you can click the "Clean Now"button to start the cleanup.

The process of the cleanup might take time, and the selected files will be cleaned up. After the process is finished, you will get a cleanup completed window displaying how many files you have cleaned and not yet cleaned.

➤ Remove Duplicate Files
In addition to removing junk files, PartitionAssistant Cleanup also offers a Duplicate Files Finder feature. This tool helps you quickly find and delete duplicate files in bulk, freeing up even more disk space. Here's step-by-step guide:
Step 1. Install and launch PartitionAssistant Cleanup. Click the "Find Duplicate Files" tab.
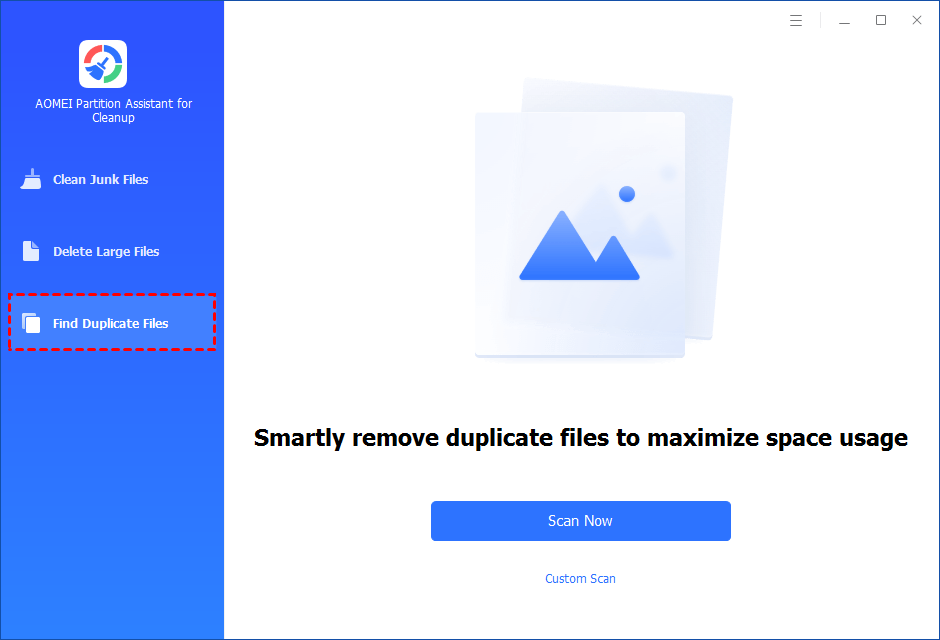
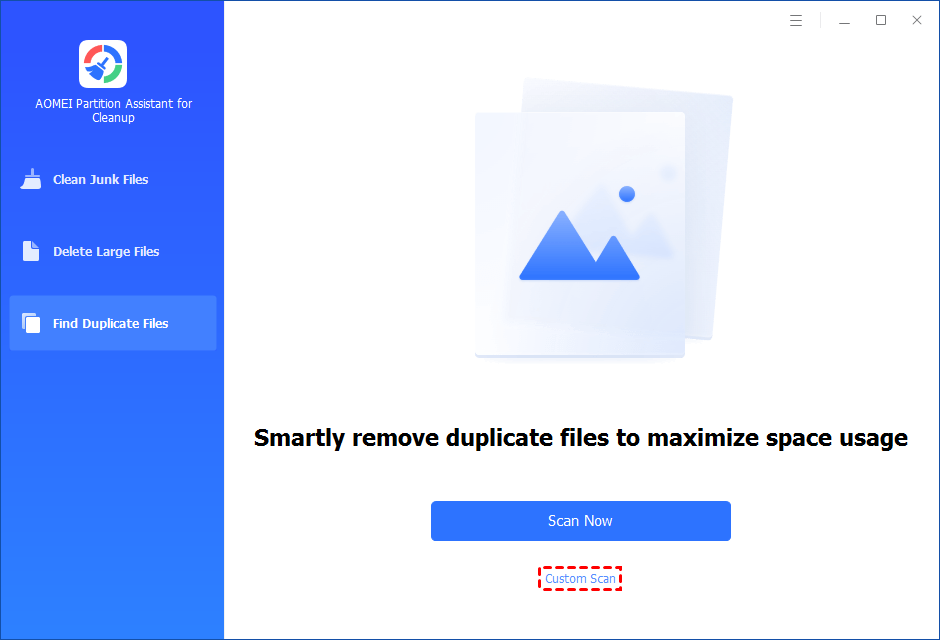
Step 2. You can either click "Scan Now" to start the scan of your system C: drive. Or, click "Custom Scan" to manually select paths to be scanned. (Here, we take the "Custom Scan" as an example.)
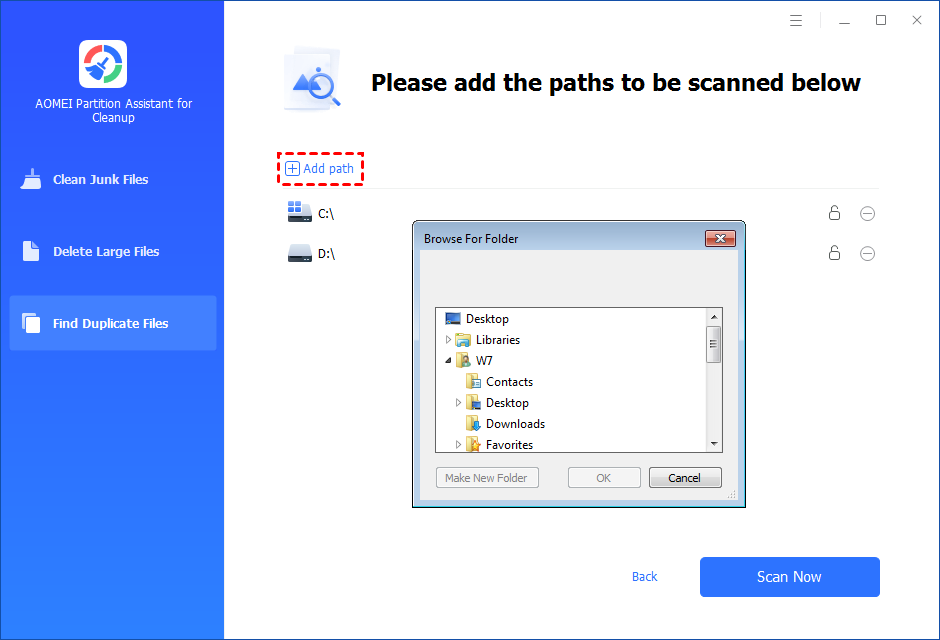
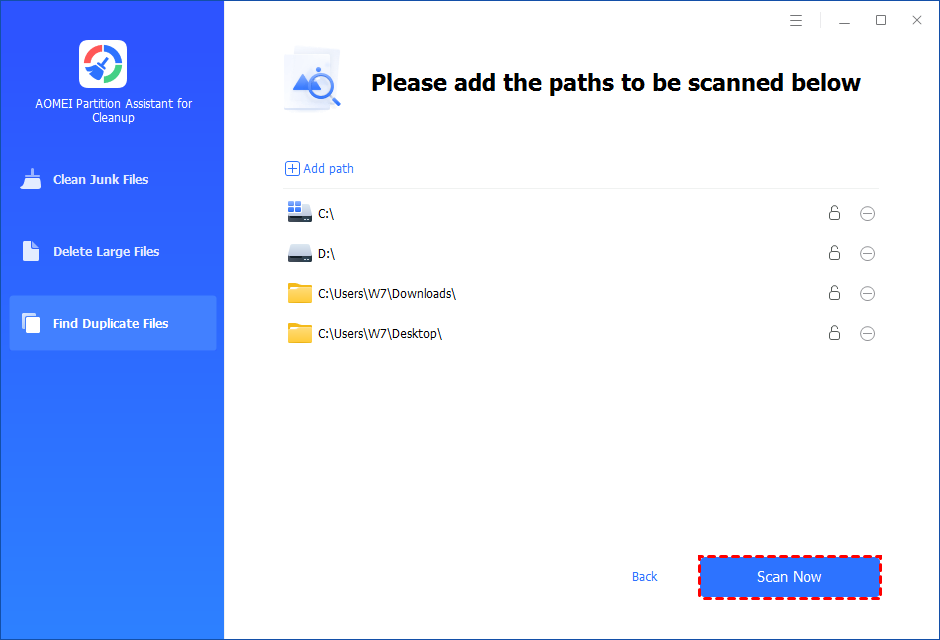
Step 3. After clicking "Custom Scan", all local and external drives on your PC will be displayed. You can also click the "Add Path" button, and then a browse folder window will pop up. So you can add more paths on this PC, like Desktop, Downloads, and other folder paths.
Step 4. Once necessary paths are added, you can click the "Scan Now" button to start the scan process.
The scan process might take time. After the scan is complete, all duplicate files will be listed. You can click the button behind to locate them.
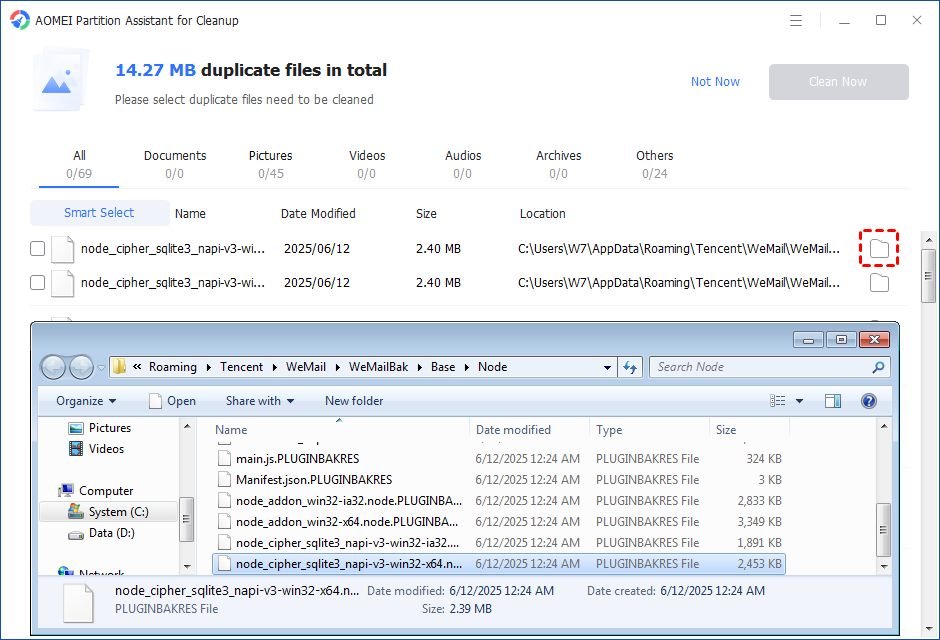
You can either manually select duplicate files, or click the "Smart Select" button to automatically select unnecessary duplicate files to delete.
Tips: If the "Smart Select" is ticked, only the oldest duplicate file will be unticked. It means that all duplicate files except the oldest one will be ticked to delete. (The oldest file means the file that was created first. This file will not be deleted. All other duplicate files are considered copies of the oldest file. )
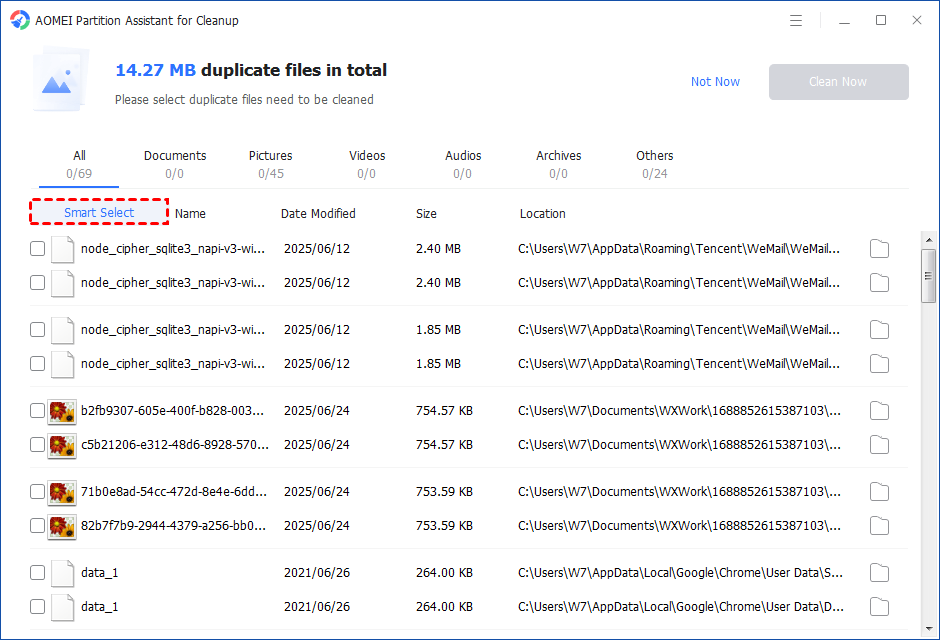
If you manually select all copies of duplicate files, you will get a pop-up warning window to keep at least one copy of the duplicate files. If you indeed want to delete all copies of duplicate files, you can click "OK" so all copies of duplicate files will be selected to delete.

After unnecessary duplicate files are selected, please click the "Clean Now" button to start the deletion.

Step 5. The deletion might take time. After the process is finished, the selected files will be deleted, and you will get a cleaning completed window displaying how much data you deleted in total.

Method 2. Enable Storage Sense on Windows
Windows comes equipped with a tool called Storage Sense. This feature can automatically free up space on your computer by deleting unnecessary files, such as temporary files and content in your Recycle Bin.
Here’s how to remove useless files enable Storage Sense on Windows:
Step 1: Press Windows + I to open the Windows Settings menu.
Step 2: Then click System > Storage.
Step 3: Turn on Storage Sense.

Step 4: You can click the "Configure Storage Sense or run it now" option to customize when and how often Storage Sense should run and what types of files it will delete.
Method 3. Run Disk Cleanup Utility
Alternatively, you can run Disk Cleanup to identify and remove a variety of temporary and unnecessary files from your PC. It allows you to see exactly what types of files are taking up space and make informed decisions about their removal.
Here's how to use the Disk Cleanup utility to delete useless files:
Step 1: Right-click the drive you want to handle and select Properties.
Step 2: Click the Disk Cleanup button in the disk properties window.
Step 3: Select the files you want to delete and click OK.
Pro Tips to Boost PC Performance
While removing useless files is advised and forms a crucial foundation, several other practices can further enhance your PC's speed and responsiveness:
✔️ Uninstall Unnecessary Programs: Go to Settings > Apps > Apps & features and remove any software you no longer use. Alternatively, move installed programs to another drive with sufficient storage.
✔️ Disable Startup Programs: Many applications configure themselves to run at startup, consuming resources and slowing down your boot time.
✔️ Run Disk Defragment (HDDs Only): If you have a traditional HDD, defragmenting it can improve file access times.
✔️ Upgrade to an SSD: If your computer still uses an HDD as its primary drive, consider upgrading to an SSD for better performance.
Summary
In conclusion, the accumulation of useless files can significantly reduce PC performance. That’s why removing these files is strongly advised. In this guide, we’ve explored several effective methods to remove useless files from your computer. Use these techniques to clean up your device, and your PC will thank you for it!

