

Tidy up You PC with These Windows 10 Cleanup Tools Now!
Do you need Windows 10 cleanup tools to free up space? This passage will share you some practical tools and the best cleanup software for Windows 10.
By Irene / Updated on February 26, 2025
Why does your PC become full?
One day, you find your PC runs slowly. When you check it, you find the C drive is almost full. Why does it occur? Generally, the reasons are as below:
- These things make your PC get full:
- Large apps and files: When you install large apps or collect big files like videos and music, they take up a bunch of space on your C drive.
- Junk files: When your computer is running, it generates various junk files such as cache, hibernation files, system and temporary files, etc. These accumulate over time and occupy space.
- Downloads folder: If you download things frequently and forget to tidy up your Downloads folder, it can get pretty stuffed.
- Updates: Keeping your Windows and software updated is crucial, but it can also consume a good chunk of space, especially if you've been neglecting those updates.
- Recycle Bin: Every time when you delete files, they sit in the Recycle Bin until you empty it, still occupying space.
- Old system restore points: Windows creates system restore points, which can use a significant amount of space if many are saved over time.
These data will continue to occupy space and degrade your system's performance. Next, we will share some cleanup tools for Windows 10 to keep it clean.
Use these Windows 10 cleanup tools to free up space
This part will share 3 built-in cleanup tools for Windows 10 as well as the best cleanup software with 4 practical solutions. According to your needs, you can look through the Table of Contents on the left side and move to the needed parts.
Way 1. Run Disk Cleanup for Windows 10
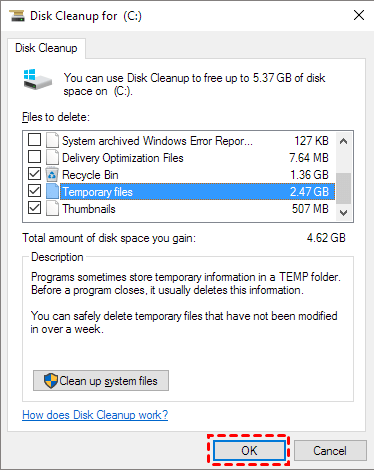
Does Windows 10 have a cleanup tool? Yes, it does. Disk Cleanup, a helpful built-in Windows utility, provides the option to remove a variety of file types, including thumbnails, Windows update files, delivery optimization files, and temporary files. Below, we have outlined the steps to assist you in cleaning the C drive on Windows 10.
Step 1. Begin by typing "disk cleanup" into the search box on the taskbar, then choose Disk Cleanup from the results.
Step 2. Pick the drive you wish to clean (e.g., C drive), and click "OK".
Step 3. Under "Files to delete", mark the files you want to remove, and then click "OK".
Way 2. Turn on Storage Sense
When the Storage Sense is activated, it will automatically free up space when your PC is running low on storage.
Step 1. Click the "Start" button and choose "Settings".
Step 2. In the Windows Settings interface, click on "System".
Step 3. On the left-hand side, select "Storage," and then switch the "Storage Sense" button to "On".
.png)
If you'd like to clean up unused files immediately, choose "Configure Storage Sense or run it now," and then click "Clean now".
Way 3. Uninstall applications
Applications and software are typically saved on the C drive if you haven't modified the default installation path. Therefore, you can free up space on your C drive by removing large or unused applications.
Step 1. Click "Start", then access "Settings" and click on "Apps".
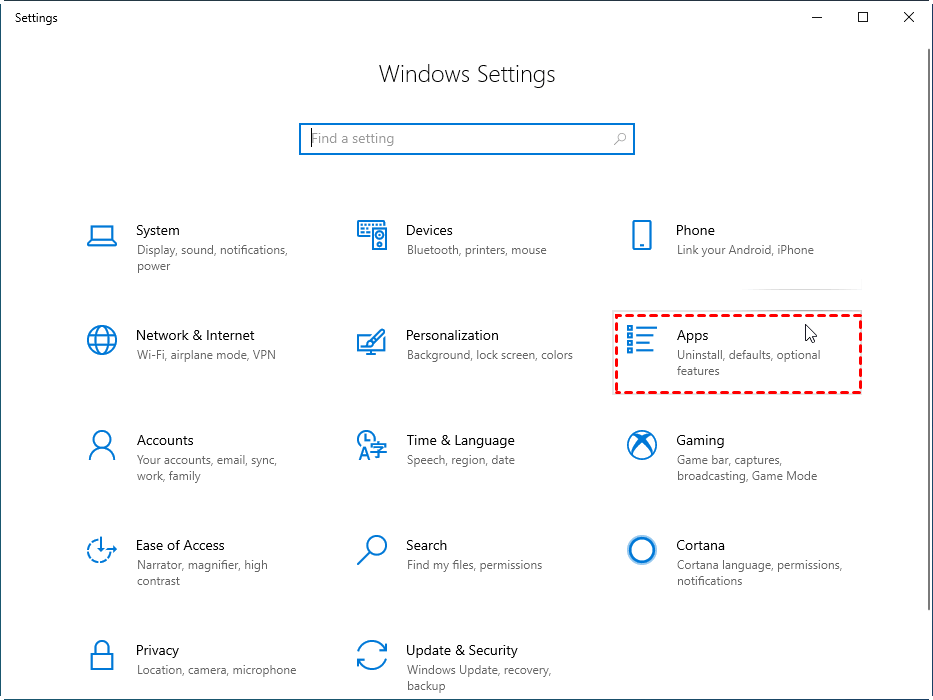
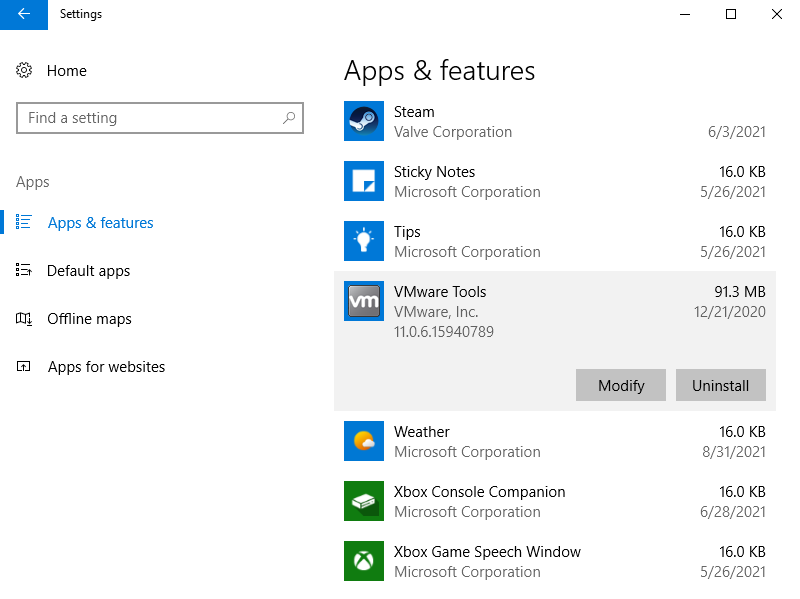
Step 2. Locate the app you no longer require, and select "Uninstall" to remove it.
Rely on the best cleanup software for Windows 10 space releasing
If you've tried the suggested methods but find that they've freed up limited space, it might be time to consider using a professional disk cleanup tool for Windows 10. AOMEI Partition Assistant Professional can be the trusted option.
This is an all-in-one tool that can provide multiple solutions for cleaning your PC and storage expansion. You can run it on almost any Windows PC, and it will continue to receive updates with the new OS released.
Option 1. Delete duplicate files
Duplicate files can accumulate on your PC over time due to actions like downloading, copying or saving files in multiple locations, which can lead to a wasted storage space. This tool can comprehensively scan your drive and clean them to release space.
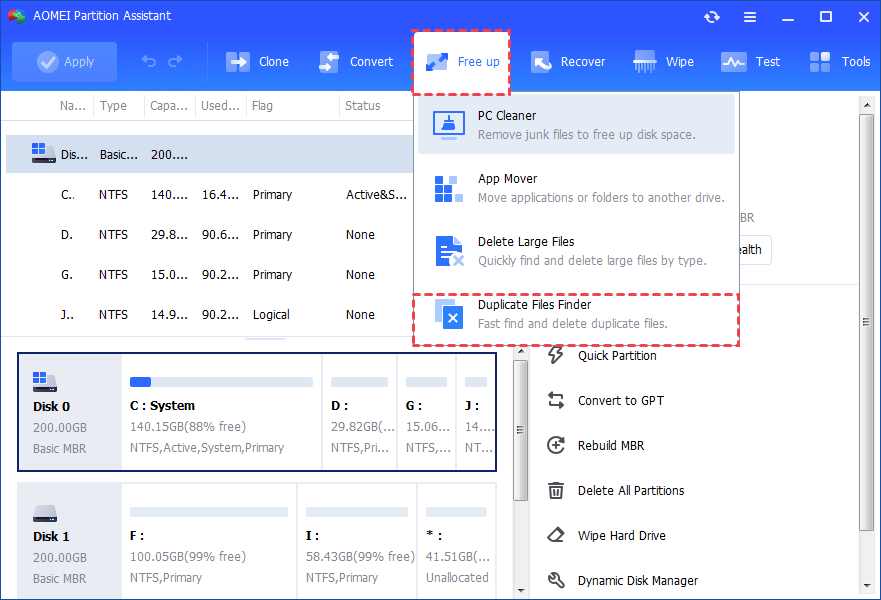
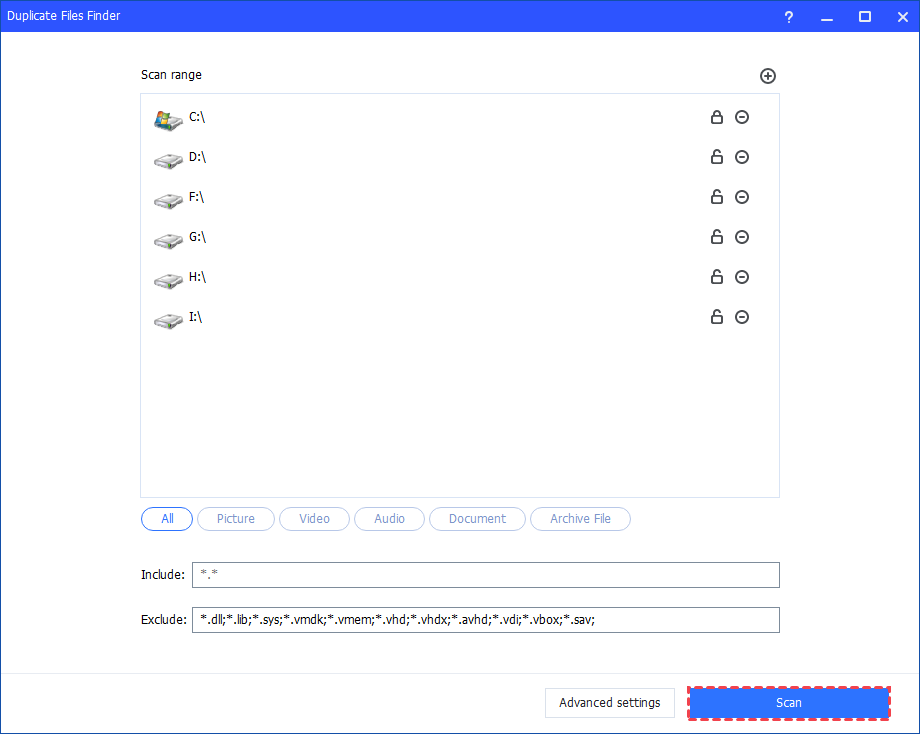
Step 1. Install the best cleanup software for Windows 10 on your computer and run it. Click "Free up" in the main tab and choose "Duplicate Files Finder".
Step 2. A comprehensive list of all the partitions present on your computer will show up. Customize this selection to your liking and then commence the scanning process by clicking "Scan".
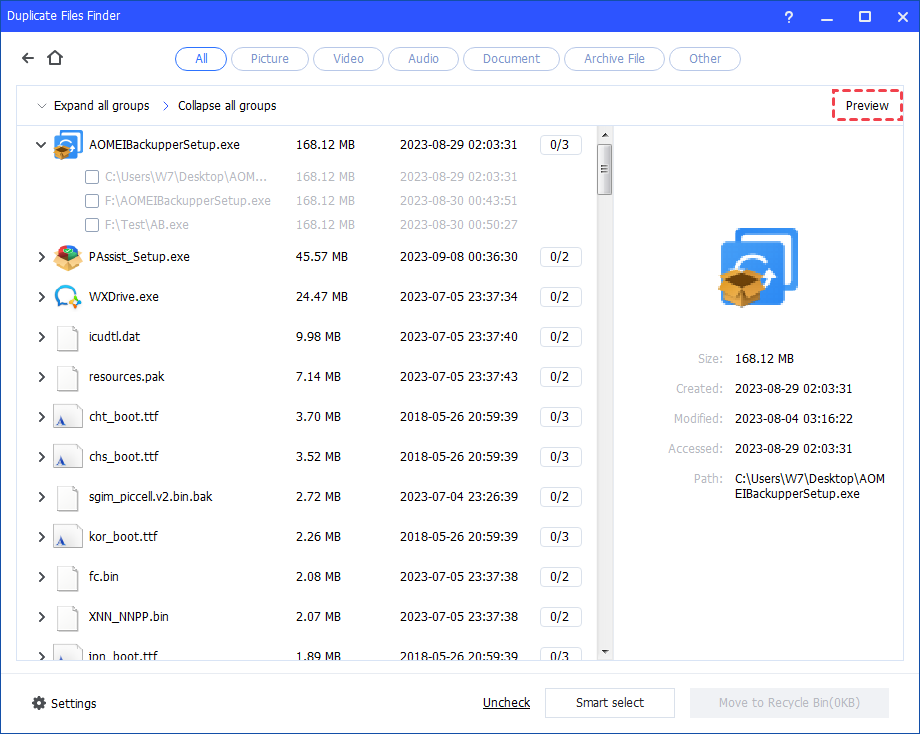
Step 3. After the process is finished, all duplicate files that meet the conditions you set will be displayed. You can click the "Preview" button to view the duplicate file details.
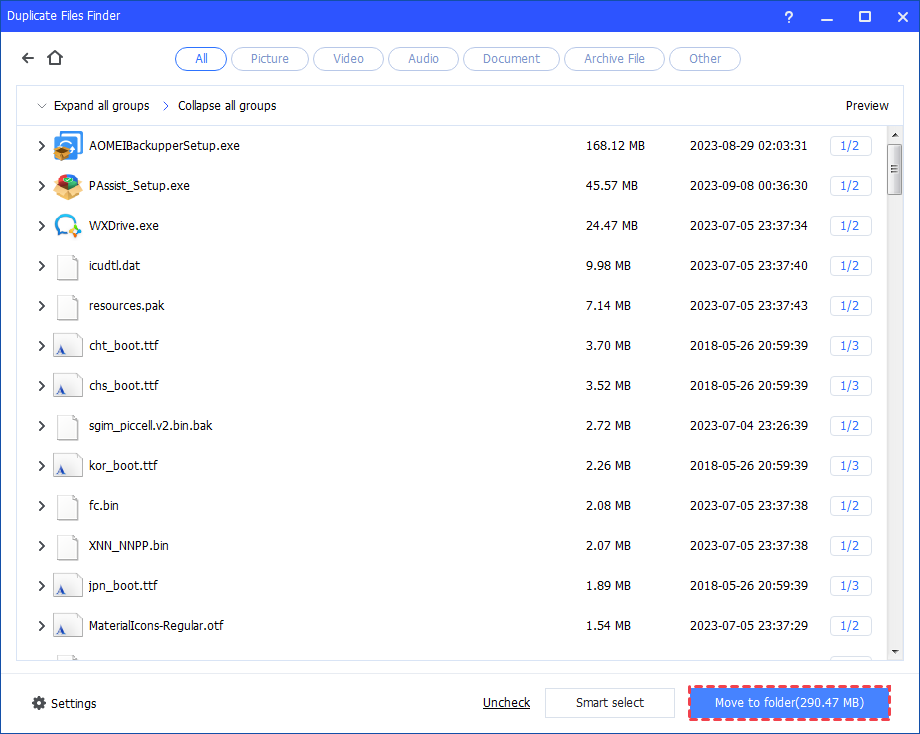
Step 4. You can select the duplicate files you want to delete, or you can employ the "Smart Select" feature for an automatic selection of duplicates. Finally, execute your decision by clicking on "Move to folder".
Option 2. Delete Large files
Too many unnecessary large files will also eat up your storage space. Use the disk cleanup tool to delete them easily and effectively.
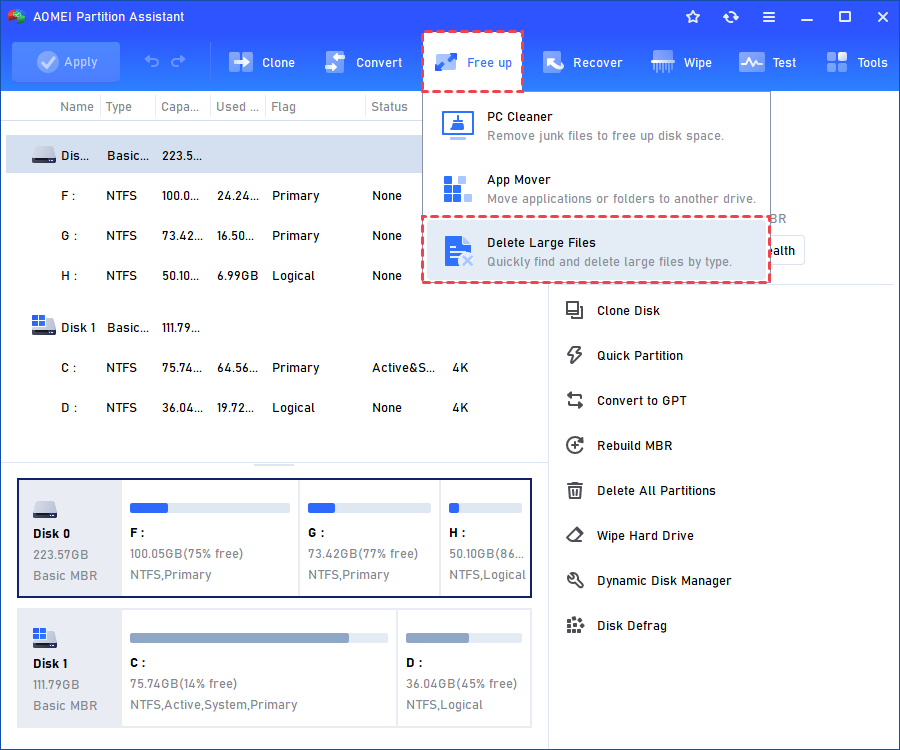
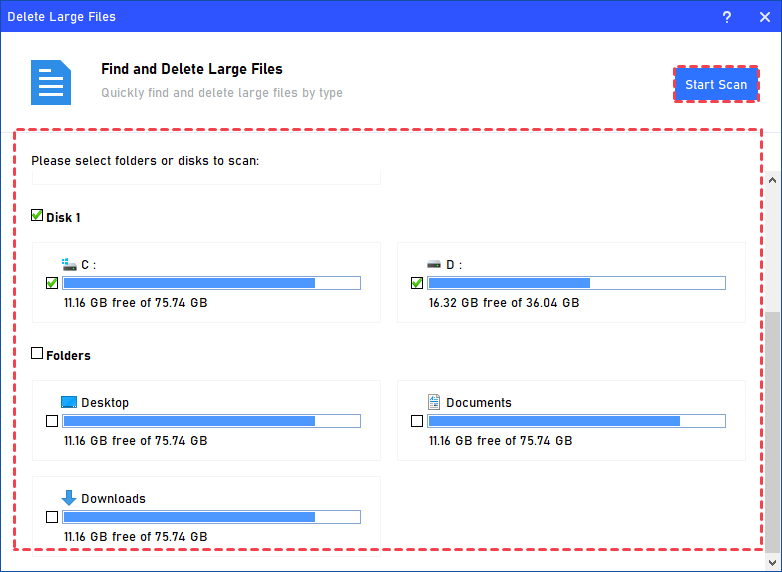
Step 1. Click "Free up" and "Delete Large Files".
Step 2. In the pop-up window, select the partitions that you want to find and delete large files, and click "Start Scan" to scan for files larger than 16MB.
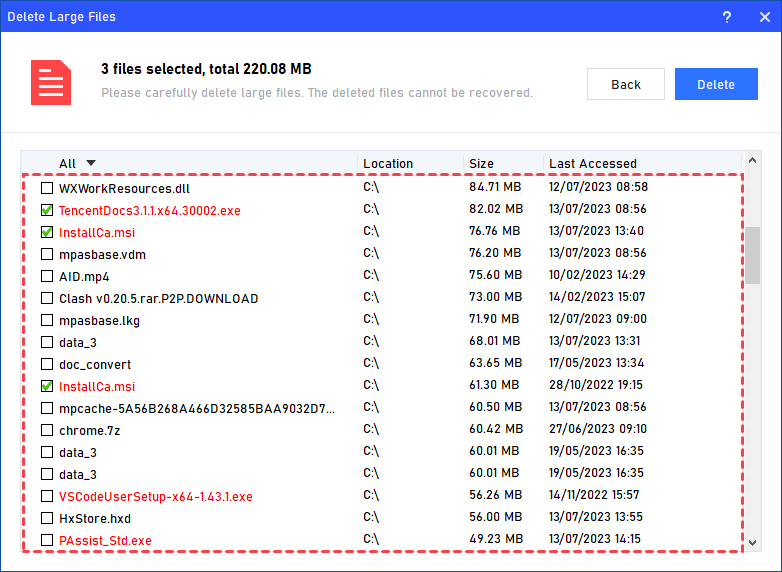
Step 3. When the scan is complete, all large files found are listed. Tick the files you want to delete, and then click the "Delete" button.
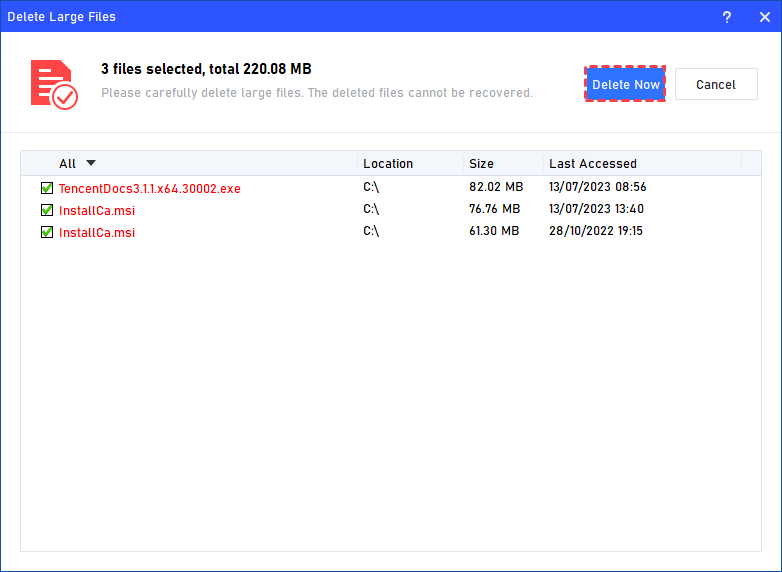
Step 4. The next window will ask you to confirm the files you have just ticked for deletion. If it’s correct, click “Delete Now” to begin the deletion process.
Step 5. Just for a while, the large files will be deleted successfully, and then you will see a warm notification suggesting you clean up your PC regularly.
Option 3. Move installed apps to another drive
Uninstalling applications may not be the best choice. Once you want to use them, you have to download them again and reconfigure the settings from scratch. AOMEI Partition Assistant provides an App Mover feature that allows you to move them to another drive. But kindly please ensure the target drive has sufficient space for storing.
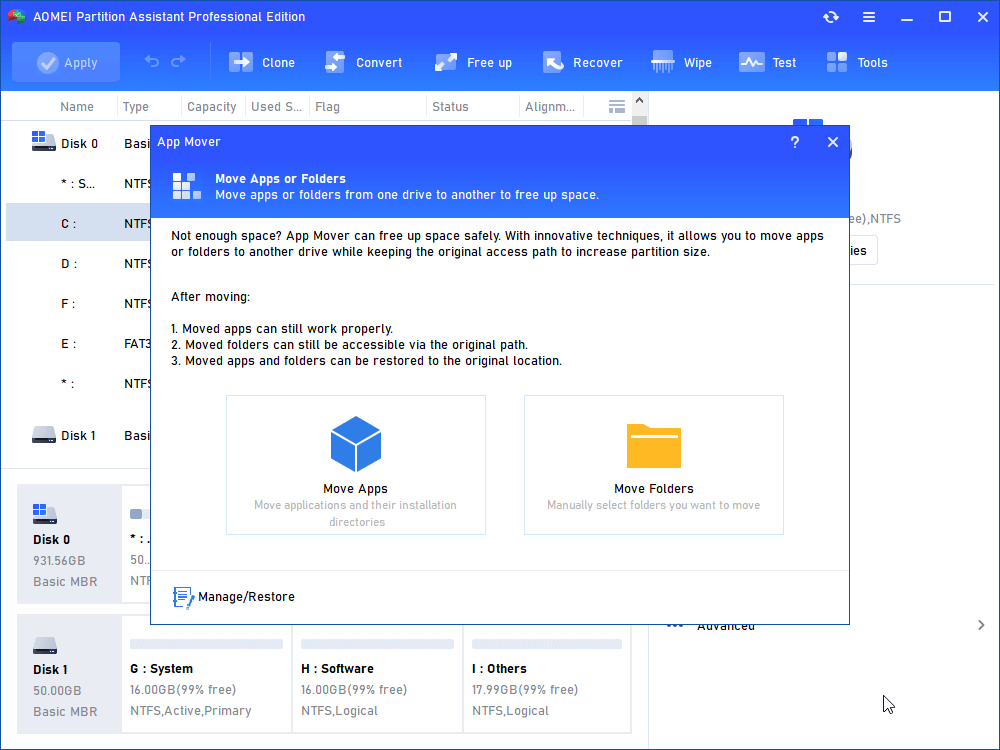
Step 1. Open the tool to clean up for Windows 10, and then click "Free up" > "App Mover" at the top interface.

Step 2. There are two options. Here we choose the "App Mover" option. By the way, the "Move Folders" allows you to move folders to a different drive.
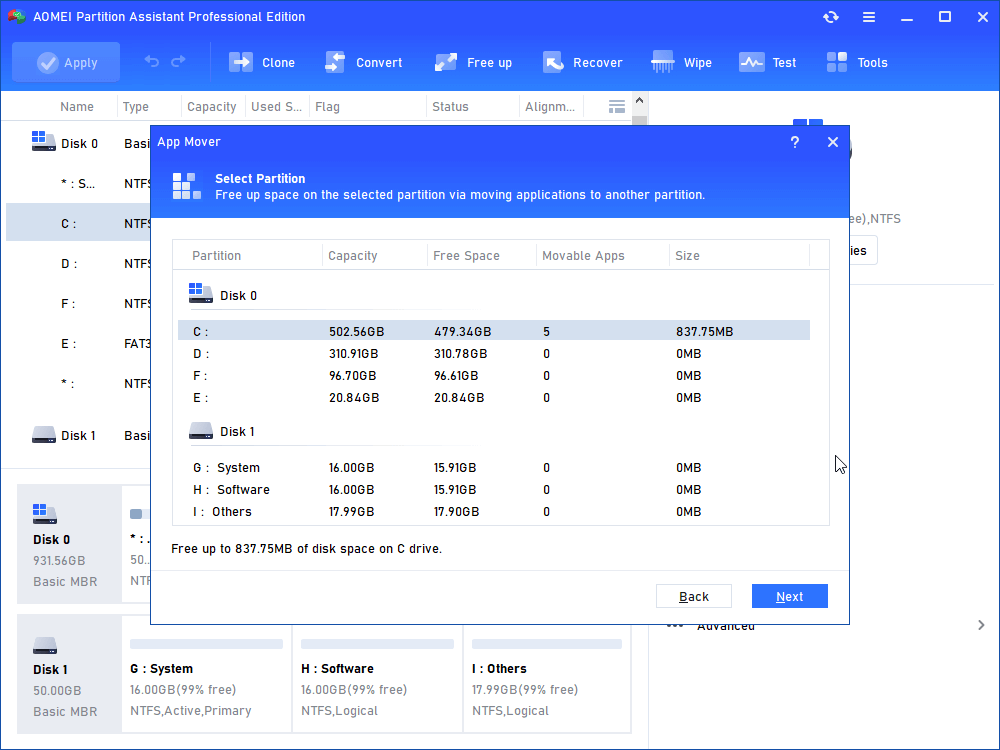
Step 3. All your partitions will be listed in the window. Choose one partition that you want to move applications from and click "Next".
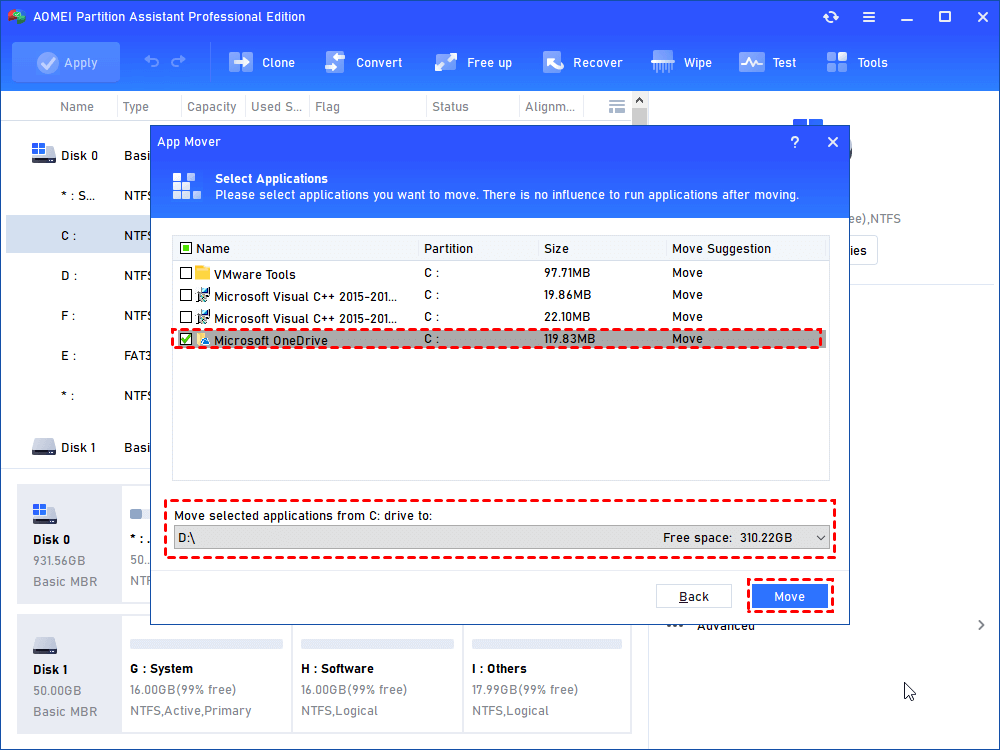
Step 4. Choose all applications you want to move and select a destination path, then click "Move".
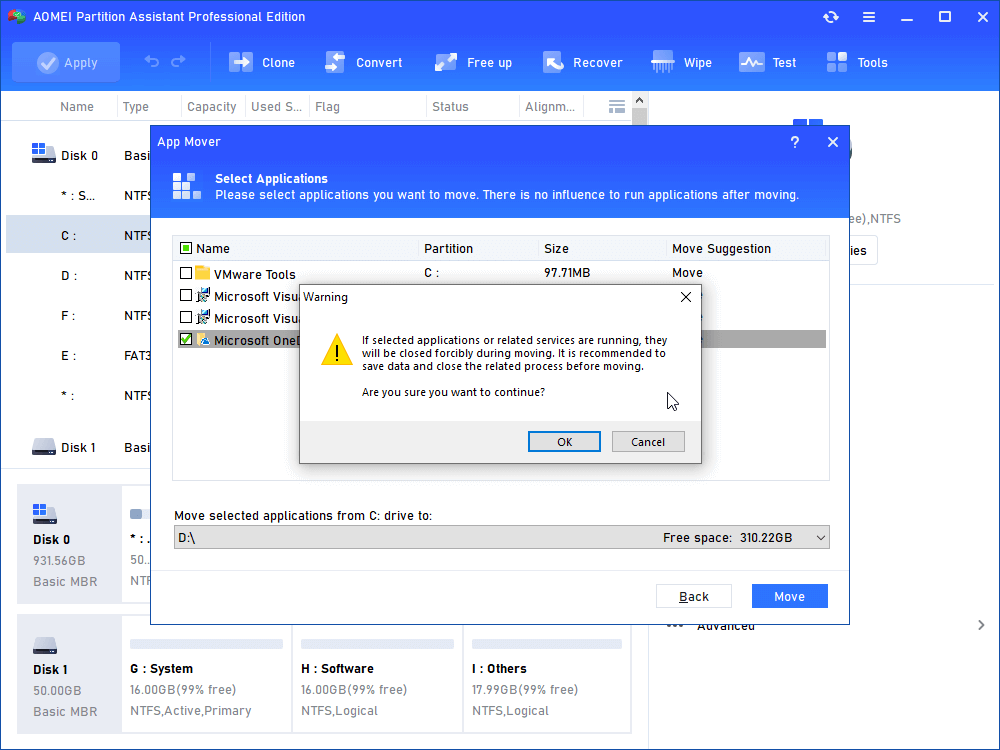
Step 5. Click "OK" on the pop-out window to begin the process.
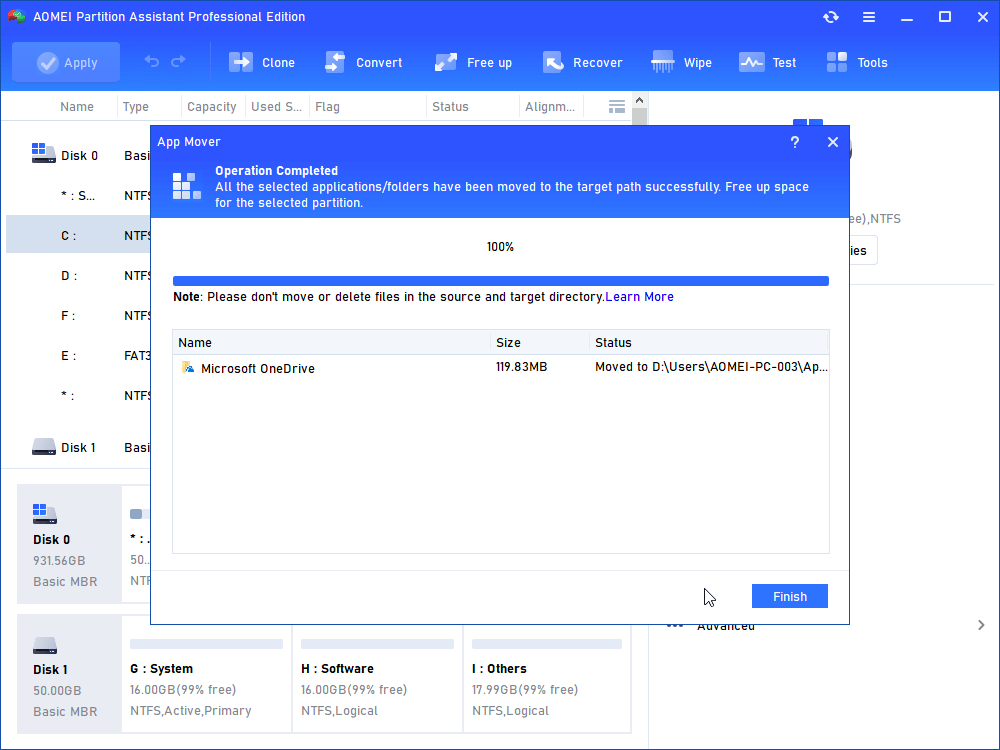
Step 6. Click on "Finish" to exit.
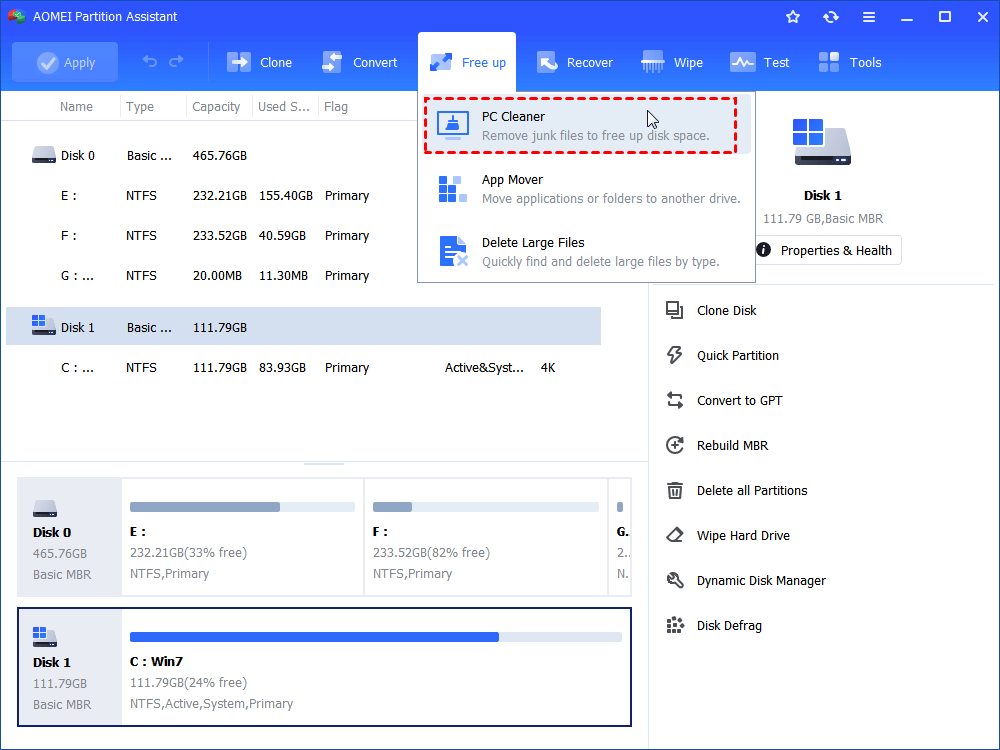
Option 4. Try PC Cleaner to move junk files
The best cleanup software for Windows 10 also offers a powerful cleaning feature called PC Cleaner. This is a convenient way to daily clean routine. It will efficiently identify and help you effortlessly remove all unnecessary and junk files from your hard drives.
Step 1. Click "Free up" > "PC Cleaner" in turn.
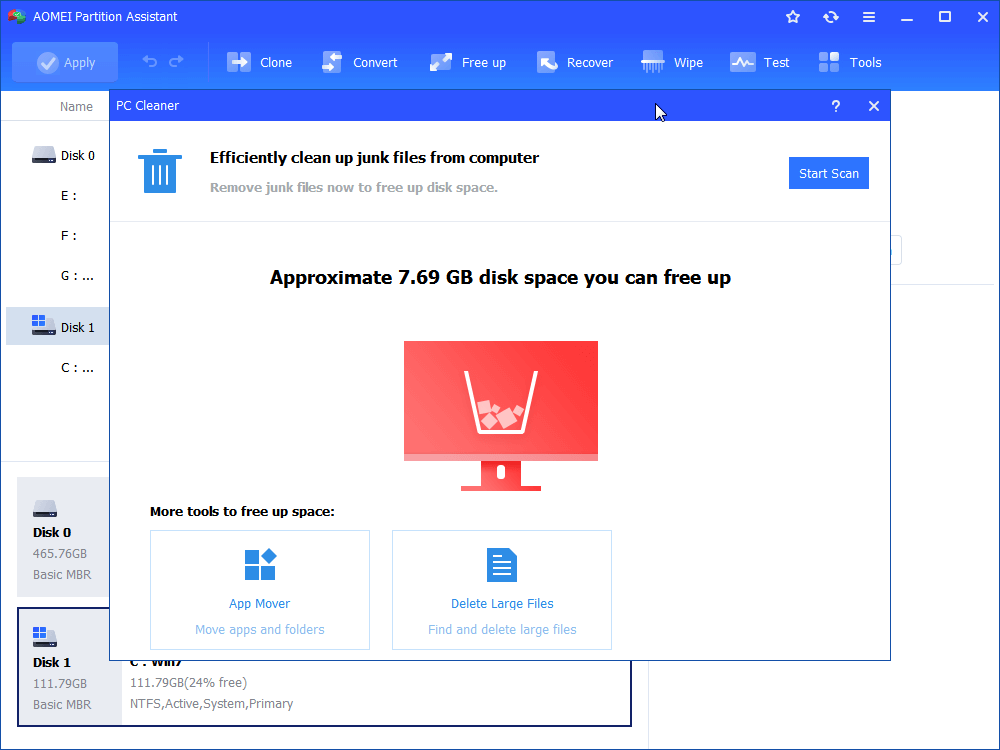
Step 2. In the pop-up window, click "Start Scan" to scan for junk files.
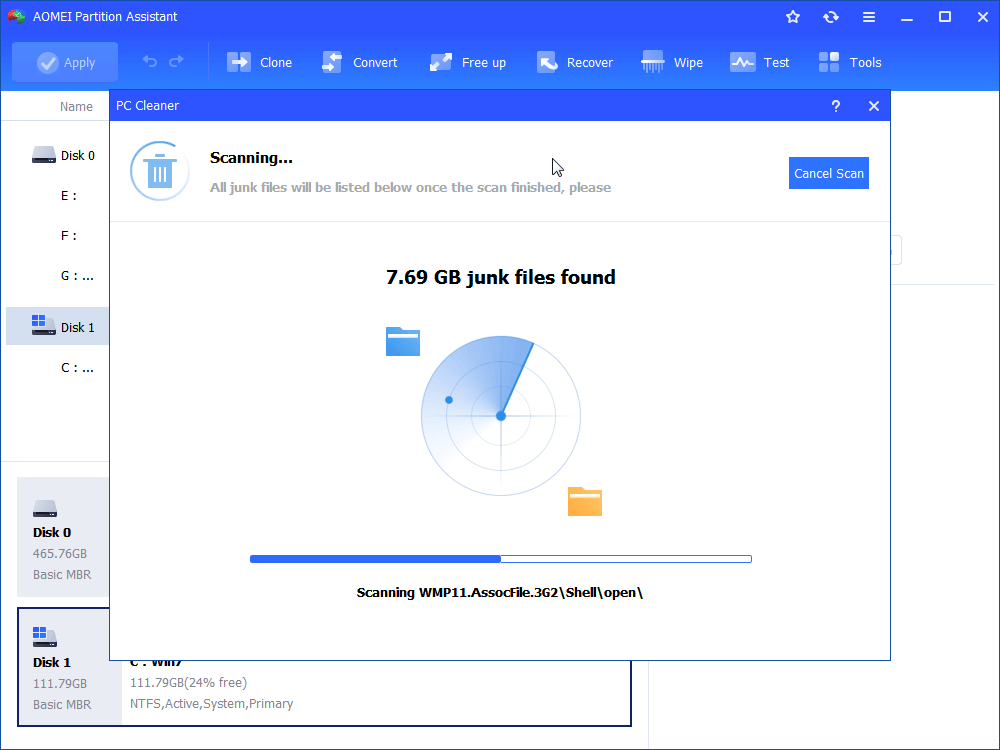
Step 3. Wait until the scanning process completes.
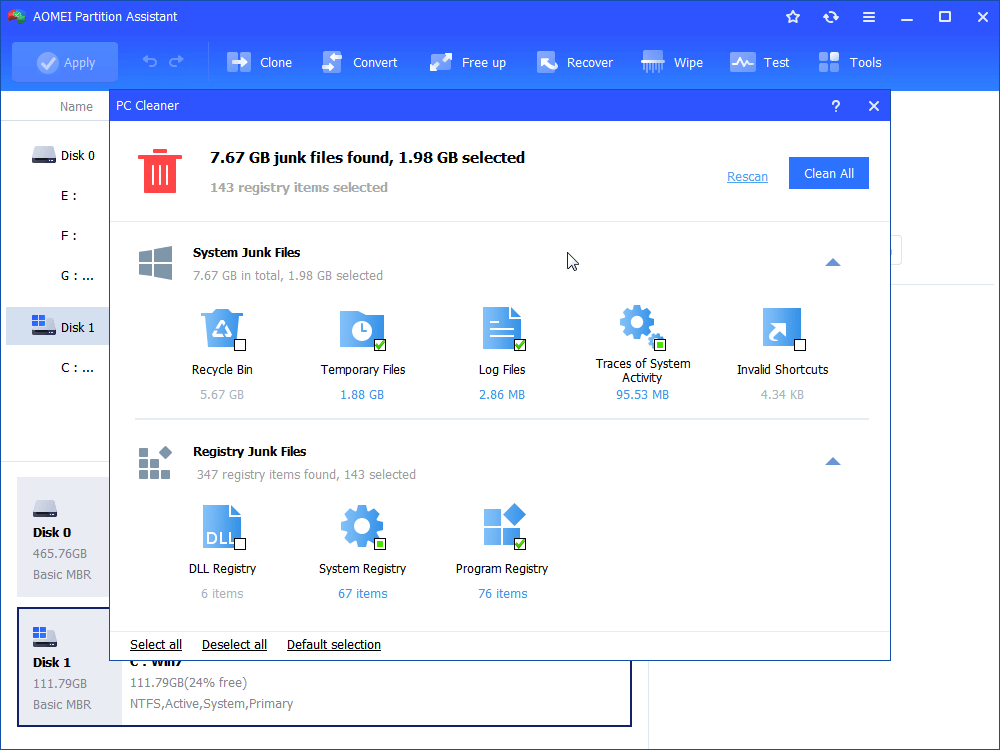
Step 4. After the scan is completed, all kinds of available junk files will be listed. Then, tick the options you want to clean, then click "Clean All" to begin the cleaning process.
Step 5. When you see a correct symbol displayed in the interface, you can click "Back" to exit the Window.
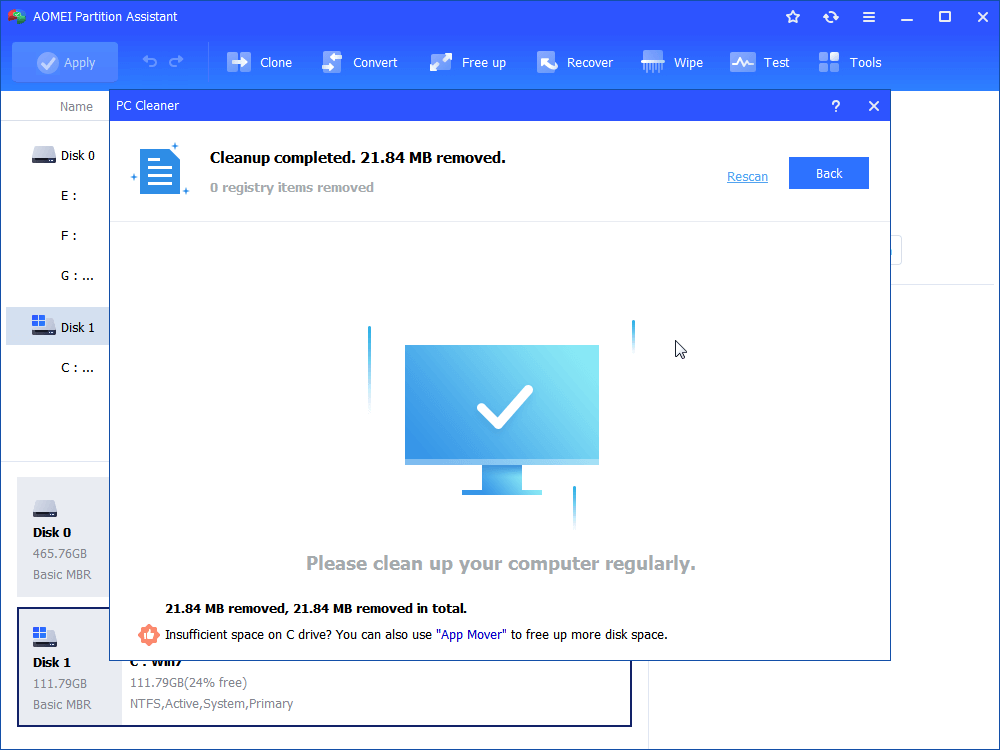
Now, all junk files are removed by this handy tool.
Ending lines
The shared Windows 10 cleanup tools can effectively help free up space and maintain a clean environment for your device. If you want to get more storage space, AOMEI Partition Assistant offers Allocate Free Space, Merge Partitions, Disk Clone, and so on. If you are a Windows Server user, you can choose the AOMEI Partition Assistant Server edition.

