

Top Windows Duplicate File Finder for Windows 10 And 11 [2023]
Windows duplicate file finder removes redundant files, freeing up valuable disk space and making your computer run faster and more efficiently.
By AOMEI / Updated on July 11, 2025
Why we need Windows duplicate file finder?
A duplicate file finder is a software tool designed to identify and manage duplicate or identical files stored on a computer or other storage device. Usually, we may need Duplicate File Finder in these scenarios:
Reclaim disk space: Duplicate files can consume a significant amount of storage space on your computer's hard drive or SSD. This can lead to decreased available space for new files, software, and system processes. A Duplicate File Finder helps you locate and remove these unnecessary duplicates, freeing up valuable disk space on PC.
Improved organization: Duplicate files can clutter your file system, making it difficult to locate and manage important documents, photos, and other files. By eliminating duplicates, you can keep your files organized and reduce the time and effort spent searching for specific items.
Enhanced system performance: An excess of duplicate files can slow down your computer's performance. When your storage is filled with redundant data, it takes longer for the operating system to find and load the necessary files. Removing duplicates can lead to faster boot times and more responsive performance.
Prevent confusion: Duplicate files can cause confusion, especially when you have multiple versions of the same document or media file with different names. This can lead to errors, such as editing an outdated version of a document. A Duplicate File Finder helps you identify and manage these duplicates, reducing the risk of errors.
Save time and effort: Manually finding and deleting duplicate files can be a time-consuming and tedious task, especially if you have a large number of files. Duplicate File Finders automate this process, making it quick and efficient.
Next, we are going to learn about how to find duplicate files and remove them on Windows 11, 10, 8, 7.
Can Windows find duplicate files?
For Windows 10 users, you can use Storage Sense to find and delete duplicate files. Here's how you can use it:
Step 1. In the Settings window, select "System."
Step 2. In the System settings, click on "Storage" in the left-hand menu.
Step 3. Scroll down to find the "Storage Sense" section and toggle the switch to turn it on.
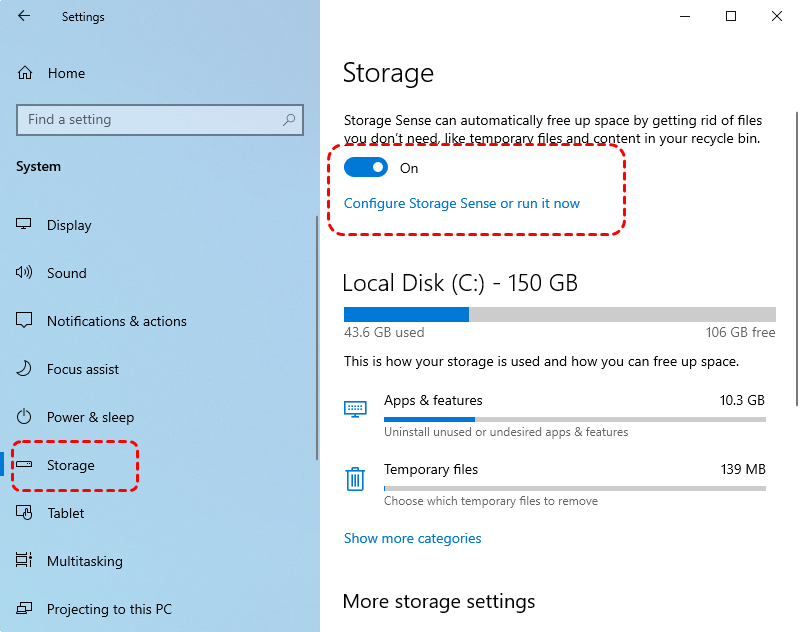
Step 4. Click on "Configure Storage Sense or run it now" under the Storage Sense toggle.
Step 5. You'll see options to configure how Storage Sense cleans up your system. You can choose how often it runs and what it deletes.
Step 6. If you want to run it immediately, click on "Clean Now."
Storage Sense primarily focuses on removing temporary files and old versions of Windows, but it can also identify and delete some types of duplicate files. However, it may not be as thorough or specialized as dedicated Duplicate File Finders available from third-party software.
If you're looking for more advanced and customizable options for finding and managing duplicate files, you might want to consider using a third-party Duplicate File Finder application, which often provides more features and control over the process.
How to find duplicate files in Windows 10 and remove them easily
PartitionAssistant Cleanup is a full-featured disk partition management tool, its Duplicate Files Finder feature can fast find and remove duplicate files in Windows 7 and above to free up disk space and speed up your computer. It's perfect for beginners and all you need to do is click with your mouse.
Please note that if you have too many large files on your drive that take up too much space and can't be found, this Windows duplicate file finder can also delete large files by type to save more space on your computer. Please download it to see how it works.
Free Up Disk Space To Keep Your PC Running Smoothly and Efficiently
Step 1. Install and launch PartitionAssistant Cleanup. Click the "Find Duplicate Files" tab.
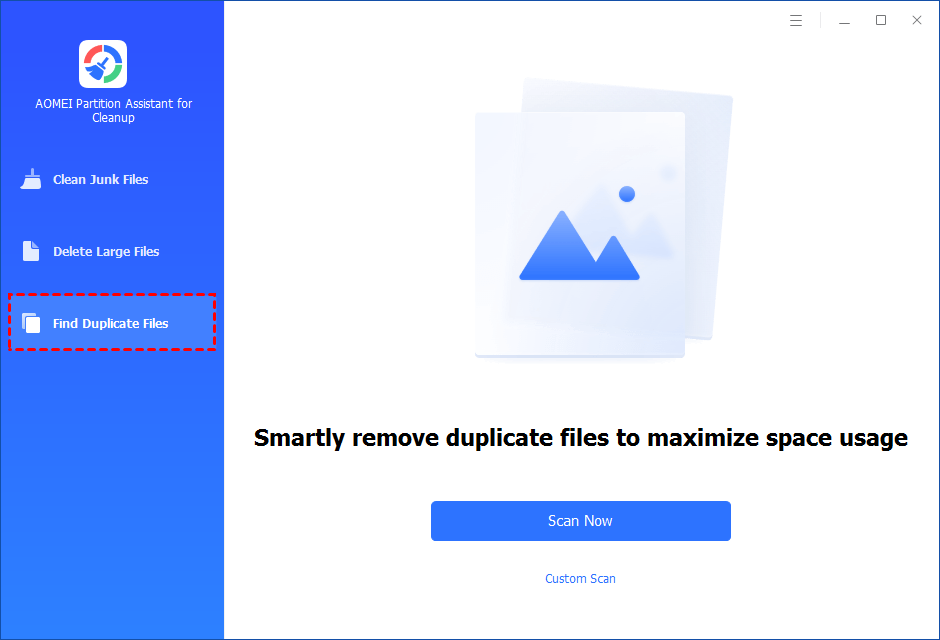
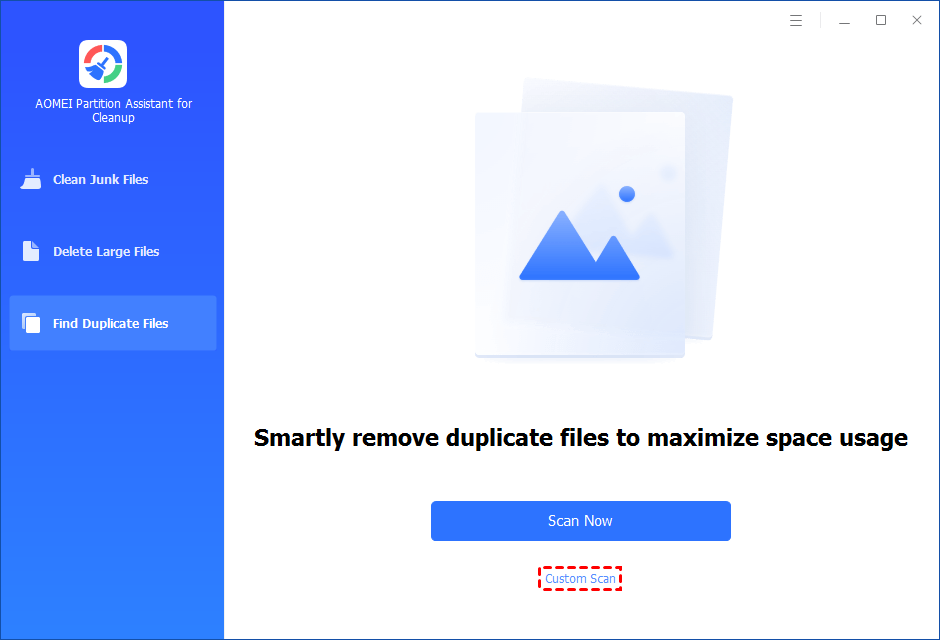
Step 2. You can either click "Scan Now" to start the scan of your system C: drive. Or, click "Custom Scan" to manually select paths to be scanned. (Here, we take the "Custom Scan" as an example.)
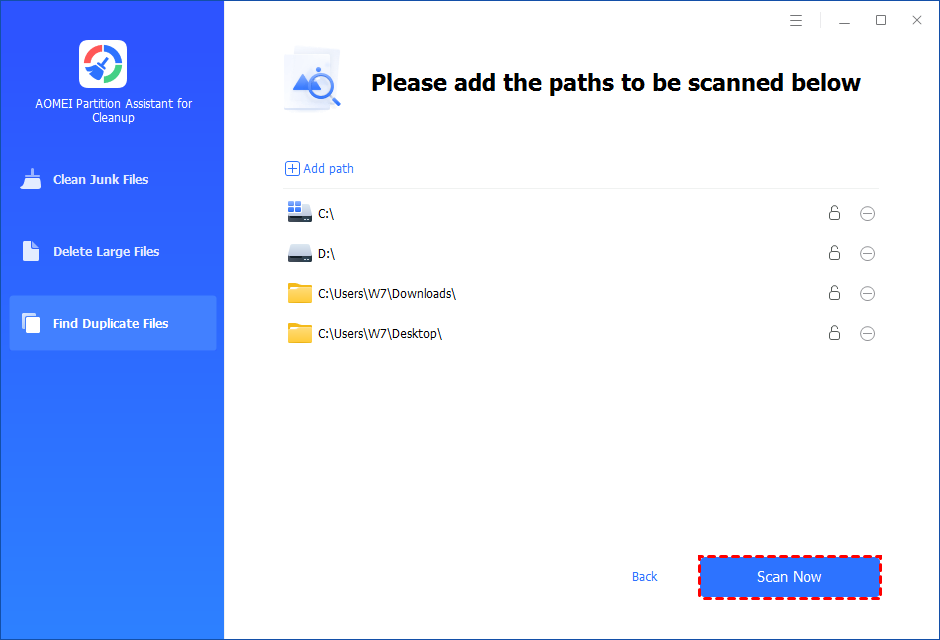
Step 3. After clicking "Custom Scan", all local and external drives on your PC will be displayed. You can also click the "Add Path" button, and then a browse folder window will pop up. So you can add more paths on this PC, like Desktop, Downloads, and other folder paths.
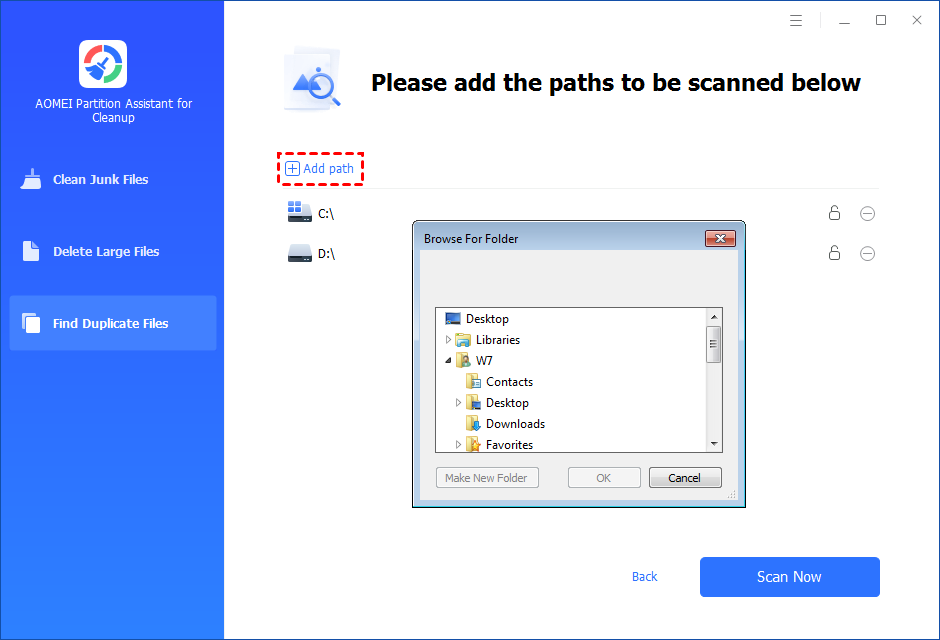
Step 4. Once necessary paths are added, you can click the "Scan Now" button to start the scan process.
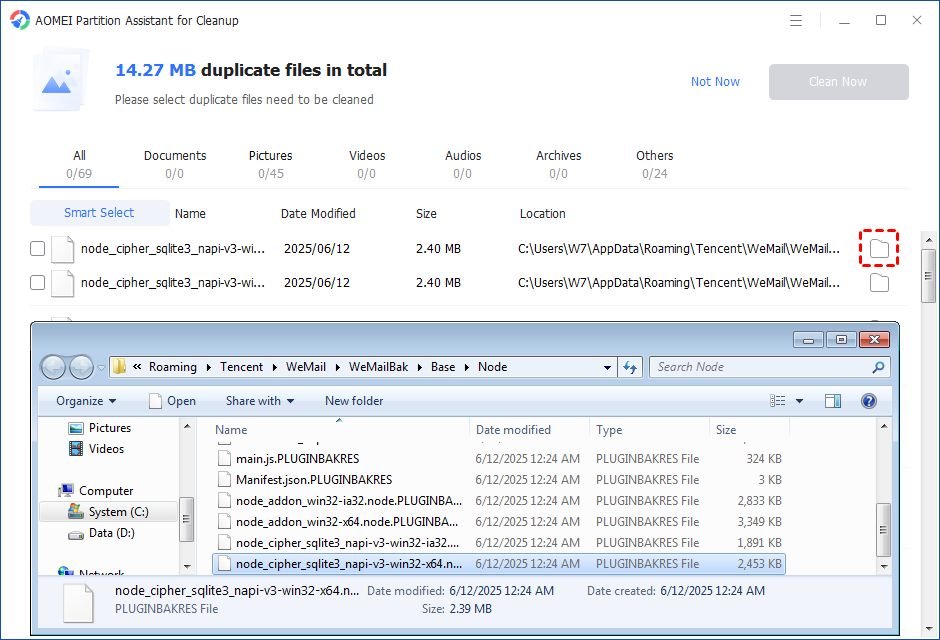
The scan process might take time. After the scan is complete, all duplicate files will be listed. You can click the button behind to locate them.
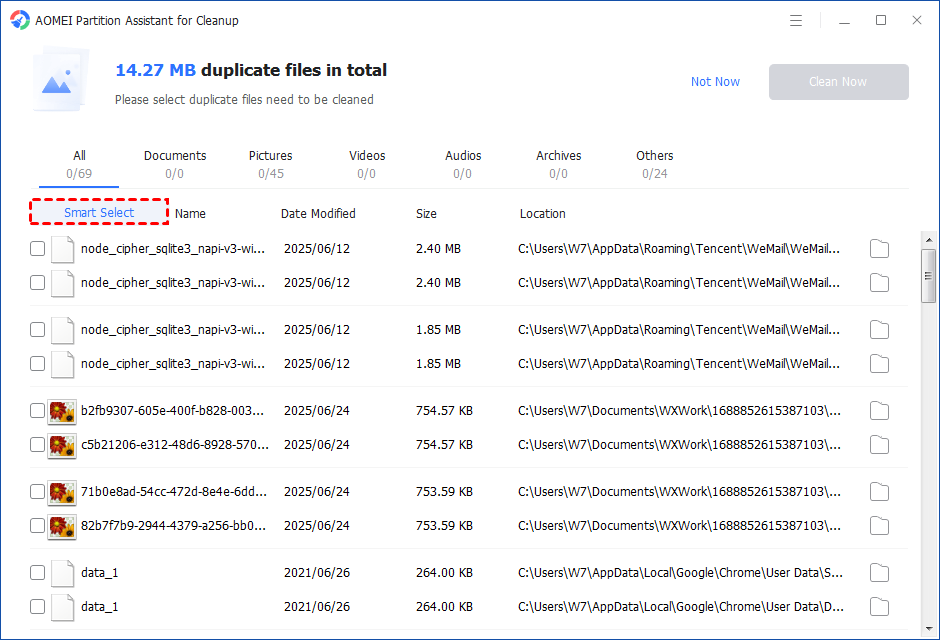
You can either manually select duplicate files, or click the "Smart Select" button to automatically select unnecessary duplicate files to delete.
Tips: If the "Smart Select" is ticked, only the oldest duplicate file will be unticked. It means that all duplicate files except the oldest one will be ticked to delete. (The oldest file means the file that was created first. This file will not be deleted. All other duplicate files are considered copies of the oldest file. )
If you manually select all copies of duplicate files, you will get a pop-up warning window to keep at least one copy of the duplicate files. If you indeed want to delete all copies of duplicate files, you can click "OK" so all copies of duplicate files will be selected to delete.

After unnecessary duplicate files are selected, please click the "Clean Now" button to start the deletion.

Step 5. The deletion might take time. After the process is finished, the selected files will be deleted, and you will get a cleaning completed window displaying how much data you deleted in total.

Conclusion
This is the full guide on how to find duplicate files on hard drive. For most of the users, Storage Sense may be enough for you to remove duplicate files. But if you want to scan deeper and remove Windows duplicate files permanently, Windows Duplicate File Finder is your best choice.

