How to Easily Find and Delete Duplicate Files with AOMEI Partition Assistant?
Duplicate Files Finder in AOMEI Partition Assistant is a tool quickly find and delete duplicate files on multiple different storage devices. It will be very useful and helpful for you to optimize storage and improve system efficiency.
Overview
Computer users often store large amounts of data and files on their systems. Over time, there may be multiple copies of files, which may be stored in different locations, resulting in wasted storage space, reduced system performance, and making data backup and maintenance more difficult. In this case, it is necessary to find and delete duplicate files on the computer.
Duplicate Files Finder is a tool in AOMEI Partition Assistant designed to quickly find and delete duplicate files on multiple different storage devices. It will be very helpful for you to optimize storage and improve system efficiency.
How to find duplicate files in AOMEI Partition Assistant
Before you do
- Download and install Partition Assistant on a Windows computer.
- Keep the drive you would like to find duplicate files connected to your computer.
This tool is very useful for you to optimize drive storage. If you would like to use this feature, please upgrade to a paid version of AOMEI Partition Assistant Professional, Server, or above versions.
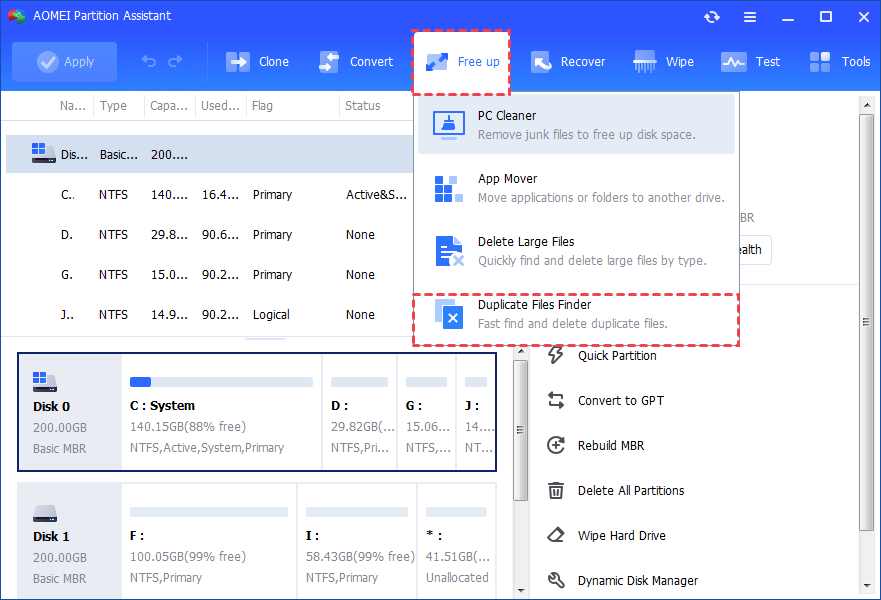
Step 1: Select Duplicate Files Finder
Install and launch AOMEI Partition Assistant, and then click the "Free up" main tab and select "Duplicate Files Finder".
Step 2: Specify scan range
1. By default, all hard drives and partitions on your computer will be displayed. You can manually click the button to add some folders to the scan range.

2. And, you can remove unnecessary partitions so the removed partitions will not be scanned.
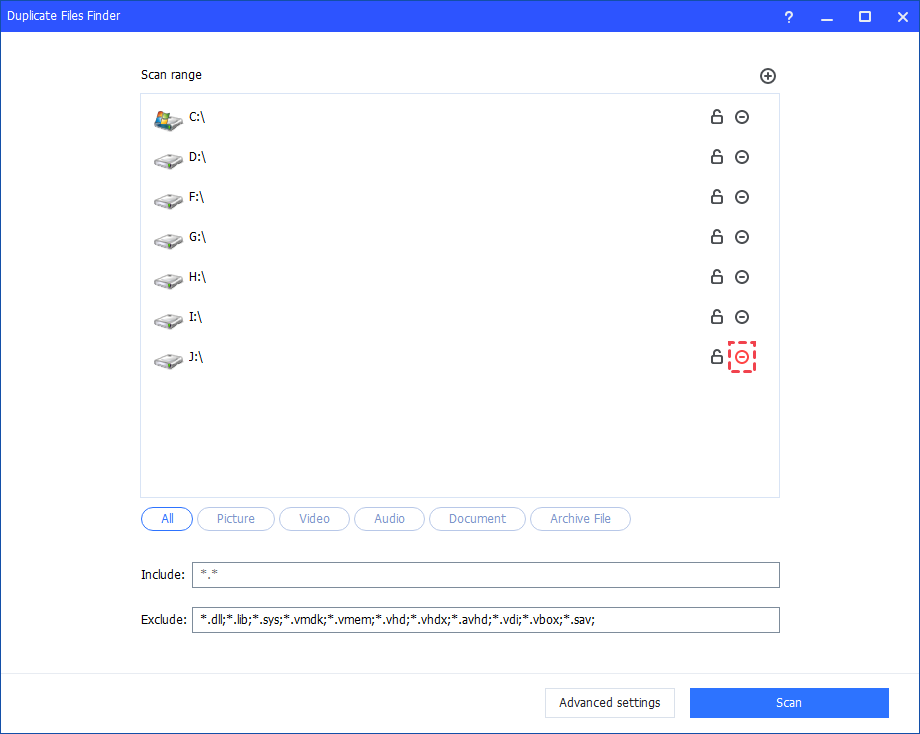
3. You can also click to lock or unlock partitions. If a partition is locked, the program will still scan it and display duplicate files on the partition. However, it is unable to delete the duplicate files on the locked drive.

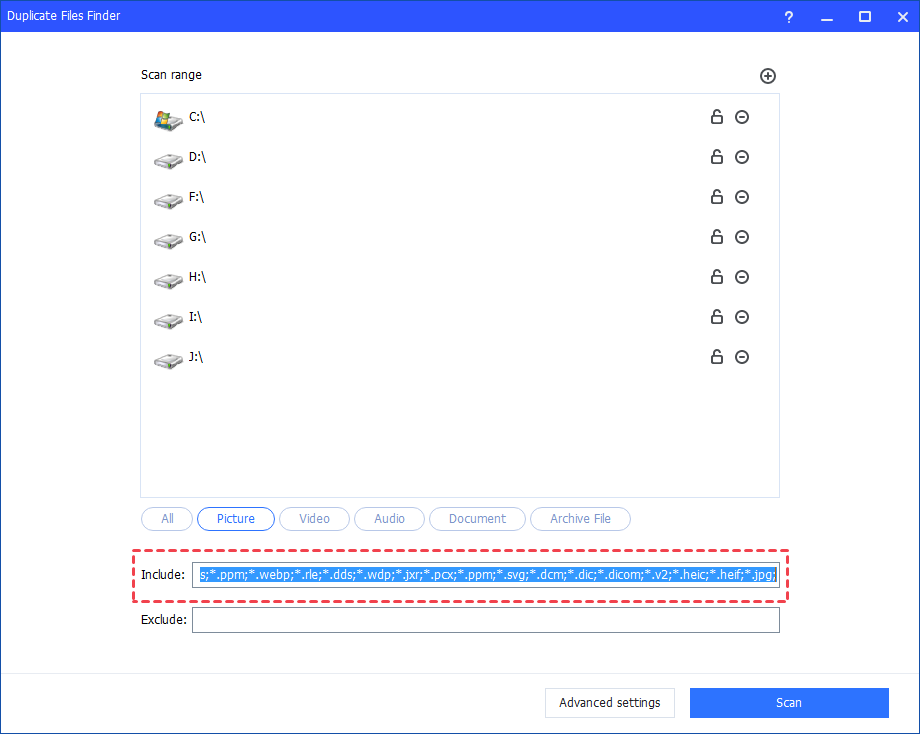
4. In this page, you can also set up an exclusion of all file extensions so that these types of files will be excluded. You can also specially configure file inclusions for picture, video, audio, documents, and archive files so that only these types of files will be included.
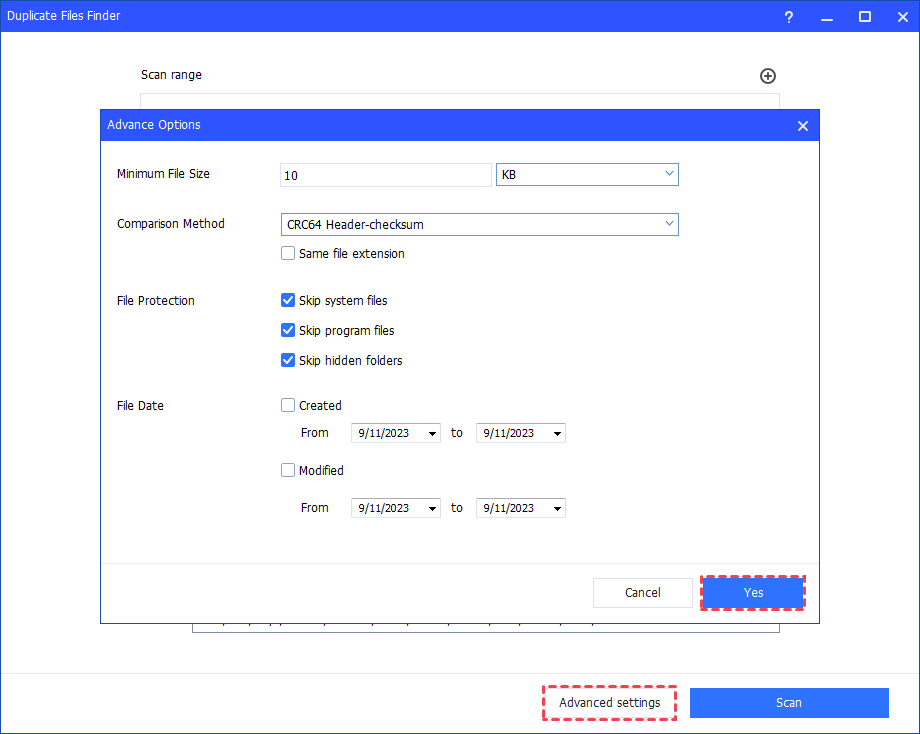
Step 3: Advanced Settings (Optional)
In addition, you can click the "Advanced Settings" to personally set up the scan rules. For Instance, you can set the minimum file size, select comparison methods, skip system/program/hidden files, and scan files as per file creation and modification date. If you make changes to the settings, please remember to click "Yes" to save the settings. (If it is not set, the program will scan as per the default scan rules.)
Tips: If you tick the "Same file extension" option, only files with the same file extension will be scanned.
Step 4: Start the scan process
Click the "Scan" button to start the duplicate files scan process.

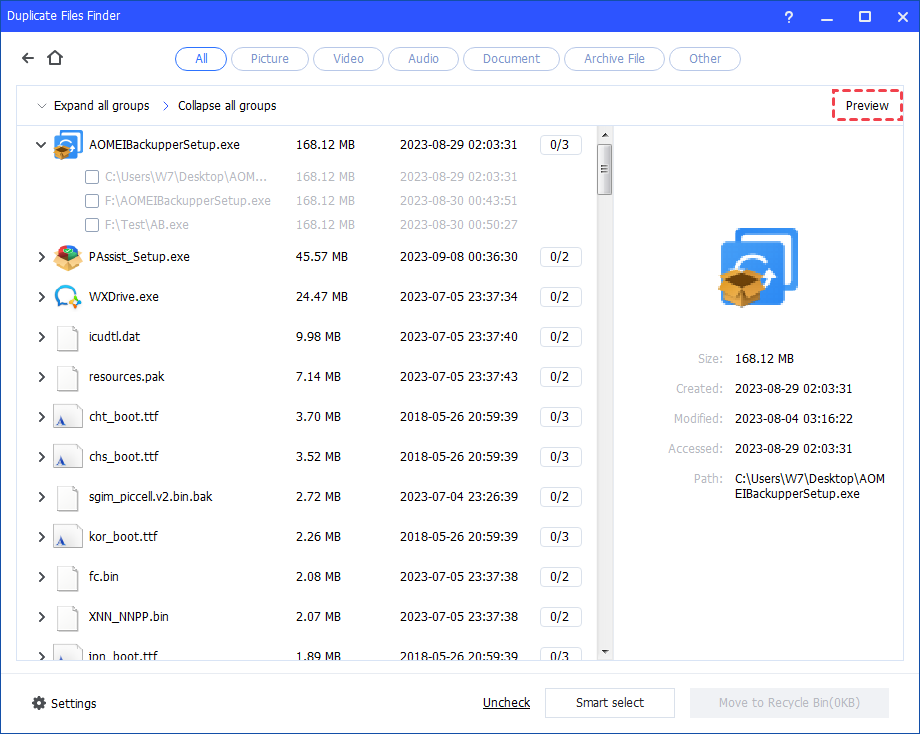
Step 5: Preview duplicate files
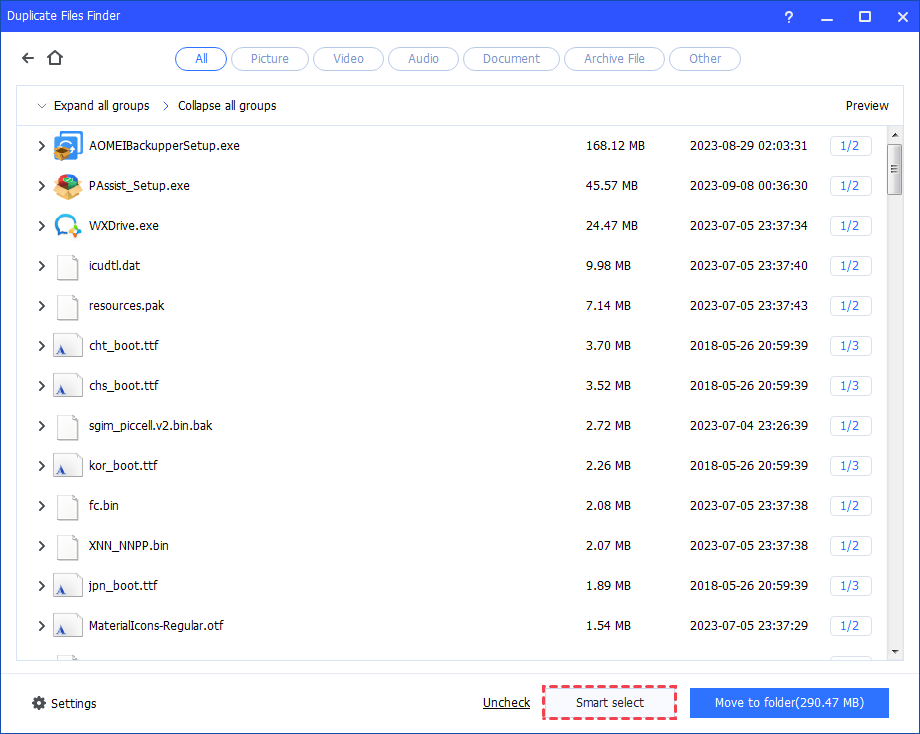
After the process is finished, all duplicate files that meet the conditions you set will be displayed. You can click the "Preview" button to view the duplicate file details.
How to delete duplicate files in AOMEI Partition Assistant
Once all duplicate files are displayed, you can either manually select unnecessary ones or do a "smart select" and then select a delete method to delete duplicate files.
Manually select duplicate files to delete
1. Manually select the duplicate files you want to delete. (You can click the "uncheck" button to untick all files.)
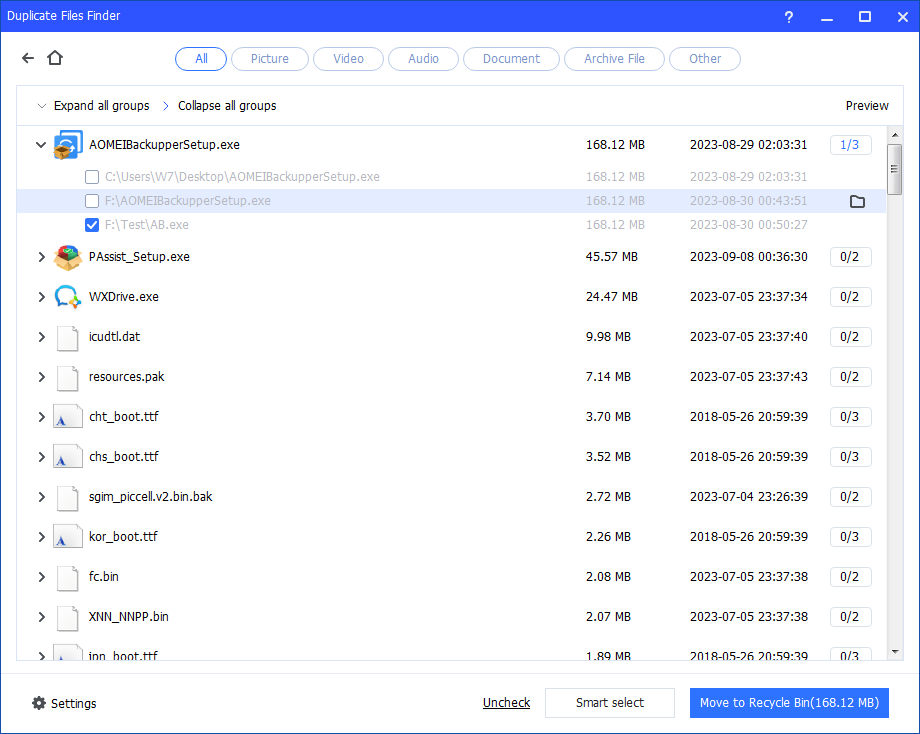
Normally, it is recommended to keep at least one duplicate file. If you select all files in the group, there will be a pop-up window to confirm if you really want to delete the entire group of duplicate files. If you confirm, you can click "OK" to continue.

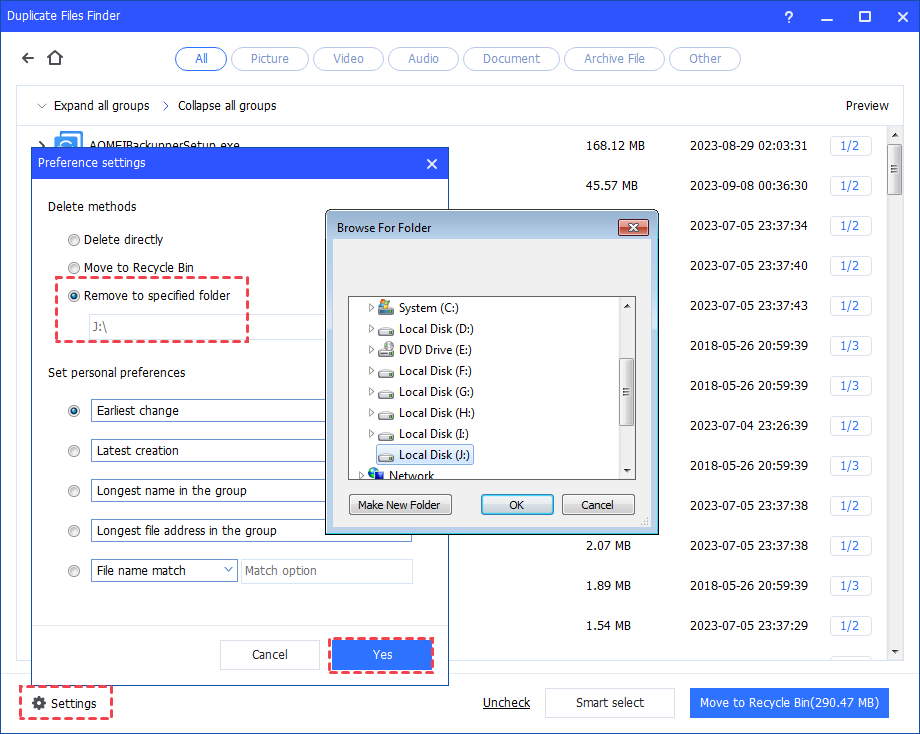
2. Select the proper delete methods and personal preference in the "Settings" and remember to click "Yes" to save settings. We just take the Move to Recycle Bin as an example.
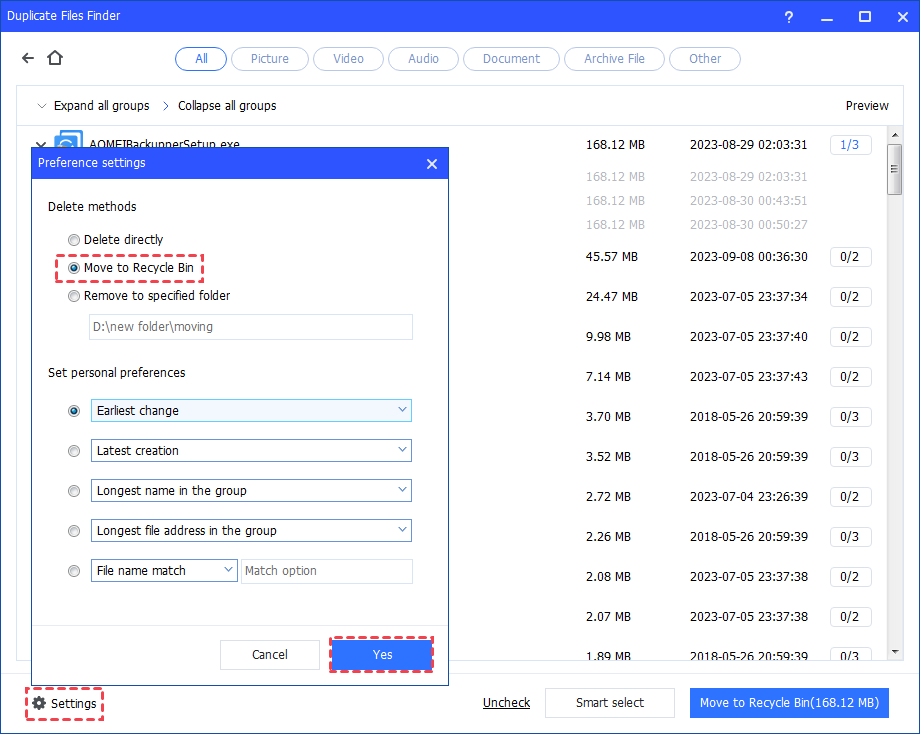
Delete methods (3 methods available)
Delete directly: duplicate files will be deleted directly and permanently.
Move to Recycle Bin: duplicate files will be moved to the Recycle Bin of your computer and it is still recoverable. (Set by default)
Remove to specify folder: move duplicate files to a specified location. You can set up a location to save the duplicate files.
Set personal preferences (This setting is for the smart set. For manual delete, there is no need to set this option.)
Earliest/Latest change: the earliest/latest change file will be selected if you click "Smart Select". (Earlist change is set by default.)
Latest/Earlist creation: the latest/earliest creation file will be selected if you click "Smart Select".
Longest/Shortest name in the group: the longest/Shortest name in the group will be selected if you click "Smart Select".
Longest/Shortest file address in the group: the longest/Shortest file address will be selected if you click "Smart Select".
File name/File address match: Enter a file name/file address to match. Only the same file name/file address will be selected if you click "Smart Select".
3. Click the button to start the move to the Recycle Bin operation.
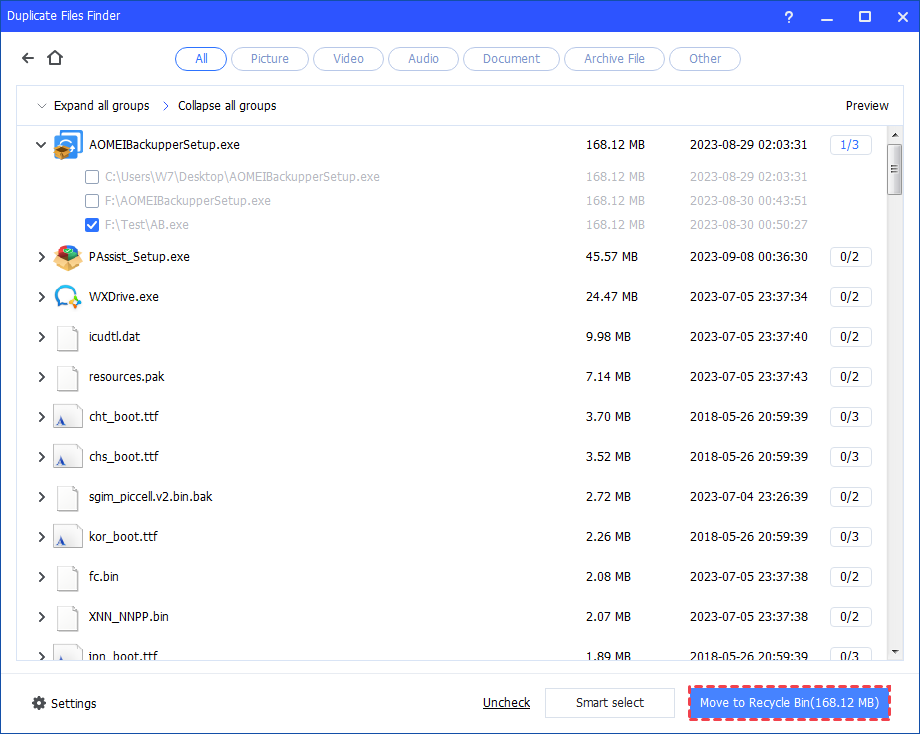
4. The deletion will be finished, and you can check the details.
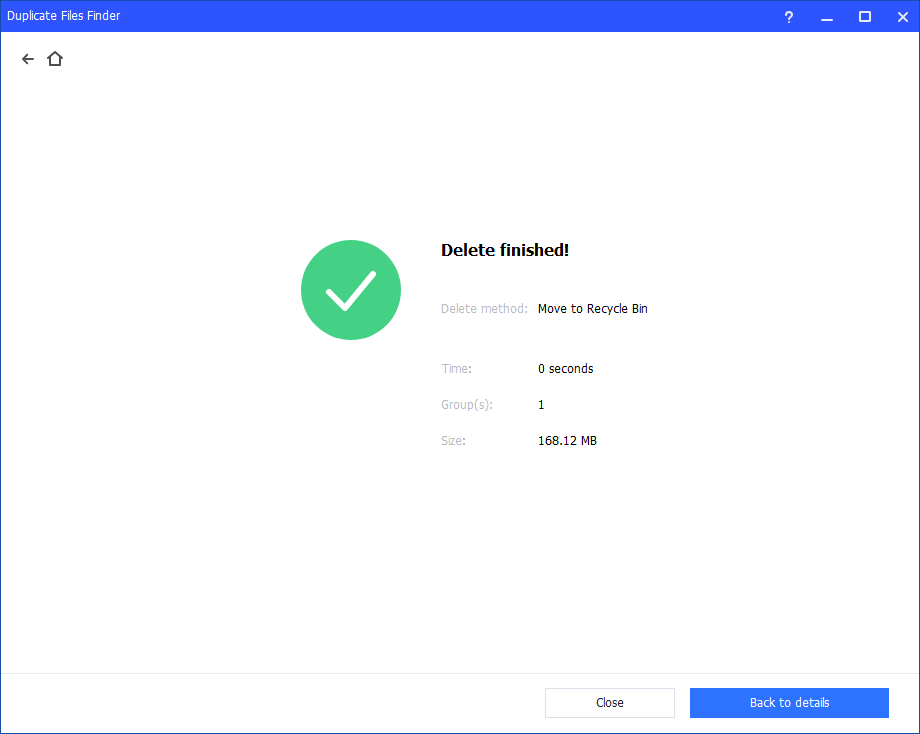
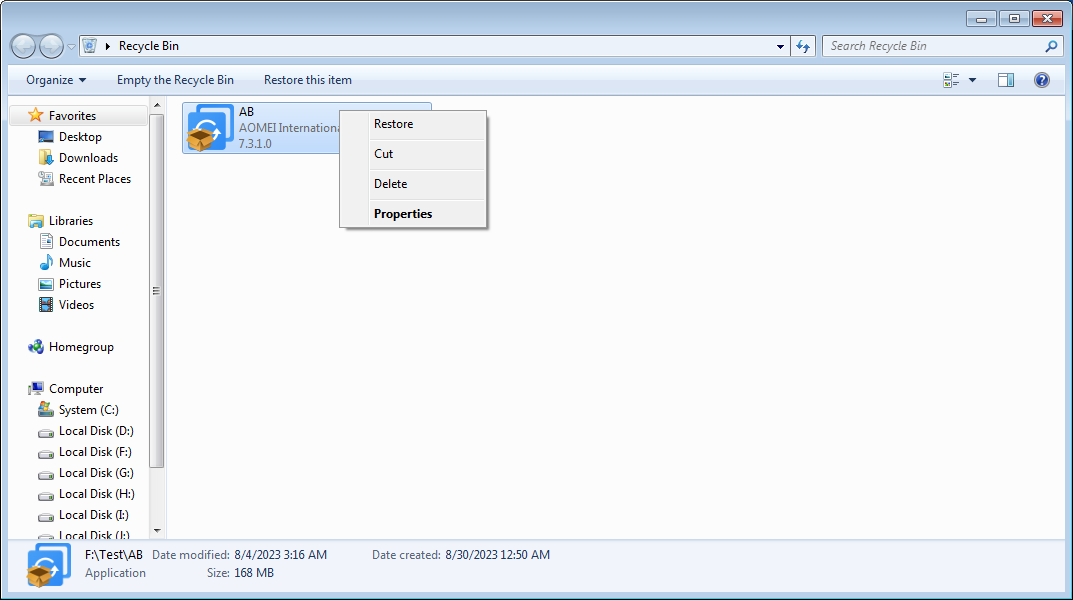
5. Since duplicate files are moved to your Recycle Bin, you can still find the deleted files in the Recycle Bin of your computer. You can still restore it.
Smart select duplicate files to delete
About smart select, it is based on the "Settings". With this option, you can select delete methods and set personal preferences.
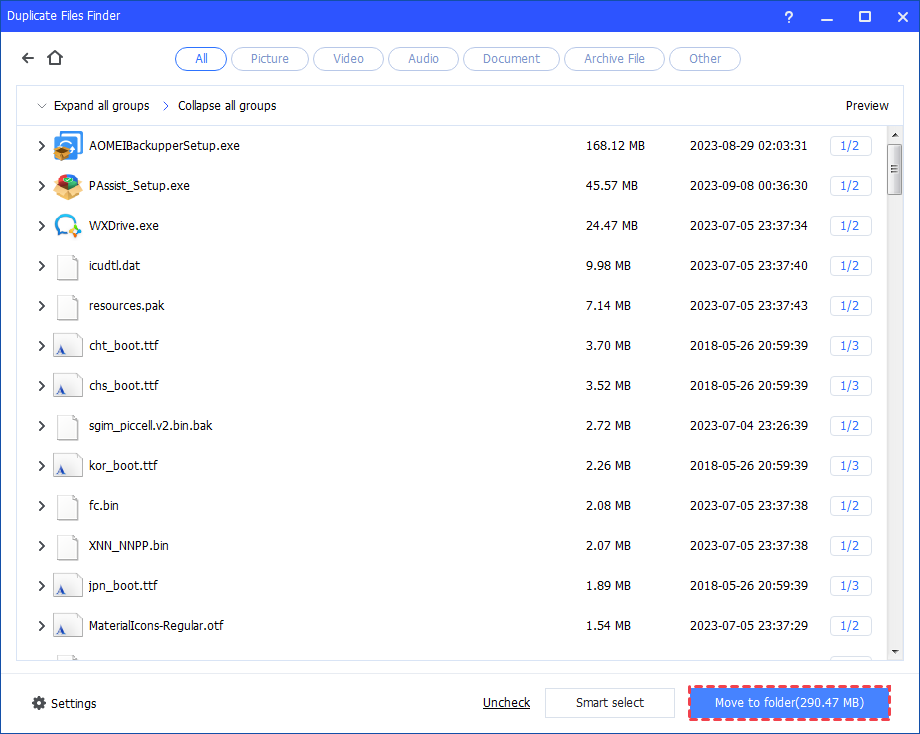
1. Set up the proper delete methods and personal preferences in the "Settings" and please remember to click "Yes" to save settings. We just take the "Remove to specify folder" as an example. Here we select J:\ as the location.
2. Click the "smart select" so some duplicate files are automatically selected as per your preference settings. (You can click the "uncheck" button to untick all files.)
3. Click the button to start the move to folder operation.
4. It might take time to finish the removal operation. Once it is finished, you can check the details.
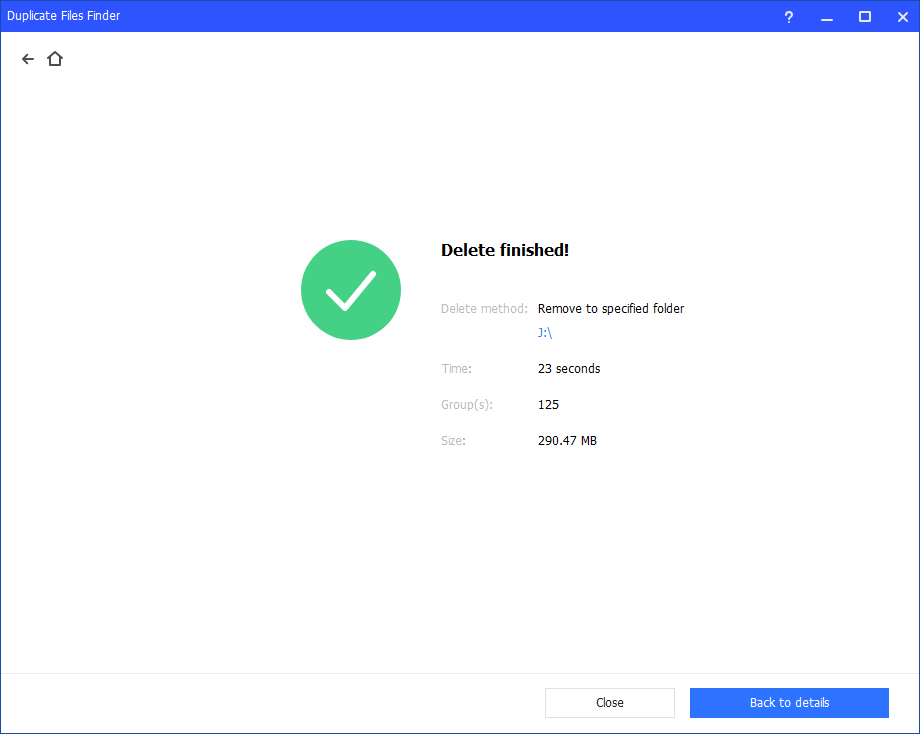
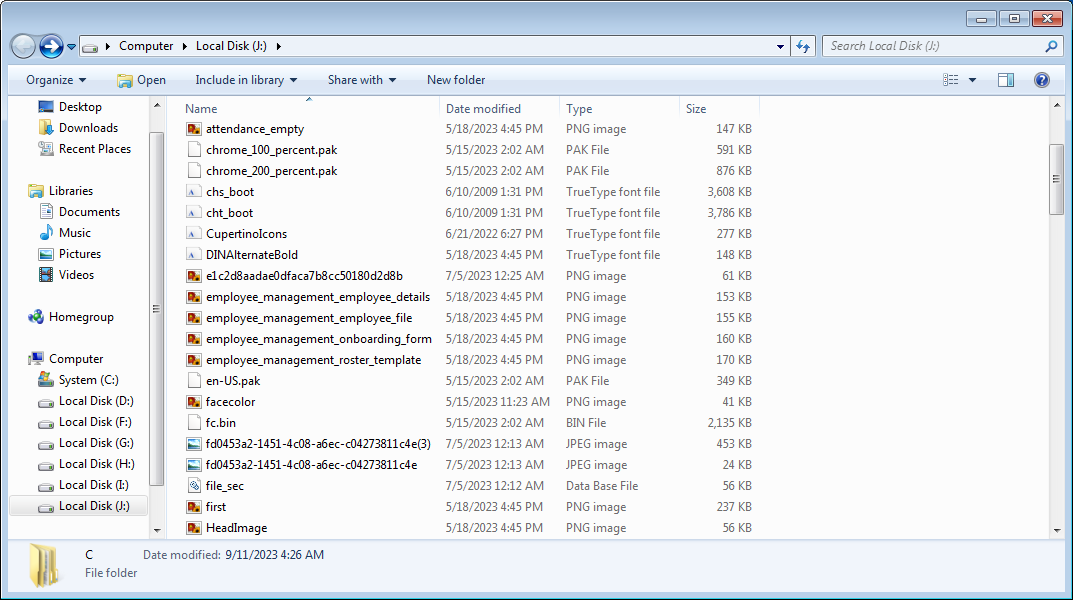
5. Since duplicate files are removed to another folder, you can directly find these duplicate files in the destination folder J:\.
Conclusion
Following the above steps, you can easily find and delete duplicate files on your computer. The Duplicate Files Finder tool is very useful to remove duplicate files for storage optimization.
AOMEI Partition Assistant also offers other useful tools, for example, Delete Large Files, and APP Mover, and so on.