How to Format a Drive for Both Mac and Windows?
Learning how to format a hard drive for both Windows and Mac ensures easy file sharing. This summary covers the best options for making an external hard drive compatible with everyone.
By Irene / Updated on January 15, 2026
When you are a creative professional finishing a 4K video edit on your MacBook Pro. You export the 20GB master file to your external SSD to hand over to a colleague using a Windows workstation. When they plug it in, the drive doesn't show up—or worse, you plug their Windows-formatted drive into your Mac and realize you can see the files, but you cannot move, edit, or delete anything.
This happens because macOS and Windows use different proprietary "languages" for data: APFS/HFS+ for Apple and NTFS for Microsoft. Without the correct bridge, your hardware becomes a one-way street. So how do you format a drive so it works smoothly on both Mac and Windows? That is exactly what this article will explain. Below, we will walk you through practical solutions to fix compatibility issues and help you choose the best format for cross-platform use.
How to format a drive for both Mac and Windows?
In this section, you can learn to format hard drive for Mac and PC in different devices. If you want to know what format works on both Mac and PC first, you can jump to this part.
Method 1. Format the external hard drive on Windows via Disk Management
If you have access to a Windows computer, using Disk Management is one of the easiest ways to format a drive so it works on both Mac and Windows. By choosing the NTFS or exFAT file system, you can transfer large files and avoid compatibility issues between the two operating systems.
❓Quick answer: Don't know should you choose NTFS or exFAT? Simply put, NTFS is technically superior to exFAT because it utilizes a journaling file system to prevent data corruption during unexpected disconnections while offering advanced security through file-level permissions and metadata logging that exFAT simply does not support.
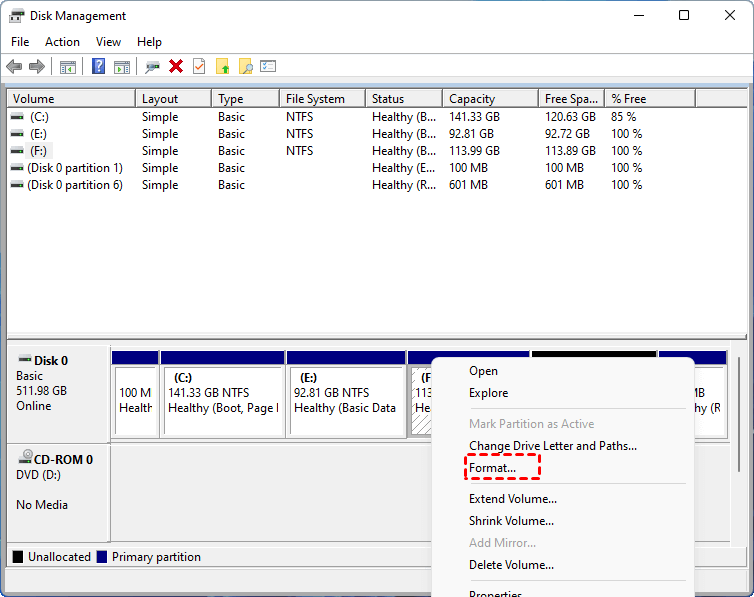
Step 1. Connect the external hard drive to your Windows PC and right-click the Start button. Select Disk Management from the menu to open the disk management tool. Right-click the target volume and select “Format”.
Step 2. Locate your external drive in the list. Right-click the Unallocated space on the drive and choose New Simple Volume to start creating a new volume.
Step 3. Follow the on-screen instructions to set the volume size, assign a drive letter, and then click Next to continue.
Step 4. When asked to choose a file system, select NTFS or exFAT. Enter a name for the drive in the Volume label field so it is easy to recognize later.

Step 5. Make sure the Perform a quick format option is checked. Click Next, then select Finish to begin formatting the drive.
Once the process is complete, your drive will be formatted in exFAT and ready to use on both Mac and Windows. In the next method, we will show how to format a drive directly on a Mac if you do not have access to a Windows PC.
Method 2. Format an external hard drive in Mac Disk Utility
While macOS Disk Utility is a reliable built-in tool for drive management, it is strictly limited to exFAT for cross-platform use because it does not natively support formatting volumes to the NTFS file system. Since NTFS is the industry standard for most retail external drives due to its robust journaling and security features, our experts recommend performing the format on a Windows PC if your workflow requires that specific architecture for maximum data integrity. For users seeking a seamless bridge between both operating systems, formatting the drive to exFAT remains the easier solution. To format a drive for both Mac and Windows to exFAT, you can follow the steps below.
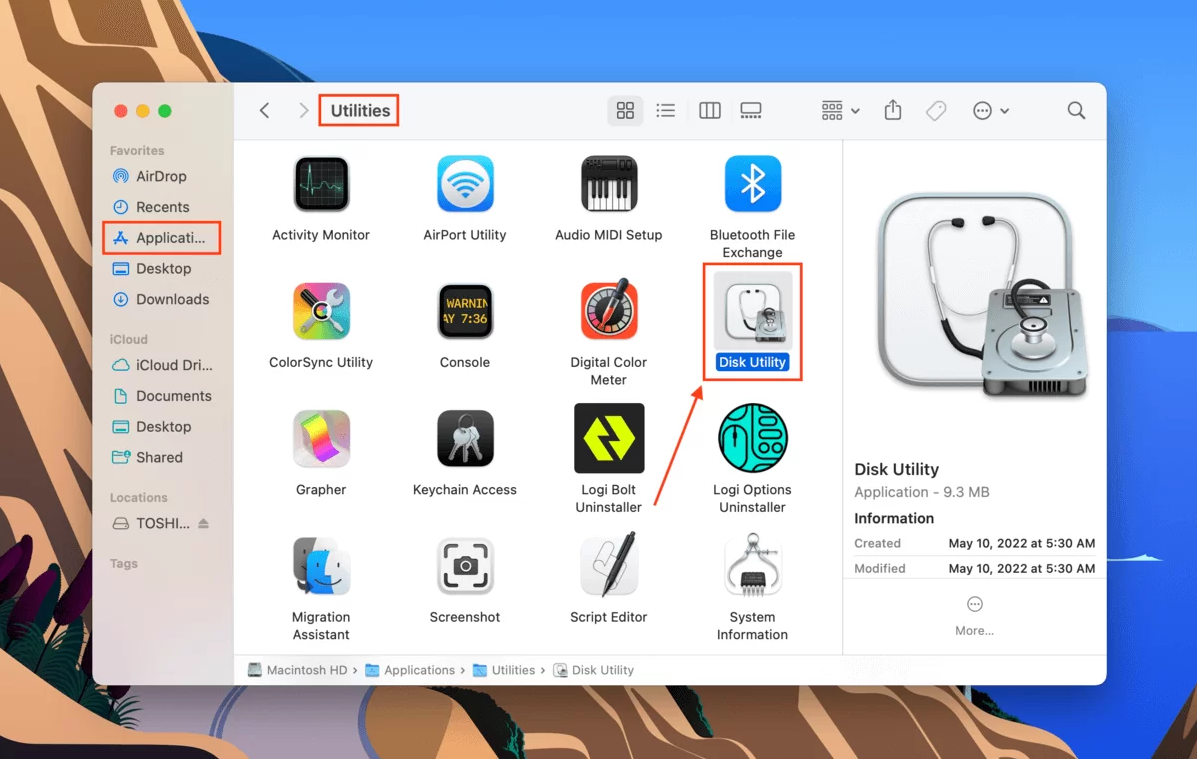
Step 1. Open Disk Utility (navigate to Finder > Applications > Utilities).
Step 2. Select the “View” menu and choose the “Show all devices” option.

Step 3. choose the external hard drive that you need to format it for both Mac and Windows from the list on the left and hit the “Erase” icon. If you find the Erase button is greyed out, you can follow this guide.
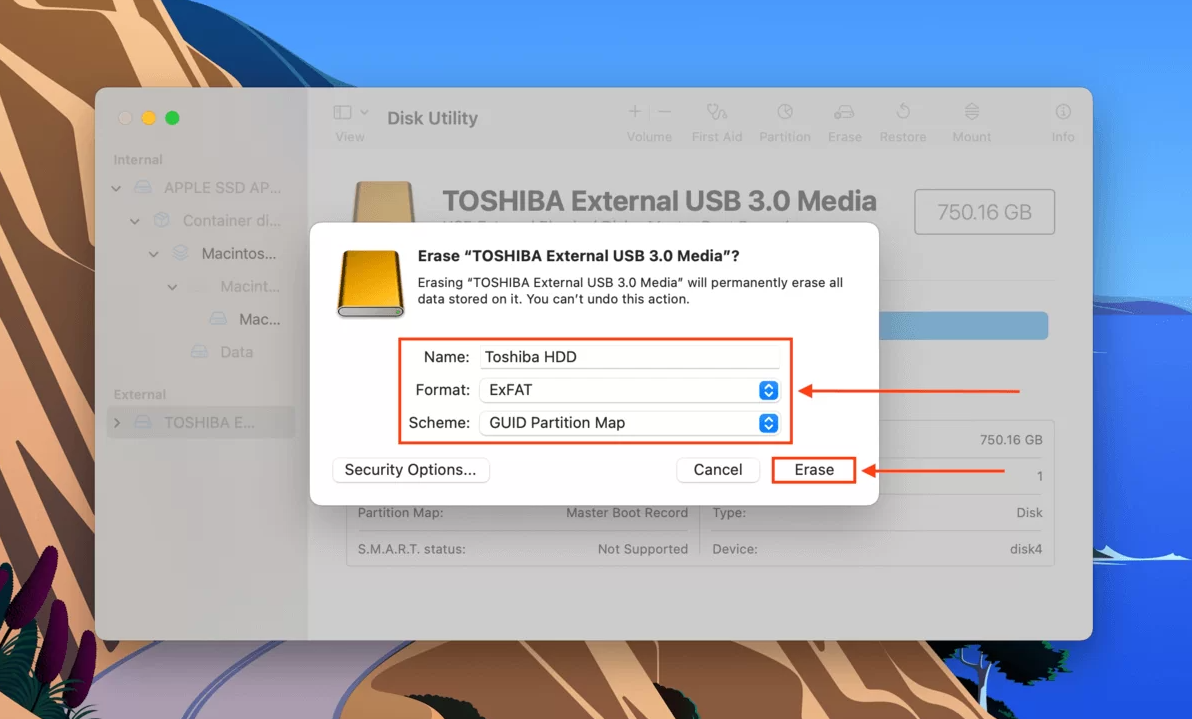
Step 4. Title your drive, pick GUID Partition Map as the scheme, and set the format to ExFAT. Finally, select “Erase” to wipe and reset your drive.
🔥 How to ensure drive compatibility with Mac and PC without reformatting?
The most efficient way to achieve full cross-platform compatibility without reformatting is by using a dedicated driver like PartitionAssistant NTFS for Mac. Since most external drives are pre-formatted in NTFS for Windows, macOS users often find themselves in a "read-only" trap where they can view files but cannot edit or move them. Reformatting to a different system would erase all your existing data, which is a significant risk for professionals handling critical backups or large media libraries.
By installing PartitionAssistant NTFS for Mac, you bridge this technical gap instantly, gaining full read and write permissions on your Mac while keeping your files intact. This software allows the drive to function as if it were a native Apple volume, maintaining the advanced journaling and security benefits of the NTFS architecture.
We recommend this approach over reformatting because it saves hours of data migration and preserves the drive's original stability. It is the safest, most professional solution for users who need to jump between Windows and macOS environments daily without sacrificing performance or risking data loss.
⚠️Note: You need to configure Security Policy in iOS Recovery Mode to allow the driver to load properly so your Mac can work fully to read and write to NTFS drives.
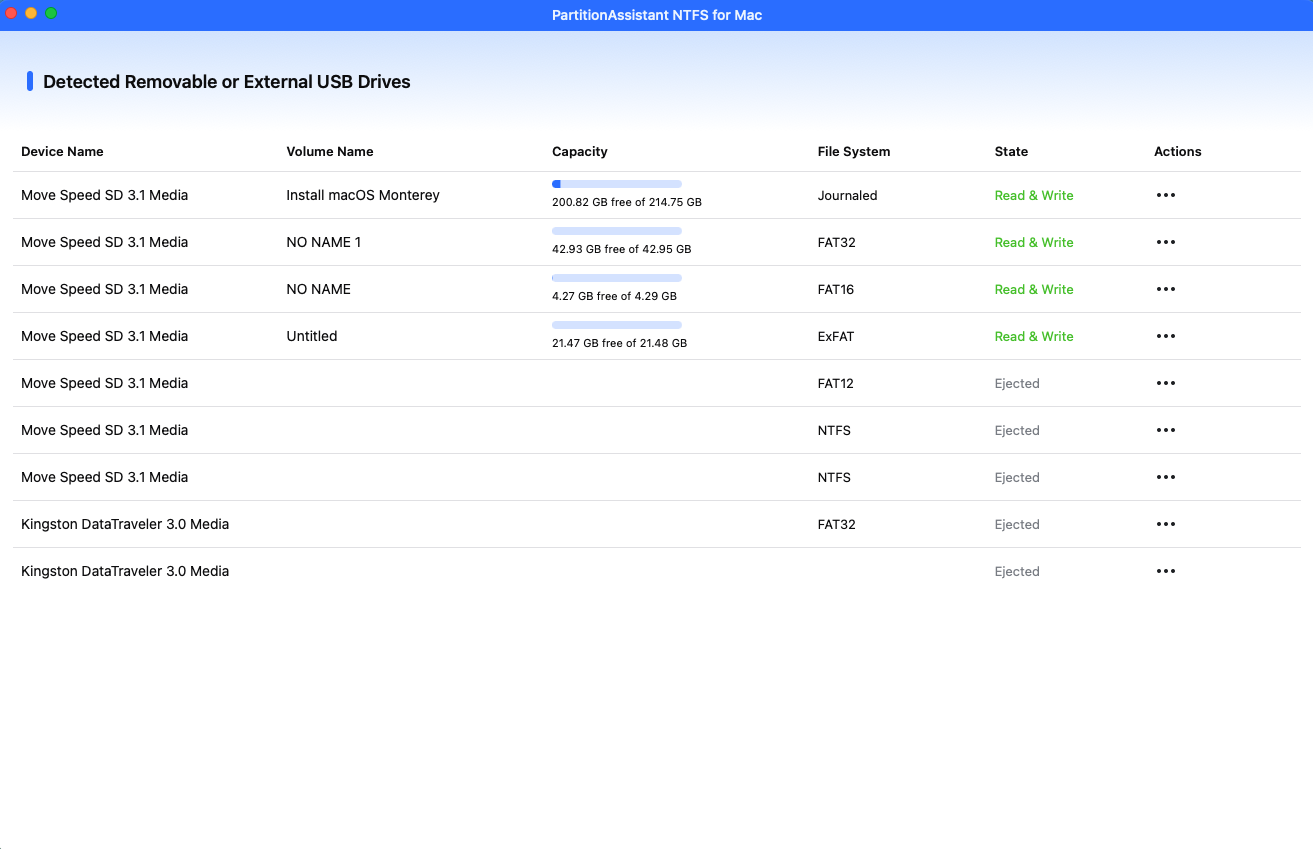
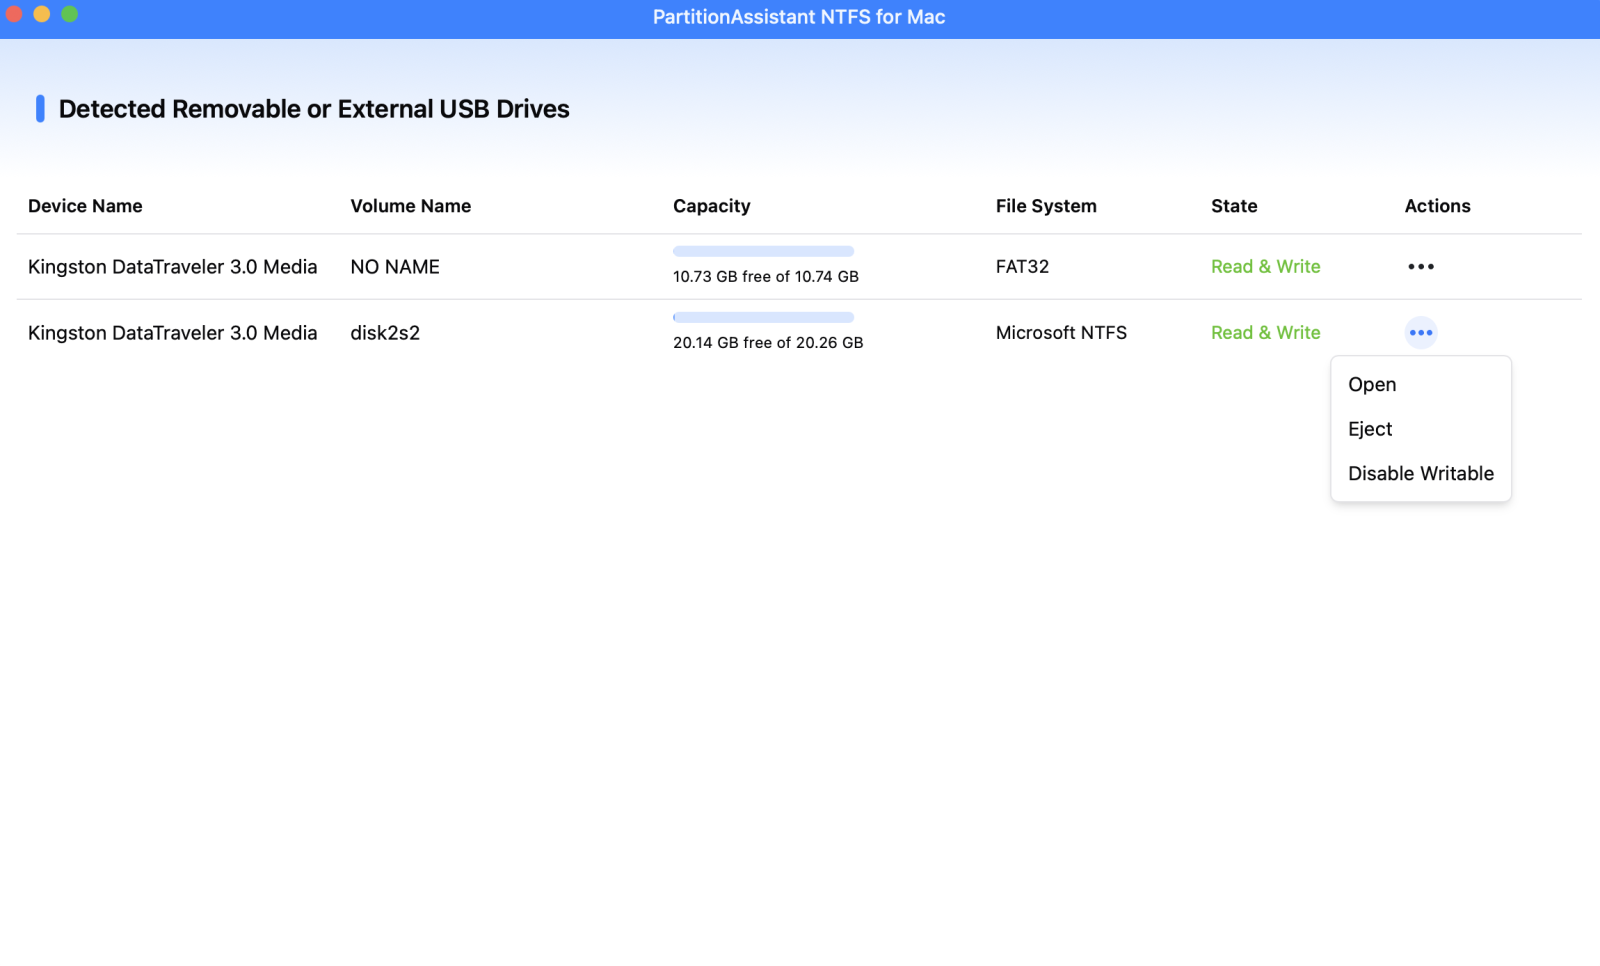
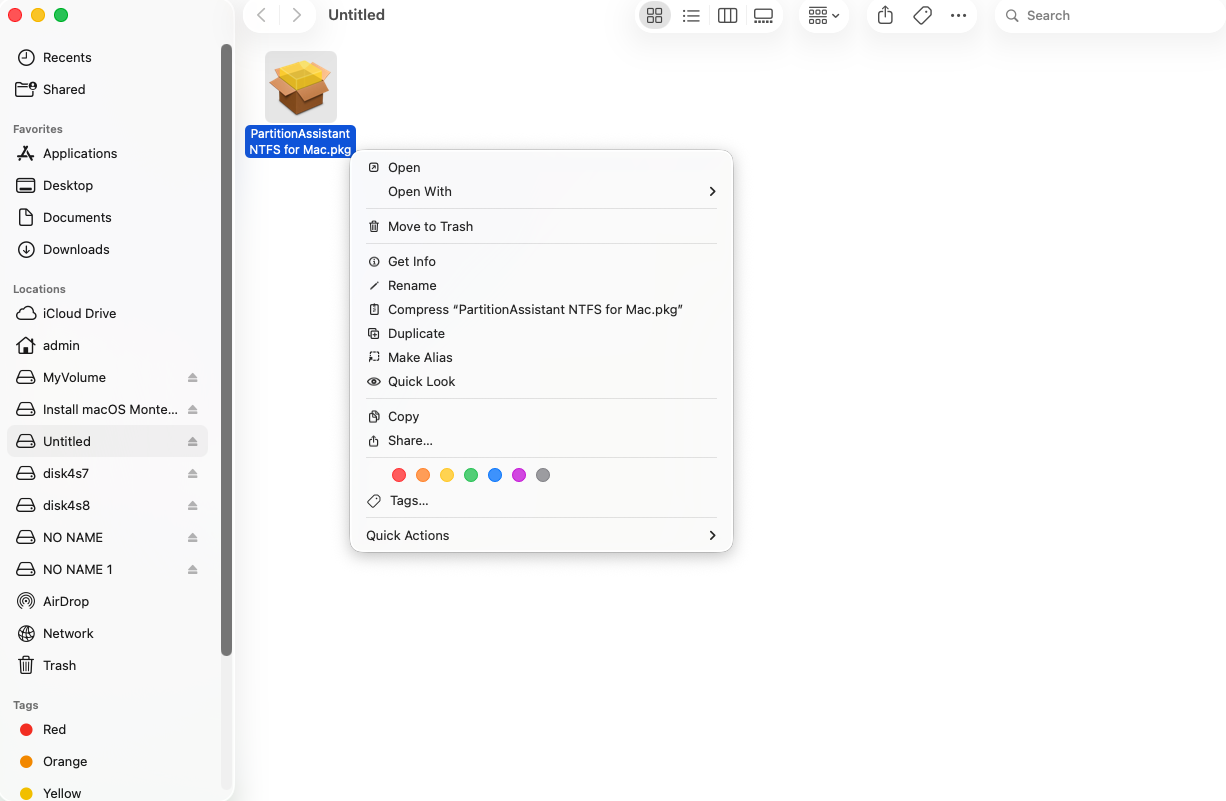
Step 1. You can install and launch PartitionAssistant NTFS for Mac, then connect your NTFS drive, and the software will automatically mount and display all connected removable and external drives.
Step 2. Select the NTFS drive you want to make it read and write, and click "Open".
Step 3. You can use this drive for both Mac and Windows like copy, move, delete, or edit files.
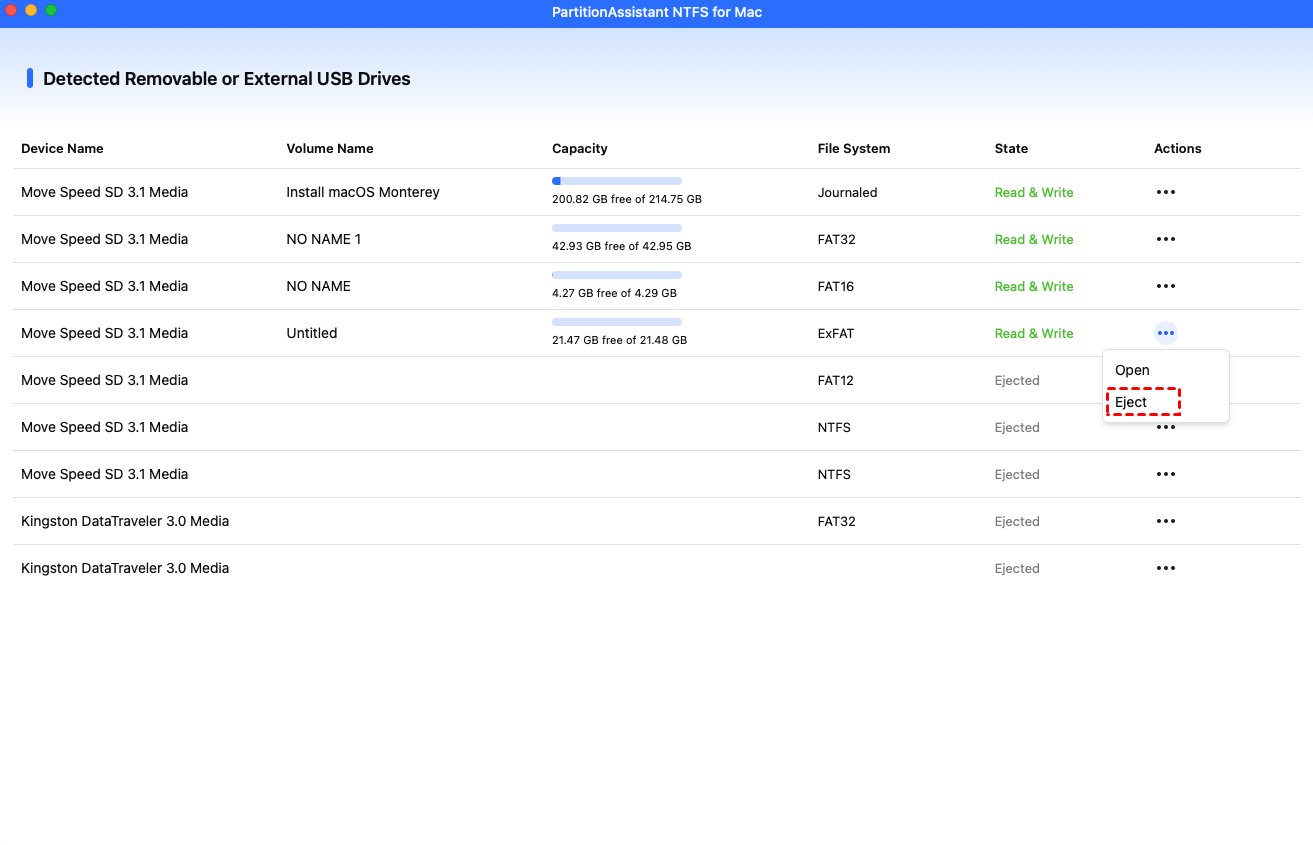
After all operations are complete, please click "Eject" to disconnect the external hard drive from your Mac.
What format works on both Mac and PC?
When choosing a file system that works seamlessly across both Mac and PC, the primary challenge lies in the fact that Windows and macOS use different native "languages." While Windows relies on NTFS for its internal drives and Apple has transitioned to APFS for modern SSDs, these proprietary formats do not communicate well with each other. To ensure an external drive works on both systems without errors, you must select a cross-platform format like exFAT or FAT32.
For most modern users, exFAT is the superior professional choice. It serves as a modern successor to FAT32 by removing the restrictive 4GB file size limit and supporting massive storage partitions, making it ideal for high-resolution video and large databases. While FAT32 offers the widest compatibility with older devices like game consoles or printers, its inability to handle files larger than 4GB makes it impractical for today’s media-heavy workflows.
The following table compares the most common file systems to help you identify the best choice for your specific hardware needs:
| File System | Mac Support | Windows Support | Key Characteristic |
| exFAT | Read & Write | Read & Write | Best for most; no file size limits. |
| FAT32 | Read & Write | Read & Write | Universal but restricted to 4GB files. |
| NTFS | Read Only | Read & Write | Windows default; requires drivers for Mac writing. |
| APFS | Read & Write | No Access | Optimized for modern Mac SSDs only. |
| HFS+ | Read & Write | No Access | Legacy format for older Mac hard drives. |
If your goal is to plug a drive into a MacBook and a Windows laptop and move files back and forth with zero friction, using PartitionAssistant NTFS for Mac is the best choice. It avoids the "read-only" limitations of NTFS on Mac while maintaining the high-capacity support that professional users require.
Conclusion
This article guide to format a drive for both Mac and Windows. Achieving full compatibility between Mac and Windows is essential for any modern workflow. While formatting a drive to a universal format like exFAT offers a simple fix, using a dedicated NTFS driver allows you to maintain professional-grade security and file integrity without the risk of data loss. Ultimately, the best choice depends on whether you prefer a fresh start or a seamless bridge for your existing files. By following these steps, you can eliminate the frustration of locked drives and keep your creative projects moving forward on any computer you encounter.
FAQs
🗨️ How to format HDD for both Mac and Windows?
To format a hard drive so it works on both Mac and Windows, you can use NTFS, exFAT or FAT32. On Windows, use Disk Management to select the drive, choose exFAT or FAT32, and complete the format. On a Mac, open Disk Utility, select the drive, choose GUID Partition Map as the scheme, select exFAT, and erase the drive. This ensures the drive can read and write files on both systems.
🗨️ What is the best format for a hard drive for both Mac and PC?
The best format for cross-platform use is exFAT. It works on both Mac and Windows, supports large files, and handles high-capacity drives. FAT32 also works but has a 4GB file size limit, making it less suitable for large videos, databases, or backups.
🗨️ Does NTFS work for both Mac and PC?
NTFS is fully supported on Windows, but on Mac it is read-only by default, meaning you can view files but cannot edit, delete, or add new files. To use NTFS on a Mac with full read/write access, you need a third-party driver like PartitionAssistant NTFS for Mac.
🗨️ Can you use a hard drive for both Mac and Windows?
Yes, you can. To make it fully compatible, format the drive to exFAT. This allows you to read and write files on both operating systems without restrictions. NTFS drives can also be used with Mac, but only with additional software for writing files.
🗨️ How to format a USB for both Mac and Windows?
Open Disk Management on Windows or Disk Utility on Mac. Select the USB drive, choose exFAT or NTFS as the format, and apply the changes. This makes the USB drive readable and writable on both Mac and Windows without losing data.

