How to See USB Devices on Mac and Fix Not Showing Up Issue?
Learn how to see USB devices on Mac and access them easily. The article also covers how to format a USB drive on Mac and resolve not showing up and not working issues.
By Irene / Updated on January 27, 2026
To see USB devices on a Mac, the USB drive must be physically detected by macOS at the hardware level and mounted correctly in Finder or Disk Utility. If a USB device is not showing up or not working on macOS, the root cause is almost always one of four issues: power delivery failure, Finder visibility settings, file system incompatibility, or logical disk errors. According to Apple Developer Documentation and macOS storage diagnostics reports, over 80 percent of USB detection problems are resolved by checking System Information, Disk Utility mounting status, or reformatting the drive using a Mac compatible file system.
This guide explains how to see USB devices on Mac, how to access USB on MacBook, how to format a USB drive on Mac, and how to fix USB not working on Mac, using verified troubleshooting steps used by macOS support engineers.
How to see USB devices on Mac?
In most normal cases, a USB device connected to a Mac will appear automatically on the desktop or in Finder. This indicates that macOS has detected the device and mounted it correctly. When the USB drive does not appear, the first task is to confirm whether macOS recognizes it at the hardware level.
Step 1. Click the Apple menu in the top left corner of the screen and select About This Mac.
Step 2. Click System Information to open the detailed hardware overview.
Step 3. In the left sidebar, scroll down to Hardware and select USB.
Checking the USB section in System Information is the first step to confirm whether macOS can physically detect the device. This helps separate possible hardware problems from software or settings issues. If the drive appears in the list, the connection is working properly, which usually means the drive is mounted but not visible due to Finder preferences.
If the drive does not appear, it may be a hardware issue, such as a faulty cable or USB port, that should be resolved before moving on to software troubleshooting. After confirming that the device is detected, users can then review Finder settings to make sure external disks are set to display.
Step 1. Open Finder. Click Finder in the menu bar and choose Settings or Preferences.
Step 2. Under the General tab, check the option for External disks. Then switch to the Sidebar tab.
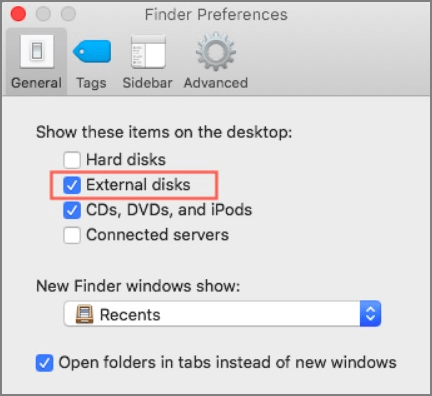
Step 3. Enable External disks in the sidebar list.
If the USB drive appears in both System Information and Finder but cannot be written to, cannot be modified, or shows limited access, the issue is typically related to the NTFS file system. macOS does not provide full write support for NTFS drives by default. The next section explains how to see and use NTFS USB devices on Mac properly.
How to fix USB not working on Mac?
Mostly, a USB drive connects to a Mac but does not appear or work properly because it uses a file system such as NTFS, which macOS can read but cannot write to by default. Using an NTFS for Mac tool enables full access to the drive without changing its format, while reformatting the drive to a macOS compatible file system removes the restriction entirely. Both methods fix the file system mismatch that causes the USB to seem invisible or unusable on a Mac.
Fix 1. Use a USB NTFS for Mac tool
When a USB drive is not working properly on a Mac, the issue is often related to the NTFS file system rather than the USB hardware itself. Many external drives are formatted with NTFS for Windows compatibility. macOS can detect these drives and read their contents, but it does not allow writing by default. As a result, the drive may appear connected but seem unusable when trying to copy, edit, or delete files. This limitation is commonly mistaken for a USB malfunction, even though the drive is actually working as designed.
PartitionAssistant NTFS for Mac helps resolve many cases where a USB drive appears not to work on a Mac due to NTFS limitations. It can directly enable full read and write support for NTFS USB drives. After installation, the USB works normally on macOS, allowing files to be copied, edited, renamed, moved, and deleted without reformatting or using Terminal commands. By fixing the NTFS compatibility issue, the software restores full USB functionality while keeping data safe and the workflow smooth.
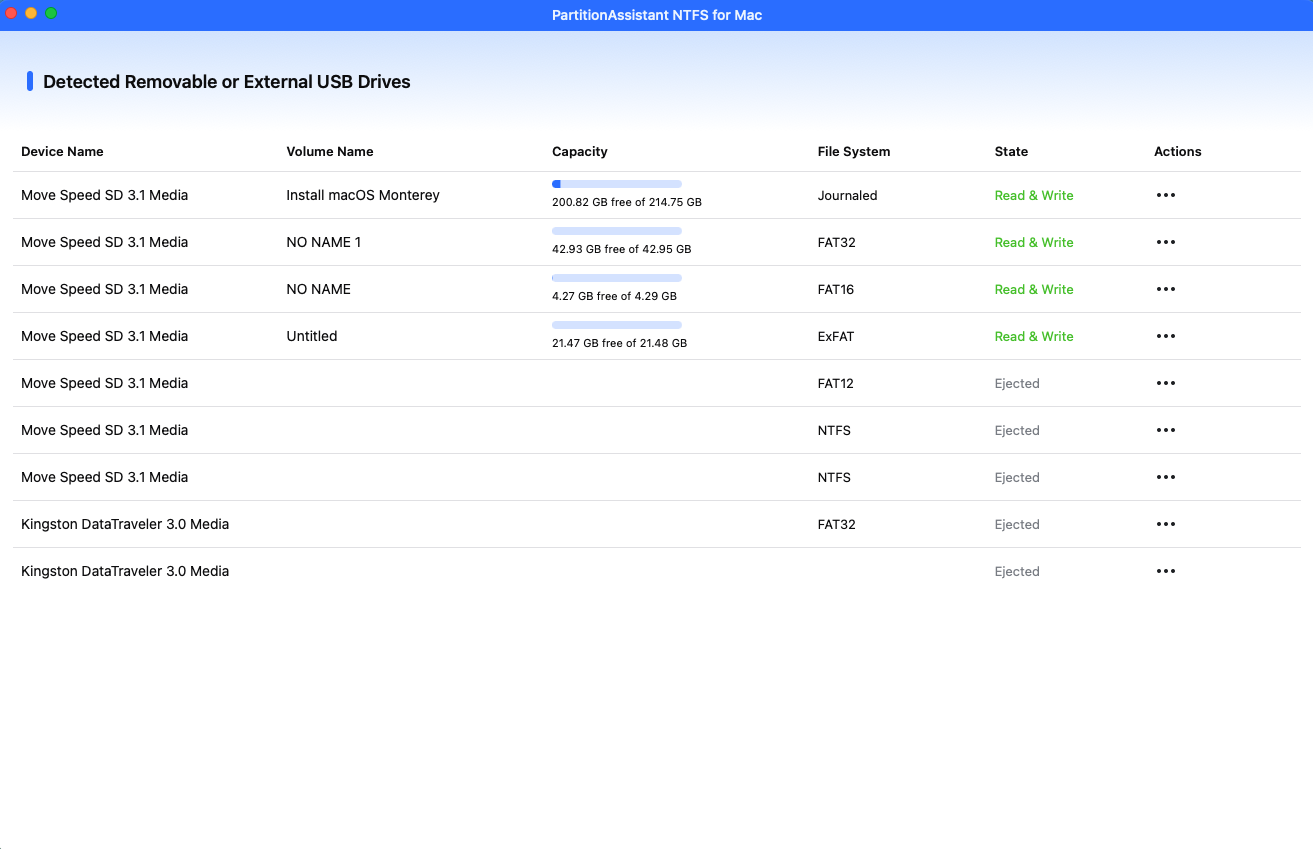
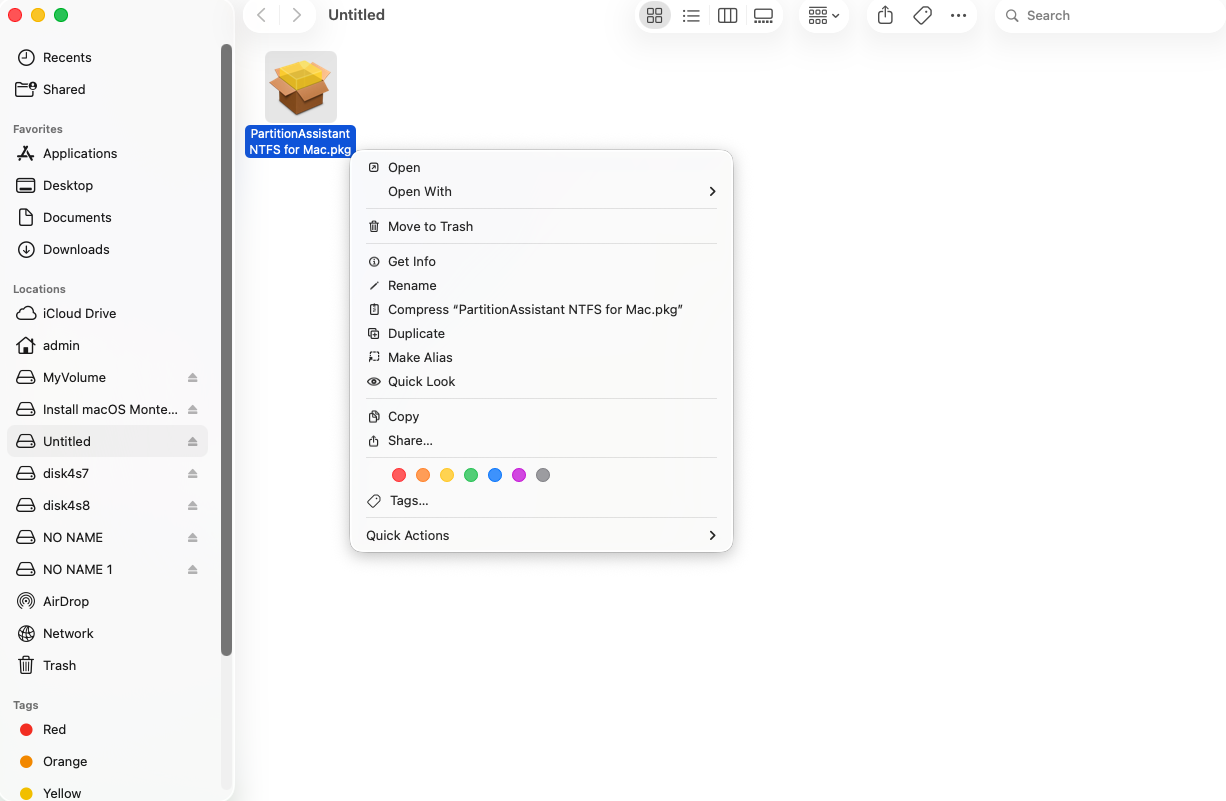
Step 1. Download the USB NTFS for Mac tool and follow the instructions to install it on your Mac. Then open PartitionAssistant NTFS for Mac. Connect your drive to the Mac. The software will find it and show it on the screen.
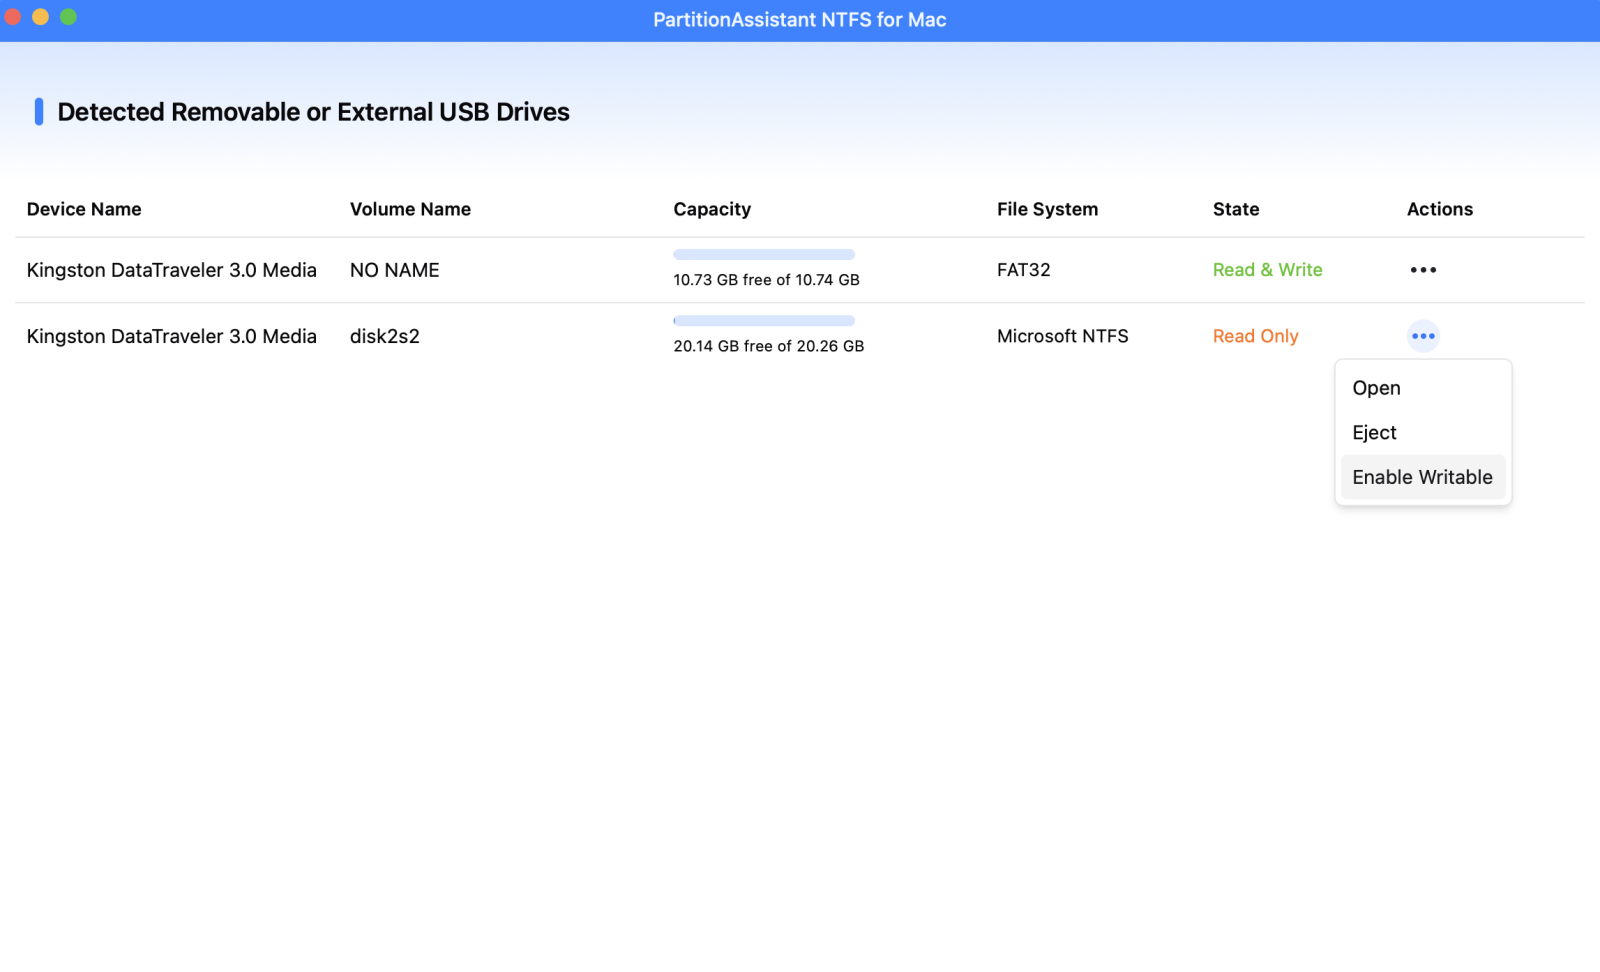
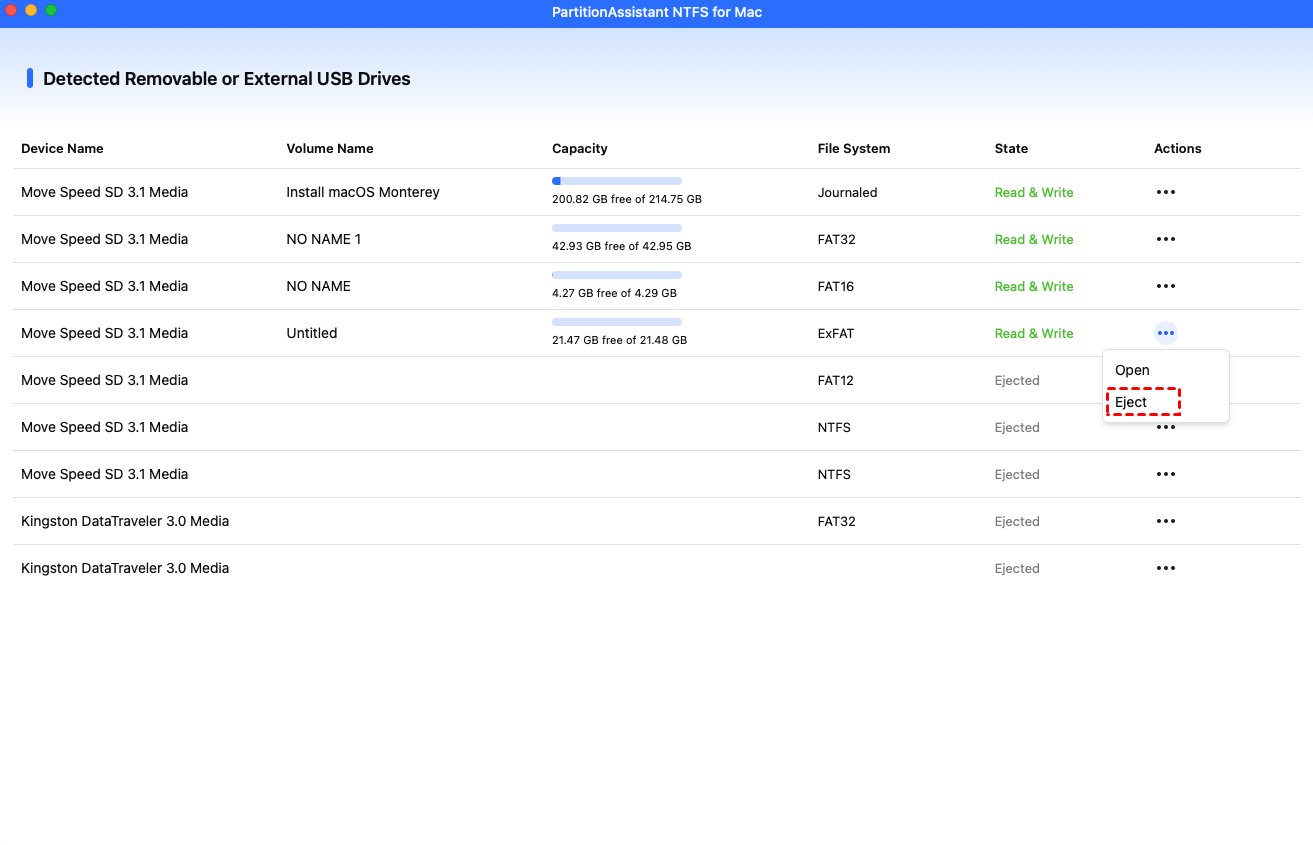
Step 2. Select the USB you want to operate. If the state is "Read Only", please click "Enable Writable".
When the state change to "Read & Write", you can click "Open" then copy, delete, and rename files on your Mac.
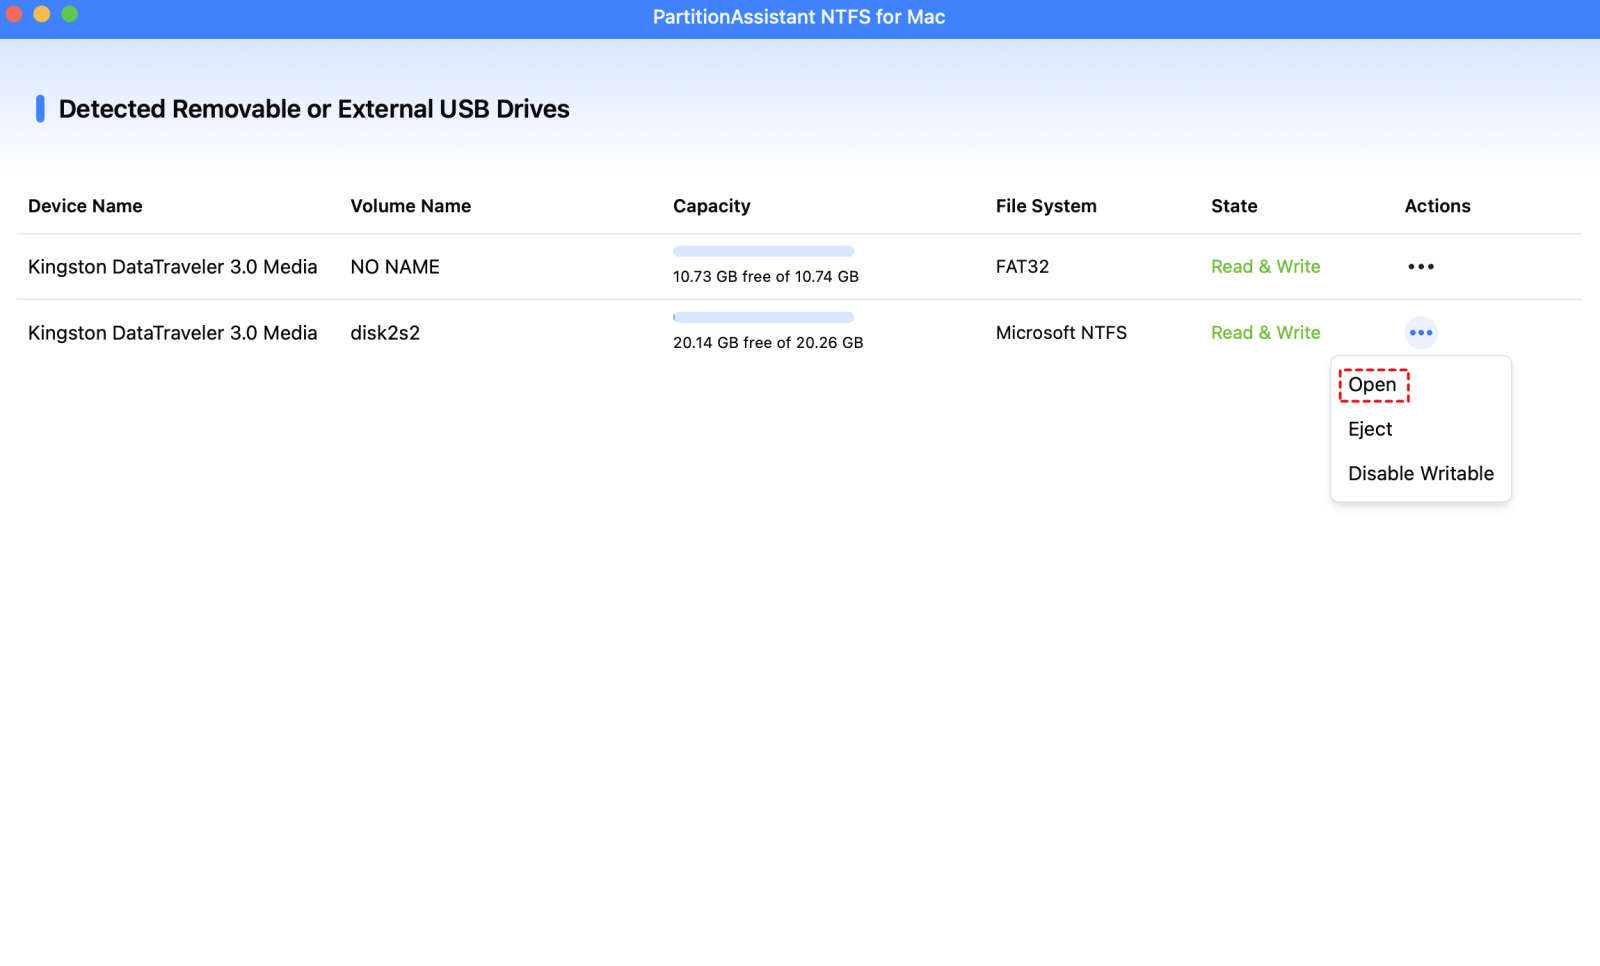
Step 3. After all operations are complete, please click "Eject" to disconnect the USB from your Mac.
Fix 2. Reformat it to other file systems
If you do not wish to use third-party software and you do not care about the existing data on the USB drive, you can reformat it to a file system that both Mac and Windows can read/write natively, such as exFAT.
Warning: This process will erase all files currently on the USB drive.
Step 1. Open Disk Utility. Select your USB drive.
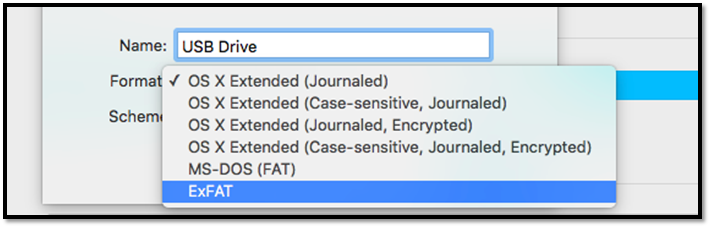
Step 2. Click "Erase". In the Format dropdown, select "exFAT".
Step 3. Click "Erase". Once the process is finished, you will be able to copy files, but any previous data is lost.
Conclusion
Knowing how to see USB devices on Mac is the essential first step to troubleshooting connection issues and restoring access to external storage. By checking System Information and reviewing Finder settings, it becomes easier to identify whether the problem is related to the physical connection or basic system preferences. When a drive is detected but cannot be used normally, resolving file system compatibility issues with NTFS software like PartitionAssistant NTFS for Mac or reformatting the drive can help it work smoothly with macOS. This guide aims to provide clear and practical direction so external devices remain visible, functional, and reliable for everyday use.
FAQs
🗨️ How do I find connected USB devices on Mac?
Open System Settings > General > About > System Report, then select USB. This section shows all USB devices that macOS currently detects, even if they are not visible on the desktop or in Finder.
🗨️ Why is my USB device not showing up on Mac?
A USB device may not appear due to file system incompatibility such as NTFS, disabled Finder settings, insufficient power, or a faulty cable or port. In many cases, the drive is detected but cannot be fully accessed because macOS limits certain file systems.
🗨️ How do I view all USB devices?
All connected USB devices can be viewed in System Information under the USB section. This provides a complete list of detected devices, regardless of whether they are mounted or visible in Finder.
🗨️ How do I see USB devices on Mac Terminal?
Open Terminal and enter diskutil list. This command displays all disks and USB devices recognized by macOS, including those that are not mounted or visible.
🗨️ Why isn't my USB showing up when I plug it in?
This usually happens because of an unsupported file system, a damaged cable or port, or a drive that needs to be mounted manually. You can follow to mount external hard drives on Mac here. Checking System Information helps confirm detection, while fixing file system compatibility or trying another port can resolve the issue.

