How To Use G-Drive External Hard Drive On Mac?
Users can learn to manage G-Drive external hard drives on Mac by following these steps to enable write access, format for compatibility, and fix common connectivity or detection problems efficiently and safely.
By Irene / Updated on January 4, 2026
Why is my G-Drive read-only on Mac?
G-DRIVE, now under SanDisk Professional, is a popular external storage brand designed for creatives who work with large files like photos and videos. It offers different models, including desktop hard drives, portable drives, and high-speed SSDs. Most G-DRIVE devices are made to work smoothly with macOS and usually appear in Finder as soon as they are connected.
However, some Mac users find that their G-Drive is read-only or does not work as expected. The most common reason is the file system. If the G-DRIVE is formatted as NTFS, macOS can read the files but cannot write to the drive without extra software. This makes the drive appear read-only. Connection problems can also cause issues, such as a loose cable, a damaged cable, or an unpowered desktop drive. In some cases, the drive may be new and not set up yet, incorrectly formatted, infected with errors, or even corrupted.
In short, a G-Drive becomes read-only on a Mac mainly due to file system incompatibility or connection and drive issues. So, how to use G-Drive external hard drive on Mac? Checking the drive format, cable, and drive status can help identify the exact cause. In the next part, we will share you the steps.
How to use G-Drive external hard drive on Mac?
Part 1. Properly connect and access a G-Drive external hard frive on Mac
Before using a G-Drive on macOS, it is important to connect it correctly and confirm that the system recognizes the device. A proper connection ensures the drive mounts successfully and allows you to access, copy, and manage files without errors.
Step 1. Connect the G-Drive to your Mac using the original USB-C, Thunderbolt, or USB cable and plug it into a compatible port.
Step 2. Wait a moment and check whether the G-Drive icon appears on the desktop or in the Finder sidebar.
Step 3. Double-click the G-Drive icon to open it and start viewing or transferring files between your Mac and the external drive.
If the drive does not appear, open a Finder window and check under Locations. If it is still missing, continue with the next solution.
Part 2. Best solution to enable full read-write access for G-Drive on Mac
The safest way to enable full read and write access for a G-Drive on Mac is to use a dedicated NTFS for Mac tool instead of reformatting the drive and erasing data. PartitionAssistant NTFS for Mac allows macOS to work with NTFS drives normally by removing the system’s read-only limitation without changing the existing file system. Once enabled, you can copy, edit, delete, rename, and move files on the G-Drive just like on a native Mac drive. It supports many storage types, including hard drives, SSDs, USB drives, and memory cards, and runs smoothly on macOS 12 and later, including both Intel and Apple Silicon Macs.
Step 1. Download and install PartitionAssistant NTFS for Mac on your system. Then connect the NTFS-formatted G-Drive to your Mac and confirm that you can open the drive.
Step 2.Launch the software and let it automatically detect and mount the G-Drive with full read and write access. If not, click the three dots and select Enable Writable until the state changes to Read & Write.

Step 3. Start using the drive normally, including writing, deleting, renaming, and moving files without reformatting.
Step 4. After all operations are complete, please click "Eject" to disconnect the external hard drive from your Mac. But the permissions are enabled, you can still access your NTFS on your Mac.
This method avoids data loss and works with various storage devices, including HDDs, SSDs, USB drives, and memory cards, while fully supporting both Intel and Apple Silicon Macs.
Part 3. Create partitions on a G-Drive external hard drive with Disk Utility
Some new G-Drive external hard drives may not have partitions set up, which can make storage management inconvenient. Creating partitions helps organize data, allocate space efficiently, and prepare the drive for regular use on macOS.
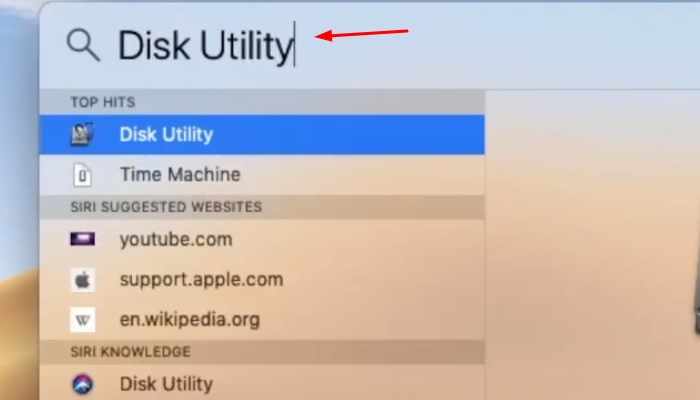
Step 1. Open Disk Utility on your Mac from Applications > Utilities.
Step 2. Select the G-Drive from the left sidebar, making sure to choose the physical drive rather than a volume.
Step 3. Click the Partition button at the top of the window.
![]()
Step 4. Choose how many partitions you want to create.
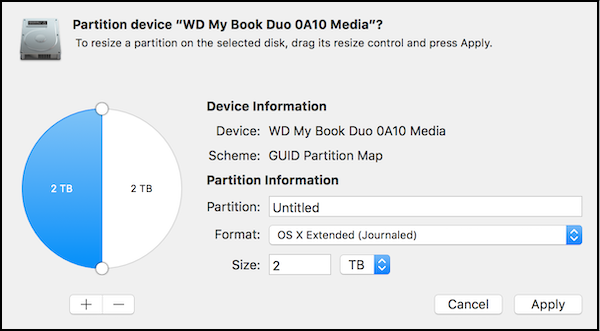
Step 5. Assign a name, select a compatible format, and set the size for each partition.
Step 6. Confirm your settings and wait for the partition process to complete.
Once finished, all partitions will appear in Finder and can be used immediately.
🌟Tips for using G-Drive on both Mac and Windows
Using a G-Drive on both Mac and Windows works best when you choose the right setup in advance. Since the two systems use different file formats, planning ahead helps avoid access issues and protects your files when switching between computers.
✔️ For easy compatibility, formatting the G-Drive as exFAT is a practical option. This format works on both macOS and Windows, supports large files, and does not require extra software. It is especially suitable for storing videos, photos, and other large media files.
✔️ For advanced Windows use, formatting the G-Drive as NTFS is often the better choice. This format offers stronger stability, better performance with large numbers of files, and supports advanced features like change file permissions and system-level security. It is especially suitable when the drive is mainly used on Windows PCs or in professional workflows that rely on Windows-based software.
✔️ If your G-Drive is already formatted as NTFS and you want to keep your data, installing an NTFS for Mac tool is a better choice than reformatting. This allows your Mac to write to the drive while keeping all existing files intact.
No matter which system you use, always eject the G-Drive properly before unplugging it. Safe ejection helps prevent data damage and ensures the drive works normally on your next connection.
Conclusion
How to use G-Drive external hard drive on Mac mainly depends on setting it up correctly and choosing the right access method. By connecting the drive properly, confirming the file format, enabling full read and write access when needed with PartitionAssistant NTFS for Mac, and safely ejecting the drive after use, you can manage, transfer, and protect your files smoothly while keeping your G-Drive working reliably on macOS.
FAQs
🗨️ How to use an external G-DRIVE?
Connect the G-DRIVE to your computer using the supplied cable and wait for it to mount. Once it appears on the desktop or in Finder, open the drive and start copying, moving, or backing up files as needed.
🗨️ Is G-DRIVE compatible with Mac?
Yes, G-DRIVE is fully compatible with Mac. Many models are pre-formatted for macOS, and even Windows-formatted drives can be used on Mac with the correct file format or additional software.
🗨️ How do I get my external hard drive to work on my Mac?
First, check the cable and port to ensure a proper connection. Then confirm the drive appears in Finder or Disk Utility. If the drive is read-only, check its file format and enable write access or reformat it if necessary.
🗨️ How to use the G drive?
After connecting the G-DRIVE, open it from Finder and manage files just like a regular folder. You can drag and drop files, use it for backups, or organize data into folders and partitions.
🗨️ Why isn't my G drive showing up?
The G-DRIVE may not appear due to a loose or damaged cable, insufficient power, an unsupported file system, or drive errors. Checking Disk Utility, trying a different cable or port, and confirming the drive format usually helps identify the issue.

