[3+1 Solutions] How to Fix LaCie is Read-Only or Not Showing Up on Mac?
This article explores common reasons why LaCie external drives show up as read-only on Mac. It provides simple solutions for fixing drive visibility and explains how to share files across different platforms.
By Irene / Updated on January 16, 2026
In a typical creative workflow, you might connect a LaCie d2 or Rugged drive, previously used on a Windows machine to your MacBook. The drive icon appears on the desktop, and you can open folders and preview files. However, the moment you attempt to drag a file onto the drive or right-click to create a "New Folder," the options are grayed out.
The primary reason a LaCie hard drive is read-only on Mac is that the drive is formatted with the NTFS file system, which is owned by Microsoft. While macOS (from High Sierra 10.13 through macOS 15 Sequoia) can parse NTFS metadata and file allocation tables to display your files, native write support is disabled by the Apple Kernel to prevent volume instability and Master File Table (MFT) corruption. But don't worry. This article will share detailed information to help fix LaCie read-only on Mac easily.

How to fix LaCie read-only on Mac?
Fix 1. Use free NTFS for Mac tool
If your LaCie drive is restricted to read-only access, the root cause is almost certainly the Microsoft NTFS formatting. While macOS is engineered to view these files, the operating system intentionally blocks write capabilities to maintain volume integrity. To resolve this without erasing your data or risking system instability through manual terminal hacks, the most effective professional approach is utilizing a free, safe, and handy utility like PartitionAssistant NTFS for Mac.
This tool acts as a seamless integration layer for the macOS Kernel. Once installed, it automatically mounts your LaCie drive with full read-write privileges, allowing you to manage files in Finder exactly as you would with a native Mac disk. You can instantly drag-and-drop, rename, and edit documents without the technical overhead of reformatting.
What makes this solution particularly handy is its "set and forget" design. It requires no complex command-line operations or recurring manual adjustments. Simply connect your drive, and the software ensures it is recognized as a writable volume immediately.
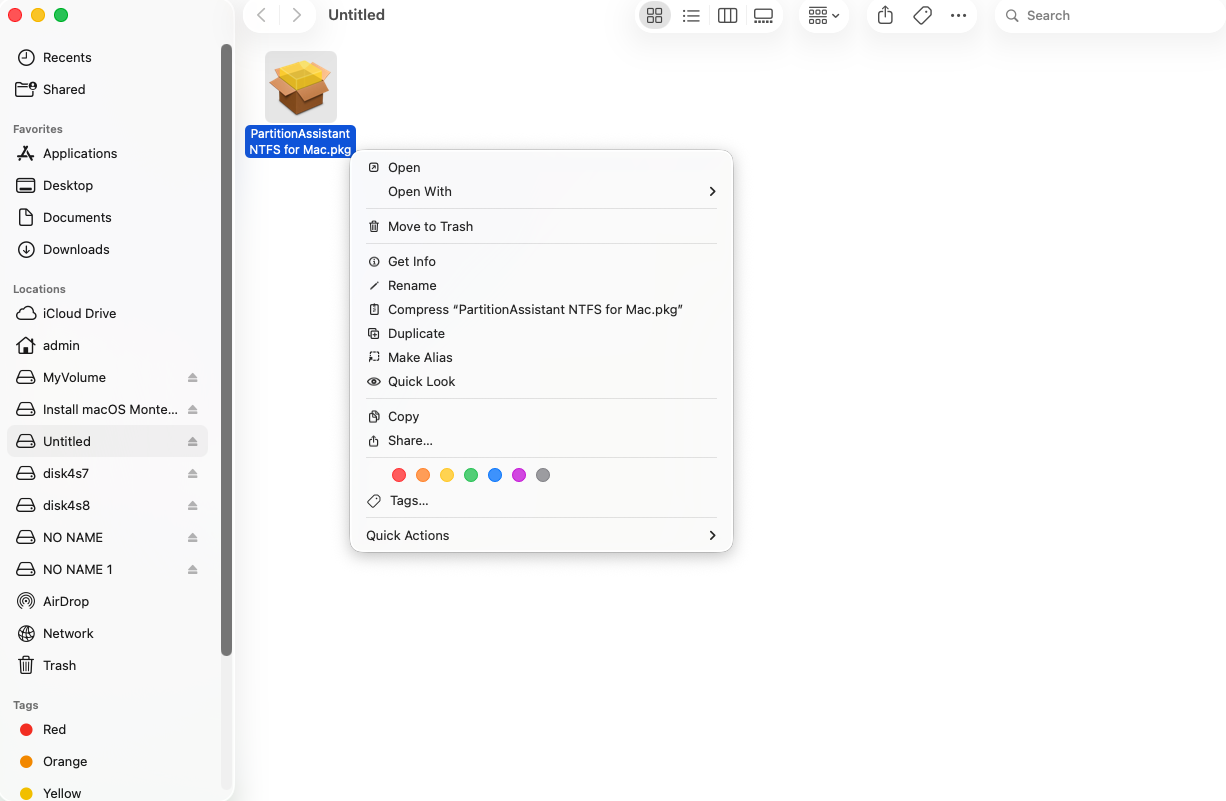
Step 1. Download the installer and follow the prompts to complete the installation on your Mac. Launch PartitionAssistant NTFS for Mac, then connect your LaCie hard drive. The software will automatically recognize the drive and show a list of all connected devices.
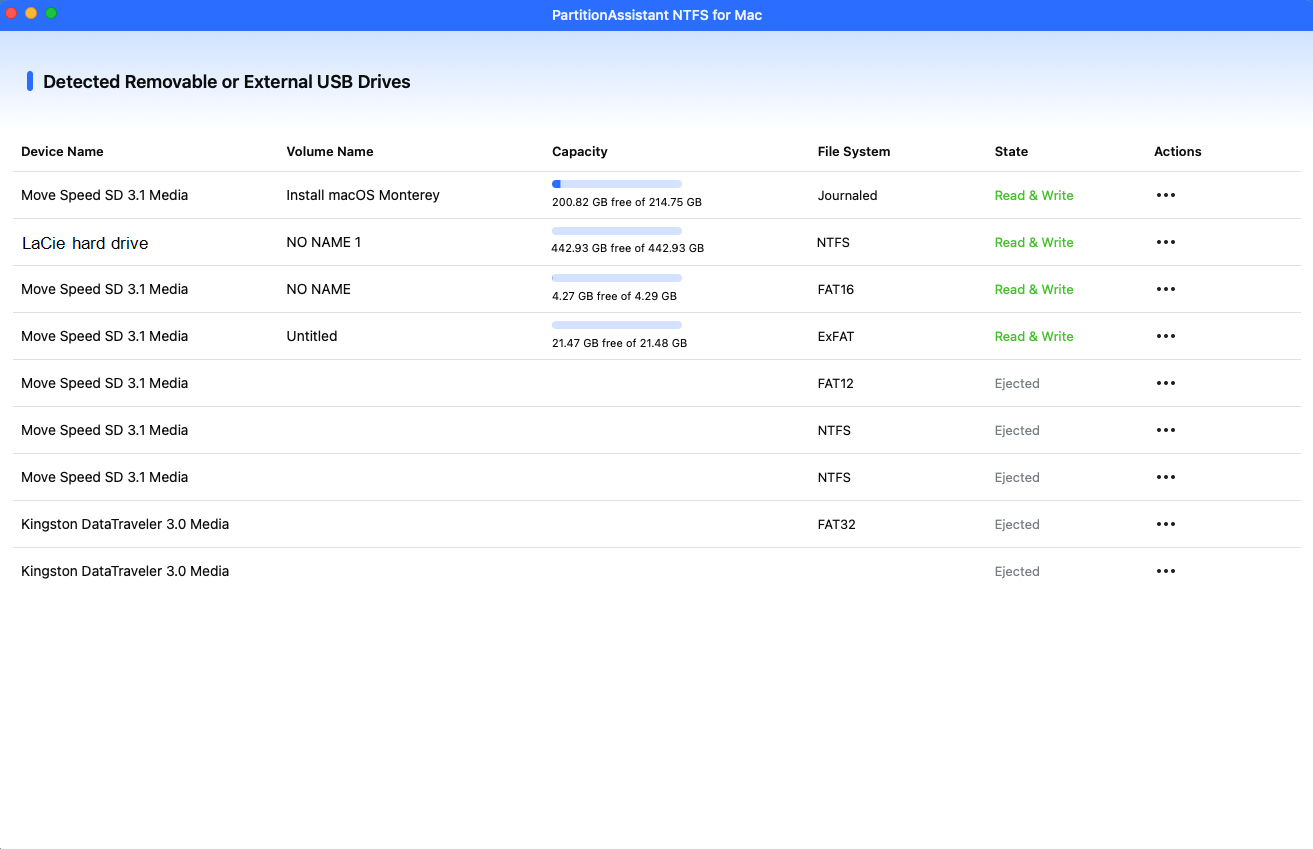
Step 2. Select the drive you want to operate and click "Open". You can also click Diskable Writable or Enable Writable to change the state to read and write.
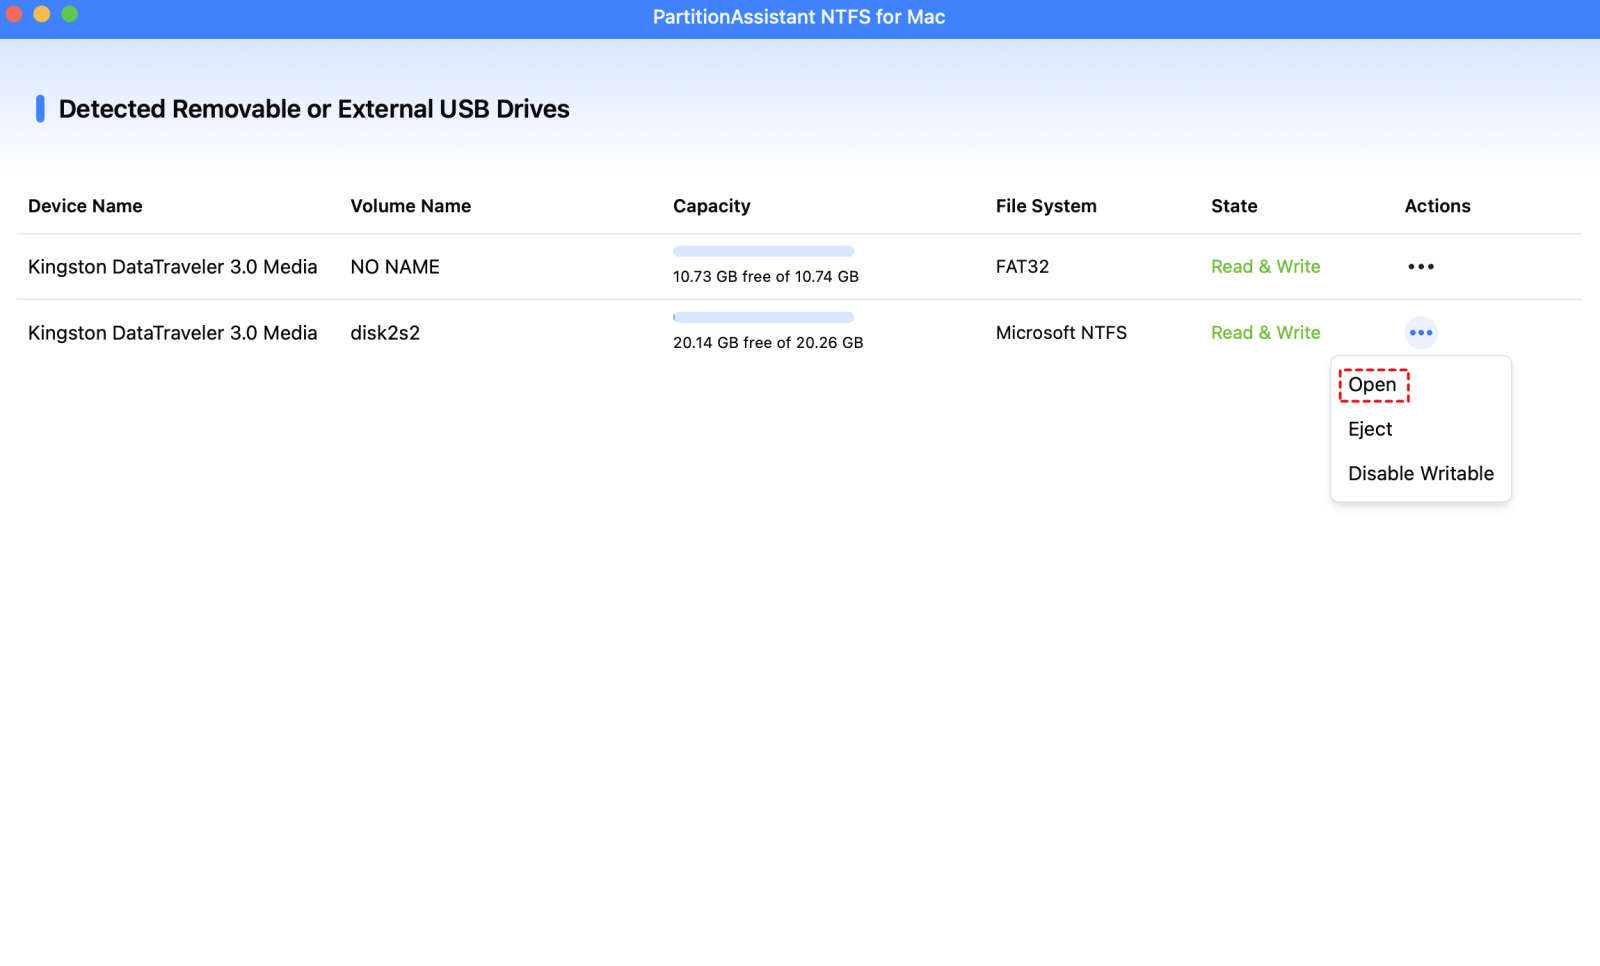
The read-only restriction on your LaCie external hard drive has been removed, and you can now copy, delete, and rename files on the NTFS drive freely.
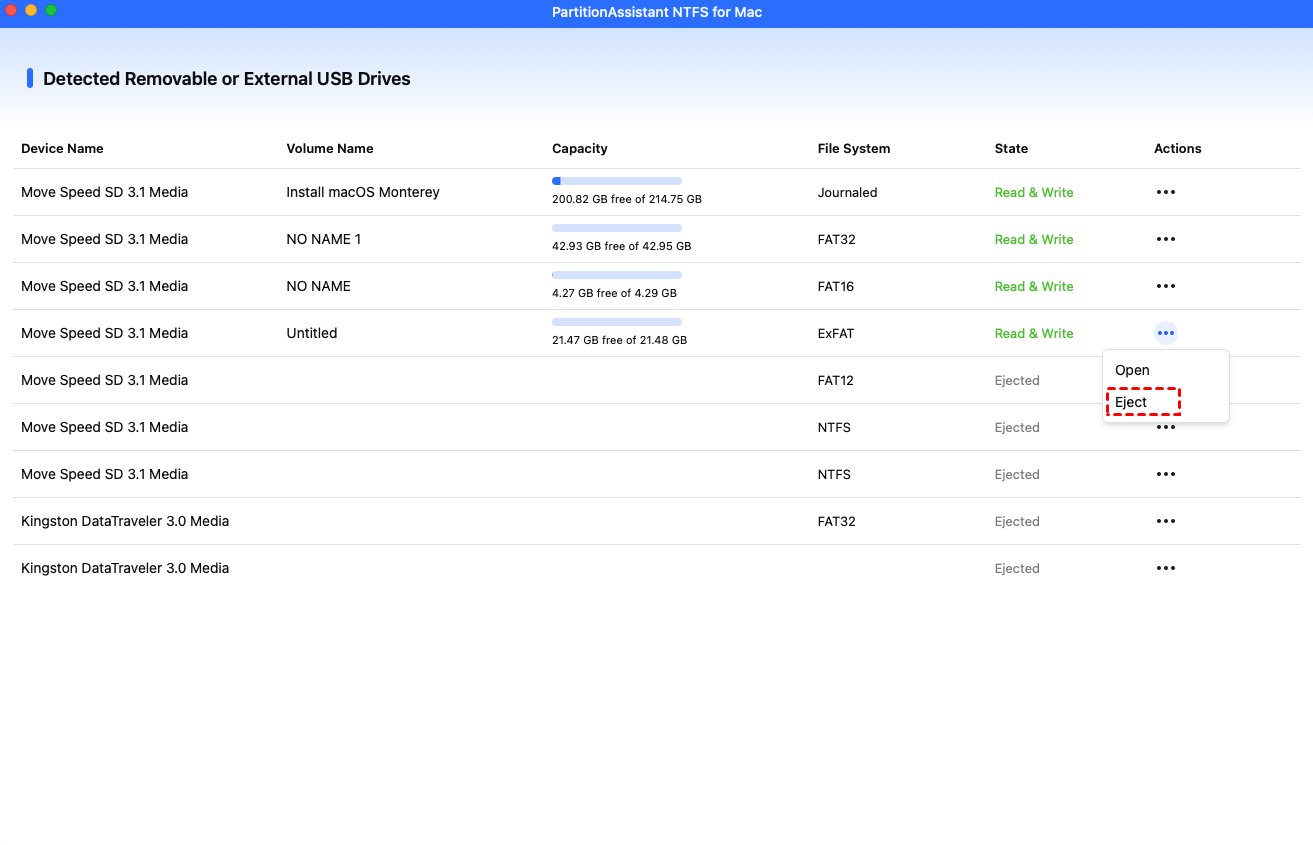
Step 3. After all operations are complete, please click "Eject" to disconnect the external hard drive from your Mac.
Fix 2. Change hard drive read-only permissions on Mac
For LaCie drives that appear read-only on your Mac, you can fix this by changing the drive’s permissions. Simply adjust the access settings in Finder or Disk Utility to allow read and write. Once updated, you’ll be able to copy, delete, and modify files on the drive without restrictions.
Step 1. Ensure the drive icon appears on your desktop or in Finder.
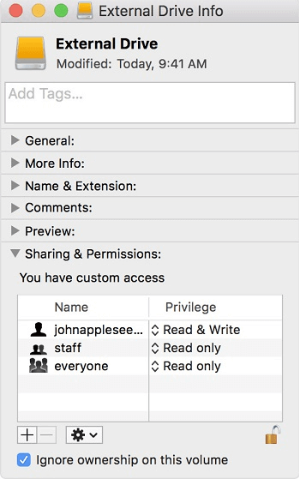
Step 2. Right-click (or Control-click) the drive icon and select Get Info (or press Command + I).
Step 3. Scroll to the bottom to find the Sharing & Permissions section. If the lock icon is closed, click it and enter your administrator password.
Step 4. Look for a checkbox labeled "Ignore ownership on this volume." Checking this box treats all files on the drive as owned by the current user, instantly granting you Read/Write access.
Fix 3. Use Terminal to change LaCie drive read-only state
When a LaCie external drive is read-only on your Mac, Terminal can help unlock it. By running commands, you can change the drive’s access settings, enabling full read and write functionality. This approach is quick.
Step 1. Open Terminal. For that, click on Go from the Finder menu. A drop-down will appear, choose Utilities and find the Terminal app.
Step 2. Type nano etc/fstab.
Step 3. Type LABEL=DRIVENAME none ntfs rw, auto,nobrowse. Make sure to change DRIVENAME with the drive name where you want to change permission settings.
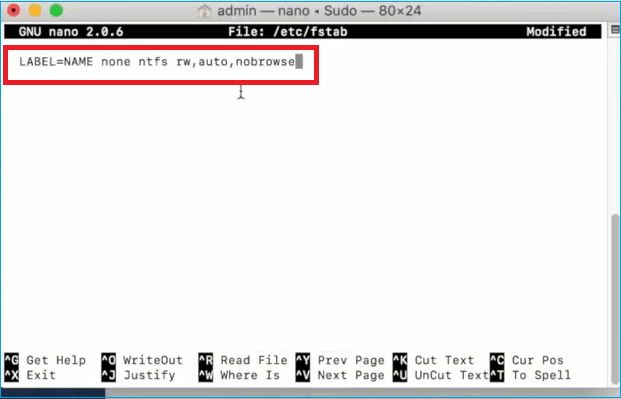
Step 4. Press Control and O keys to save the file. After that, press Control and X keys to close Nano.
Step 5. Disconnect the drive. Reconnect it again. Now check and see if the issue is resolved.
Bonus tip: How to fix LaCie external hard drive is not showing up on Mac?
If your LaCie drive is not showing up on your Mac, there are a few simple checks and settings you can try before assuming the drive is faulty.
Step 1. Make sure the drive is properly connected and powered. Try using a different USB-C or USB-A cable, as cables can fail internally without visible damage. If you are using a hub or dongle, connect the drive directly to your Mac’s port to ensure it gets enough power.
Step 2. Listen to the drive if it is a mechanical hard disk. A spinning sound means it has power and is attempting to work. Clicking noises may indicate a hardware problem, and silence could mean the drive isn’t receiving power.
Step 3. Check your Finder settings. Click the Finder icon in your Dock, then select Finder > Settings (or Preferences on older macOS). In the General tab, make sure "External disks" is checked under "Show these items on the desktop."
Step 4. Go to the Sidebar tab in Finder settings and confirm that "External disks" is checked under "Locations." This ensures the drive appears in Finder’s sidebar.

By following these steps, most visibility issues can be resolved, allowing your Mac to recognize and access the LaCie drive.
Conclusion
LaCie read-only on Mac issues are common when the drive is formatted with NTFS, but they can be fixed easily. Using a reliable NTFS for Mac tool like PartitionAssistant allows full read and write access without risking your data. You can also adjust drive permissions or use Terminal for advanced control if needed. By following these methods, your LaCie drive will work smoothly on your Mac, letting you manage files freely and keeping your workflow uninterrupted.
FAQs
🗨️ Why is my external hard drive read only on my Mac?
Most external hard drives, including LaCie, are formatted with the NTFS file system used by Windows. macOS can read these drives but cannot write to them by default. This is why your drive appears read-only. Other causes may include locked permissions or system settings that prevent writing.
🗨️ How do I change permissions on LaCie hard drive Mac?
To change permissions, right-click (or Control-click) the drive icon on your Mac and select Get Info. Scroll to Sharing & Permissions, click the lock to make changes, and ensure your user has Read & Write access. You can also check Ignore ownership on this volume to grant full access to all files.
🗨️ How to unlock a LaCie hard drive?
If your LaCie drive is read-only, you can unlock it using a professional NTFS for Mac tool like PartitionAssistant. This software enables full read and write access. For drives compatible with macOS, unlocking may simply involve changing permissions in the Get Info panel.
🗨️ Is LaCie compatible with Mac?
Yes, LaCie drives work with Mac. Most come preformatted with exFAT or HFS+, which are fully compatible with macOS. Windows-formatted NTFS drives can be read but need extra software for writing.
🗨️ Why is my Mac not detecting LaCie drives?
If your Mac does not detect a LaCie drive, check the physical connection, try a different USB cable, and connect directly instead of through a hub. Ensure the drive has power, and confirm Finder settings show external disks. If the drive is still not recognized, the drive may be faulty or require driver/software support.

