[6 Fixes] Mac Doesn’t Recognize External Hard Drives After Being Installed
Mac doesn’t recognize external hard drives after being installed? This post will explain the most common reasons for and offer six effective methods to help you get rid of this troublesome issue.
By Hedy / Updated on March 11, 2026
External hard drives are supposed to make life easier. Plug them in, and your files instantly become accessible. But sometimes things don’t go according to plan. You install or connect an external hard drive, yet your Mac refuses to recognize it. No icon appears on the desktop, nothing shows in Finder, and suddenly that reliable storage device feels like a mysterious black box.
This problem is surprisingly common among macOS users, especially after installing new software, system updates, or external drivers. In many cases, the drive is actually connected to the Mac, but the system fails to mount or display it properly. According to Mac troubleshooting resources, the drive may still appear in Disk Utility but remain unmounted, meaning macOS detects the hardware but doesn’t allow access to the data.
The good news? Most of the time, the issue is not permanent. Whether it’s a simple configuration mistake, a file system compatibility problem, or a temporary macOS glitch, there are several practical ways to fix it. Understanding the causes is the first step toward solving the problem.
This guide explores why a Mac doesn’t recognize external hard drives after installation and walks you through reliable solutions—from quick fixes to advanced troubleshooting methods. If your external drive suddenly disappears or refuses to show up, keep reading. The solution might be simpler than you think.
|
Fix 1. Check physical connections and hardware |
Loose cables, damaged USB connectors, or insufficient power can prevent the device from being recognized properly. |
|
Fix 2. Try another USB port or computer |
Sometimes the issue originates from a faulty USB port or incompatible interface. |
|
Fix 3. Show external drives in Finder |
Your Mac may actually detect the drive, but Finder settings might hide external disks. |
|
Fix 4. Manually mount the external drive in Disk Utility |
If the drive appears in Disk Utility but not in Finder, it may simply be unmounted. |
|
Fix 5. Repair the drive using First Aid |
File system corruption or disk errors can stop macOS from recognizing external drives correctly. |
|
Fix 6. Make external hard drives recognized on Mac |
If compatibility issues exist, adjusting file system support or installing proper drivers can help macOS recognize and access external hard drives normally again. |
Why Mac doesn’t recognize external hard drives after being installed?
When macOS fails to recognize an external hard drive, the symptoms can vary. Some issues are obvious, while others are subtle enough to confuse even experienced users.
One of the most common signs is that the external drive does not appear in Finder. You connect the drive, maybe the LED light turns on, but nothing shows up on the desktop or sidebar. It’s as if the device doesn’t exist.
Another scenario occurs when the drive appears in Disk Utility but is grayed out or unmounted. This indicates that the Mac detects the hardware but cannot access the data partition. According to troubleshooting guides, manually mounting the drive through Disk Utility often resolves this situation.
Sometimes the drive appears but is read-only. You can view files but cannot copy new ones onto the disk. This commonly happens when the drive uses NTFS, a Windows-based file system.
Below are the most common reasons why this happens.
▶ Improper physical connection: One of the simplest reasons is a loose or faulty connection. If the USB cable, adapter, or port is damaged, the Mac may fail to detect the external drive. Sometimes the drive receives power but does not properly communicate with the system. Trying another cable, port, or adapter often resolves this issue.
▶ Unsupported file system: Mac computers primarily support APFS, HFS+, FAT32, and exFAT. If the external hard drive is formatted using NTFS, which is designed for Windows, macOS may detect it but only allow read access. In some cases, older or corrupted NTFS partitions may prevent the drive from appearing correctly.
▶ Drive is not mounted: Even if macOS detects the hardware, the drive might not automatically mount. When this happens, the disk will not appear in Finder but may still be visible in Disk Utility. Manually mounting the disk can often solve the problem.
▶ Finder settings hide external drives: Sometimes the drive is actually recognized, but Finder is not set to display external disks. If the option to show external disks on the desktop or in Finder sidebar is disabled, the drive will appear as if it is missing.
▶ Corrupted disk or file system errors: If the drive was not safely ejected previously or experienced power interruption, its file system may become corrupted. macOS may refuse to mount a disk that contains errors until it is repaired using disk repair tools such as First Aid in Disk Utility.
How to fix Mac doesn’t recognize external hard drives after being installed
If your Mac fails to detect an external hard drive after connecting it, several hardware or system issues may be responsible. The following solutions help you diagnose and fix the problem effectively.
Fix 1. Check physical connections and hardware
A loose cable, damaged USB adapter, or insufficient power supply can prevent your Mac from detecting an external hard drive. Before attempting advanced solutions, confirm that all physical connections are secure and functioning properly.
Step 1. Disconnect the external hard drive from your Mac.
Step 2. Carefully inspect the USB cable and connectors for visible damage or wear.
Step 3. Reconnect the cable firmly to both the external drive and your Mac.
Step 4. Ensure the external hard drive receives power (listen for spinning sounds or LED indicators).
Step 5. If the drive uses an external power adapter, verify that it is properly plugged in.
Step 6. Try using a different compatible cable if available.
Step 7. Restart your Mac and reconnect the external drive.
If the drive appears after reconnecting, the issue was likely related to a loose or faulty connection.
Fix 2. Try another USB port or computer
Sometimes the problem lies with a malfunctioning USB port rather than the external hard drive itself. Testing different ports or another computer can help determine whether the issue is caused by your Mac’s hardware or the drive.
Step 1. Safely disconnect the external hard drive from your Mac. Plug the drive into another available USB port on the same Mac.
Step 2. Wait a few seconds to see if the drive appears on the desktop or in Finder.
Step 3. If it still does not appear, connect the drive to another Mac or Windows computer. Check whether the system recognizes the drive.
Step 4. If the drive works on another computer, your Mac’s USB port may be faulty. Consider using a USB hub or adapter if ports appear damaged.
This quick test helps isolate whether the problem is with the external drive or your computer.
Fix 3. Show external drives in Finder
macOS allows users to control which devices appear in Finder. If external disks are disabled in Finder settings, the drive may be connected and working but simply hidden from view.
Step 1. Open Finder from the Dock. Click Finder in the menu bar at the top of the screen.
Step 2. Select Settings (or Preferences on older macOS versions). Navigate to the General tab.
Step 3. Under “Show these items on the desktop”, check External disks. Next, open the Sidebar tab.
Step 4. Enable External disks under the Locations section. Once enabled, your external hard drive should appear on the desktop or in the Finder sidebar when connected.
Fix 4. Manually mount the external drive in Disk Utility
In some cases, macOS detects the external drive but does not automatically mount it. When this happens, the drive will not appear in Finder, but it may still be visible within Disk Utility.
Step 1. Open Disk Utility using Spotlight Search (press Command + Space and type “Disk Utility”).
Step 2. In the left sidebar, locate your external hard drive. Click the drive name to highlight it.
Step 3. Check if the drive status shows Not Mounted. Click the Mount button at the top of the window.

Step 3. Wait a few seconds while macOS attempts to mount the disk. After mounting successfully, check Finder to see if the drive appears.
If the drive mounts successfully, you should now be able to access its files normally.
Fix 5. Repair the drive using First Aid
Disk errors or corrupted file systems may prevent macOS from properly recognizing an external hard drive. The built-in First Aid feature in Disk Utility can scan and repair minor disk errors automatically.
Step 1. Open Disk Utility on your Mac. Locate the external hard drive in the sidebar.
Step 2. Select the external drive or its volume. Click the First Aid button in the top toolbar.
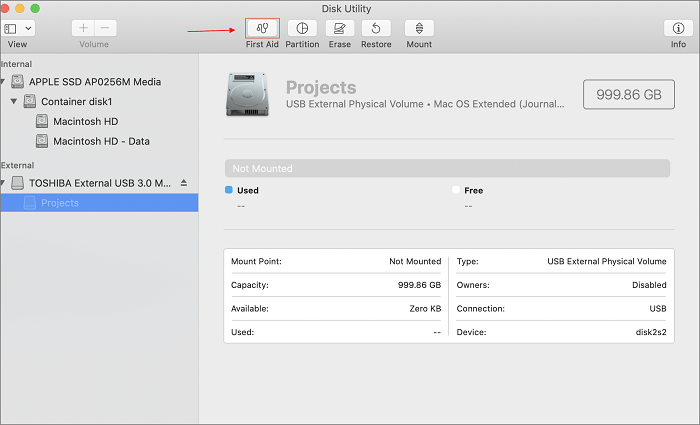
Step 3. Choose Run when prompted. Wait while macOS checks the disk structure and repairs errors.
Step 4. Once the process finishes, reconnect the drive and verify if it appears in Finder.
This repair process can resolve many file system issues that prevent drives from mounting properly.
Fix 6. Make external hard drives recognized on Mac
If the drive is still not recognized, the problem may involve incompatible file systems or disk configuration issues. Adjusting the drive format or enabling proper support can help ensure macOS recognizes the external hard drive.
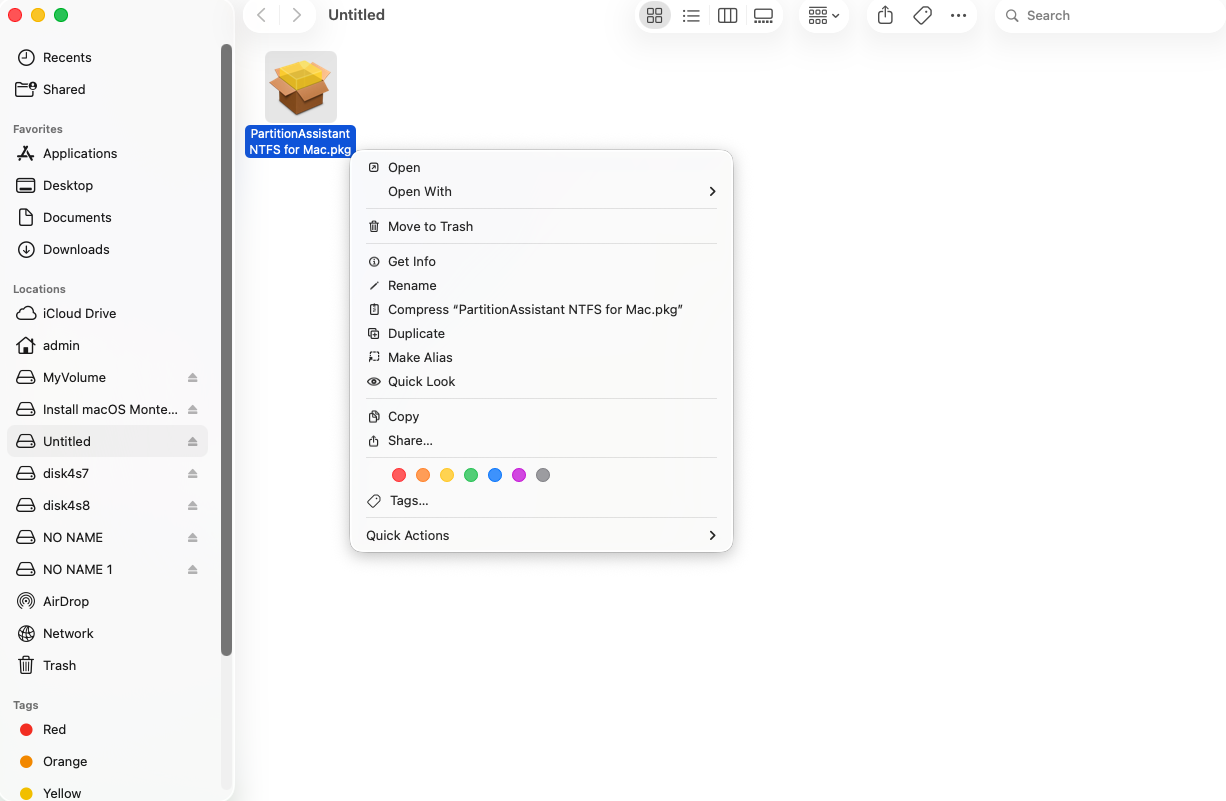
PartitionAssistant NTFS for Mac is a practical tool designed to help Mac users access and manage Windows-formatted drives. If your external hard drive is not recognized or cannot be written on Mac, this software can help mount the drive properly and enable full read-write access without reformatting.
✍ Key features of PartitionAssistant NTFS for Mac
✔️ Enable full NTFS read-write access: The software allows Mac users to read, write, delete, rename, and move files on NTFS partitions without restrictions. This means you can transfer files between Windows and Mac systems easily.
✔️ Automatically mount external drives: When an NTFS external hard drive is connected, the program can automatically detect and mount the disk, making it appear normally in Finder.
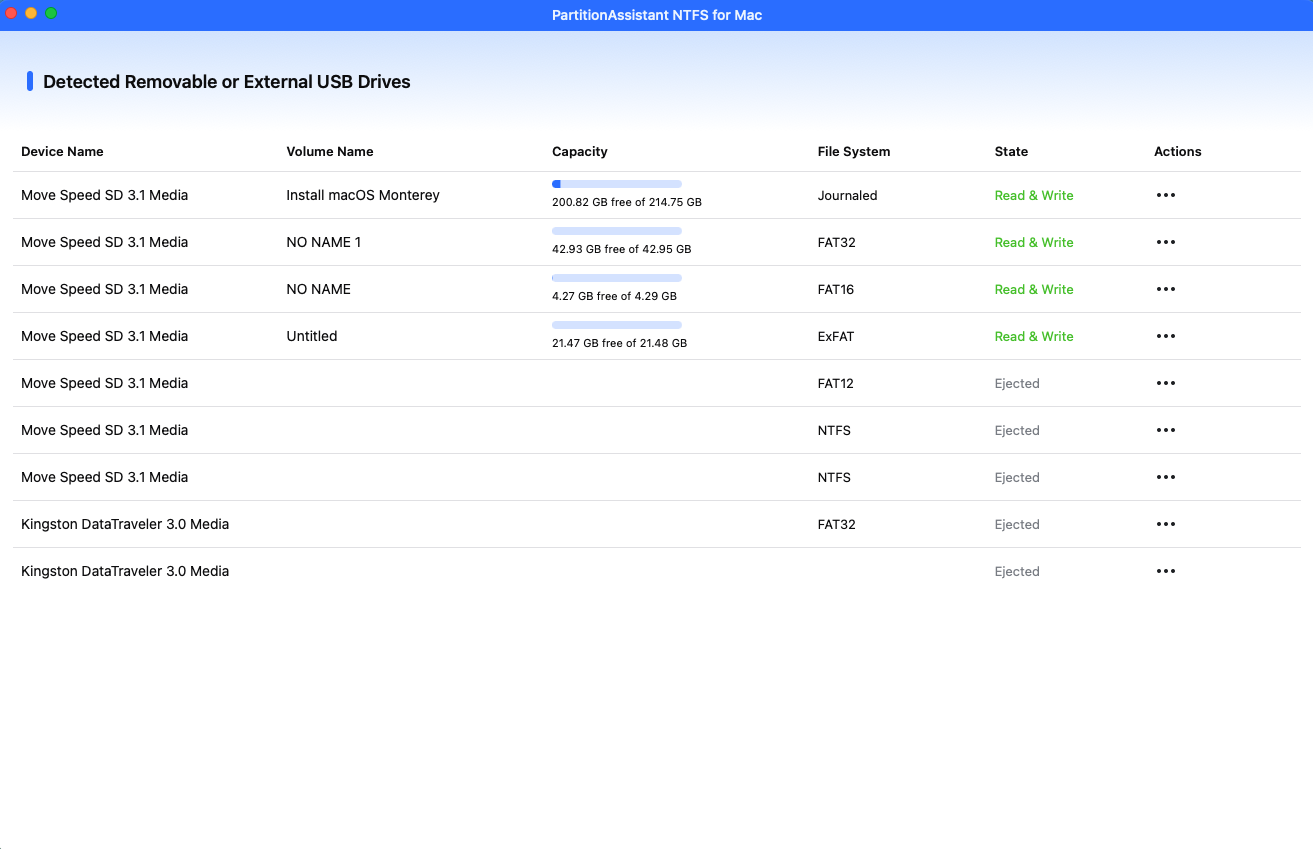
✔️ Support for multiple storage devices: PartitionAssistant NTFS for Mac works with many types of devices, includingexternal hard drives, USB flash drives, SSDs, Thunderbolt drives, SD, and CF cards. This makes it a versatile solution for different storage scenarios.
✔️ Compatibility with modern Mac systems: The tool supports macOS 10 and later versions and works with both Intel-based Macs and Apple Silicon chips.
With this tool installed, Mac users can easily access external hard drives, USB drives, SSDs, and other storage devices formatted with NTFS just like a native Mac disk.
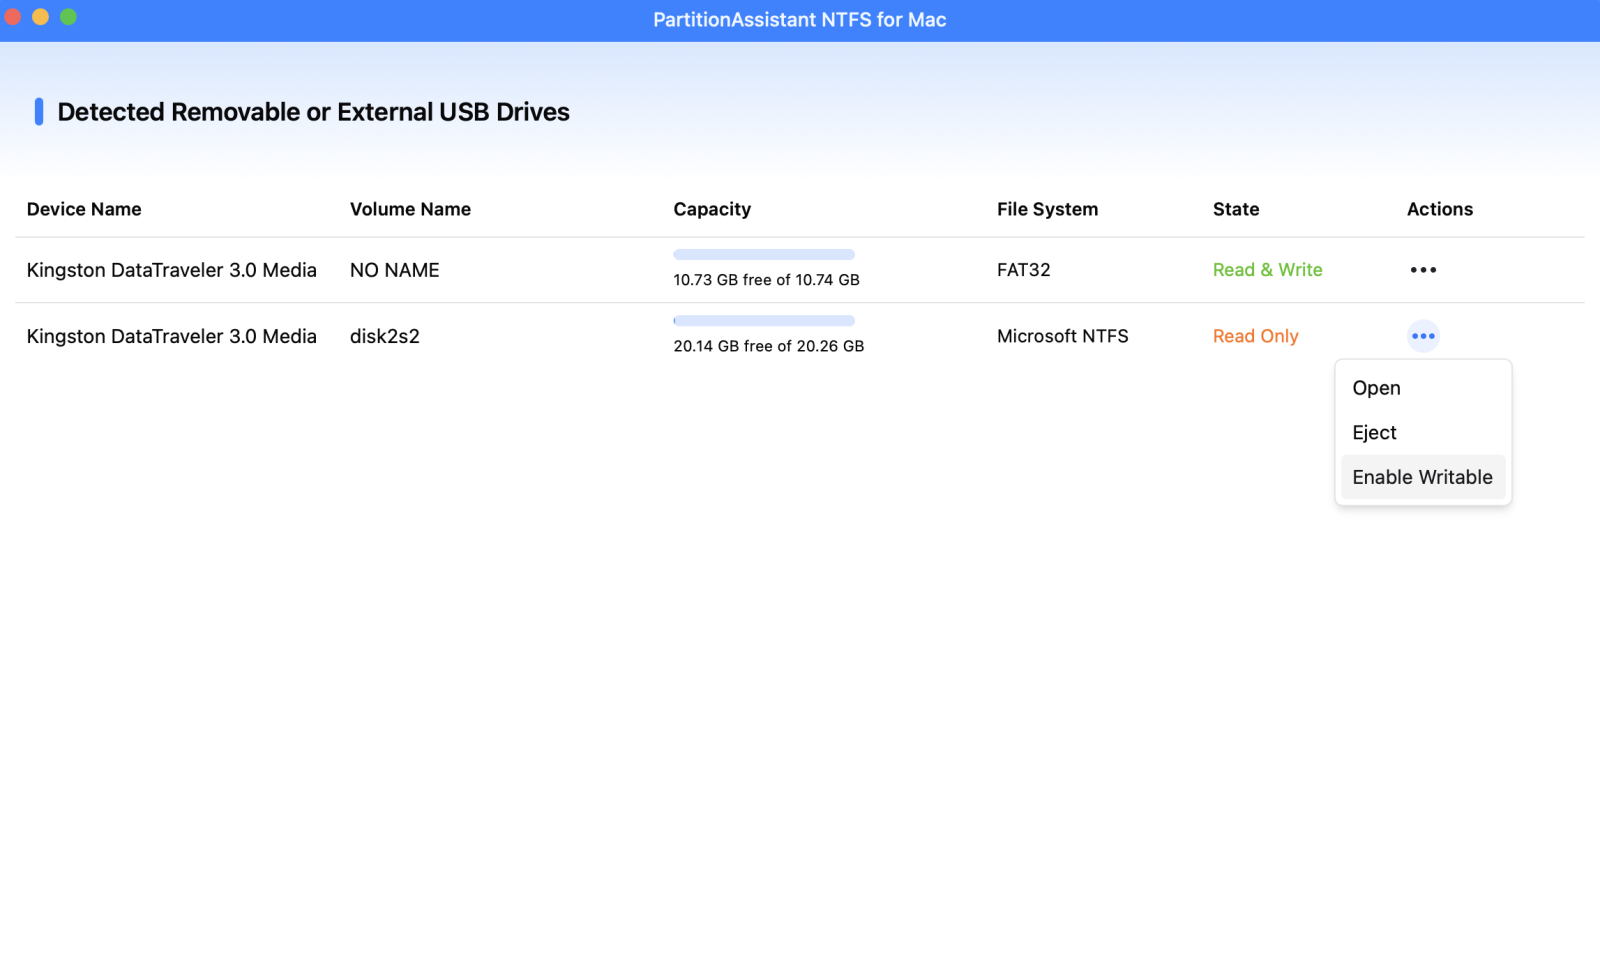
Step 1. Open PartitionAssistant NTFS for Mac and insert yourexternal hard drive. You can click "Enable Writable" to adjust the state to Read & Write. Then the program will automatically detect, mount, and display all connected external and removable drives.
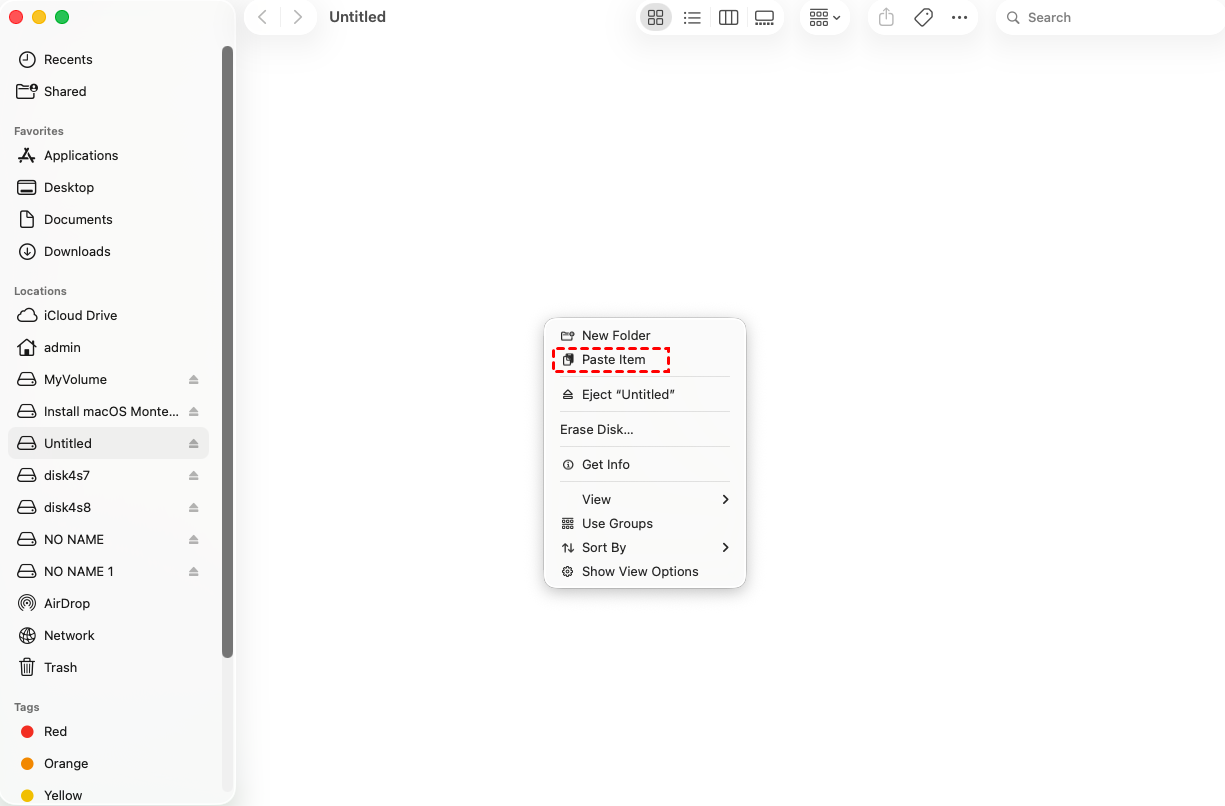
Step 2. Select the drive you want to operate and click "Open". Now you can write files on your Mac and click "Paste Item" to copy the files to your drive.
Step 3. You can also copy, delete, and rename files on the external hard drive.
Step 4. Once all tasks are finished, click Eject to safely remove the external hard drive from your Mac.
FAQs
1. Why does my external hard drive not appear in Finder but shows in Disk Utility?
This usually means the drive is connected but not mounted. Opening Disk Utility and clicking the Mount button typically resolves the issue.
2. Can a Mac read NTFS external hard drives?
Yes, macOS can read NTFS drives but cannot write to them by default. Additional software or reformatting to exFAT may be required.
3. How do I know if my external hard drive is damaged?
Signs of hardware damage include clicking noises, failure to appear in Disk Utility, or extremely slow detection times.
4. Does updating macOS help fix external drive detection issues?
Yes. System updates often include bug fixes and improved hardware compatibility that resolve USB and storage recognition problems.
5. What is the best format for an external drive used on both Mac and Windows?
exFAT is generally the best choice because it works on both operating systems and supports large file sizes.
Conclusion
Mac may fail to recognize an external hard drive for several reasons, including loose connections, hidden Finder settings, unmounted disks, unsupported file systems like NTFS, or disk corruption. By checking hardware connections, adjusting Finder settings, mounting the drive in Disk Utility, repairing errors with First Aid, or using tools like PartitionAssistant NTFS for Mac, you can usually restore access and make the external drive work normally on your Mac.

