What Is Local Users and Groups? How to Manage Them in Windows PCs?
This article explains local users and groups in Windows and shows easy ways to view, edit, and manage them. It also introduces useful tools for handling local accounts on Windows 11 and 10.
By Irene / Updated on November 20, 2025
What is local users and groups?
Local Users and Groups is a built-in Windows management feature that helps administrators create, manage, and secure user and group accounts stored on a single computer. These accounts exist only on the local machine, so they cannot be transferred or used to sign in to other computers. This tool is available through the Local Users and Groups MMC snap-in, which displays all default and custom user accounts and groups. It plays an important role in controlling access, assigning permissions, and organizing users for better security.
What are Local Users?
Local user accounts are authenticated by the Windows operating system through a username and password. Each account has its own profile, settings, and access rights. The default accounts include the Administrator account, which has full control and should be protected with a strong password, and the Guest account, which provides limited access. Both are disabled by default. Administrators can create additional accounts and assign rights and permissions depending on the user’s tasks. In Windows Server systems, local user accounts are also considered security principals and are assigned unique security identifiers (SIDs).
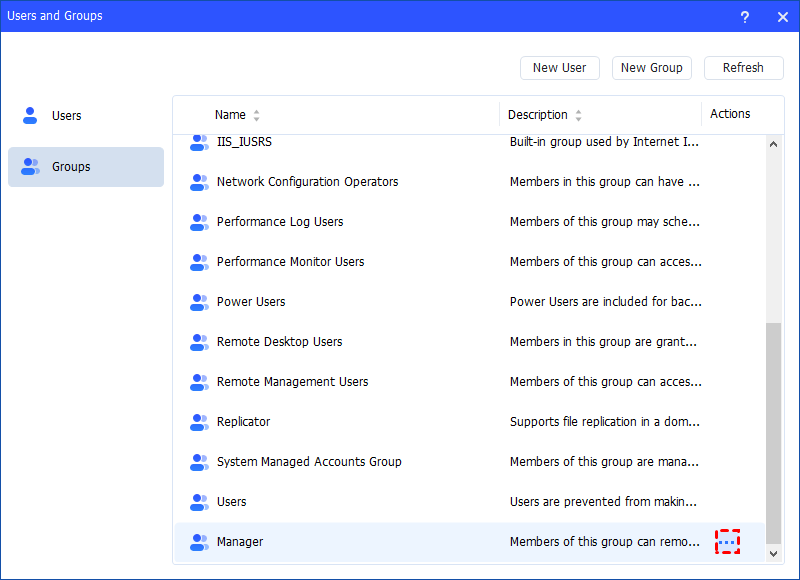
What are Local Groups?
Local groups are collections of user accounts that share the same permissions. They make management easier by allowing administrators to assign rights to a group instead of to individual users. A local group can include local users, domain users, computer accounts, and more. Groups are commonly used to manage file access, system rights, and administrative tasks. A single user can belong to multiple groups.
Together, Local Users and Groups offer a straightforward way to manage authentication, permissions, and resource access on a standalone Windows computer.
How to edit local users and groups in Windows PCs?
Managing local users and groups can be difficult for many people because Windows 10 Home does not include the Local Users and Groups tool, and since beginners are often not familiar with command-line operations. AOMEI Partition Assistant solves these issues by offering a simple, visual way to manage accounts on any Windows edition. Its “Users and Groups” feature lets you create, edit, or delete accounts through a clear interface instead of using lusrmgr.msc.
Many users still rely on tools like Computer Management or command-line utilities. However, these methods involve multiple steps and may cause errors if a command is mistyped. AOMEI Partition Assistant makes things easier by providing an intuitive interface where you can set permissions and control access with just a few clicks.
The software also includes system-optimization tools, so it is helpful for both IT staff and everyday users. It provides a faster, safer, and more intuitive way to keep Windows PCs secure and organized. Overall, whether you manage one computer or several, AOMEI Partition Assistant offers a smooth and reliable alternative to complex or limited built-in tools.
For Windows Server user,s please choose the AOMEI Partition Assistant Server edition.
The Best Windows Disk Partition Manager and PC Optimizer
Option 1. Create Local Groups in Windows Home
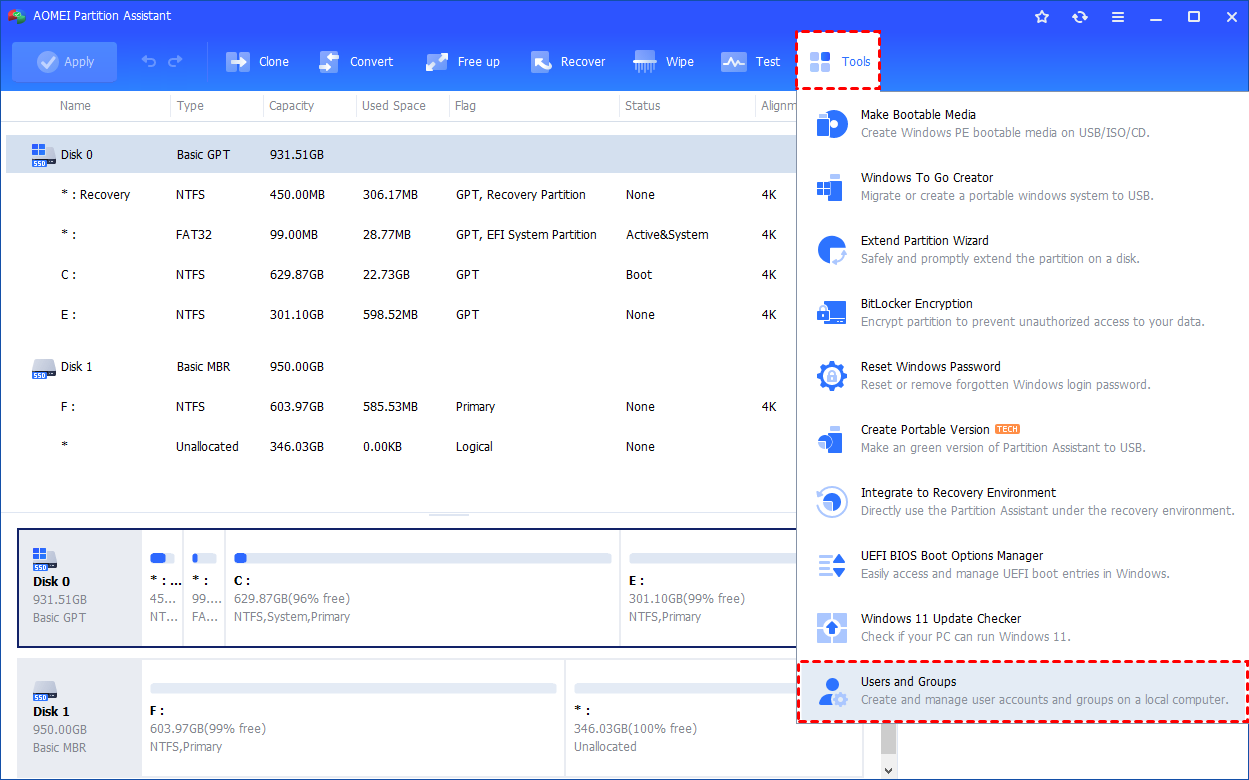
Step 1. Install and launch AOMEI Partition Assistant. Click the "Tools" main tab and select "Users and Groups".
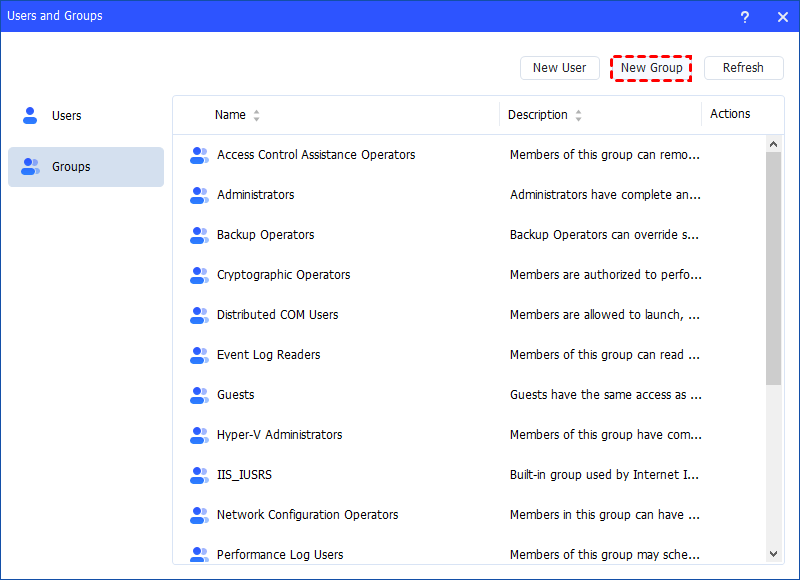
Step 2. Click the "Groups" tab and then click the "New Group" button to create a new group. You can also click the "Refresh" button to refresh the group list.
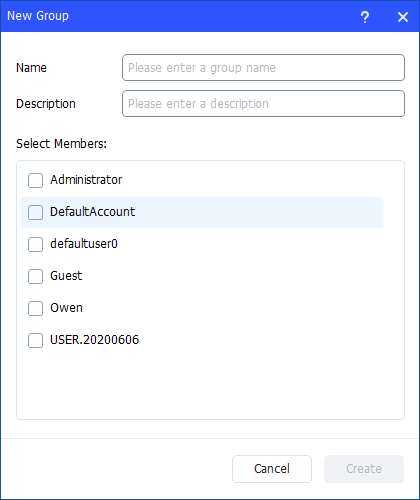
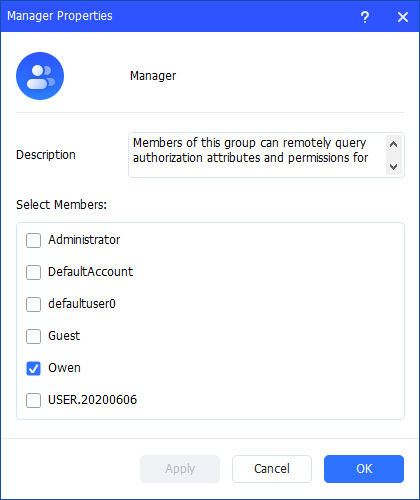
Step 3. Then, type the name and description for the new group. And, you can select user accounts as members of the group.
Notes:
- To perform this procedure, you must provide credentials for the Administrator account on the local computer (if you are prompted) or you must be a member of the Administrators group on the local computer.
- A local group name cannot be identical to any other group name or user name on the local computer that is being administered. The local group name can contain up to 256 uppercase characters or lowercase characters, except for the following: " / \ [ ] : ; | = , + * ? < > @
- A group name cannot consist solely of periods (.) or spaces.
Step 4. After all is set, click "Create" to create the new group.

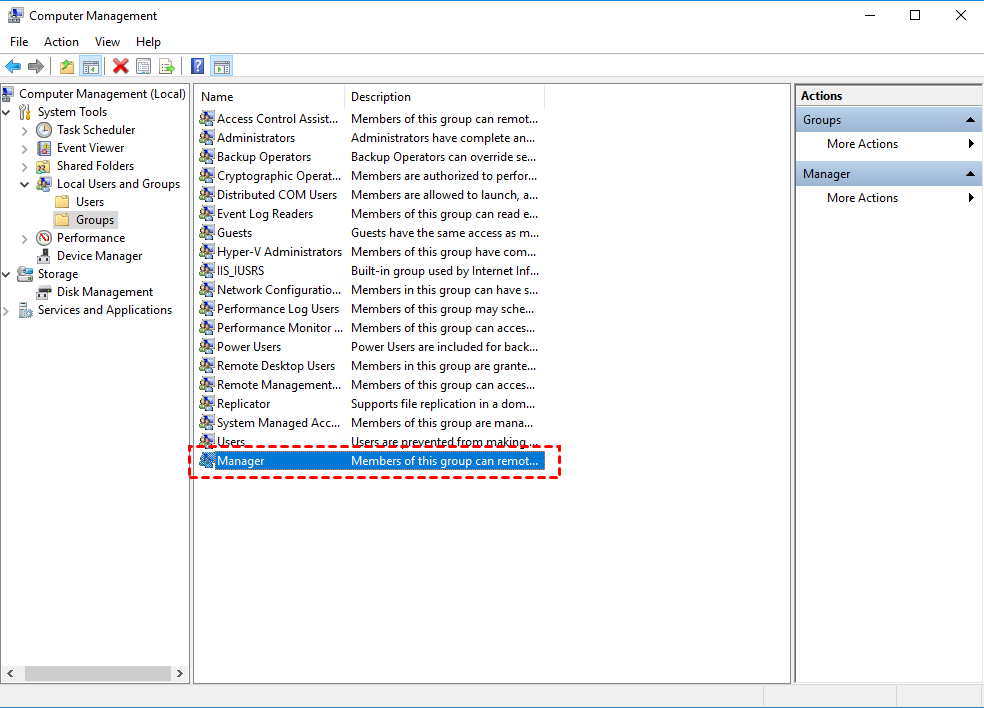
Finally, you can see the group is created successfully in Windows Local Users and Groups. And, you can also manage the new group.
Option 2. Easily Manage Local Groups
Step 1. Under the "Groups" tab, you can also manage your local groups. Find the group you want to manage and click the three-point button for management.
Step 2. You can manage members of the group, rename, delete, and edit the properties of the group.
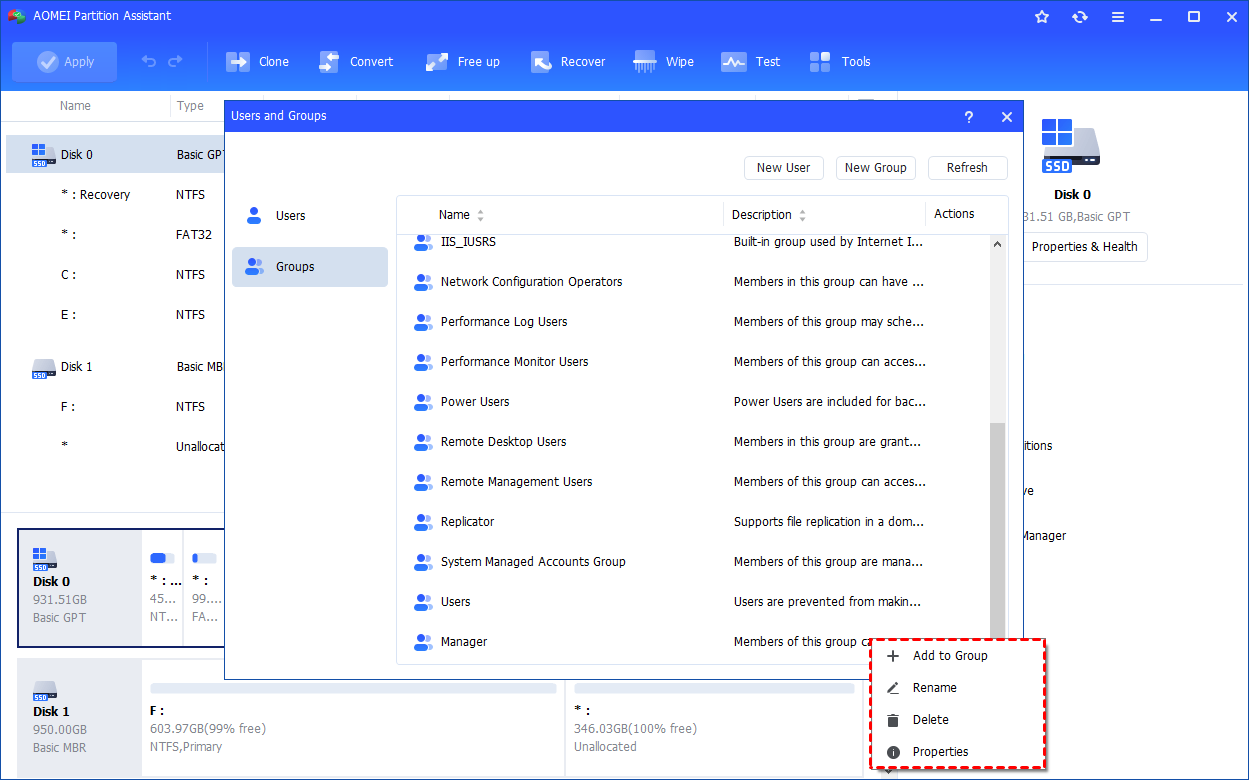
Option 3. How to Add to Group
Click the "Add to Group" option to change the group description and add/remove user account(s) to the group. Click "Apply"or "OK" to apply the change.
Note: All the rights and permissions that are assigned to a group are assigned to all members of that group.
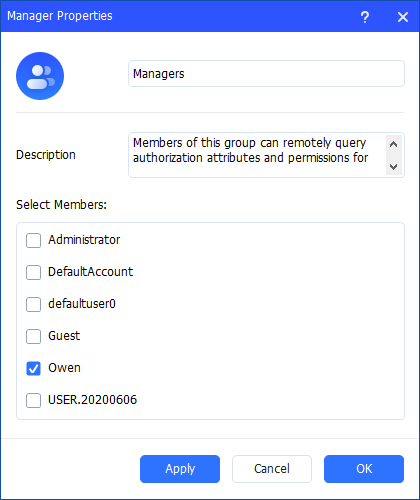
Option 4. How to Rename a Group
Click the "Rename" option to change the name of the group, modify the description, and add/remove user account(s) to the group as well. Click "Apply"or "OK" to apply the change.
Option 5. How to Delete Group
Click the "Delete" option to delete the unnecessary group. You will get a pop-up window saying that deleting the group will delete its identifier. Click "Yes" if you confirm, and then the account will be deleted directly.
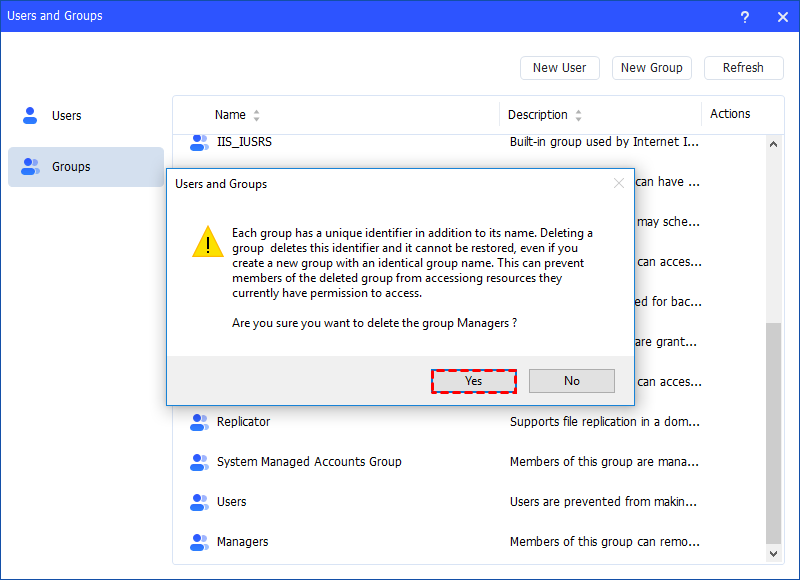
Notes:
-
Some default built-in groups, for example, Administrator, Users, Guests, and so on, cannot be deleted.
-
Deleting a local group removes only the group. It does not delete the user accounts, computer accounts, or group accounts that were members of that group.
-
A deleted group cannot be recovered, so please be cautious before deleting a group.
Properties
Click the "Properties" option to check the group properties. You can change the description of the group and add/remove user account(s) to the group. Click "Apply" or "OK" to apply the change.

Bonus tip: How to manage Windows local users and groups with CMD?
If you are familiar with Command Prompt, here is a clear and structured explanation of how to run commands to manage Local Users and Groups in Windows:
Part 1. Creating a new User via Run Command
Creating a new user through the Run command is a fast alternative to using graphical tools. It allows administrators to add accounts instantly with just a few typed commands.
Step 1. Press Windows + R on your keyboard to open the Run dialog.
Step 2. Type cmd and press Ctrl + Shift + Enter to launch Command Prompt as Administrator.
Step 3. In the Command Prompt window, type the following command and press Enter:
net user Username Password /add
(Replace Username with the desired account name and replace Password with a secure password.)
Step 4. Once executed, the new user account will be created successfully.
Step 5. You can confirm by typing: net user
Part 2. Managing Groups with Run Command
Managing groups from the Run command helps administrators control permissions and assign users to specific groups efficiently. This method is especially useful in multi-user environments.
Step 1. Press Windows + R to open the Run dialog.
Step 2. Type cmd and press Ctrl + Shift + Enter to run as administrator.
Step 3. To create a new group, type:
net localgroup GroupName /add
(Replace GroupName with your chosen group name.)
Step 4. To add a user to a group, type:
net localgroup GroupName Username /add
(Replace GroupName with the group name and Username with the user you want to add.)
Step 5. To remove a user from a group, type:
net localgroup GroupName Username /delete
Step 6. To view all groups on the system, type:
net localgroup
Conclusion
This article explains what is local users and groups. Managing local users and groups can keep a Windows PC secure and organized. Traditional tools work, but they can be limited or difficult for some users. AOMEI Partition Assistant provides an easier and more flexible way to create, edit, and manage accounts on any Windows edition. With its intuitive interface, it helps you control permissions, improve efficiency, and keep your system running smoothly. Whether you manage one computer or many, this tool offers a reliable and convenient solution for everyday user and group management. If you want to extend drive space, you can also use it to allocate free space to the full drive, move installed apps to another drive, or deeply clean your PC. This can also help to fix boot issues like the blue screen of death with error code.
The Best Windows Disk Partition Manager and PC Optimizer

