How to Resize C Drive in Windows 7 without Losing Data Free?
This tutorial introduces how to resize C drive partition in Windows 7 using Disk Management, Command Prompt and free powerful tool to change partition size without losing data.
By Lucas / Updated on May 12, 2023
You need to resize partition in Windows 7
A partition is a division of a hard disk drive with each partition on a drive appearing as a different drive letter. Generally speaking, you may want to resize hard drive partition in Windows 7 in following situations.
-
System drive is too small. When you receive the prompting message: low disk space during computer use, it is time to resize Windows 7 partition. Because you cannot even open some sort of files or applications.
-
Data drive is too large. Another case is plenty of disk space has been divided into one data drive. It would be a mess if you store all data on that drive. Therefore, it is necessary to change partition size in Windows 7 and then create one more partition for different sorts of data.
-
Unreasonable partitioning on the disk. Most PCs were partitioned before the customers take it. Some of them have only one partition named C drive, and some of them have many partitions that are not quite helpful.
Anyway, no matter why you want to resize partition in Windows 7, it is important to figure out how to perform partition resizing. In total, this passage details three easy-to-follow methods.
Resize Windows 7 partition free with built-in tools
Windows offers two different utilities with graphical user interface and command user interface. One is Disk Management and the other is Command Prompt. Let’s get to know them one by one.
Resize Windows 7 partition in Disk Management
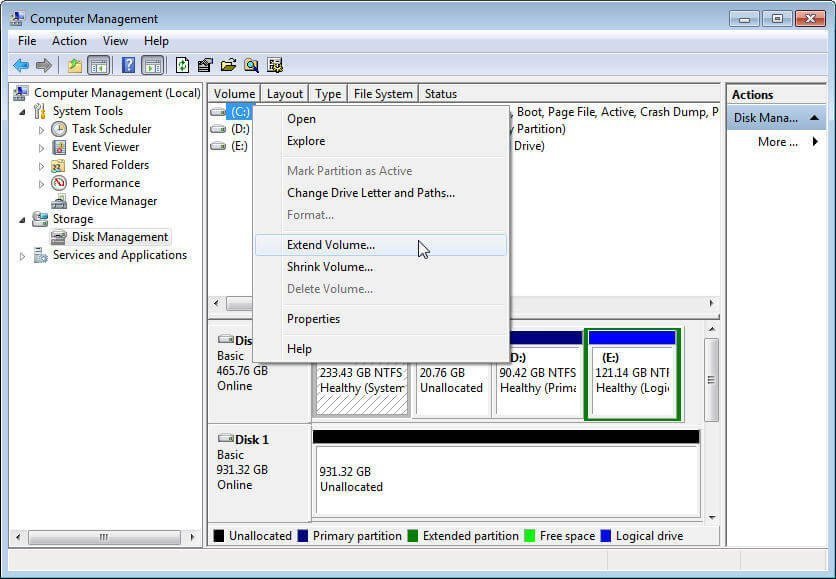
1. Press Windows key + R key to open Run. Type diskmgmt.msc and click OK. Run as administrator. Find Disk Management under Storage tab.
2. Right click the partition you want to resize. You can select “Shrink Volume” or “Extend Volume” from the given list. Take Extend Volume for example.
Tips:
-
To use “Extend Volume” function, there should be an unallocated space adjacent to the selected partition. Otherwise, you’ll get extend volume grayed out trouble.
-
If you choose “Shrink Volume”, you are likely to shrink only half of the selected partition due to hibernation files, etc. in most cases. To break the restriction, you can turn to shrink C drive beyond half.
3. Follow the wizard to complete the extending.
Resize C drive in Windows 7 via Command Prompt
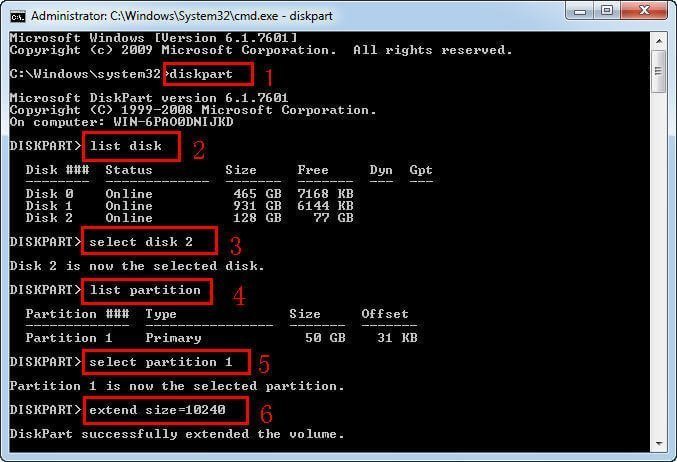
1. Open Run as instructed. Type cmd and run as administrator.
2. Type following commands in sequence.
-
list disk
-
select disk n (where n is where the target partition on)
-
list partition
-
select partition m (where m is the partition you want to resize)
-
extend size=10240 (it will extend by 10GB)
-
exit
To extend partition in Diskpart, make sure there is also unallocated space contiguous. Otherwise, the operation may not be able to complete.
Those two methods are quite simple, but their limits sometimes prevent our behavior. For instance, if there is no unallocated space on the disk, you need to delete existing partition next to the selected drive to generate unallocated space, and then perform partition extending. To extend C drive in Windows 7 without formatting, it is a wise move to choose another powerful tool.
Resize partition Windows 7 without losing data free
AOMEI Partition Assistant Standard is free partition manager that allows you to change partition size, even the BitLocker partition in Windows 7 effectively without data loss. If there is no unallocated space adjacent, you can use “Merge Partitions” to add it to target partition. You can also extend partition when the unallocated space is in front of the target partition, i.e. extend to both right side and left side. Free download to have a try.
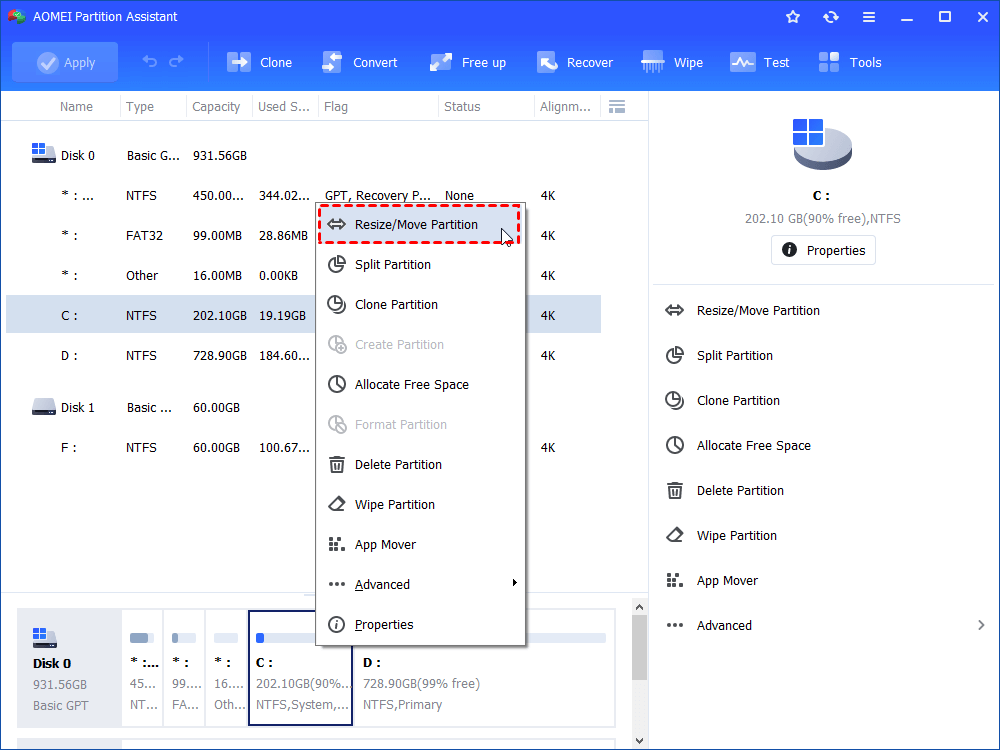
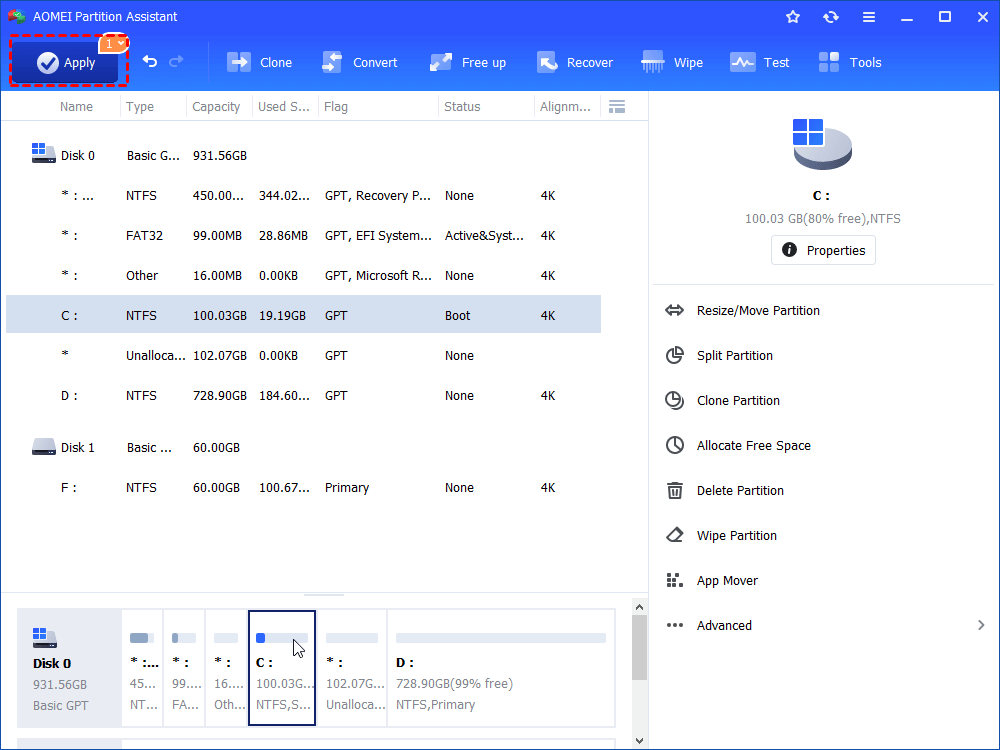
Firstly, right-click C to choose option "Resize/Move Partition".
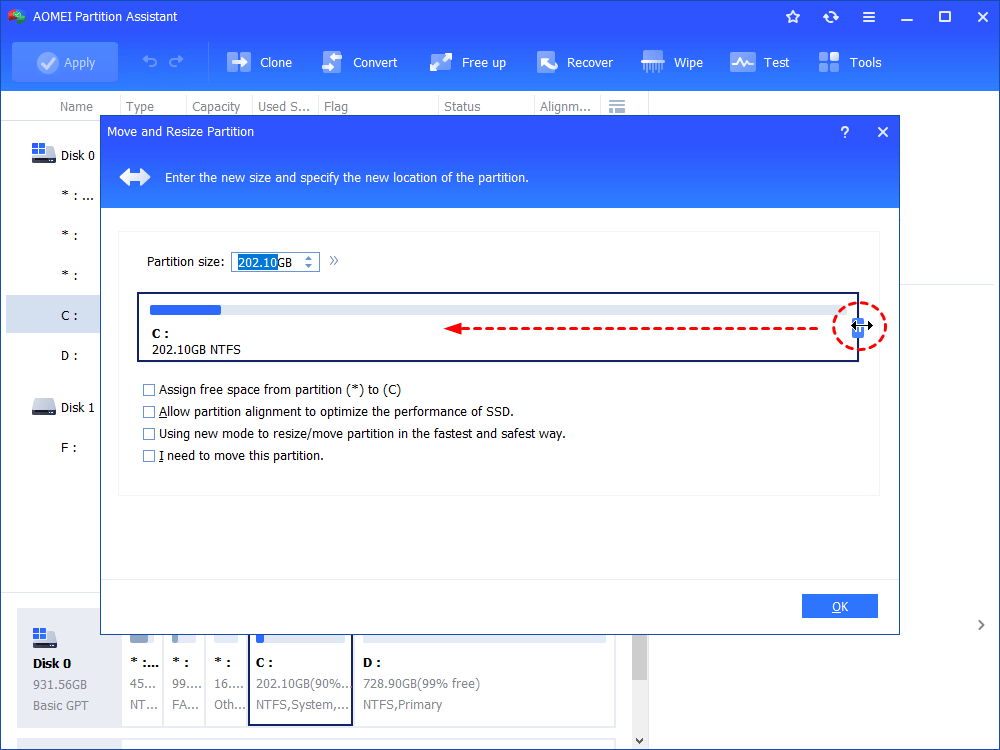
Secondly, at this Move and Resize Partition window, lay the mouse to small circle in the right or left until it becomes a double-headed arrow. No matter which position you put, just drag it oppositely. After that, select "OK". If you want to move this partition, tick the box in front of “I need to move this partition”.
Thirdly, please check the change on C drive and commit the task by clicking "Apply". Then, another window pops up. Click "Proceed" to take effect the change.
Tips: It will take several minutes and a reboot is required.
After shrinking C drive in Windows 7, you can add it to D drive or use it to create a new partition. To add the unallocated space to D drive, please refer to how to combine two unallocated space which shows combine not only two unallocated space but also unallocated space and existing partition. To create new partition, please turn to following part.
How to create partition from unallocated space?
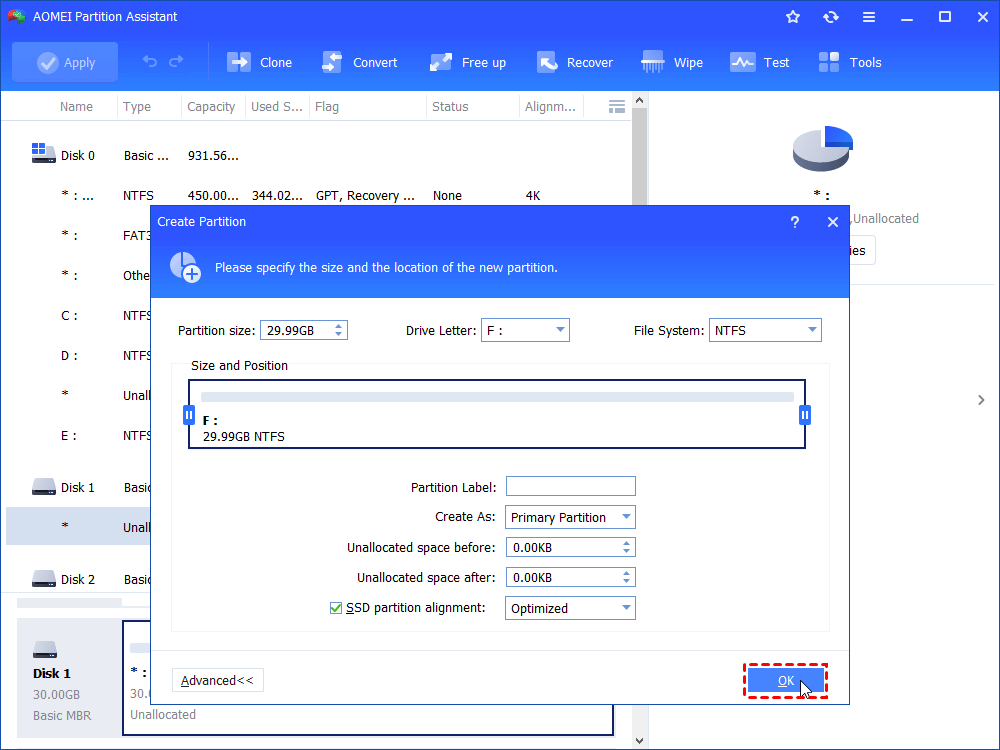
1. Right click the unallocated space to choose "Create Partition".
2. In the display window, fulfill the exact information of the new volume. Moving and resizing are permitted in the process. If you want to name or select the new volume's type, click "Advanced" button. It will give you more details. Then, click "OK".
3. Preview the changes on the disk. Then, click "Apply" and "Proceed" to realize the task. After that, you will see the progress window below, which shows the change is being executed.
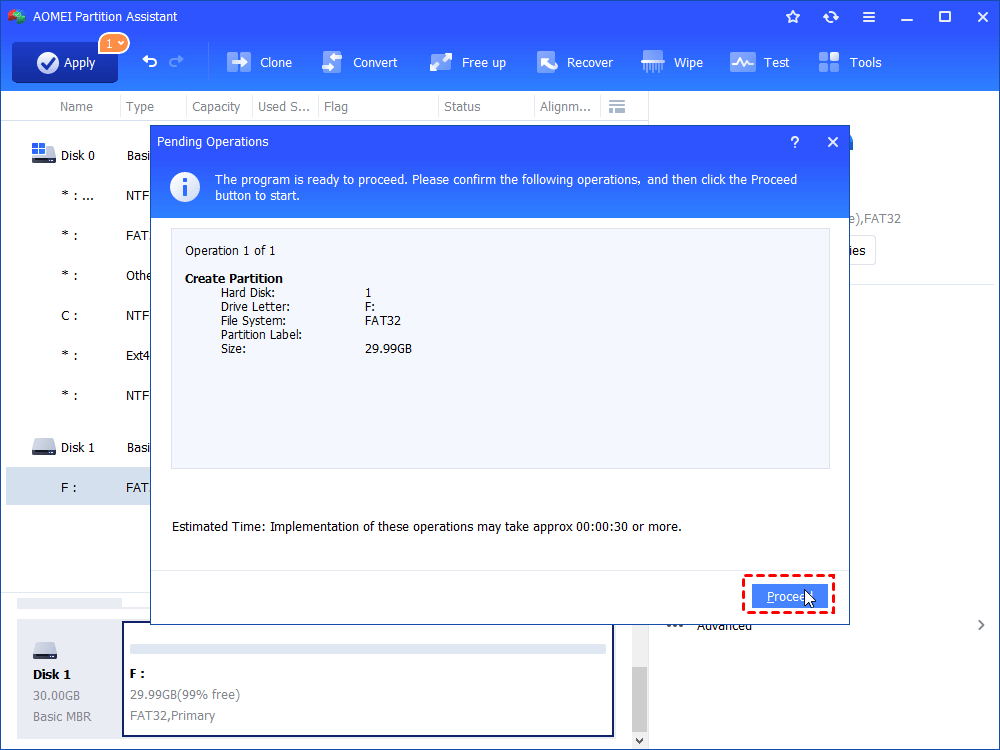
Tips: The progress window above is the same as resize Windows 7 partition free. Both of the operations do not need to reboot computer. How convenient the tool is!
To sum up, the procedures above is so easy. As we all know, the Disk Management in Windows OS has so many limitations, even for advanced Windows 10/7/8/8.1/Vista OS. As covered before, AOMEI Partition Assistant is also capable of many other things. For instance, you can create a bootable USB drive and operate all tasks under Windows PE mode. Thus, the third party tool—Partition Assistant, is extremely essential for you.

