Can’t Upgrade to Windows 11? Try the 3 Easy Ways!
This post will explain why you can’t upgrade to Windows 11 and provide corresponding methods from 3 aspects.
By Irene / Updated on October 13, 2023
Why can’t I upgrade to Windows 11
Windows 11 has grabbed many computer users’ attention since it was released for its series of updates. Thus, they click on the update to Windows 11 downloading button without hesitation but feedback with “This PC cannot run Windows 11 message”.
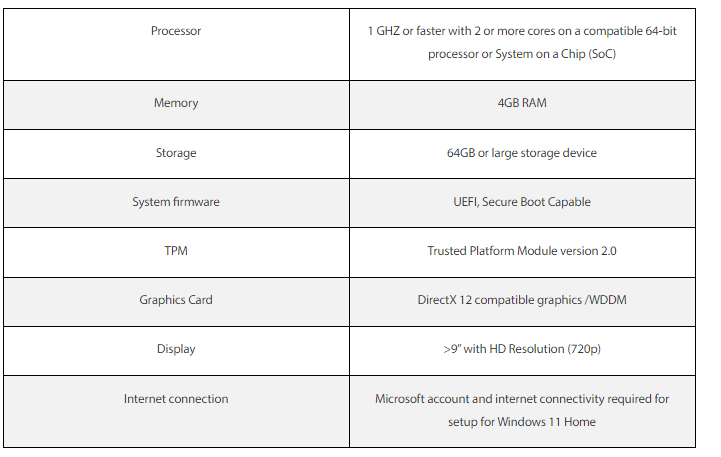
Why can’t I upgrade to Windows 11? In fact, Windows 11 demands stricter hardware requirements than before versions, meaning you must meet the minimum requirements that to install the system. Here we attach the basic requirement list below for reference.
If you are still not so clear about whether your device can run Windows 11 or not, you can download PC Health Check Tool from the Microsoft official website and have a check. You can see more details of update failure from the results once you cant upgrade to Windows 11. The program will offer some possible reasons for this.
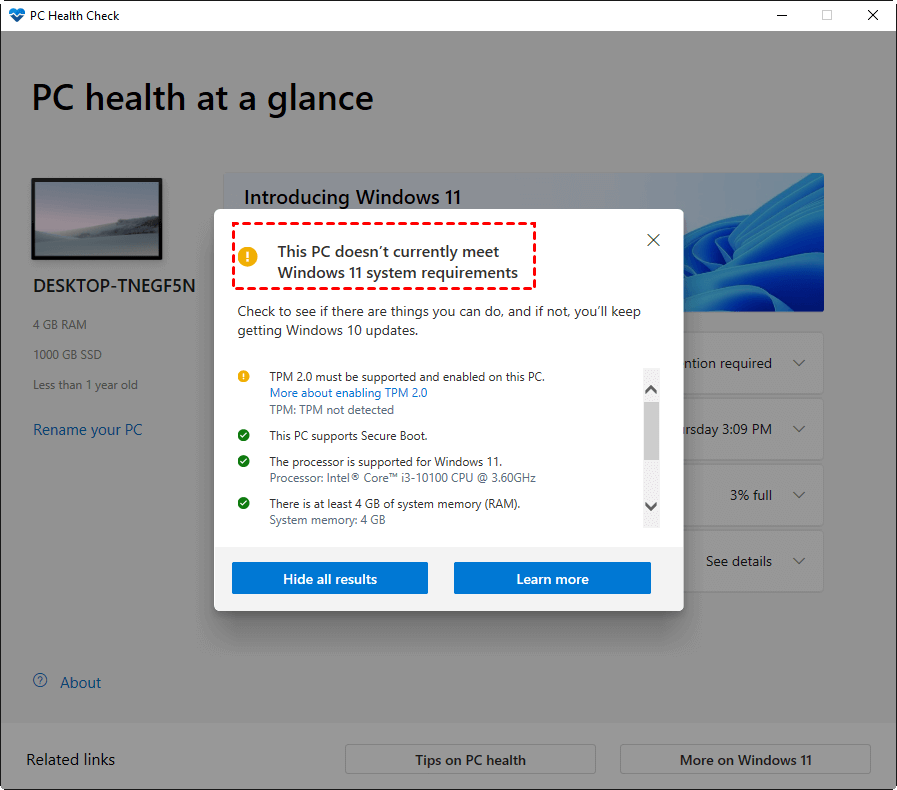
In light of a large number of feedback and data, most users are rejected because of out-of-storage space, UEFI only, TPM 2.0, and Secure Boot Capable. Therefore, today we will provide targeted solutions for Windows 11 update failure.
3 fixes for cant upgrade to Windows 11
In this part, we will offer methods from 3 aspects. You can pore through them individually to learn more details about the failure of the upgrade to Win 11 and the corresponding fixes. Or you can directly move on to the specific part.
Fix 1. Convert MBR to GPT for UEFI only issue
Windows 11 upgrading requires UEFI only because it can simplify and speed up the hardware initialization and boot process, breaking the limitations of BIOS. But the UEFI just supports GPT partition. That means if your disk is MBR, you need to convert it to GPT and then modify BIOS to UEFI boot mode.
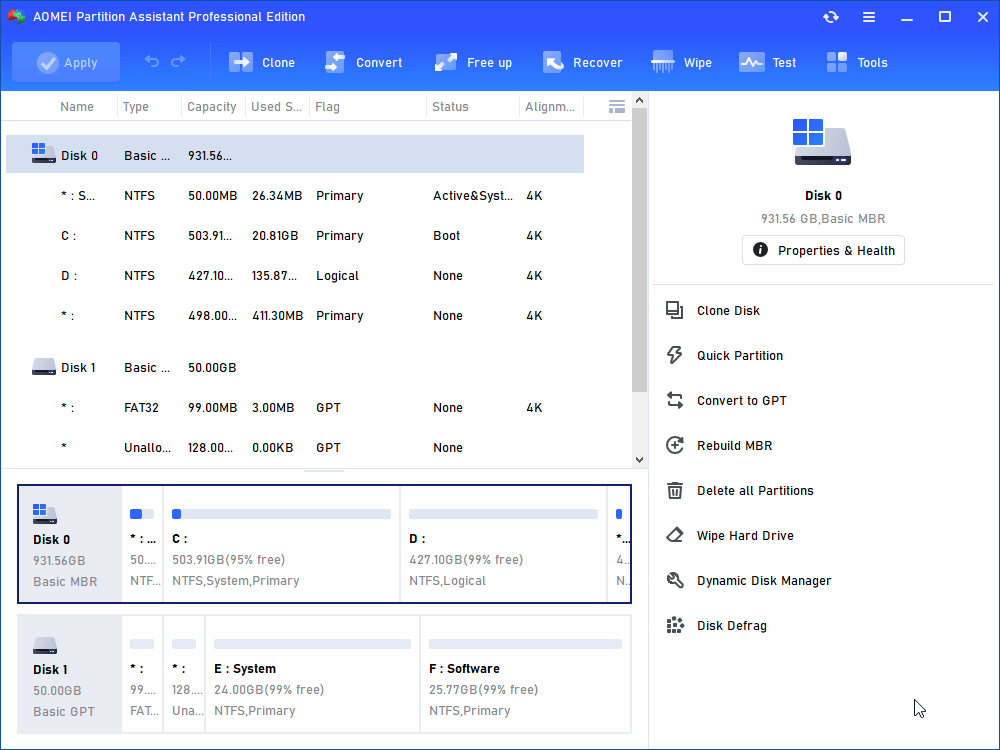
Although many methods are available to converting to GPT, there is the possibility of causing data loss or corruption, or incompatibility issues once make mistakes. AOMEI Partition Assistant Professional provides "Convert MBR to GPT" feature. With user-friendly software designs a clear and concise interface, you can easily convert MBR to GPT without data loss. Just following the guidance, you can successfully convert it even without any computer knowledge.
Step 1. Open and launch the software. Right-click on the system disk and choose the “Convert to GPT” option.
Step 2. Choose “OK” and “Yes” to confirm the operation.
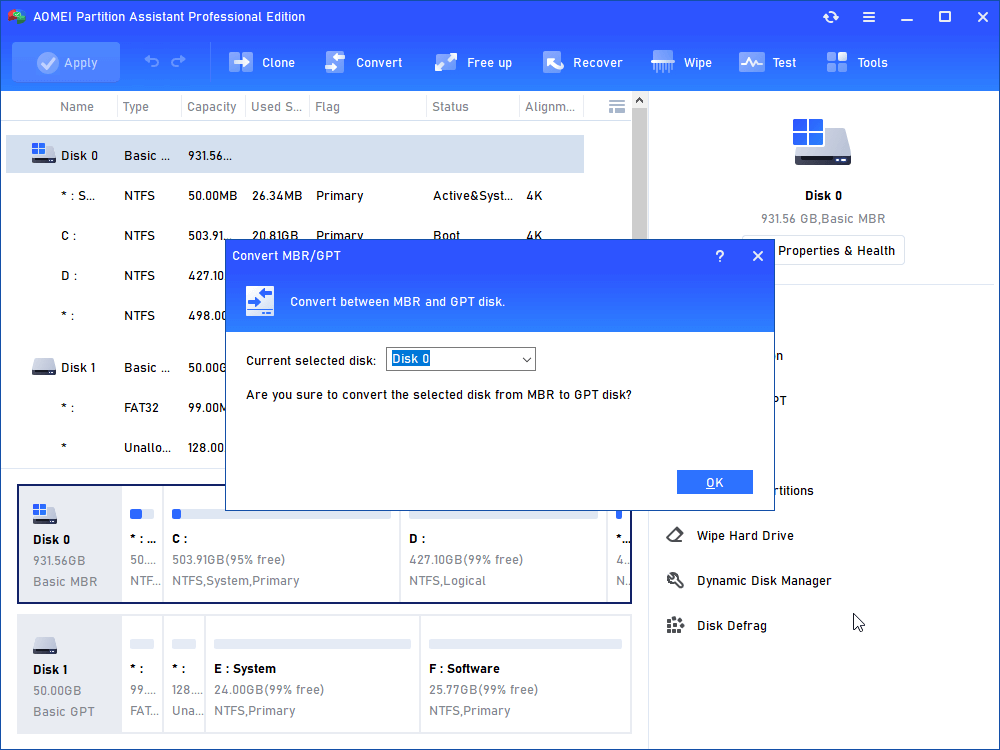
Step 3. Then, select “Apply” on the corner of the upper left side to commit the operation.
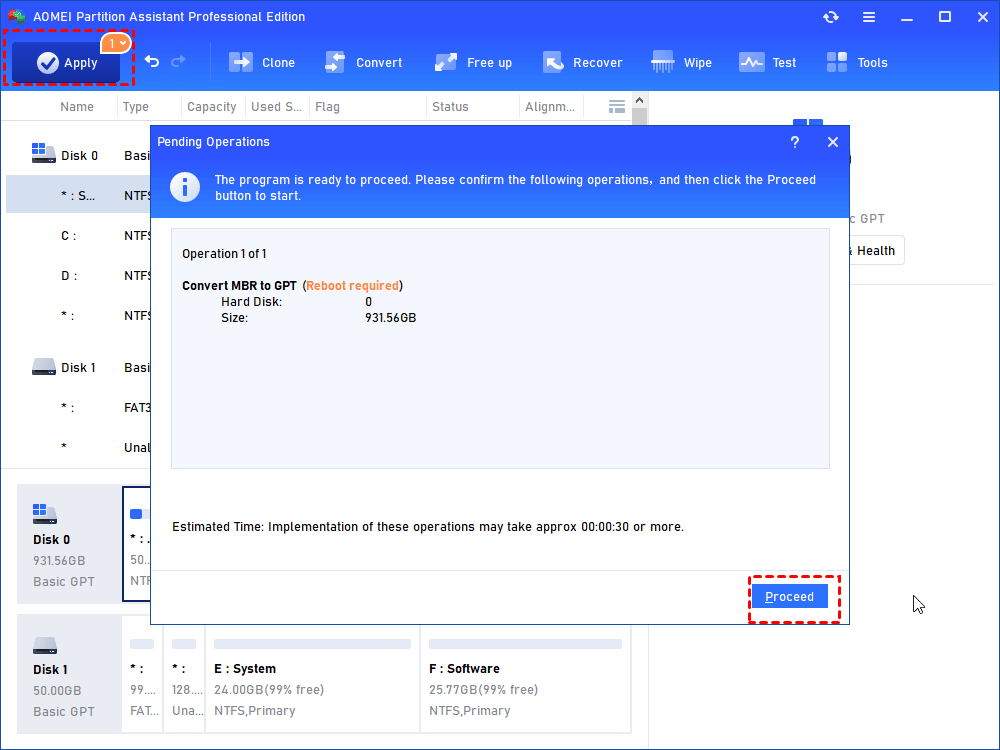
Next, the device will complete the operation in WinPreOS mode. When you successfully convert MBR to GPT, you can change BIOS to UEFI.
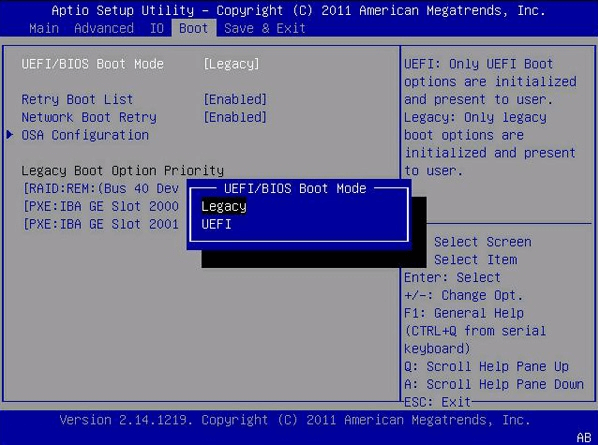
Step 4. Start your PC and hit the specific key (the key is different from computers, you can search for relevant information on the internet) to enter the firmware interface.
Step 5. Select the “UEFI/BIOS Boot Mode” and change the Legacy to UEFI. Then save and exit. When all things are done, you can try to upgrade to Win 11.
Fix 2. Enable TPM 2.0 and Secure Boot
The second major requirement for updating to Windows 11 is TPM 2.0 and Secure Boot. TPM (Trusted Platform Module), also named ISO/IEC 11889, is an independent chip, as the below picture shows. It can be used to process the keys in devices for encryption, decryption, and privacy protection.
TPM 2.0 is the newest version of TPM, which is the unavoidable demand in Windows 11 updates. Although you can search for some methods to bypass the TPM 2.0 to update Windows 11, you may still shoulder the risk of instability or insecurity. So now, it is better to follow the provided step-by-step guidance to enable TPM 2.0 and Secure Boot with us together.
▌Part 1. Check TPM
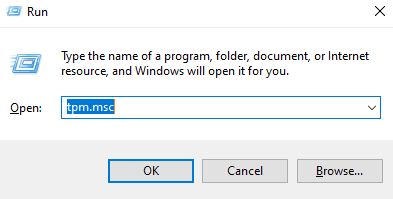
Step 1. Simultaneously it “Win+R” and input “tpm.msc” with clicking “OK”.
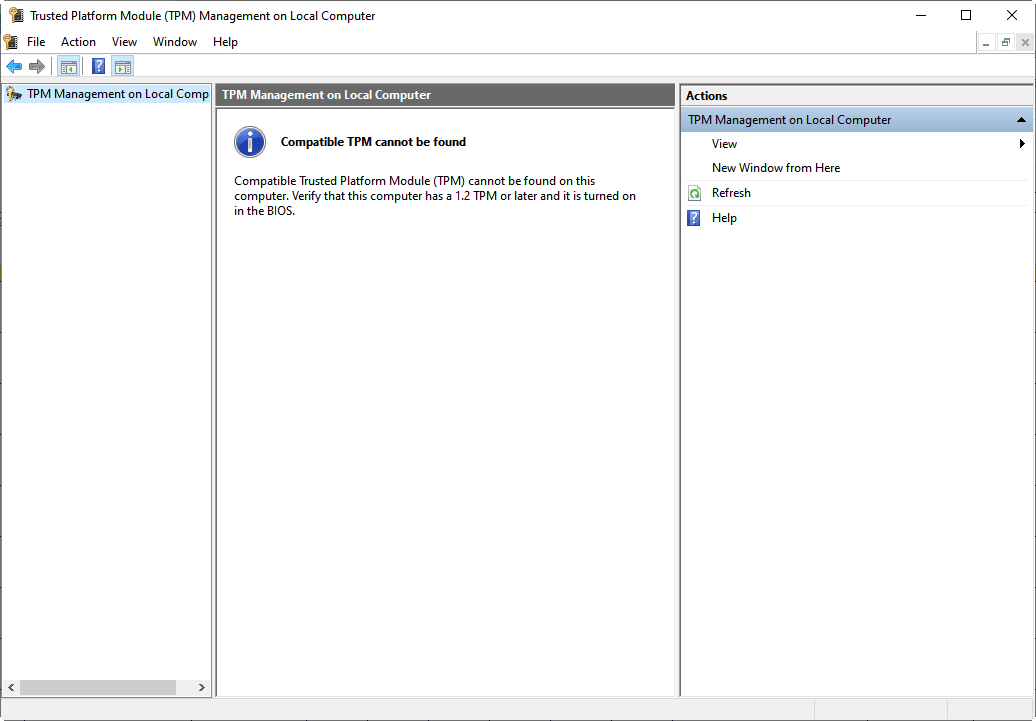
Step 2. Open the window to see details. If the “Status” displays “The TPM is ready for use”, it means the TPM is enabled. And you can check the TPM version in the right corner as the picture shows.

Step 3. If it is disabled but the version suits, the screen will show “Compatible TPM cannot be found”. Now, you should go to BIOS to turn it on.
▌Part 2. Enable the TPM
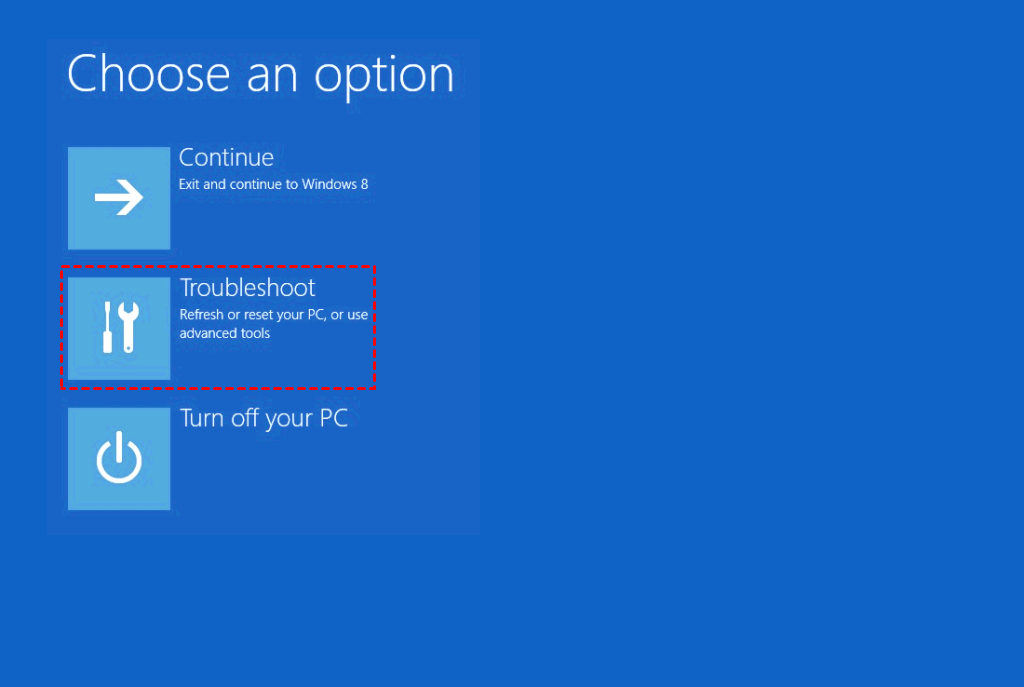
Step 1. After clicking restart, hit “Shift” to move on “Windows Advanced Options menu” and choose “Troubleshoot” option.
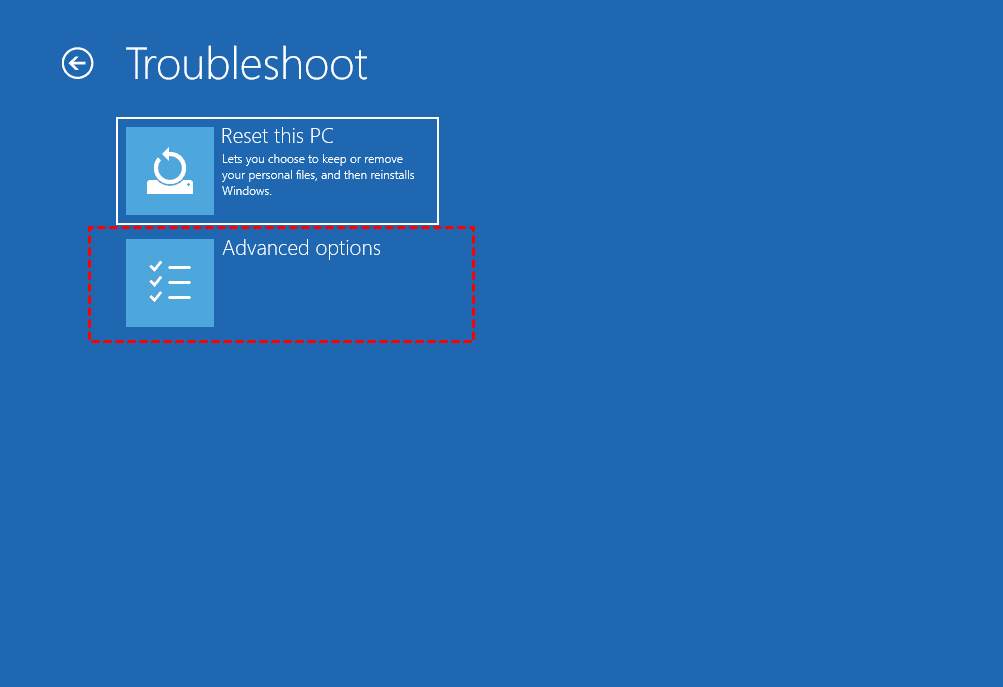
Step 2. Select “Advanced options”.
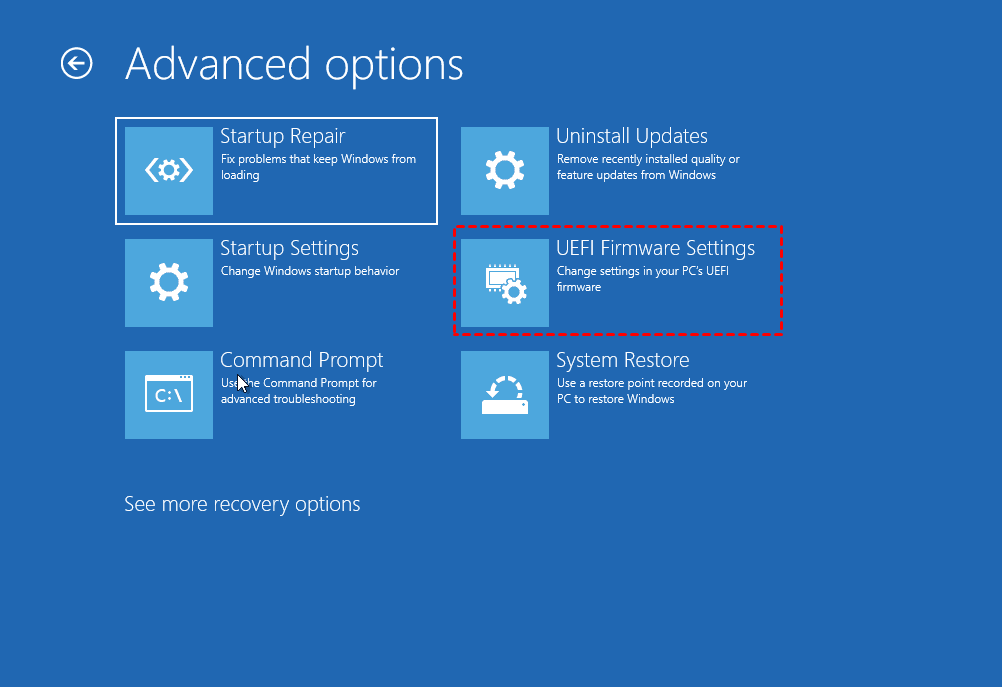
Step 3. Click “UEFI Firmware Settings” to open BIOS.
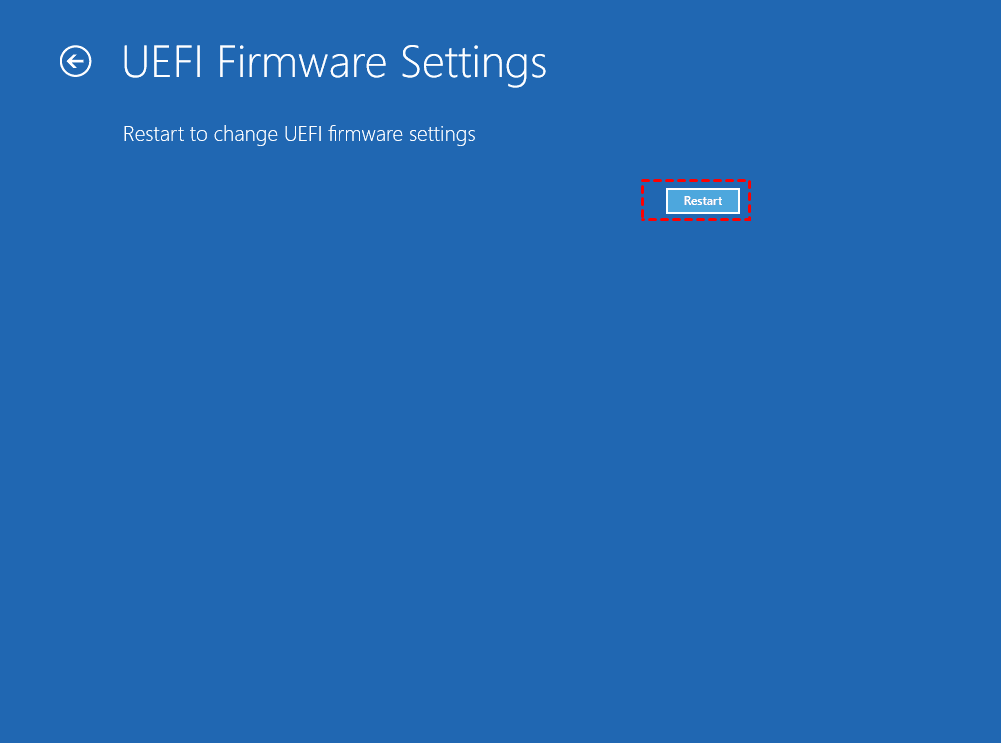
Step 4. Then hit the “Restart” button.
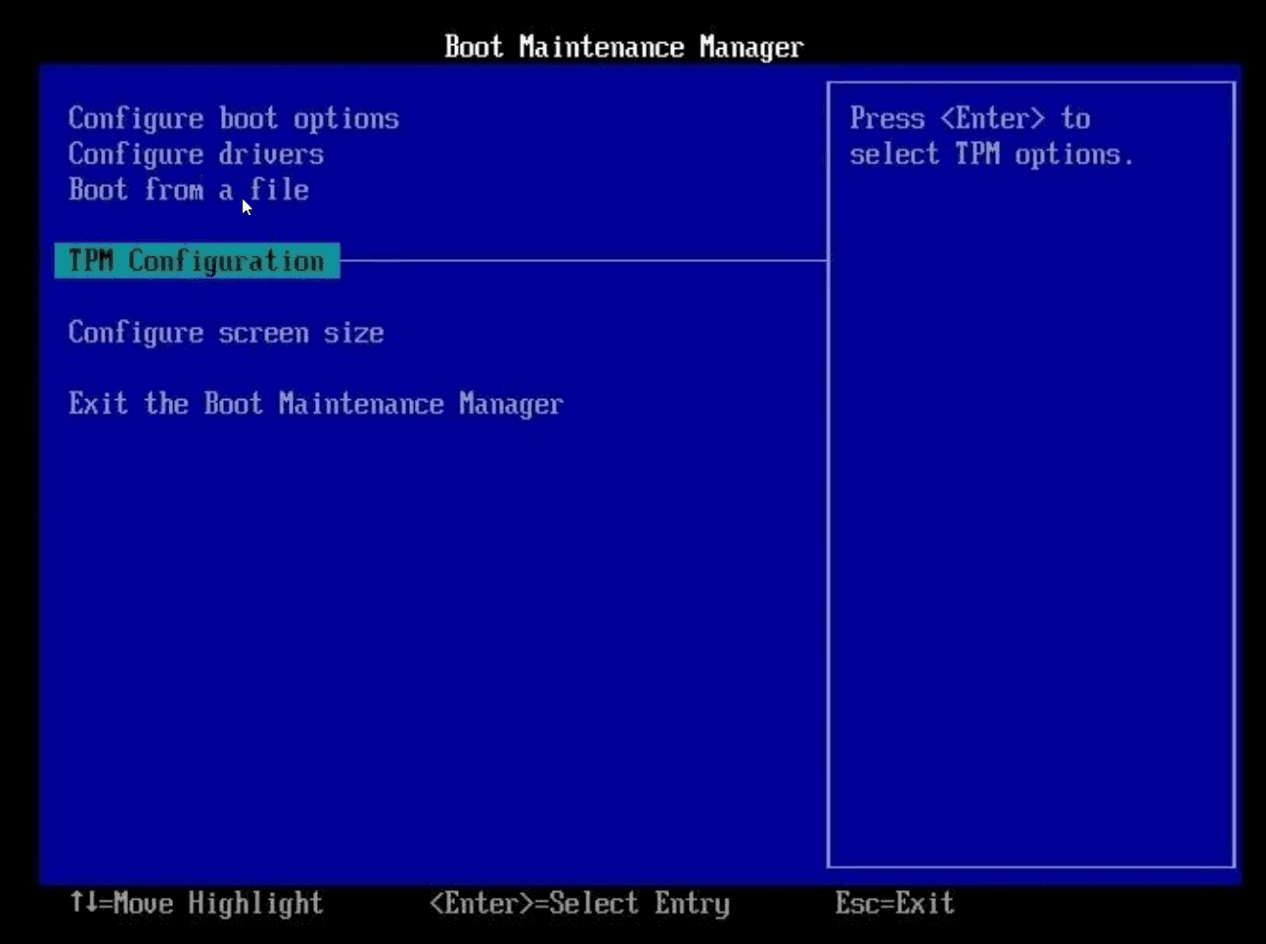
Step 5. Then continuously hit “Del” (usually for desktops) or “F2” (usually for laptops) button to enter BIOS. Move on to the “Security Settings” to choose “TPM Configuration”.
▌Enable Secure Boot
In case of malicious software intruding, many computers will set Secure Boot to prevent that with keys. Here we will provide guidance for enabling it in BIOS. Before beginning, please ensure your device supports this function.
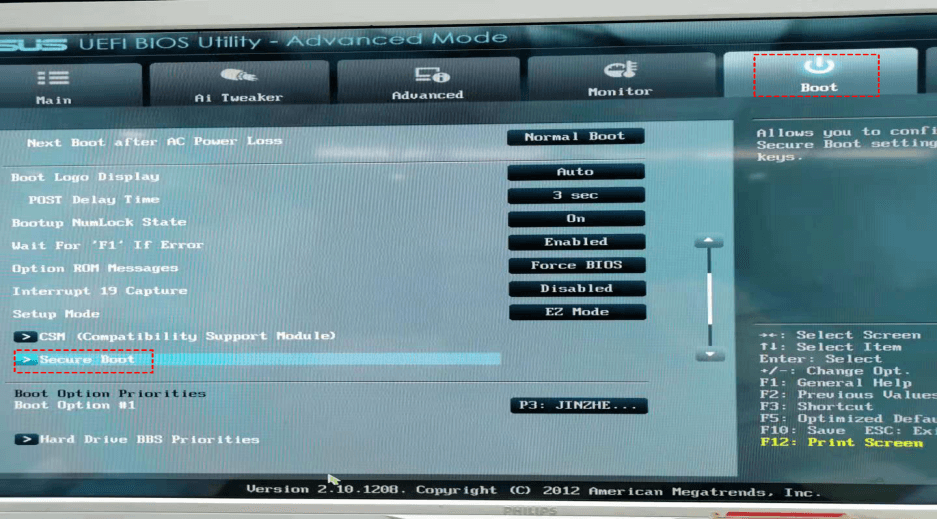
Step 1. Restart your PC and enter BIOS with hitting the specific key. Choose “Boot”>“Secure Boot”.
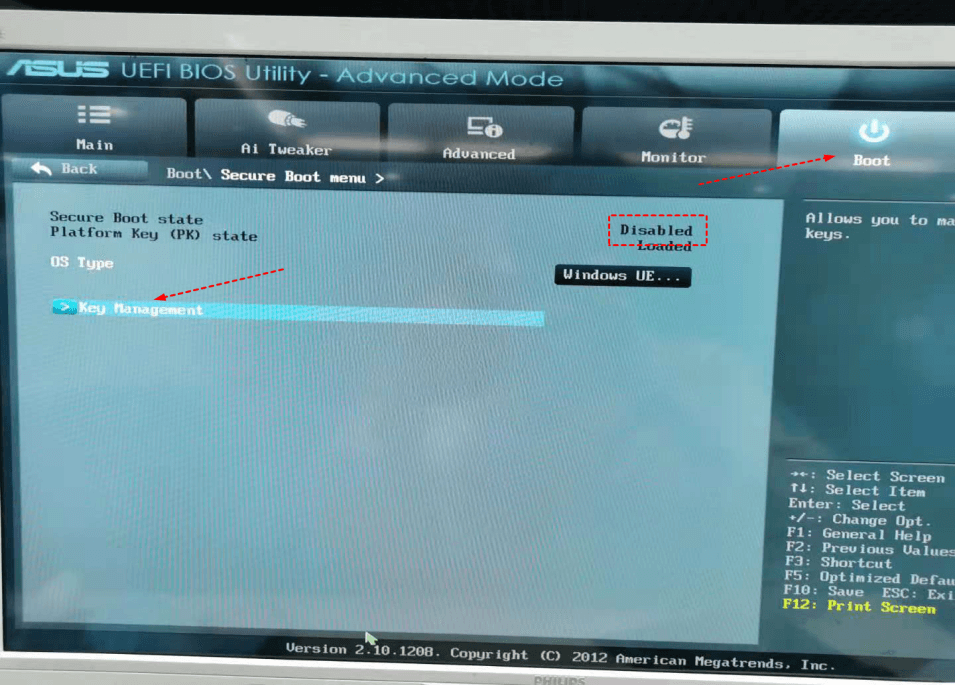
Step 2. Select “Key Management”.
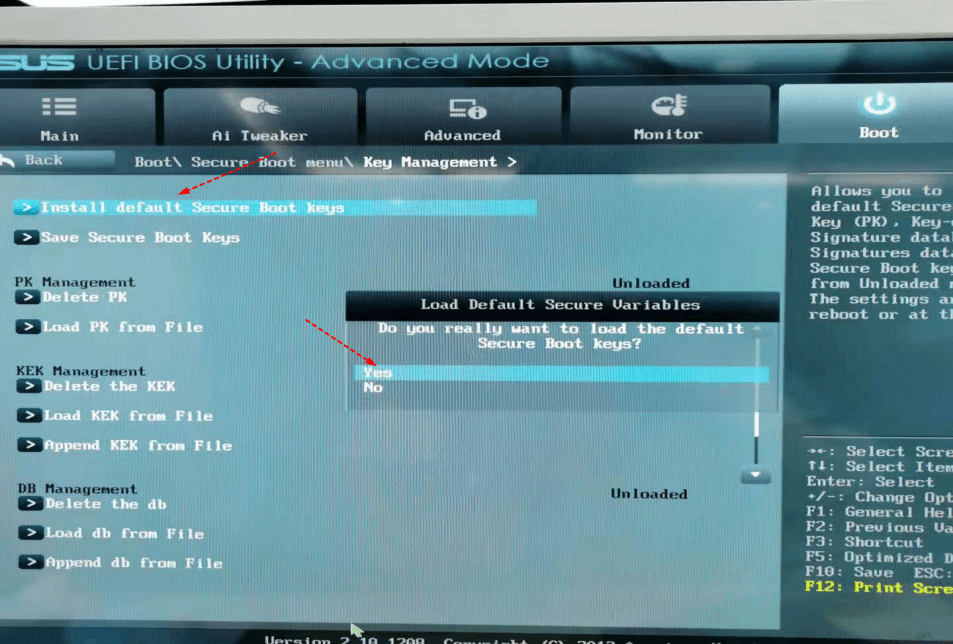
Step 3. Click the “Install default Secure Boot Keys” option. Now the Secure Boot is enabled.
Fix 3. Extend system drive space
Why can't I upgrade to Windows 11? The answer is also related to storage issues. The minimum storage requirement is no less than 64 GB. If people have used too much C drive space before, meeting this demand may be a little difficult, especially for users who expect to directly upgrade older Windows version, which needs more than 30GB of free space in the C drive.
AOMEI can help you extend the drive space as well. Its Allocate Free Space feature allows you to directly allocate sufficient space from other drives to the C drive. Just with 3 simple steps, you can easily and quickly extend your C drive space.
Step 1. Launch AOMEI Partition Assistant Professional and click the drive that has enough free space. Here we take D drive as an example. Right-click it and select the “Allocate Free Space” button.

Step 2. Please choose the wanted size to allocate and the destination drive you need to add it.

Step 3. Next, back to the main interface and click “Apply”>” Proceed” to commit the operations.

Verdict
In this post, we discuss the possible reasons why you can't upgrade to Windows 11 with providing targeted solutions. In short, you can enable TPM 2.0 and Secure Boot by following the guidance. Or if the problem is UEFI only or an inadequate storage issue, they can be solved by converting MBR to GPT and extending system drive space via AOMEI Partition Assistant.
As we can see, AOMEI Partition Assistant is a robust software that can fix many computer-related problems. Other advanced features like cloning disks, secure erasing SSD, and converting FAT32 to NTFS are also trusted by mass computer users. Besides, there is also the Server Edition for Server 2022/ 2019/2016/2012(R2)/2008(R2)/2003 users.

