How to Upgrade to Windows 11 without TPM?
Do you want to upgrade Windows 10 to Windows 11 but find your computer doesn’t have TPM 2.0? Don’t worry, this post aims to explain the meaning of TPM and show you how to upgrade to Windows 11 without TPM in a reliable way.
By Hedy / Updated on May 12, 2023
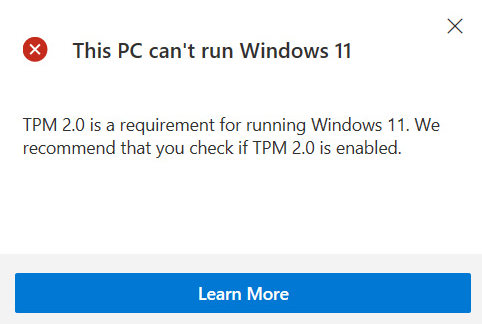
This PC can't run Windows 11: TPM 2.0 is a requirement
According to Microsoft official, Windows 11 is allowed to be free upgraded from Windows 10 as long as the device has met the minimum system requirements for Windows 11. Among all the requirements, TPM 2.0 is a headache for a number of users.
This can explain why they want to know how to upgrade to Windows 11 without TPM when receiving the "This PC can't run Windows 11: TPM 2.0 is a requirement for running Windows 11" message.
◤ What is TPM 2.0?
TPM 2.0, also known as Trust Platform Module 2.0, is a chip embedded in a PC's motherboard or in its processor. As a successor of TPM 1.2 technology, TPM 2.0 has an additional SHA-256 in the algorithm and adds authorization based on asymmetric digital signatures, which means the biggest change of TPM 2.0 is more secure than TPM 1.2 in terms of encryption.
It mainly has the following three functions:
♥ Ensure integrity of platform: TPM 2.0 will ensure your PC starts from a trusted combination of hardware and software and continue to work until the OS has fully booted and applications are running normally.
♥ Encrypt storage devices: TPM 2.0 is designed to protect the keys for encrypting computer storage devices and provide complete authentication for a trusted boot pathway.
♥ Verify device integrity: TPM 2.0 can be used by any application to manage digital rights, protect software licenses, prevent online cheating, etc.
◤ How do I know if I have TPM 2.0 on my PC?
If you are not sure if your computer has TPM 2.0, you can follow the steps below:
Step 1. Press "Windows" + "R" together, and then type "tpm.msc" and click "OK".
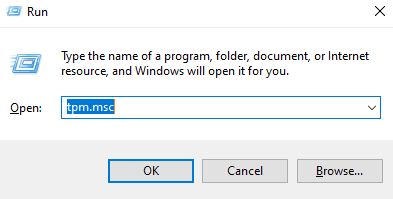
Step 2. In the TPM management window, if the "Status" lab shows "The TPM is ready for use", then the TPM is enabled. You can check the TPM version in the right corner.

Can I install Windows 11 without TPM? Any risk?
We have mentioned that TPM 2.0 is one of the requirements for Windows 11, but how to upgrade to Windows 11 without TPM if there is no TPM 2.0 on the computer? Thanks to the advanced technology, it is possible to perform Windows 10 upgrade to Windows 11 without TPM 2.0. But should you bypass the TPM limitation to install Windows 11?
According to Microsoft, if you run Win 11 on an unsupported PC, you will stop receiving any updates in the future, which may lead to data risk and even system crashes. Therefore, it's not recommended to upgrade to Windows 11 without TPM 2.0. For those who insist on evading the TPM check, follow the next part to get it done.
How to upgrade to Windows 11 without TPM?
If you plan to upgrade to Windows 11 from Windows 10 directly, you can refer to the steps below:
Step 1. Press the "Windows + R" keys simultaneously to open the Run box.
Step 2. Input "regedit" or "regedit.exe" and click "OK" to run the Registry Editor window.

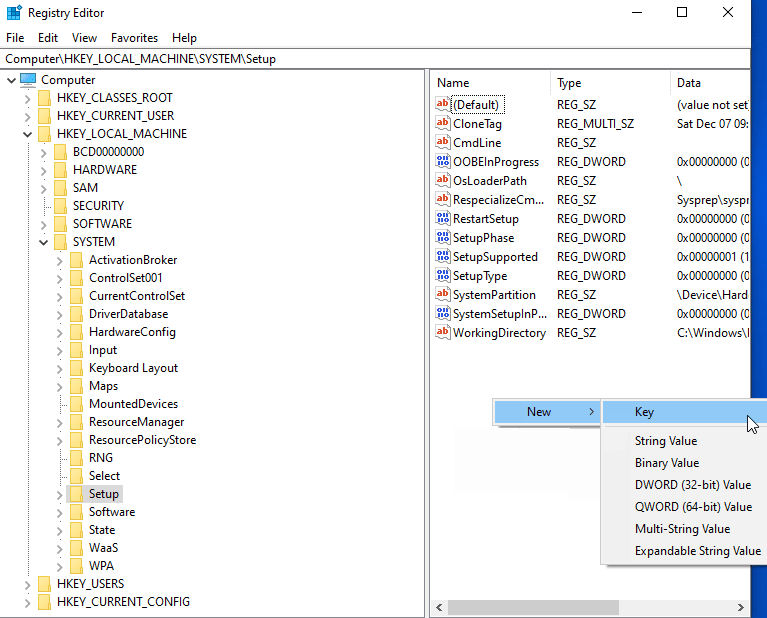
Step 3. Navigate to "HKEY_LOCAL_MACHINE\SYSTEM\Setup".

Step 4. Right-click the blank, and select "New" > "Key" to add a new registry key on the left side of the editor. Make sure you name it "LabConfig".
Step 5. Under the "LabConfig" folder, right-click the blank again to create two "DWORD (32-bit) Value” options to create new DWORD value.
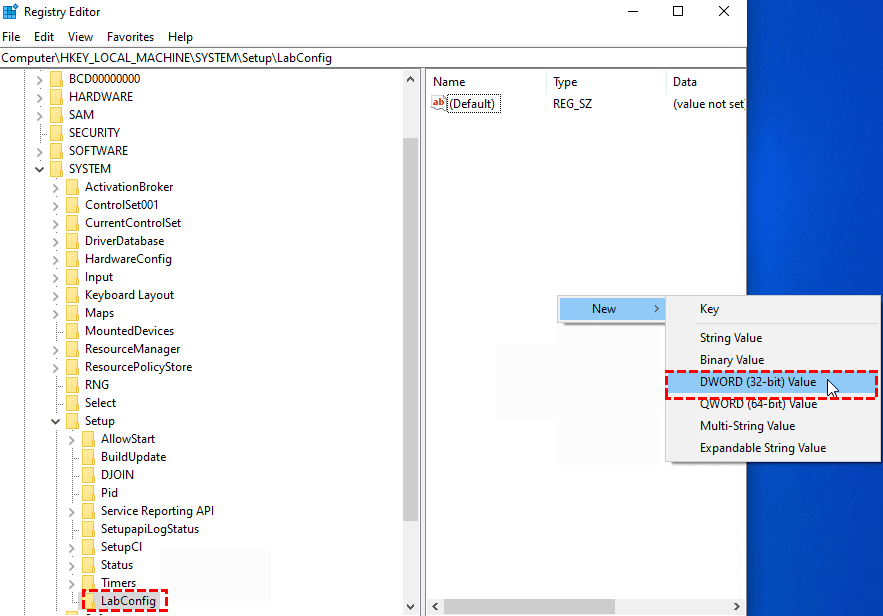
Step 6. Name it as “BypassTPMCheck”. Then double-click it and change the "Value data" from "0" to "1".
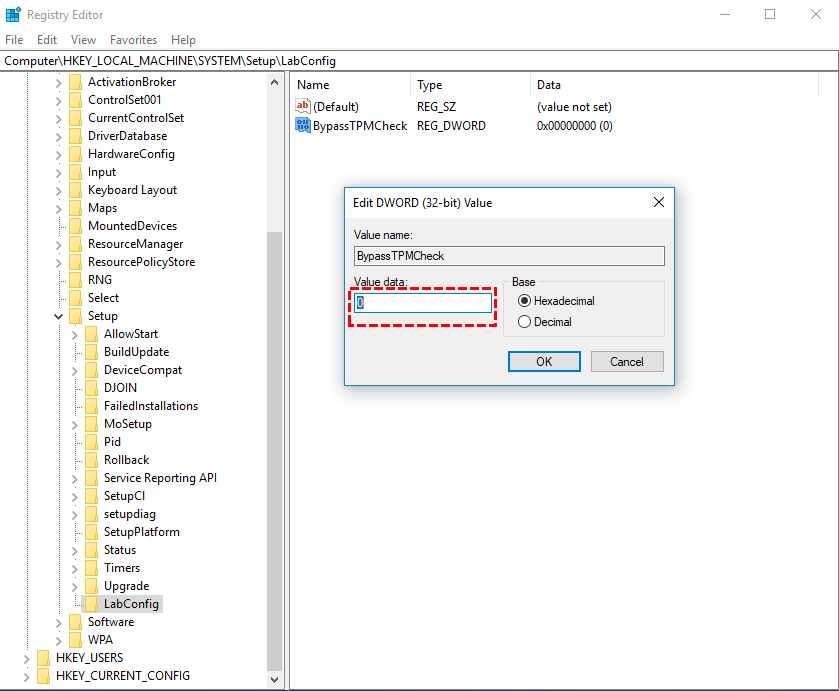
Now, you have made Windows 11 bypass TPM, you can begin to upgrade your system to Windows 11.
If you're installing Windows 11 from USB on an incompatible computer, you'll be reminded that "This PC can't run Windows 11" during the installation course. In such a case, the next steps can let you upgrade to Windows 11 without TPM.
Step 1. Once the "Windows Setup" window shows, press the "Shift + F10" keys to open the Command Prompt.
Step 2. Type the command "regedit" and press "Enter" to open the Registry Editor.
Step 3. Then, follow the above Step 3 to 5 to bypass the TPM limitation. After that, you can continue to install Windows 11.
Recommended way: Make your PC eligible for Windows 11 requirements
If you need Windows 11 for daily use or work in the future, we still suggest you update your configuration to meet the Windows 11 system requirements out of safety considerations. Next, we'll show you how to enable TPM 2.0 on your computer and help you resolve another tricky issue: Secure Boot.
► Enable TPM 2.0
Step 1. Press "Window + I" to open Settings and go to Update & Security > Recovery > Restart now. On the next page, choose Troubleshoot > Advanced options > UEFI Firmware Settings > Restart.
Step 2. When your PC is loading, press F2, Del, or ESC to enter the BIOS settings. Then go to the Security Settings and select the TPM Configuration option.
Step 3. Because the motherboard of the computer is different, the name of TPM in the BIOS setting will be different. Find it and make sure it’s enabled.

► Convert MBR to GPT
Among all the requirements for Windows 11 upgrade, TPM 2.0 is not the only troublesome issue that makes users annoyed, Secure Boot too. Secure boot is a unique feature on UEFI boot mode. If you want to enable Secure Boot on UEFI, there is a premise - the system disk should be GPT partition style. If you are running on an MBR disk with Legacy BIOS, you need to convert to GPT before making Secure Boot enabled.
AOMEI Partition Assistant Professional, the best MBR2GPT converter, can help you change disk style from MBR to GPT without losing data. If you are not willing to install Windows 11 without Secure Boot or TPM 2.0, download this software to complete the conversion and then upgrade to Windows 11 directly.
Here is a demo version for you to have a try:
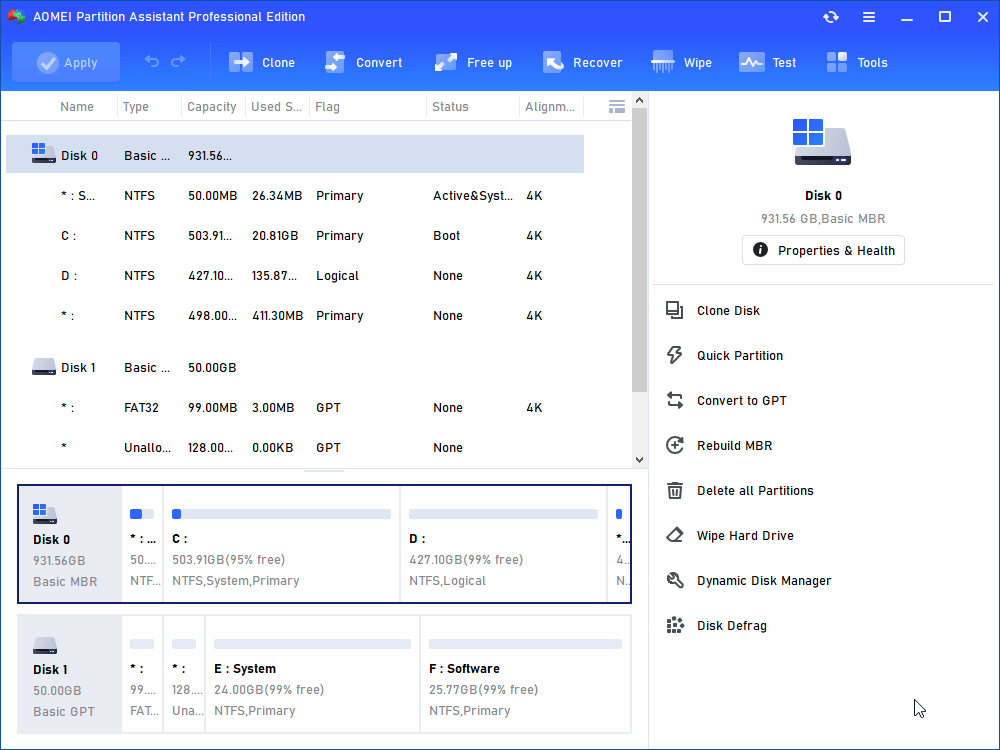
Step 1. Install and launch AOMEI Partition Assistant Professional, right-click the MBR system disk you want to convert, and select "Convert to GPT".
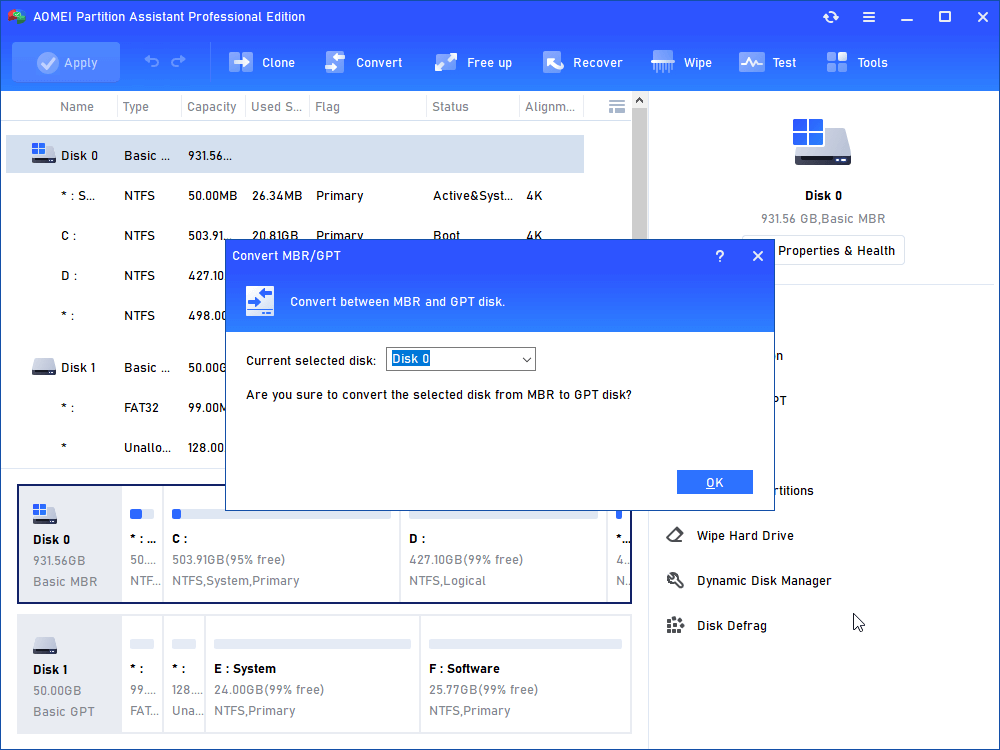
Step 2. In the pop-out window, you will be asked are you sure to convert the selected disk from MBR to GPT disk. Click "OK" to continue.
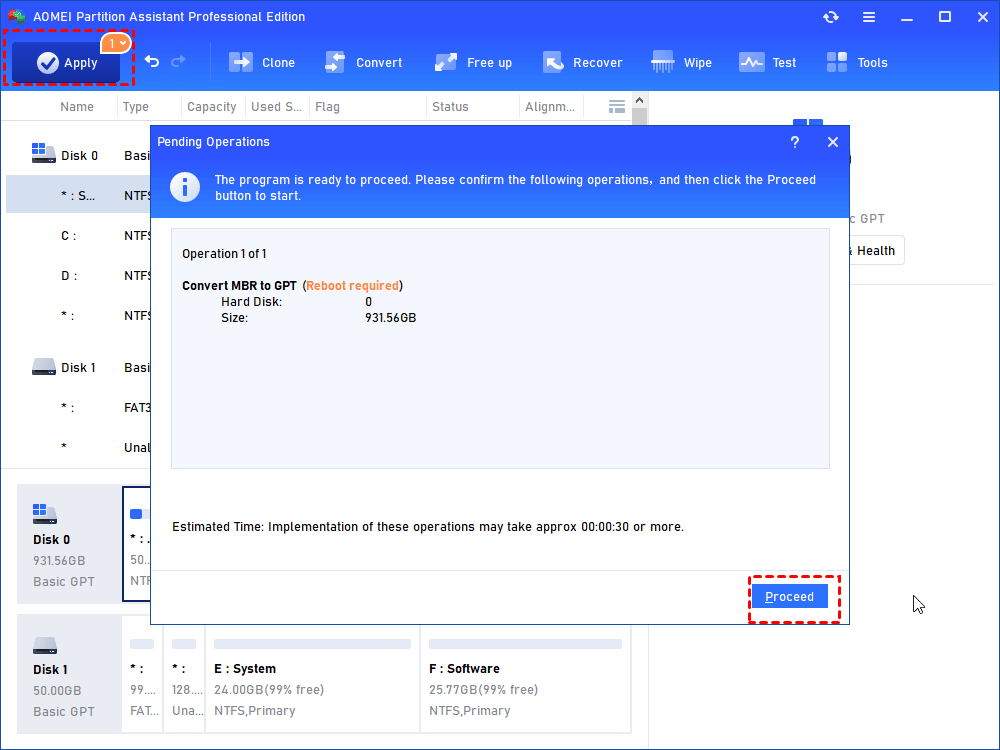
Step 3. After a while, you will back to the main console, click "Apply" and you will find your disk style has been changed into GPT.
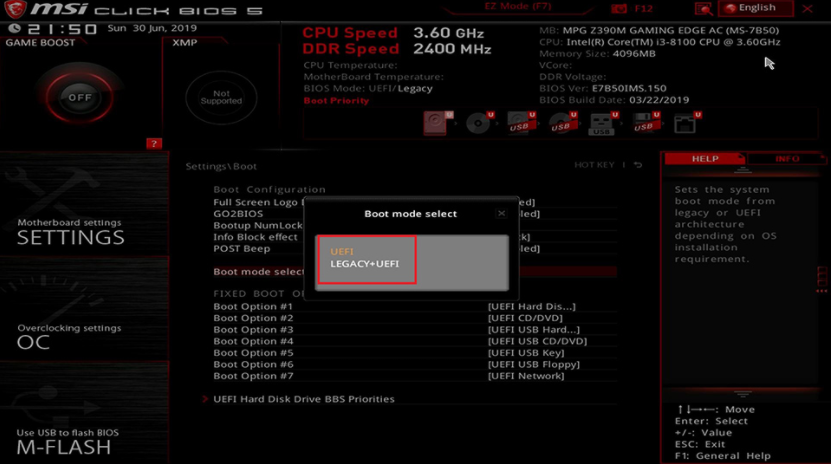
After that, you just need to enter the BIOS to change the boot mode from Legacy to UEFI, and then you can enable Secure Boot.
Conclusion
This post has explained what TPM 2.0 is, how to check its version, how to upgrade to Windows 11 without TPM, and how to make your PC eligible for Windows 11 requirements. You can choose one method based on your situation.
If you have other problems when upgrading to Windows 11, AOMEI Partition Assistant is always on standby. For example, you can use it to extend C drive to meet the 64GB storage requirements or create a portable Windows 11 USB to enjoy the new system on any device.

