[Solved] How to Change Drive Letter on Windows 11
When the drive letter will not be available due to some operation or you decide to change the original drive letter to another drive letter, you may want to know how to change drive letters on Windows 11. In this post, you may find the answers.
By AOMEI / Updated on May 12, 2023
Scenario
"After upgrading from Windows 10 to Windows 11, I found that many drive letters on my computer were changed, which made it difficult for me to open the drive at once. So how to change the drive letter on Windows 11? Is there any good way to avoid the drive letter confusion problem after upgrading the Windows system? Thanks for your suggestion. "
Importance to change a drive letter
A drive letter is an alphabetical identifier for a volume, and each drive letter can be used once on a computer. Normally, Windows assigns drive letters to all available drives on your computer. However, some users find that their previously assigned drive letters become not available when they upgrade the Windows system. You can change the drive letter to ensure that the files and folders on this drive can be recognized and accessed smoothly.
How to change drive letter on Windows 11 (3 methods)
How to change the drive letter on Windows 11 to better manage drives? In this article, I will recommend 3 methods to you: Diskpart, Disk Management and an excellent third-party freeware.
│Method 1. Change a drive letter via Diskpart
The Diskpart is a practical tool for commands input in the operating system. With this powerful built-in tool, you can delete partitions, format partitions, etc. Please follow the steps below to see how to change drive letter in Windows 11.
Note: Before executing the entered commands, please carefully check whether them are correct. If the wrong commands are executed, they will cause unnecessary data loss.
Step 1. Click the Search button next to the Windows and type "diskpart".
Step 2. Type the following commands in turn and press "Enter" each time:
• list volume (To list all the partitions in the computer.)
• select volume 7 (Volume 7 is the target volume.)
• assign letter=F
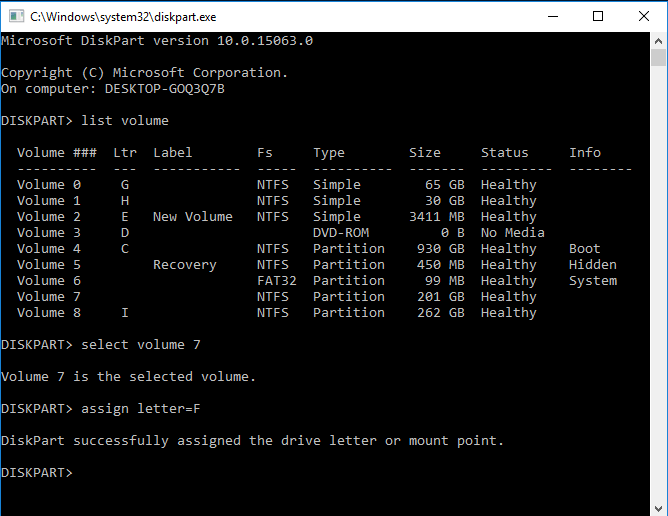
Step 3. Input "exit" to close Diskpart.
│Method 2. Change a drive letter with Disk Management
In addition to Diskpart, you can also use simpler Disk Management, which is a routine task on a computer. It can help you manage hard disk partitions with functions such as creating/extending/shrinking/deleting volume, and so on. Here is the answer for "Windows 11 how to change drive letter" by Disk Management.
Warning:
✍ If the file system of the target drive is not FAT or NTFS, the "Change Drive Letter and Paths" will be greyed out, so please format this drive first.
✍ You will be failed to change the letter drive if the target drive is write-protect.
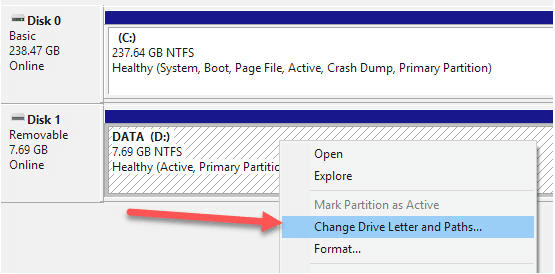
Step 1. Press "Windows + R" to open the "Run" program and type "diskmgmt.msc" to open Disk Management.
Step 2. Right-click the target drive and click "Change Drive Letter and Paths".
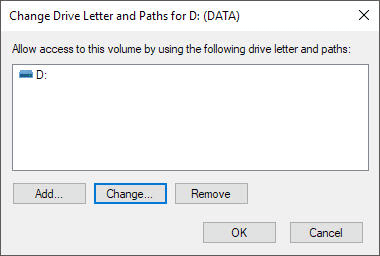
Step 3. Click "Change" and "OK" in the ejected window.
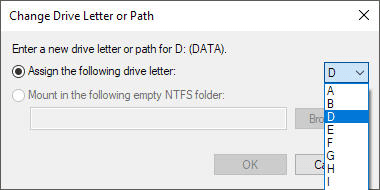
Step 4. Choose a proper drive letter for the drive with the drop-down menu and click "OK".
Step 5. Execute this operation and click "Yes".
│Method 3. Change a drive letter with a powerful freeware
As you can see, although the two methods mentioned can help you change the drive letter, both of them have drawbacks: If you enter the wrong command in Diskpart, it will cause data loss or even a system crash; when the file system does not meet the requirements or the target drive is write-protected, you cannot successfully change the drive letter in Disk Management.
So how to change drive letter on Windows 11 safely and easily? Here, I would recommend you a brilliant freeware -AOMEI Partition Assistant Standard. You can change a drive letter even if the drive is write-protected or not using the NTFS or FAT file system. Ditching the complicated commands, you can change the drive letter in the beautiful interface with a few simple clicks.
In addition to changing the drive letter, this software includes but is not limited to Resize partition, Change partition type ID, Merge partitions, etc.
Let's see how to change a drive letter in Windows 11.
Tips:
✐ Some programs have their own specific drive letters, changing the drive letters directly may cause those programs to not work properly.
✐ If there's a system installed in the target partition, you cannot change the drive letter of it.
Step 1. Download and open AOMEI Partition Assistant Standard. Right-click the target drive, then select "Advanced" and "Change Drive Letter" in turn.
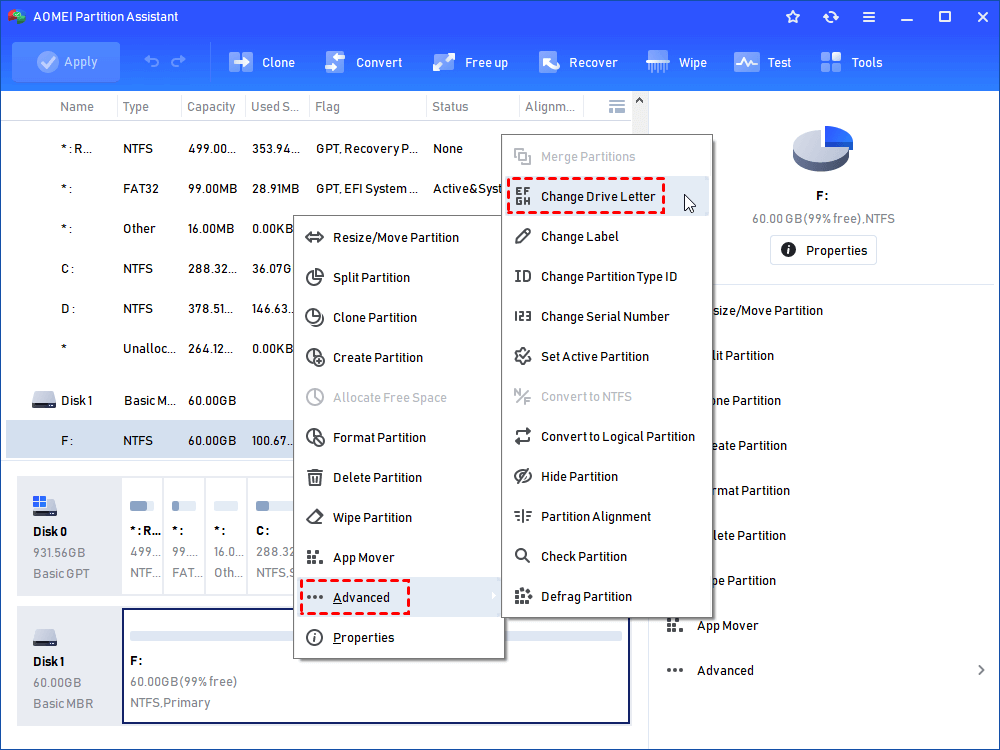
Step 2. Select a new drive letter from M to Z in the popped window.

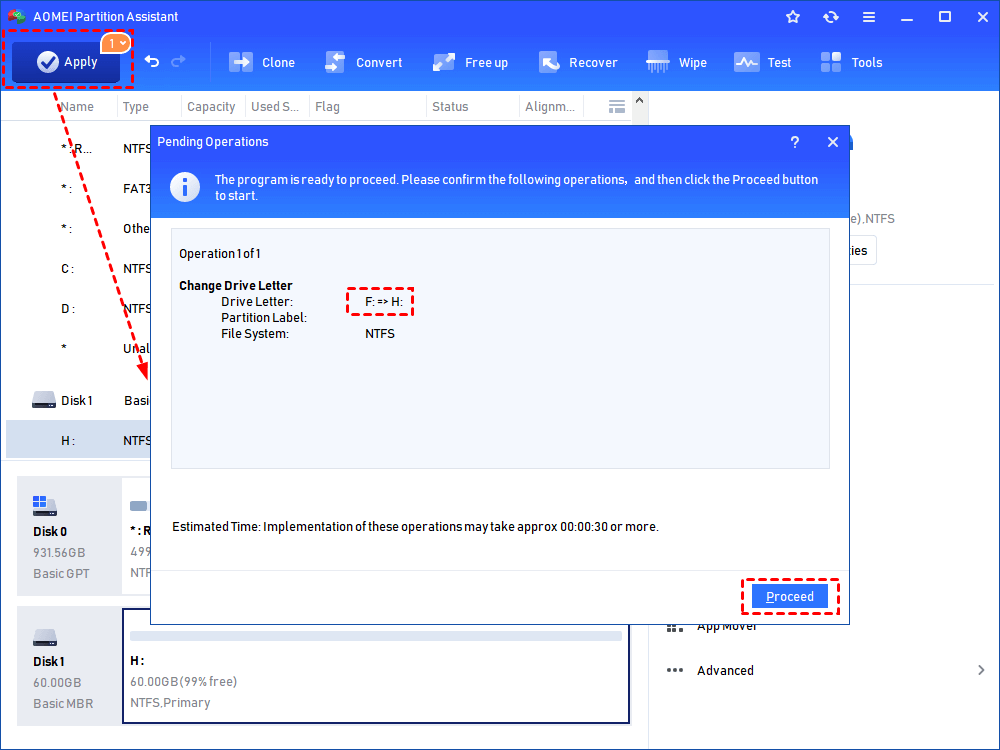
Step 3. Click "Apply" and "Proceed" to complete the pending operations.
Conclusion
How to change a drive letter on Windows 11? Through this article, you may have found the answers: Diskpart, Disk Management and AOMEI Partition Assistant Standard are all helpful for you. Through comparison, I believe you have also found which is the best choice. If you want to enjoy more advanced features like Migrate OS to another drive and Move Application from one partition to another, you can turn to the Professional Version.

