Windows 11 MBR Installation: A Step-by-Step Guide
If you are looking for a way to make Windows 11 MBR installation come true, refer to the following content to learn more useful information.
By Lucas / Updated on February 26, 2025
Can Windows 11 run on the MBR disk?
The MBR contains operating system-specific information and facilitates the booting process or loads the OS into RAM for execution. Simply put, the MBR is what propels the execution of your operating system. Windows 11 can run on a system with the Master Boot Record (MBR) partition style, but only as a secondary disk. This implies that MBR cannot be used as the primary disk format for Windows 11.
GPT (GUID Partition Table) configuration UEFI has been set by Microsoft, which is regrettable, as secure boot permits the installation and operation of Windows 11. Therefore, to install Windows 11, your operating system disc type must be GPT. The MBR format, however, can function as a second drive in Windows 11. It is not cause for concern if you lack a GPT disk. In the interim, we shall examine the process of installing Windows 11 on an MBR partition.
In fact, if you want to upgrade from Windows 10 to Windows 11, you can only install it on a GPT disk, because Windows 11 needs to be booted by UEFI boot mode; but if you plan to freshly install Windows 11, you can install it on an MBR disk.
How to achieve Windows 11 MBR installation
Now, we will offer a step-by-step guide on how to perform Windows 11 MBR installation.
Warning: Please backup computer before upgrading to Windows 11.
1. Make sure PC meets Windows 11 system requirements
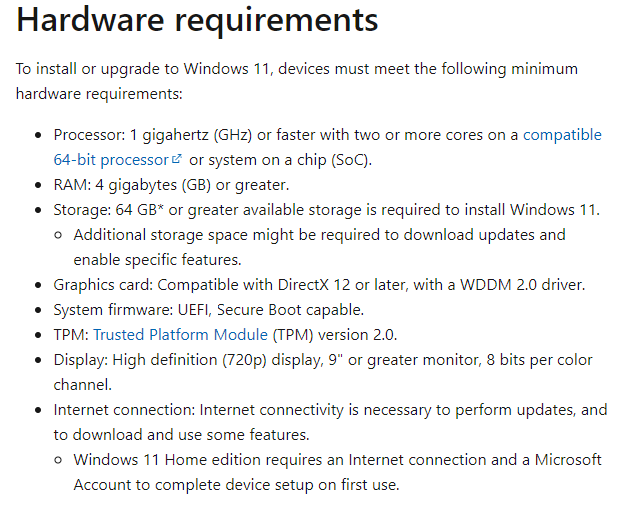
Verify your PC satisfies Windows 11 system requirements before installing Windows 11, ensure that your PC satisfies the minimum system requirements to operate Windows 11. The hardware and system requirements for Windows 11 are as follows:
1. Storage Space: A minimum of 64 GB of free space on your C drive is required to install Windows 11.
2. Enable TPM 2.0: Windows 11 must be compatible with the TPM (Trusted Platform Module). Should that not be enabled, have no concern.
3. Enable Secure Boot Modes and UEFI Support in BIOS: As previously mentioned, Microsoft has mandated the inclusion of secure boot modes and UEFI support in BIOS to install Windows 11. Consequently, ensure that you satisfy this prerequisite prior to continuing with the installation.
4. GPT disk type for OS drive: In order to install Windows 11, ensure that your OS drive is of the GPT type. Nonetheless, this is not a cause for concern, as the subject of this article is the installation of Windows 11 on an MBR partition.
2. Convert MBR to GPT for Windows 11 installation
As mentioned at the beginning, you can upgrade from the old version to Windows 11. But some users may say, “What should I do if my system disk is not GPT but MBR?”. Don’t worry, we can convert MBR to GPT for Windows 11 update.
Here, you should try AOMEI Partition Assistant Professional, a powerful MBR to GPT converter that allows you to convert system or data disk from MBR to GPT without losing data. Before starting, please make sure that your motherboard supports UEFI boot mode. If not, the converted PC may not boot normally.
Note: If the PC does not support UEFI boot mode, you can also run Windows 11 by creating Windows 11 bootable USB drive.
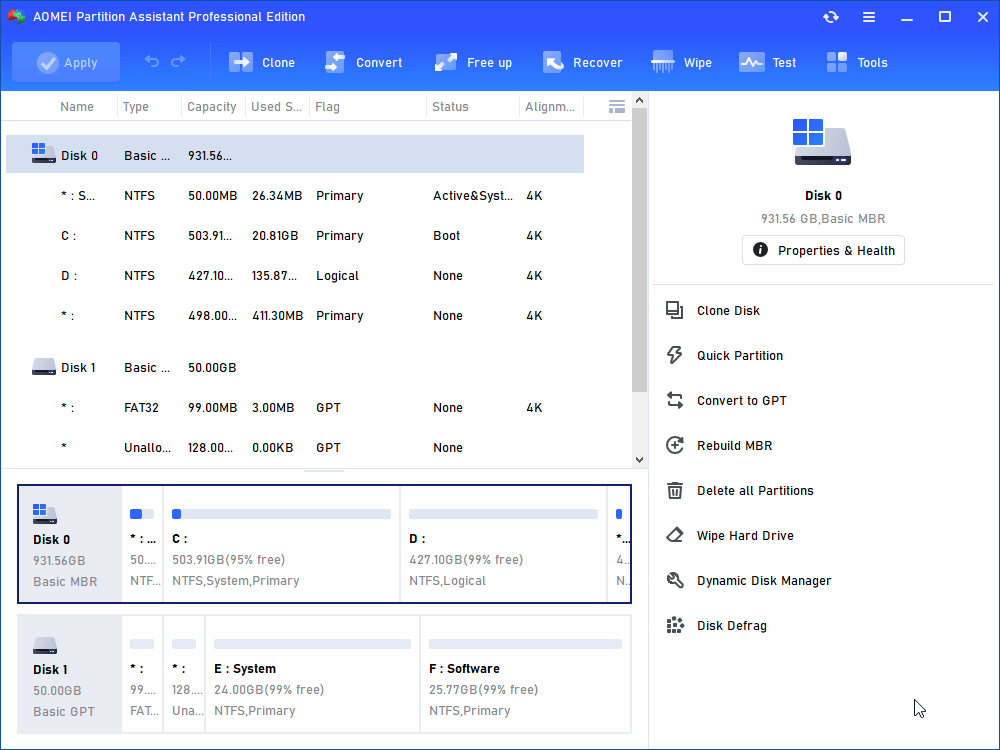
Step 1. Install and run AOMEI Partition Assistant Professional. Right-click the disk (take the system disk as an example) and choose “Convert to GPT”.
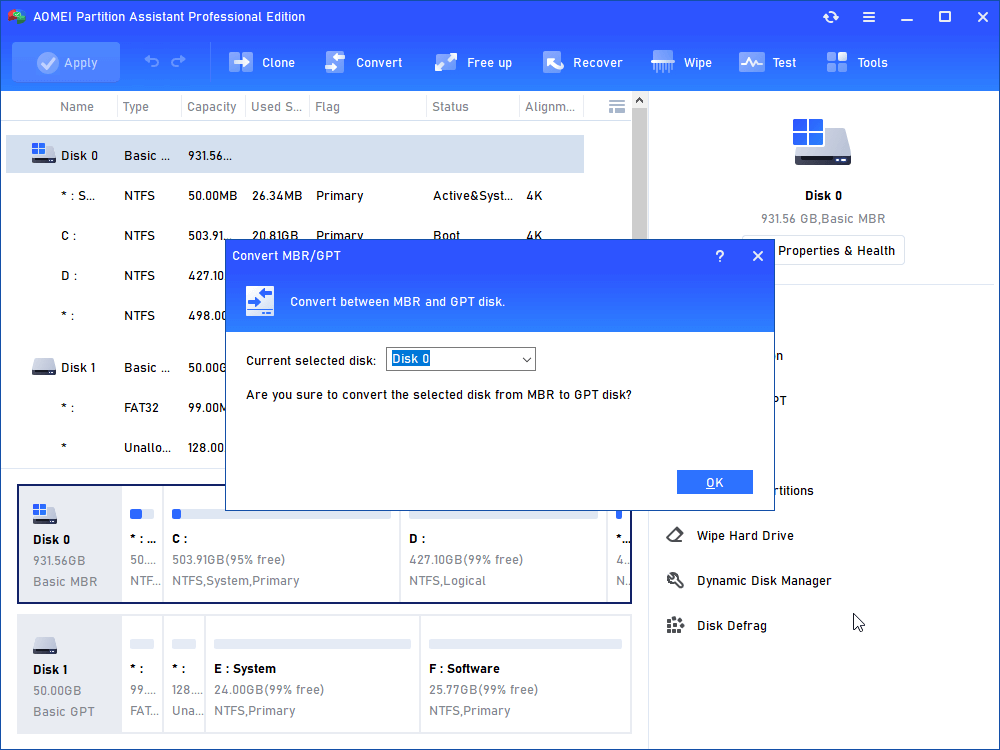
Step 2. Click “OK” to confirm your operation.
Step 3. Click “Apply” to commit the pending operation.
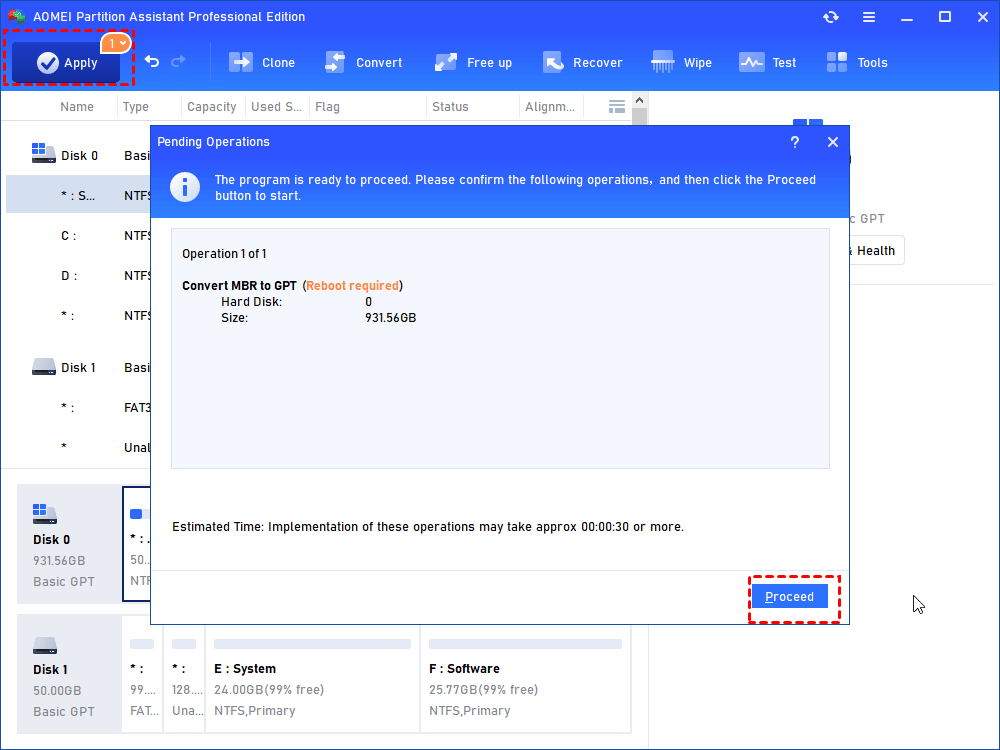
After that, you have converted the system disk from MBR to GPT successfully. Since the GPT disk matches with UEFI, so you also need to change the Legacy to UEFI.
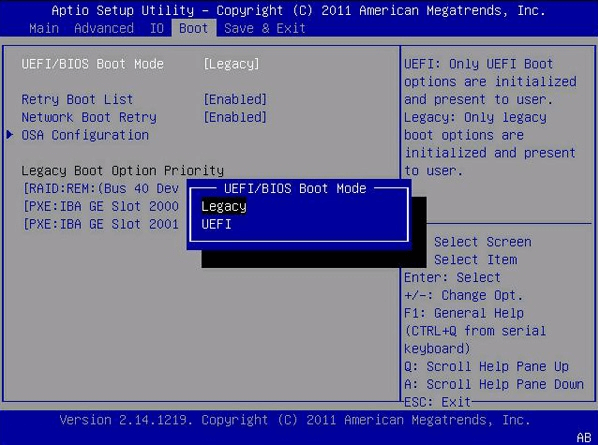
✦ Enter the BIOS settings when the computer is turned on.
✦ Use the arrow keys to select UEFI/BIOS Boot Mode in the Boot column, and then change Legacy to UEFI.
One additional crucial step before installation is to enable Safe Boot and enable TPM 2.0. Let us examine how you can accomplish that.
1. Implement Secure Boot
Step 1. Navigate to Settings and choose Update & Security. After arriving, choose the Recovery option.
Step 2. Select the Restart now icon in the "Advanced Startup".
Step 3. Select Troubleshoot from the Advanced Startup menu following the restart.
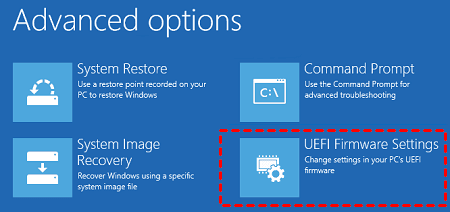
Step 4. Accesse the UEFI Firmware Settings option.
Step 5. Press the Restart icon. You must navigate to the security or boot preferences page. It would help if you then navigated to the Secure Boot option. Once there, enter the keypad.
Step 6. Select Enabled as the option.

Following that, press the Enter key. Restarting your system will enable secure launch functionality on your computer.
2. Configure TPM 2.0
Step 1. Navigate back to the Settings menu and select Update & Security.
Step 2. You must subsequently choose the Recovery option. Restart from Advanced Start-up.
Step 3. Select the Troubleshoot option. Proceed to Advanced Options.
Step 4. Access the UEFI Firmware Settings, then restart.
Step 5. Proceed to the boot or security preferences page.
Step 6. Navigate to the TPM state change screen, select Enabled, and press enter.

Exit the UEFI configuration and verify the updated settings.
3. Upgrade from Windows 10 to Windows 11
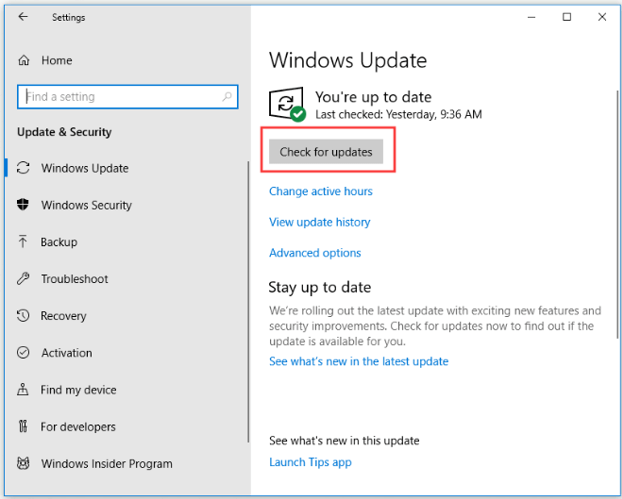
Finally, you just need to go to “Settings”> “Update and Security”> “Windows Update”, and then click “Check for updates”. If available, you will see Windows 11 updates. Click Download and Install to complete.
If your Windows Update doesn't show "update", you can also install Windows 11 via USB.
How to optimize the performance of Windows 11 after upgrading
How to optimize the performance of Windows 11 after upgrading Optimizing the performance of Windows 11 after an upgrade is crucial to ensure a smooth and efficient computing experience. Here are steps you can take to enhance the performance:
▶ Update Drivers and Software
After upgrading, make sure all your drivers and essential software are up-to-date. Outdated drivers can lead to compatibility issues and performance bottlenecks.
▶ Upgrade Hardware
If possible, consider upgrading your hardware, such as adding more RAM or replacing hard drive with SSD. This can significantly boost overall system performance.
▶ Disable Startup Programs
Open the Task Manager (Ctrl + Shift + Esc), go to the "Startup" tab, and disable unnecessary programs from launching at startup. This helps speed up the boot process.
▶ Optimize Visual Effects
Open the System Properties (Win + Pause/Break), go to "Advanced system settings", and under the "Performance" section, choose "Adjust for best performance" or customize visual effects to suit your preferences.
▶ Manage Power Settings
Adjust power settings to balance performance and battery life. Go to "Settings" > "System" > "Power & battery" and choose an appropriate power plan.
▶ Disable Special Effects
Minimize or turn off special effects like transparency and animations in the Windows settings to reduce resource usage.
▶ Limit Background Services
In the Task Manager, navigate to the "Services" tab and disable any unnecessary services that may be running in the background.
▶ Disk Cleanup and Defragmentation
Use the built-in Disk Cleanup tool to remove unnecessary files and perform disk defragmentation to optimize file placement on the drive.
▶ Check for Resource-Intensive Applications
Use the Task Manager to identify any applications or processes consuming excessive CPU, memory, or disk resources and consider alternatives or optimizations.
By following these steps, you can significantly enhance the performance of Windows 11 after upgrading, ensuring a more responsive and efficient computing experience.
Conclusion
From what has been discussed above, this page not only provides you with how to implement Windows 11 MBR installation, but also shows you how to optimize the performance of Windows 11 after upgrading. If you want to use AOMEI Partition Assistant on Windows Server, please upgrade to AOMEI Partition Assistant Server.

