How to Make Partitions in Windows 7, 8, 10 after after Installation
Making partition can separate your OS from your data. In this post, you’ll learn how to make partitions in Windows 7 in 2 ways.
By Lucas / Updated on May 12, 2023
Reasons to make partition
Disk partitioning is to divide a hard drive into multiple logical units. Mainly, by partitioning your disk, you can separate your operating system from your data and thus, when the system is corrupted, it can reduce the chances of your data becoming corrupted. For this reason, you can make partitions after installation. Next, this post will introduce how to make partitions in Windows 7 after installation.
2 ways to make partitions in Windows 7 after installation
Method 1: Make partitions with Disk Management
For example, you have C/D/E three primary partitions in Windows 7 after installation, and you want to make more partitions on this disk. Let’s see how to make disk partition in Windows 7 after installation with Disk Management.
Step 1: Use Windows+R to open Run, type “diskmgmt.msc” and click OK.
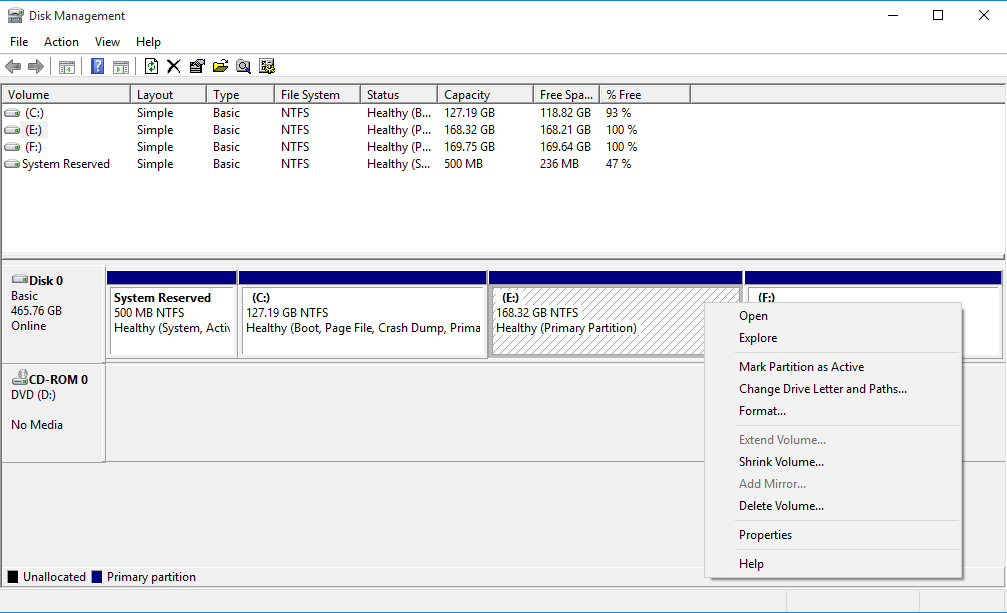
Step 2: Right-click on the partition you wish to resize and select the Shrink Volume option.
Step 3: Enter the size you wish to shrink your drive to in megabytes (1000 MB = 1GB). Then click on the Shrink button.
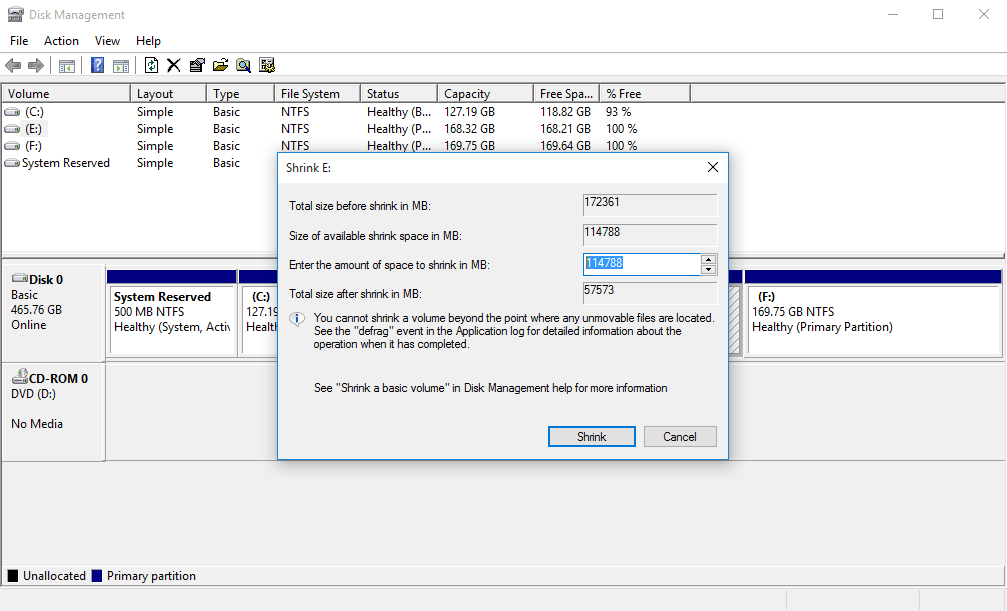
Note: You cannot shrink your volume more than the amount indicated in the Size of available shrink space in MB section.
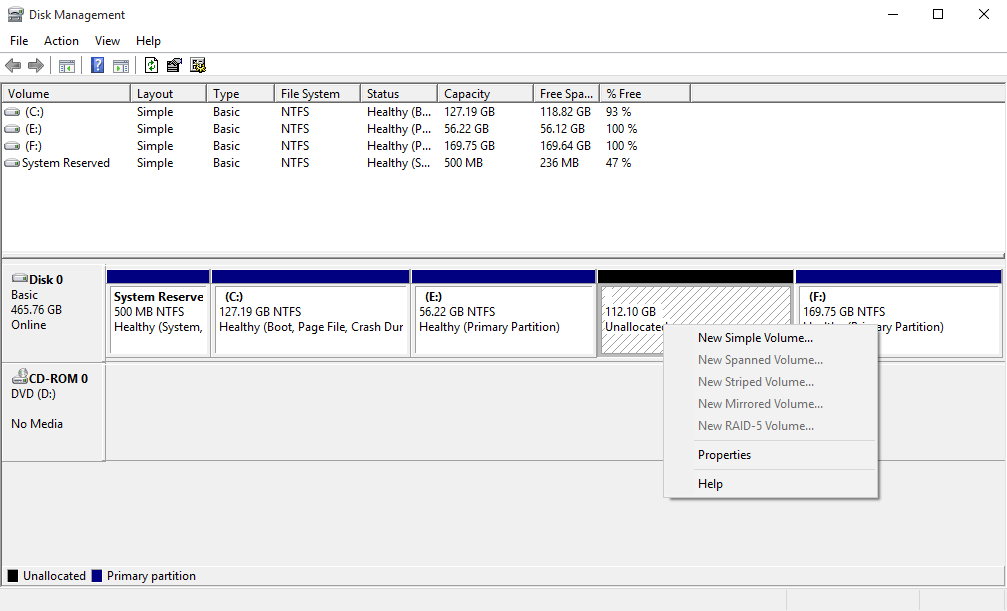
Step 4: You should now see a new unallocated space in your Disk Management window. Right-click on the unallocated space and select the New Simple Volume option. The New Simple Volume Wizard should pop up. Click on the Next button to continue.
Step 5: Enter the amount of memory you wish to allocate for your new partition and click on the Next button. To store data on this partition, you must format it first. Click on the Format this volume with the following settings:
For File System, select NTFS
For Allocation unit size, select Default
For Volume Label, type the name you wish to give your new drive.
Click on the Perform a quick format
Then click on the Next button

If you want another new partition, follow the same step. If your disk is MBR, sometimes, you may receive an error message: you cannot create a new volume in this allocated space because the disk already contains the maximum number of partitions.
MBR disk only supports 4 primary partitions or 3 primary partitions and 1 extended partition at most. In this case, you have to convert MBR to GPT
Method 2: Make partitions with AOMEI Partition Assistant
Disk Management has some limitations, the size of available shrink space is very small, or even zero; Sometimes, the disk already contains the maximum number of partitions, and you do not want to delete an old one to create a new one with Disk Management, what should you do?
In this case, you can use third-party software. AOMEI Partition Assistant Standard is a professional disk management tool. It is fast and free to use. It allows you to make partitions in Windows 7/8/10/11 without formatting, and you can use this tool to resize the BitLocker partition if you have a large BitLocker partition with sufficient space. Let’s see how to create partitions in Windows 7/8/10 with AOMEI Partition Assistant.
Step 1: Download AOMEI Partition Assistant and launch the software.
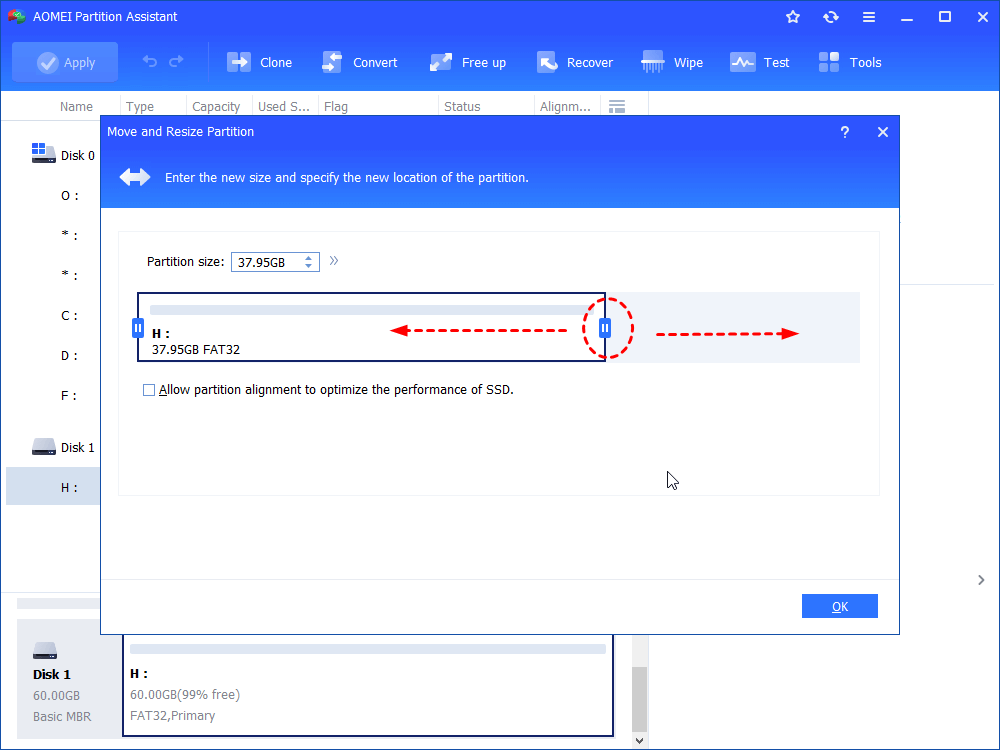
Step 2: Right-click the partition you want to shrink and choose Resize/Move Partition.

Step 3: Position the mouse pointer on the right border of the partition and drag the border rightwards to extend partition. Or type the size of unallocated space after. Then click OK.
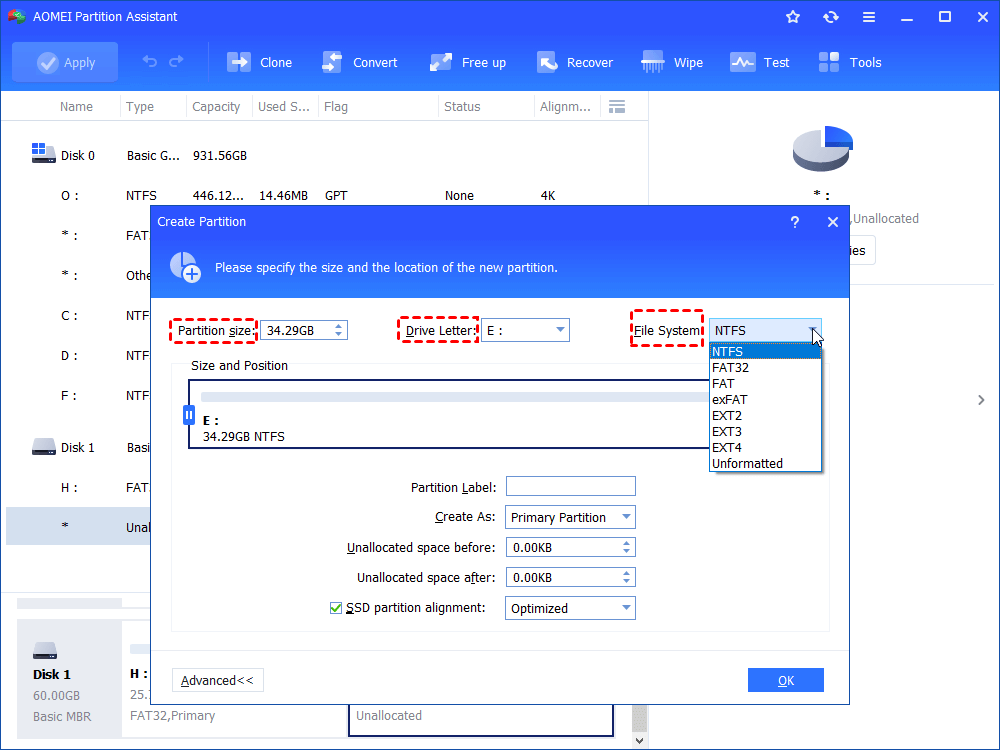
Step 4: You will see there is an unallocated space of 55.96GB right after E partition. Right click the unallocated space and choose Create Partition. Type the Partition Size, choose Drive Letter and File System, then click OK.
Step 5: Click Apply at upper left corner to save the change.
Another easy way to create partition without unallocated space.
If there is no unallocated space, you do not have to resize partition for unallocated space. You can create a new partition directly on old partition with NTFS or Fat32 file system as long as it has free space. However, in order to use this feature, you must upgrade the freeware to the Pro edition.
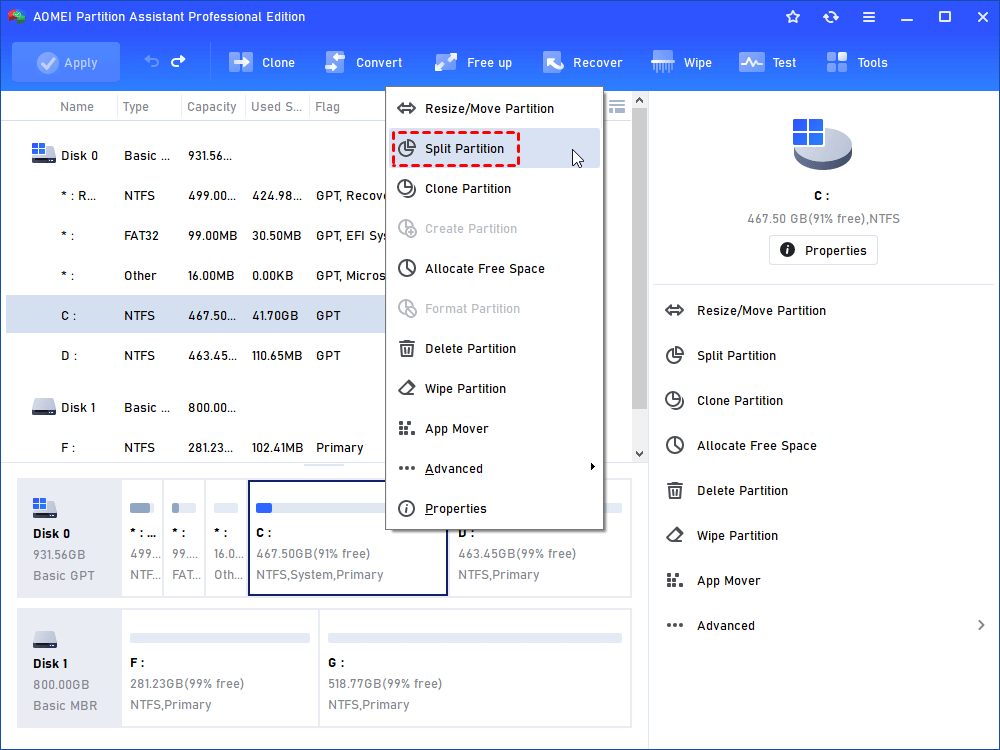
Take F drive as an example, right-click F partition and choose Split Partition. Input Drive Letter and New partition size, click OK. At last, click Apply to save the change.
If the disk is MBR, and you already have 4 primary partitions. You still want to create another partition, you do not have to worry about the error message: you cannot create a new volume in this allocated space because the disk already contains the maximum number of partitions.
When there are already 4 primary partitions, you can create new partitions with AOMEI Partition Assistant, it will automatically convert new partition and the resized partition to logical partition. In addition, AOMEI Partition Assistant allows you to move partition which cannot be operated with disk management.
Conclusion
To make a conclusion, this passage introduces how to make partition in Windows 7/8/10 after installation in 2 ways, you can choose either of them based on your own preference.
Besides making partition, AOMEI Partition Assistant has many other powerful features. For example, you can Convert FAT32 to NTFS, make bootable media, migrate OS to SSD, etc.

