Answered: Can I Use My Old SSD In A New Computer?
Can I use my old SSD in a new computer? Yes, you can put old SSD to a new computer. This guide will share specific steps to help you transfer the old SSD data and install it to the new PC.
By Irene / Updated on February 20, 2025
User case: Can I use my old SSD in a new computer?
I'm building a new system soon and I'd like to transfer an old NVME SSD with my Windows 10 installed and other games as well.
What would i have to do in order for it to boot properly and keep all my files? I don't have the old system with me so I don't have any option to uninstall windows on it or anything. Will directly removing the old SSD from my computer and inserting it into the new PC cause boot failure and data loss?
- Question from Reddit
"Can I use my old SSD in a new computer?" This is a common question, especially for those looking to save time and effort. But can you simply remove it from the old device and insert it into the new one? The answer is likely no. Moving the SSD directly to a new PC may cause boot failure due to hardware or driver conflicts. If the new PC has different hardware, the operating system on the old SSD might not be compatible, leading to boot issues like blue screen of death. While data loss is unlikely, there is always some risk if the system isn’t set up properly or if the SSD is damaged during the transfer. It’s usually safer to clone the old SSD to a new one to ensure all data is preserved.
How to safely install old SSD in new computer?
If you want to use the old SSD in a new computer as the system drive with all the original data, you can follow the 4 stages to transfer the old data to the new disk with ease.
Stage 1. Make some preparations
If you want to safely transfer the data from the old SSD to the new PC, it it necessary to make some preparations.
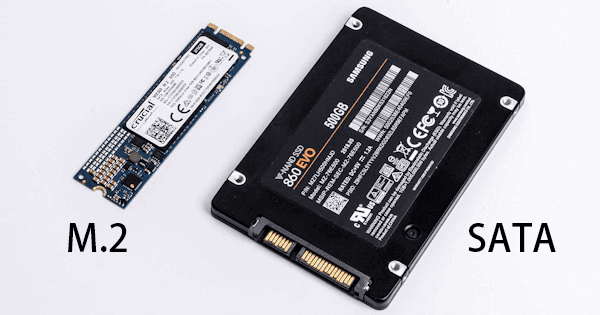
1. Choose the Right SSD and Check Hardware Compatibility: Ensure the SSD is compatible with your laptop or new PC, supporting the correct interface (SATA/M.2) and configuration (AHCI/RAID).
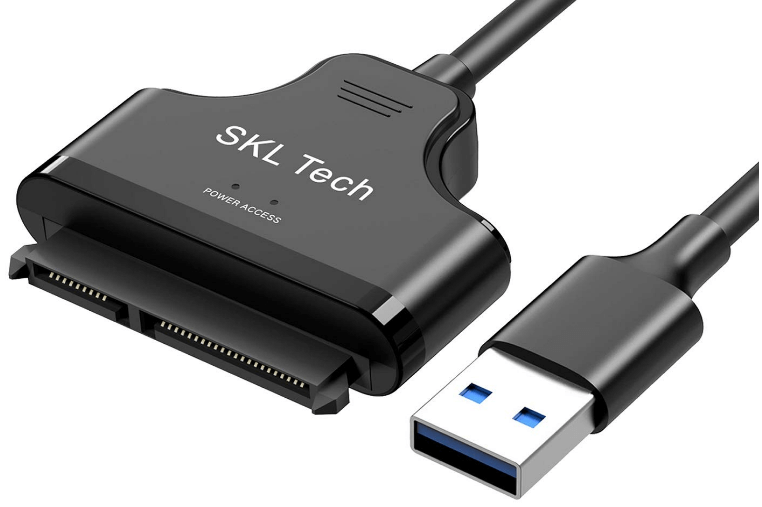
2. Prepare a USB-SATA Adapter: Use this to connect the SSD for better performance than a USB cable.
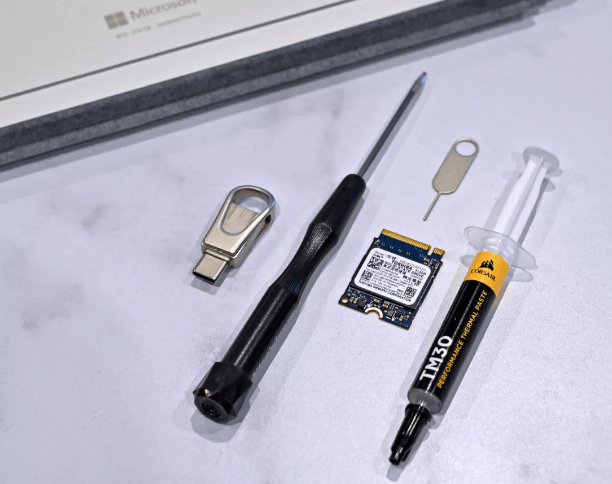
3. Gather Necessary Tools: Have screwdrivers, tweezers, and anti-static gloves ready for the replacement.
4. Download Cloning Software: Use software like AOMEI Partition Assistant to clone your old SSD’s data to the new one.
Stage 2. Run the cloning software to transfer the old disk data
AOMEI Partition Assistant is a widely used computer management tool, known for its Clone Disk feature that allows users to easily transfer all their original data, including files, programs, and even the operating system, to a new disk. This eliminates the need for reinstallation, saving both time and effort. The software is compatible with most Windows versions, including Windows 11, 10, 8, and 7. It can clone every part of your hard drive, even hidden or system-related sections, ensuring that your new drive is fully bootable.
Depending on your needs, AOMEI also offers different cloning methods to support disks of various sizes. It can seamlessly clone between MBR and GPT partition styles without requiring any conversion. Additionally, if your PC is unable to boot, you can use AOMEI Partition Assistant to clone your hard drive by creating a bootable USB drive.
The Best Windows Disk Partition Manager and PC Optimizer
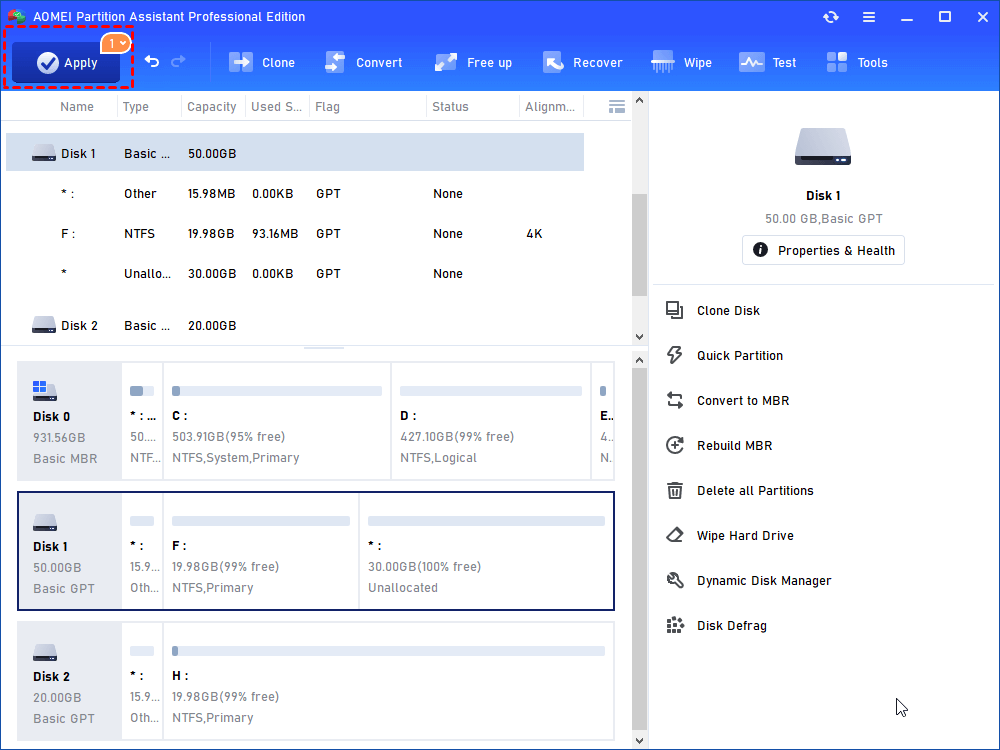
Step 1. Install and launch AOMEI Partition Assistant. Connect the old disk to your new computer.
Step 2. Click the "Clone" main tab and select "Clone Disk". (You can also right-click the Disk you want to clone and select the "Clone Disk" tool to run disk clone.)
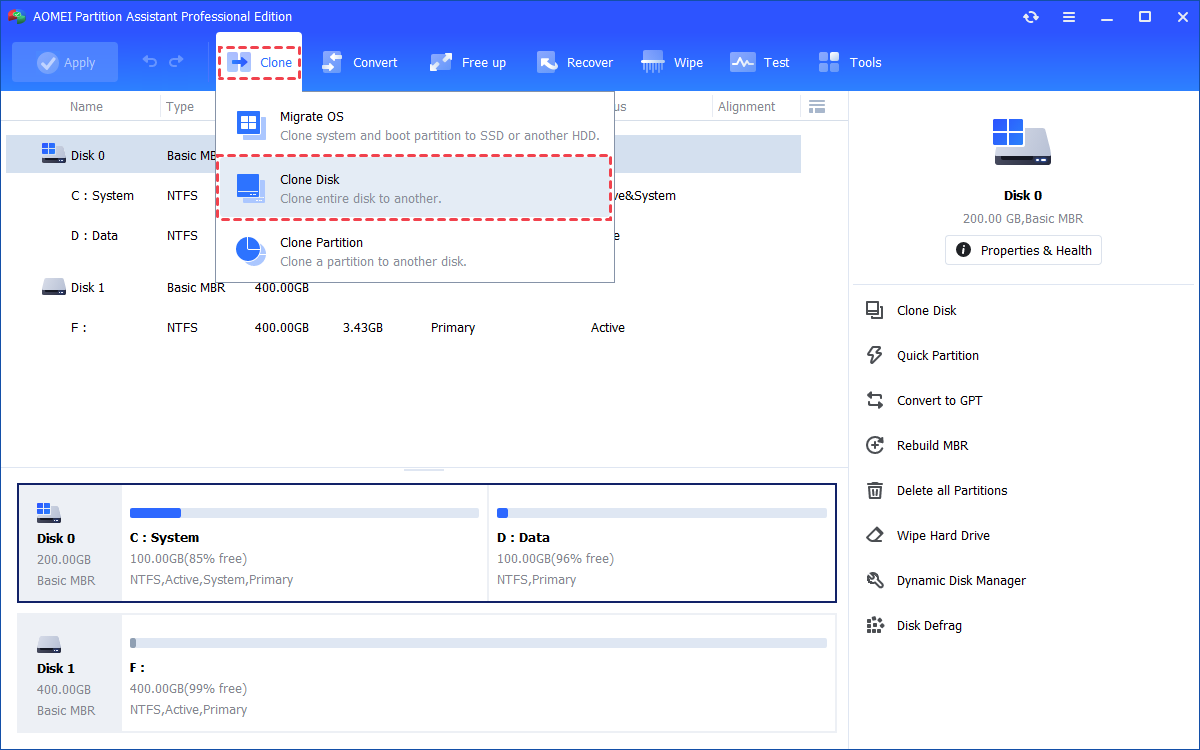
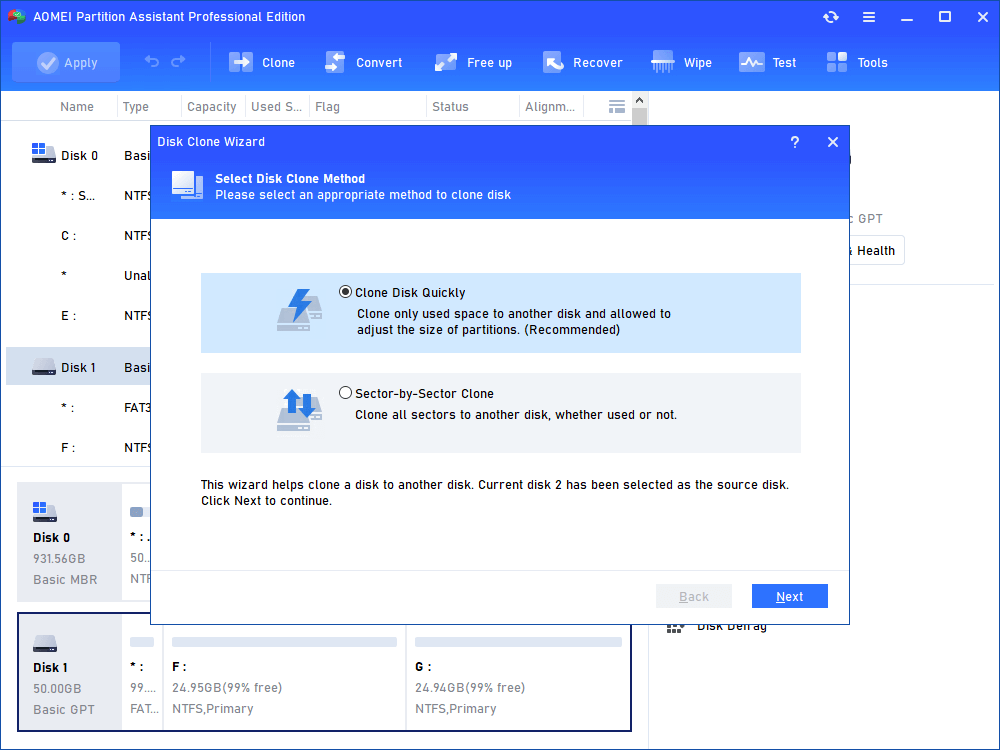
Step 3. Choose the hard disk that you need to clone as the source disk and click "Next".
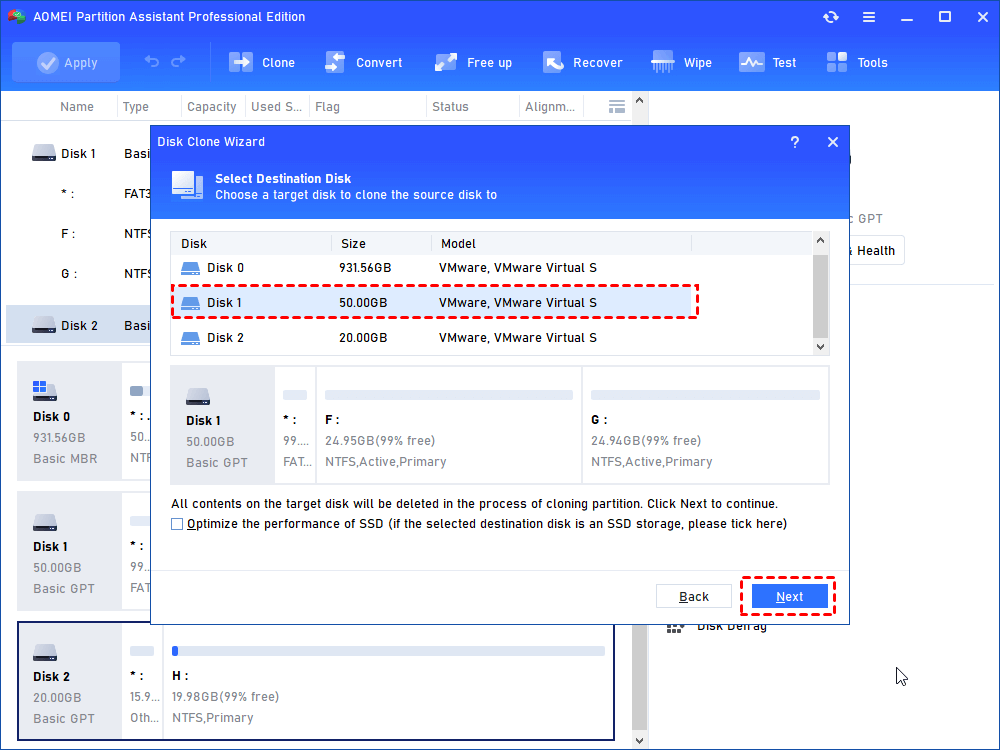
Step 4. Select the destination disk to put the data of the source disk on, and then click "Next".
Step 5. Then, you will enter the Confirm interface where you can check the source and destination disk. After all is set, you can click the "Confirm" button to continue.
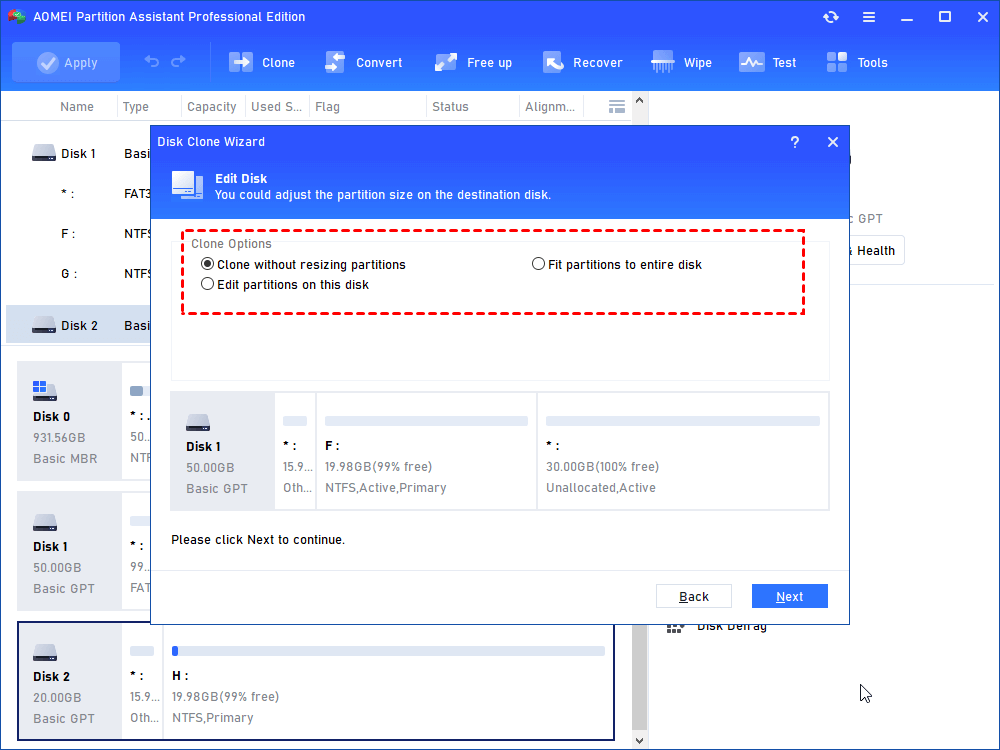
In lower left corner of the window, you can click the "Settings" button to adjust the partition size on the destination disk. There are 3 options for you:
Fit partitions to entire disk: all partitions will be cloned to the target disk and take up its full capacity according to the original partition size proportion.
Edit partitions on this disk: you can change every partition size on the target disk as you need.
After finishing the adjustment, please click "Save".

● You can tick "4K alignment" to improve the reading and writing speed of SSD if the selected destination disk is an SSD storage.
● All data on this selected destination disk will be wiped out after you save the operation to physical disk. If there is important data on the destination drive, please make a backup in advance.
● If you clone to a smaller SSD, the first option is grayed out. If you select Sector-by-Sector Clone, it is unable to adjust the size on the destination disk.
Step 6. You can preview the disk cloning operating by viewing the "Pending Operations". To commit the "Pending Operations", please click "Apply" and "Proceed".
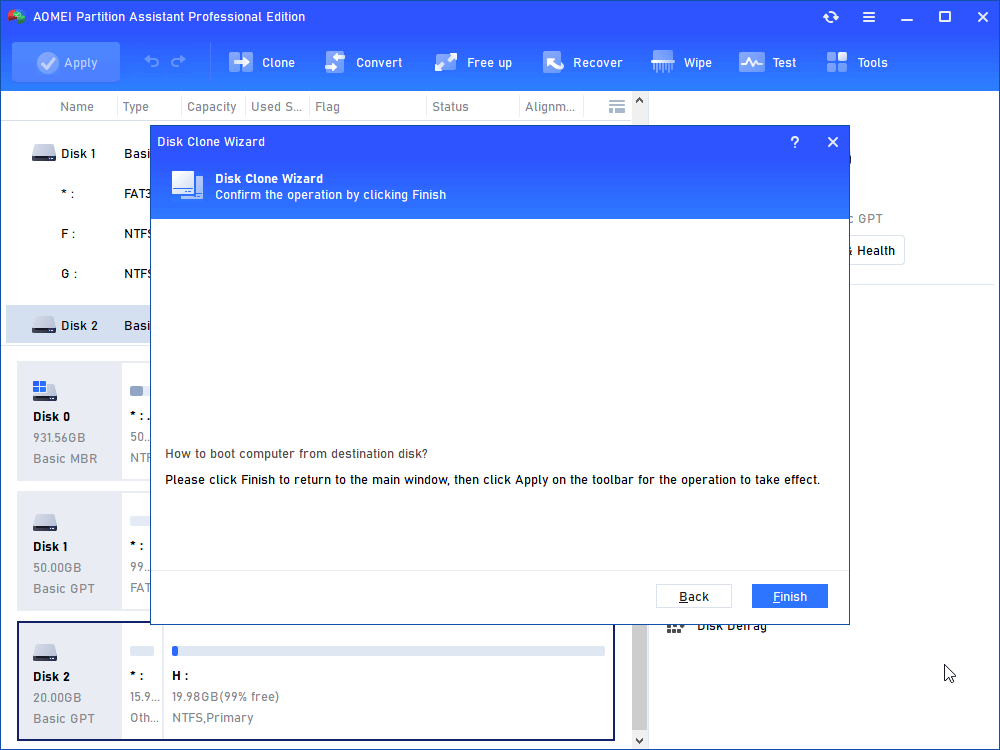
Step 7. The cloning process will start and you can check the cloning process.
Then, everything on the original old drive has been moved to the new one. You can disconnect the SSD from your computer.
Stage 3. Replace the disk
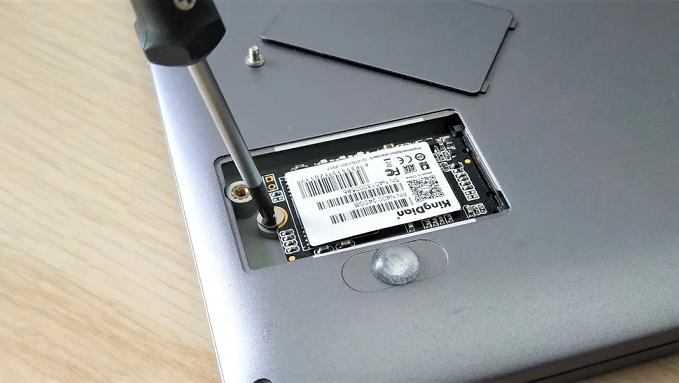
Now, if you want to directly use the old disk in new computer and reserve the new disk from it, you can read this section. When replacing a laptop SSD, it’s important to choose the right size and type. M.2 SSDs come in various lengths, such as 2280, 2260, 2242, and 2230, and may use either NVMe or SATA interfaces. Ensure compatibility before upgrading. This guide covers the steps for replacing M.2 NVMe, M.2 SATA, and 2.5-inch SATA SSDs.
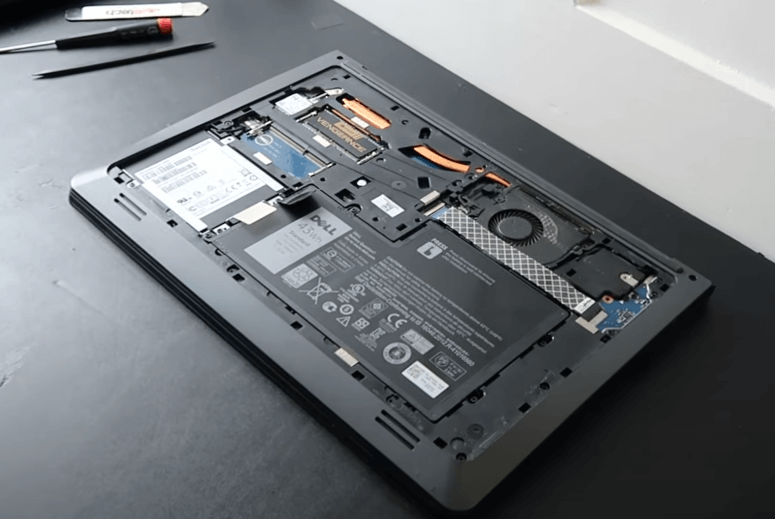
For M.2 NVMe and SATA SSD replacements, power off the laptop, disconnect AC power, and remove the battery if possible. Open the laptop’s bottom panel or hatch and locate the SSD. Remove the securing screw and gently lift the SSD, noting any adhesive. Insert the new drive at an angle, secure it with the screw, and reassemble the laptop before powering it up.
For a 2.5-inch SATA SSD upgrade, power off the laptop and remove the back cover. Disconnect the old hard drive by loosening the screws, lifting it at an angle, and detaching it from the cable. Remove the drive from its caddy, insert the new SSD, secure it, and reattach the cover.
If you don't want to replace the new computer disk but need to directly add the old disk to the PC as a storage drive, you can now first format the SSD or secure erase SSD to clean the old disk data, and then install it to the second disk slot. Before cleaning it, it is important to check whether you have successfully clone the data to the new disk and successfully boot from it.
Stage 4. Boot from the SSD
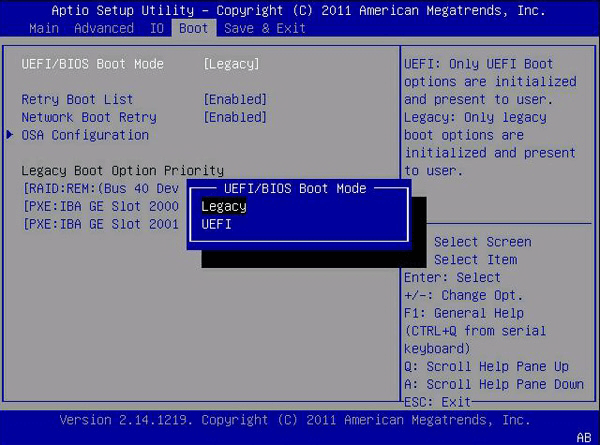
Once all the steps are completed, restart your laptop, and it will boot from the new solid-state disk. However, if your old drive and the new drive use different partition styles, you may need to switch from Legacy BIOS to UEFI boot mode, or vice versa, to ensure compatibility between the partition scheme and boot mode.
When you reboot your PC, press ESC, F1, F2, F8, or F10 repeatedly to access the BIOS setup. Look for the Boot tab, switch the boot mode to either Legacy or UEFI, and then press Enter.
Note: The exact entry key to access BIOS may vary depending on your computer's brand. If you do not know the specific key, you can directly run AOMEI Partition Assistant's UEFI BIOS Boot Options Manager function to enter.
Conclusion
In conclusion, transferring your old SSD to a new computer can be done safely, but it requires proper preparation. Simply inserting the old SSD into the new system may result in boot failure due to driver conflicts or hardware differences. It’s best to clone the SSD using reliable software like AOMEI Partition Assistant to preserve all your files and ensure the new system boots properly. By carefully selecting the right SSD, using the correct tools, and following the cloning process, you can smoothly migrate your data and enjoy an easy experience with your new PC.

