How to Erase a Bricked SSD on Windows PCs
How to erase a bricked SSD on a Windows PC? Read this post and you will learn three easy and workable methods to wipe a bricked SSD quickly and effectively.
By Hedy / Updated on February 27, 2025
What is a bricked SSD?
A bricked SSD refers to a solid-state drive (SSD) that has become completely unusable or unresponsive, often due to software, firmware, or hardware issues. When an SSD is "bricked", it is effectively "dead" — it no longer functions or can be accessed, rendering the storage device as useful as a brick.
There are two common types of bricked SSDs:
Hard brick: The SSD is completely non-functional, and no amount of troubleshooting or software intervention can bring it back to life. This could be caused by severe firmware corruption or physical damage.
Soft brick: The SSD is still physically intact but has become unresponsive due to issues like corrupted firmware or failed software updates. In this case, recovery methods like re-flashing the firmware may be possible to restore the SSD.
In either case, a bricked SSD typically means the data is inaccessible, and recovery might require professional help, depending on the cause of the issue.
Why should you erase a bricked SSD?
Erasing a bricked SSD is generally done for several key reasons:
1. Data security
If the SSD has become unresponsive or bricked due to a firmware or software issue, there’s a risk that sensitive data could be exposed or remain accessible to unauthorized parties. Erasing the drive ensures that all data on it is permanently wiped, reducing the chances of data theft or leakage.
2. Fixing firmware or software corruption
In some cases, the bricked state may result from corrupted data or firmware. Erasing the SSD might help restore it to a "clean" state, allowing you to attempt re-flashing the firmware or reinstalling software in hopes of fixing the issue.
3. Preventing further damage
In certain cases, if the SSD is bricked due to software or firmware problems, using the drive for other purposes could potentially worsen the damage. Erasing it can sometimes be the first step in troubleshooting or recovery.
4. Recycling or reusing the drive
If the SSD is no longer usable in its current state and you're planning to recycle it or repurpose its components, erasing the drive ensures that all sensitive data is securely removed, so it doesn't pose a risk to privacy.
However, keep in mind that erasing a bricked SSD is a destructive action, and once erased, the data may be irrecoverable. So, it should only be done if recovery is no longer possible or necessary.
How to erase a bricked SSD on a Windows PC
Erasing a bricked SSD can be challenging, especially since the drive is no longer responding to normal commands. However, if you're looking to wipe a bricked SSD, here are a few methods you can try.
✍ Note: The first step in dealing with a bricked SSD is figuring out if it’s truly bricked. It’s important to verify whether the SSD is not being recognized by the system or if it’s an issue with your computer’s operating system.
◆ Check your system BIOS: Reboot your system and enter the BIOS (or UEFI) settings to see if your SSD is being detected. If it’s not listed, your SSD may indeed be bricked.
◆ Try different ports or cables: Sometimes, the problem may be as simple as a loose connection. Swap out cables or connect the SSD to a different port.
Way 1. Use Disk Management (If the SSD is recognized by the system)
If the SSD is partially recognized by your computer but not fully operational (i.e., not bootable), you may still be able to erase it using built-in disk management tools.
Step 1. Open Disk Management on your computer (Press Windows + X and choose Disk Management).
Step 2. Find the bricked SSD in the list of drives. If the drive is visible, right-click on it and select Delete Volume.

Step 3. Once the volume is deleted, you can create a new partition and format the SSD.
If the SSD is unresponsive in Disk Management, you might need to proceed with other methods.
Way 2. Use Diskpart Command
If you’re unable to reset the firmware or recover the data, the next step is to attempt to clean the SSD using Windows Diskpart. Here's how to do it:
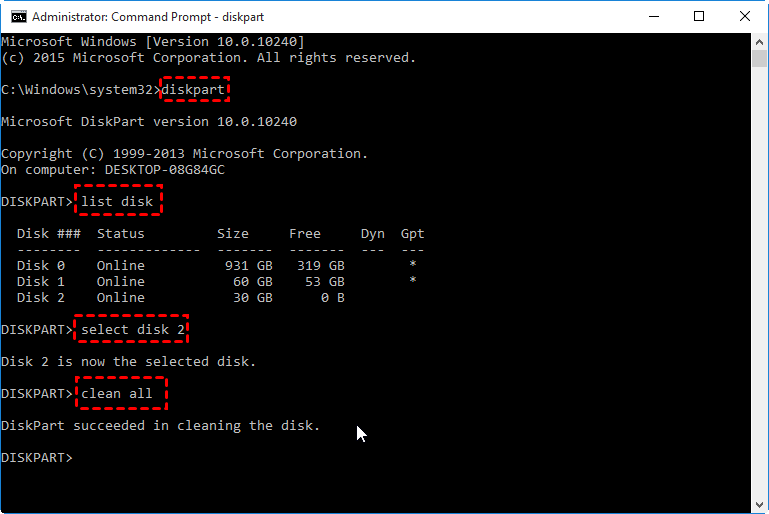
Step 1. Open the elevated command prompt: click "start" button, input "cmd" in the search box and press Enter, right-click the program and choose "Run as administrator".
Step 2. In the pop-out command prompt window, type "diskpart" and press Enter to launch the utility.
Step 3. Type "list disk" and press Enter: get a list of disk numbers to select from.
Step 4. Type "select disk #" and press Enter: substitute # for the disk number listed that you want to run "clean all" command on. Here we select disk 2.
Step 5. Type "clean all" and press Enter.
Way 3. Use a third-party disk eraser
For a more secure erasure that ensures no data can be recovered, you can use third-party software like AOMEI Partition Assistant. Unlike the Diskpart clean all command, the SSD Secure Erase feature in AOMEI software can wipe SSD data without affecting its lifespan or performance. However, this feature is currently only available on Windows 7. To use it, you'll need to connect the target SSD to a Windows 7 PC and follow the steps outlined below.
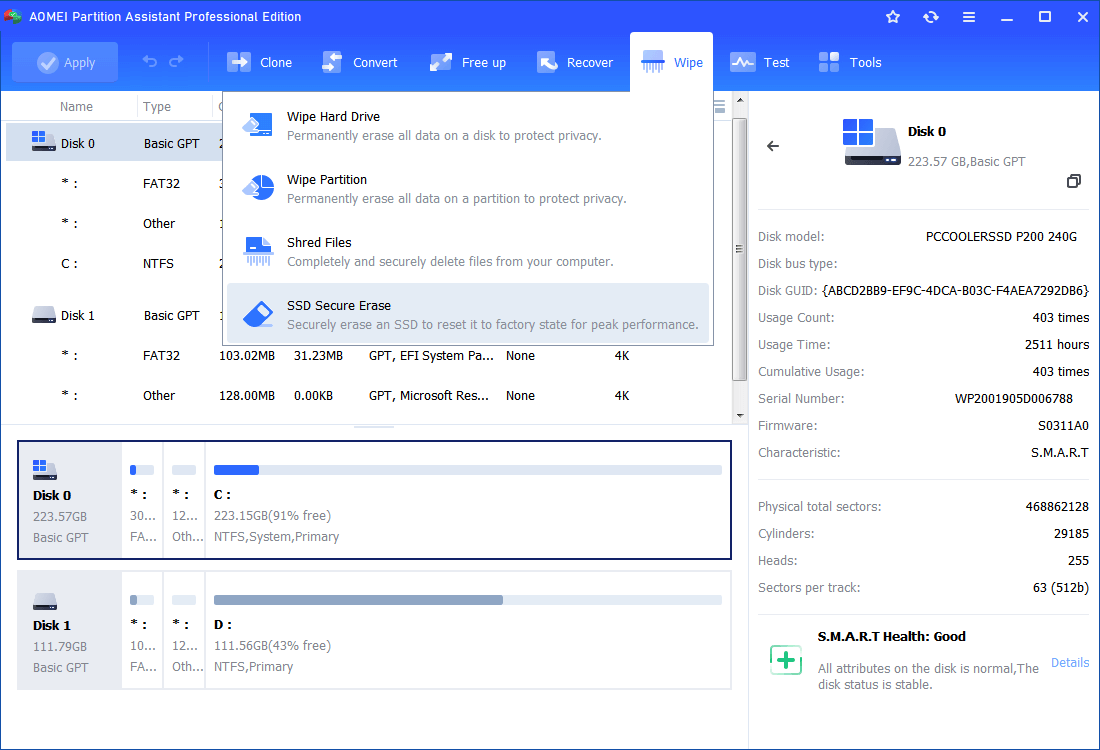
Step 1. Install and run AOMEI Partition Assistant. (The Demo Version is available for a free trial). In its main interface, click “Wipe” in the top toolbar, and choose “SSD Secure Erase”.
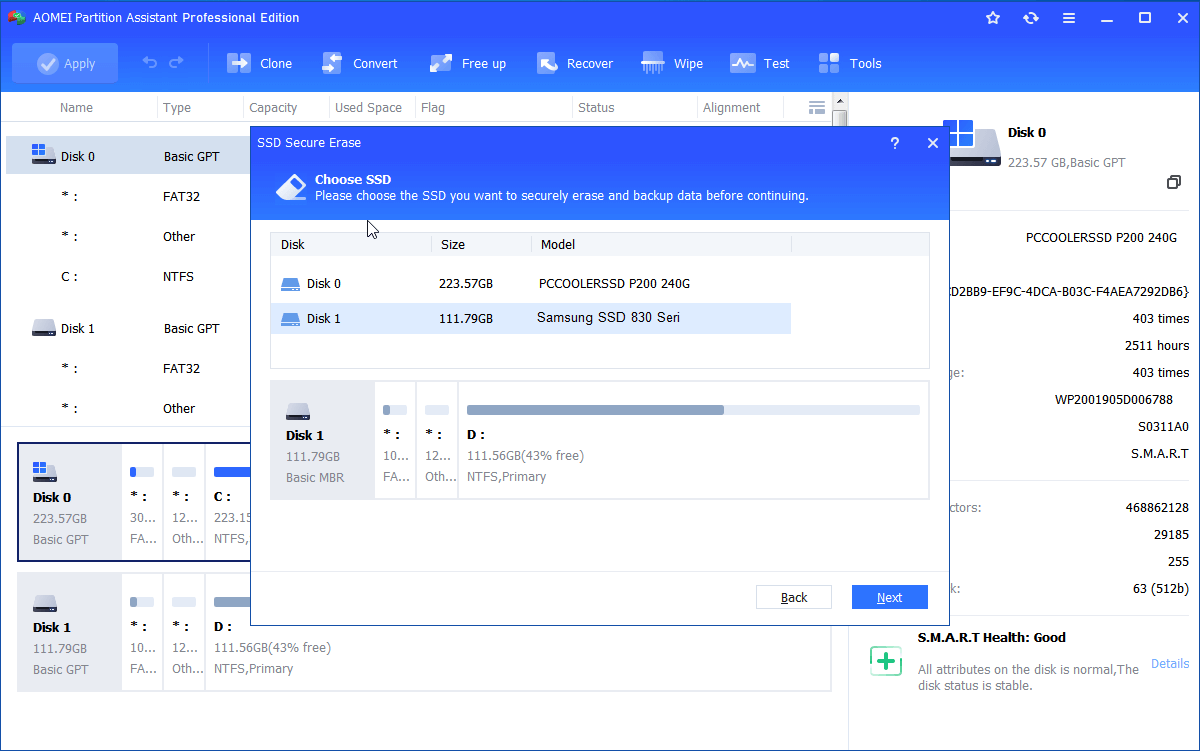
Step 2. Choose the SSD drive you need to erase from the given disk list and click "Next".
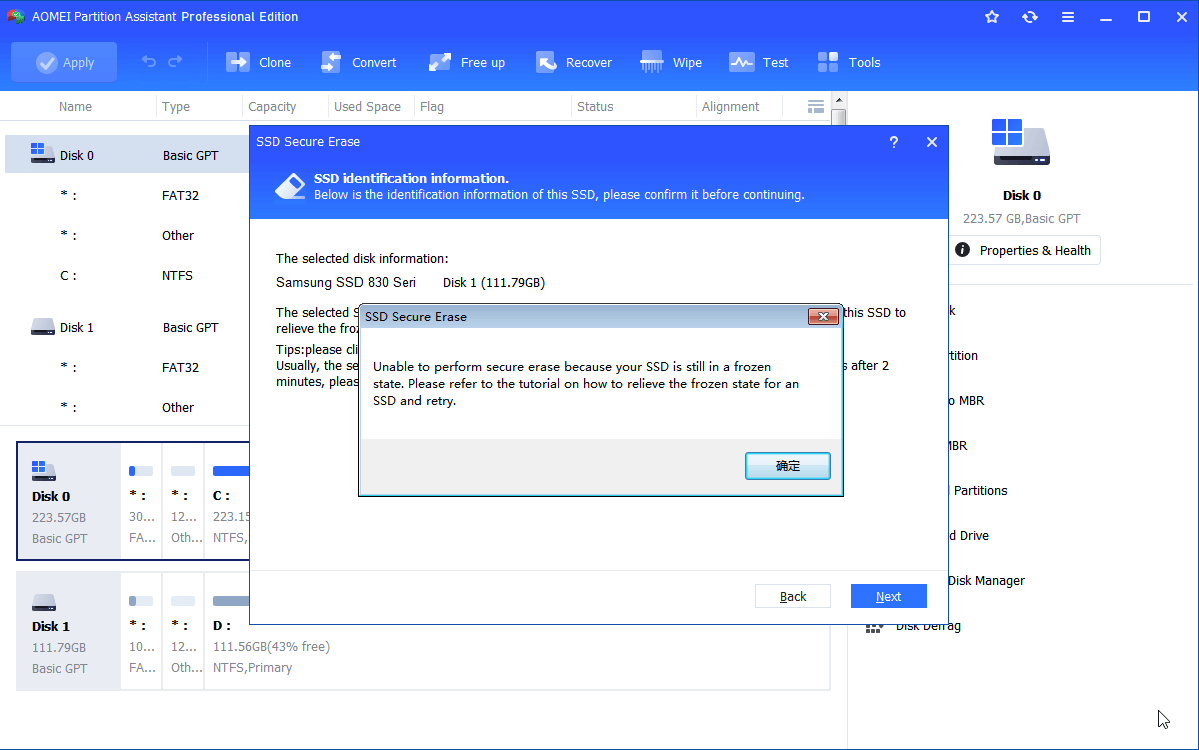
Step 3. Here you can view and check the basic information of the selected SSD drive.
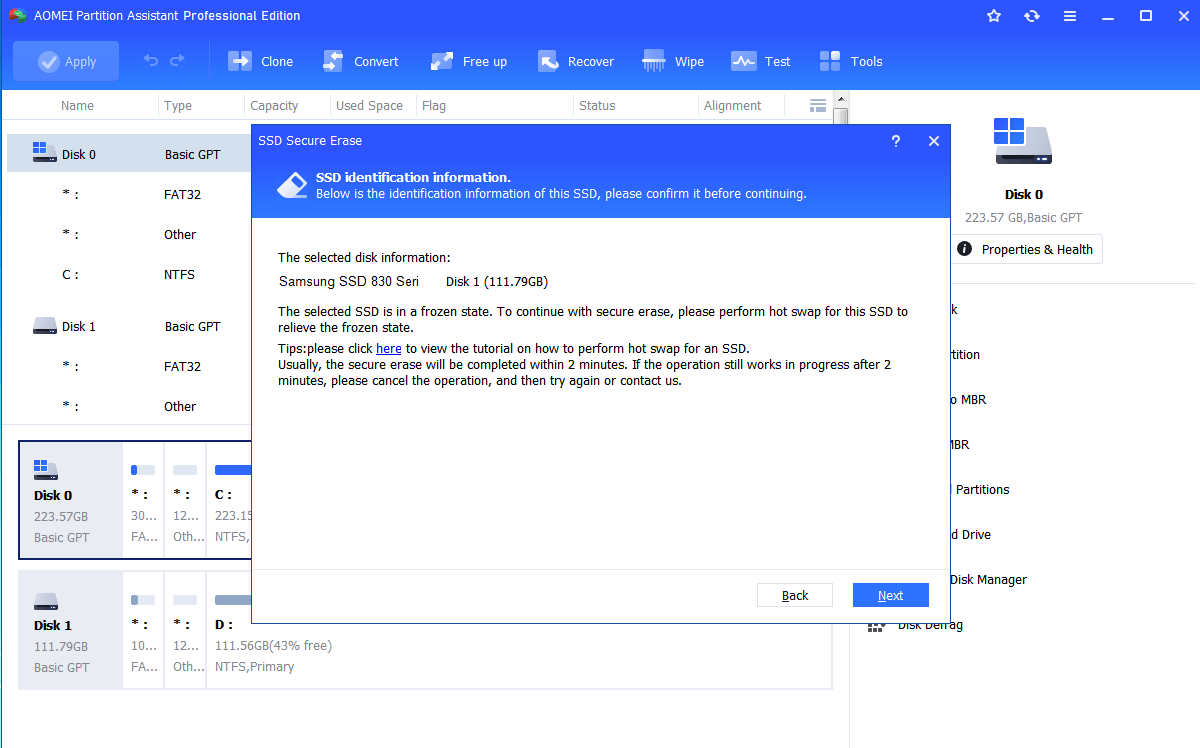
Warning: you might find the SSD drive is in a frozen state, if you click "Next", you will receive an error message shown below. To continue with secure erase, you can refer to the given tutorial to perform hot swap for the SSD.
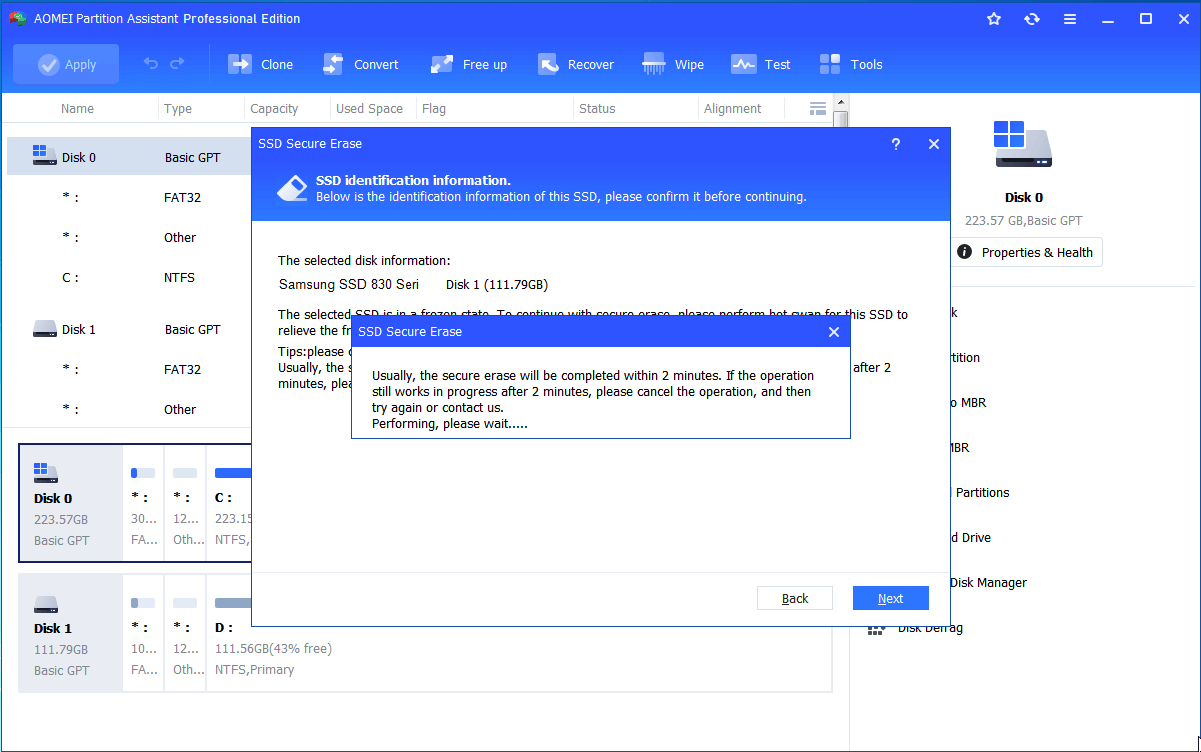
Step 4. After a successful hot swap, then click "Next" to start the SSD Secure Erase.
Conclusion
That’s all about how to erase a bricked SSD. In conclusion, cleaning up a bricked SSD on a Windows PC can be done using several methods, depending on whether the drive is recognized by the system. You can start with built-in tools like Disk Management or Diskpart for partial functionality. For a more secure wipe, third-party tools like AOMEI Partition Assistant offer a safer option that won’t affect the SSD’s lifespan. Remember, always back up your data, and when in doubt, consider professional data recovery services.

