How Do I Clone A Hard Drive with Clonezilla [ Full Guide]
Clonezilla is a free, open-source tool designed for disk imaging and cloning. If you are wondering how do I clone a hard drive with Clonezilla, this article will help you finish the cloning process easily.
By Hedy / Updated on May 16, 2025
What is Clonezilla?
Clonezilla is a free, open-source disk imaging and cloning software designed to help users create complete backups of their hard drives or partitions. It is widely used for system backups, deployments, and data recovery. Clonezilla is available in two main editions:
Clonezilla Live: A standalone, bootable version designed for single-machine backup and recovery tasks. It is ideal for home users or small businesses needing a simple way to clone or image individual systems.
Clonezilla SE (Server Edition): A network-based solution that allows mass cloning of systems over a local network, making it suitable for large-scale deployments in educational institutions, data centers, and corporate environments.
Key features of Clonezilla:
• Supports various file systems, including NTFS, FAT, ext2/3/4, XFS, and more.
• Efficient data compression and encryption options.
• Allows disk-to-disk, partition-to-partition, or image file backup.
• Supports UEFI and MBR boot modes.
• Can clone only the used portions of a disk, making the process faster.
• Offers both graphical (Live) and command-line (Server Edition) interfaces.
Common use cases:
• Creating full system backups to prevent data loss.
• Cloning hard drives when upgrading or replacing a disk.
• Deploying a single system image across multiple computers.
• Recovering lost or corrupted systems.
Things to know before cloning hard drive with Clonezilla
Before opting for Clonezilla as your Windows 10 cloning solution, be aware of a few important factors. This tool is not designed with beginners in mind and demands a certain level of technical expertise.
Even navigating Clonezilla’s download page can be confusing. Users must identify their CPU architecture, choose a file format for the installation, and select a download source. Although these options are typically set to default for most, the process can be overwhelming. Unfortunately, that complexity only deepens once you start using the tool.
Clonezilla isn’t a standard application you install and launch. Instead, you must create a bootable USB or CD/DVD with the installation file, restart your computer, and boot directly from the external media.
Its interface is reminiscent of early computing, resembling an MS-DOS-style text-based layout rather than a modern graphical user interface. Even experienced users may struggle, making it an impractical choice for novices.
How do I clone a hard drive with Clonezilla
Using Clonezilla can be daunting, but if you’re determined to proceed, here’s a straightforward walkthrough for cloning Windows 10 or 11. Just follow these steps carefully:
Step 1. Visit the Clonezilla website and get the software. For most modern systems, choose the AMD64 CPU architecture and any of the available file types.
Step 2. Use the downloaded ISO file to make a bootable USB or DVD. Numerous online guides can help with this process.
Step 3. Restart your computer and enter the boot menu (commonly F12 for Gigabyte motherboards). Select the USB or DVD containing Clonezilla.
Step 4. Choose "Other modes…" to continue.
Step 5. Pick the "Clonezilla live (To RAM…)" option.
Step 6. Set your preferred language and keyboard configuration.
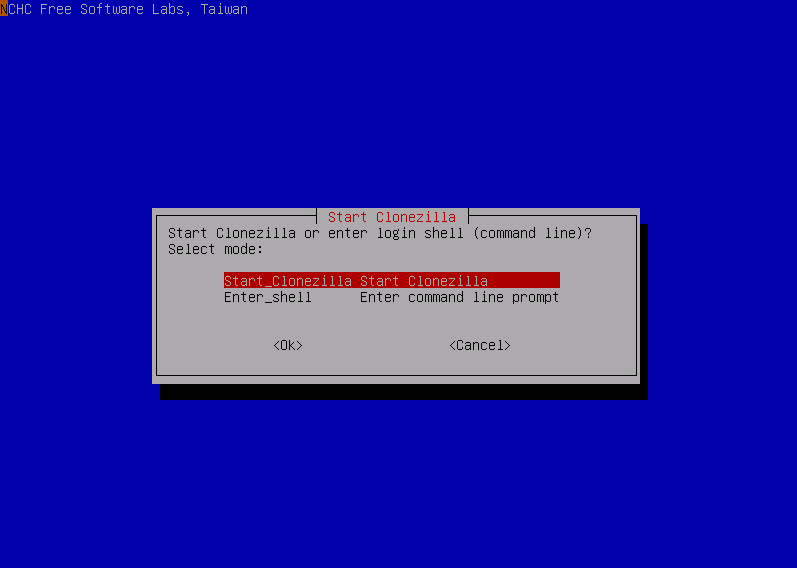
Step 7. Choose the first option to start.
Step 8. Choose "device-device" for direct cloning between drives.
Step 9. Opt for a simplified setup process.
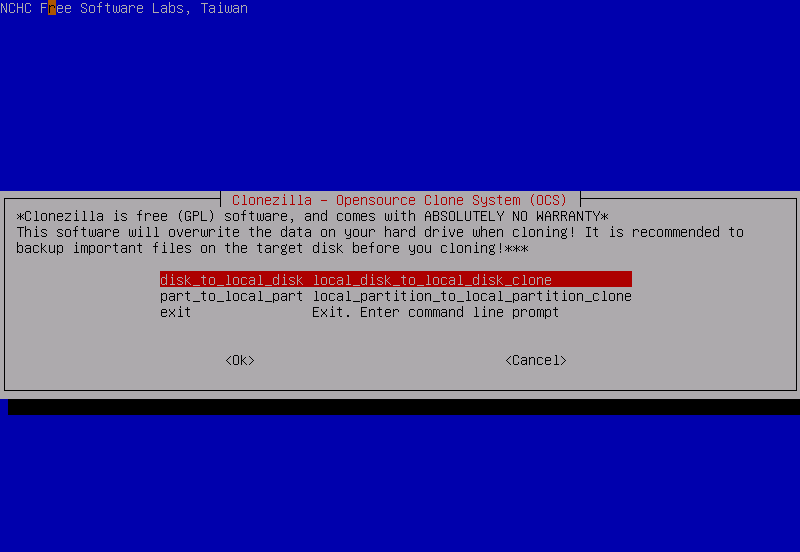
Step 10. Select "disk_to_local_disk" to clone from one disk to another.
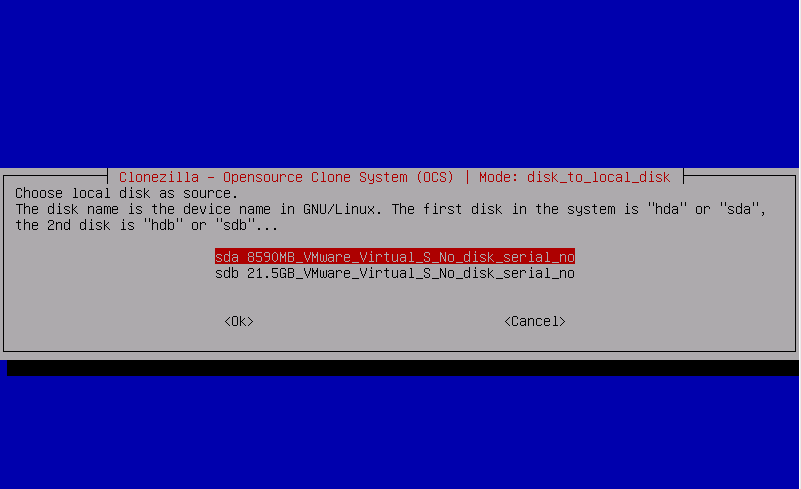
Step 11. Pick the disk you wish to clone.
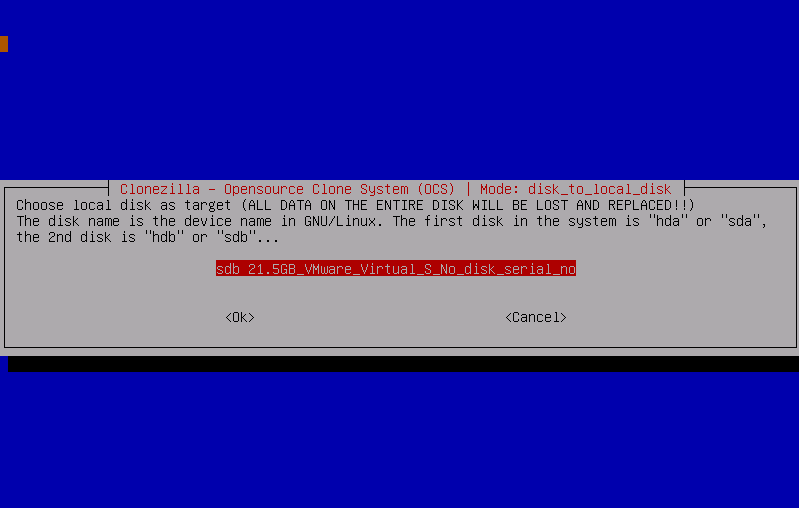
Step 12. Specify the destination disk for the clone.
Step 13. You can bypass checking the source disk.
Step 14. Choose whether the PC should reboot, shut down, or remain active.
Step 15. Press Enter to initiate the process.
Step 16. Press 'Y' and then Enter when prompted.
Step 17. Clonezilla will display the cloning status.
Step 18. After the process is complete, choose to reboot or shut down.
Clonezilla’s process is far from user-friendly. It requires significant preparation, technical knowledge, and comfort with an interface reminiscent of early computing.
Fortunately, Clonezilla isn’t your only option. If this seems overly complex, there are simpler alternatives for cloning Windows 10 or 11, one of which is discussed next.
A better alternative to clone a hard drive with ease
If Clonezilla feels overwhelming or doesn’t suit your needs, AOMEI Partition Assistant offers a user-friendly alternative. This versatile tool supports cloning both system and data disks in all editions of Windows 11/10/8/7. It works seamlessly with both MBR and GPT partition schemes, and your target disk can be different size of your source drive; any data disk can be used as the destination.
AOMEI Partition Assistant stands out for its intuitive interface, making the cloning process straightforward. Unlike Clonezilla’s complex setup, AOMEI Partition Assistant simplifies everything with a clean design and a guided process—just a few clicks, and you’re done. Detailed instructions for using it are provided below.
Step 1. Open the installed AOMEI Partition Assistant Professional, click "Clone" in the main interface, and select "Clone Disk".

Step 2. Choose the hard disk that you need to clone as the source disk like SSD and click "Next".

Step 3. Select the destination disk to store the data on the source disk, and then click "Next".

Step 4. Then, you can check the source and destination disk in the next window or change to "Sector to Sector clone", and click the "Confirm" button to continue if there is no problem.

Here, you can also click the "Settings" button to adjust the partition size on the destination disk or tick "4k alignment" to Optimize the performance of SSD if the target disk is an SSD drive.

Tip: If you want to clone Windows to a smaller drive, the "Clone without resizing partitions" button will be greyed out. Then, a Note about how to boot OS from the destination disk will pop up. Read and keep it in mind.
Step 5. After returning to the main interface, check the pending operation and click "Apply" and "Proceed" to commit the operation.

Conclusion
Clonezilla is a solid option for cloning your Windows installation, especially if you've upgraded your HDD or SSD and want to avoid reinstalling everything from scratch. It’s also perfect for securely backing up critical data to another drive.
However, Clonezilla isn't beginner-friendly. It demands technical expertise, including knowledge of USB booting, navigating a Linux Debian-like interface, using command-line tools, and configuring boot parameters.
If that sounds overwhelming, don’t worry—there’s a much simpler alternative: AOMEI Partition Assistant. This tool makes cloning your Windows installation effortless, even for complete beginners.

