Solutions to Disk Partition Not Recognize by Windows 11, 10, 8, 7
What to do when a disk partition is not recognized by Windows 11? Don’t worry. In this post, you’ll learn several practical ways to help make the partition recognizable again.
By AOMEI / Updated on May 12, 2023
Overview of the error disk partition not recognized by Windows 11
Windows 11 is the latest operating system by Microsoft which was published in Oct, 5, 2021. As of now, millions of users worldwide have downloaded or installed Windows 11 on their personal computers. This new operating system brings us so many astonishing new features including Auto HDR and the Mac-like interface.
However, we could still run into some errors when using Windows 11. One of the worst is that occasionally, your disk partition may not be recognized by Windows 11. When you click on the partition, you might be prompted that there’s something wrong or sometimes, the partition just disappeared somehow.
In the next part, based on different cases that your disk partitions can’t be recognized or read by Windows 11, 10, 8, 7, we will share several solutions.
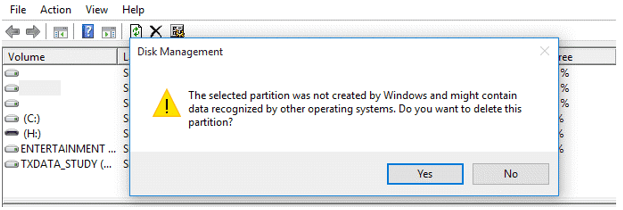
Case 1. “The selected partition was created by Windows and might contain data”
Sometimes, the users may encounter the issue that Windows 11 cannot recognize the partitions they created. They open the Windows Disk Management and want to seek a solution, but only the “Delete Volume” issue is available. And once they delete the partition, you’ll receive a note: “The selected partition was not created by Windows and might contain data recognized by other operating systems. Do you want to delete this partition?”.
Before we proceed to fix this issue, we need to know why it happens. Here are some possible causes:
1) The current hard drive is an MBR disk with more than 2TB of storage. (MBR only support to create the partition smaller than 2 TB. ) So the extra space on the disk will be recognized as unallocated in Disk Management.
2) The disk was changed to MBR and is currently running as an MBR disk on Windows 11.
3) All of the MBR disk space is occupied.
Because of the differences between MBR and GPT, when hard drive partition not showing up on Windows 11/10, you can consider converting MBR to GPT.
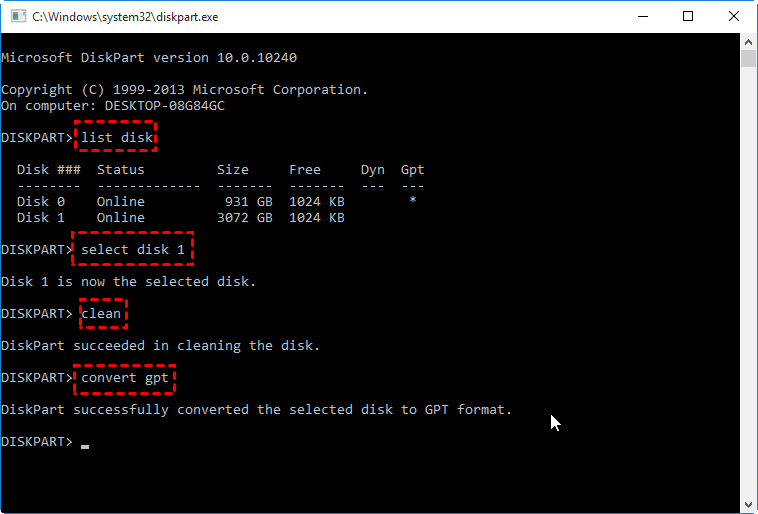
▶ Solution 1. Convert MBR to GPT via Diskpart
While Disk Management cannot work normally, you can try another Windows buiilt-in tool- Diskpart. It can help you to convert MBR to GPT.
Step 1. Click on the "Start" and input "DiskPart" in the search box, then press "Enter" to run the Diskpart.
Step 2. Input the commands below, then press “Enter” each time.
• list disk
• select disk n (n is the number of the disk you want to convert).
• clean (Delete all the partitions on the selected disk.)
• convert gpt
▶ Solution 2. Convert MBR to GPT with a third-party software
From what we see above, we can draw a conclusion: it’s the MBR partition table that causes the “unrecognizable” error. So, we share the steps to convert MBR to GPT using Diskpart.
However, if you want to perform conversion between MBR and GPT, you have to delete all partitions on the hard disk. In other words, you’ll suffer from severe data loss. So, it’s imperative to find another alternative that provides a more secure way to handle it.
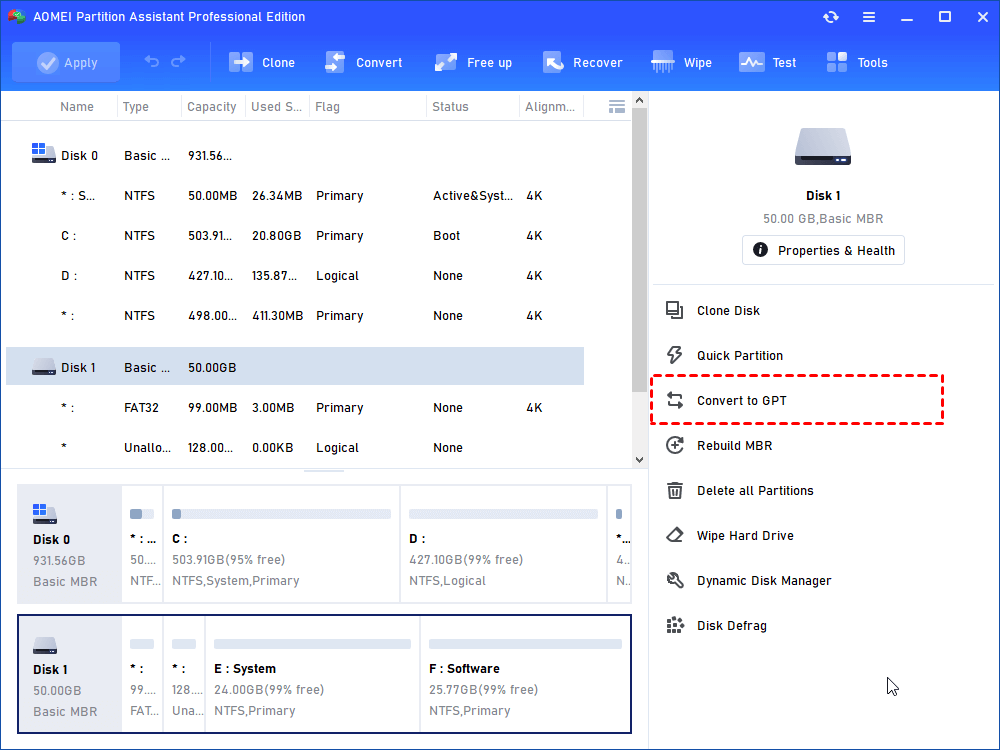
This time, I recommend AOMEI Partition Assistant Professional, a versatile and efficient disk management utility, it can perform various operations to manage disk, including MBR GPT conversion without data loss, primary disk to logical disk conversion, free space allocation, and so on.
Let’s try the best disk manager to fix the error!
Step 1. Install and run AOMEI Partition Assistant Professional. Click the problematic disk and choose "Convert to GPT" from the right column or right-click on the disk and select “Convert to GPT”.
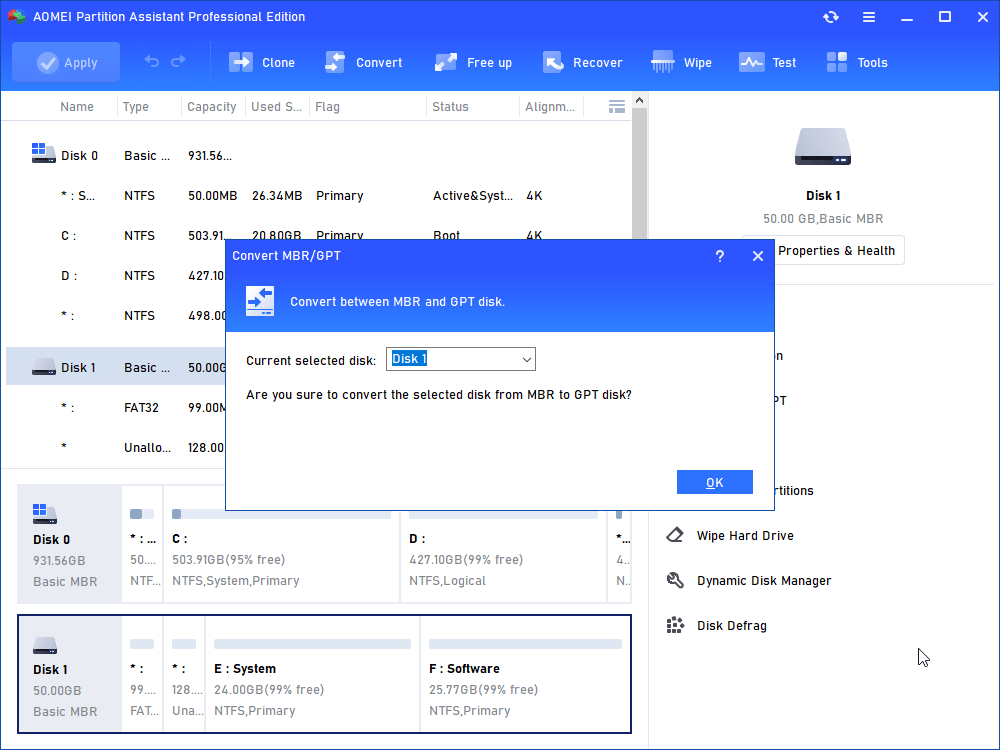
Step 2. When prompted with the notification “Are you sure to convert the selected disk from MBR to GPT disk”, hit “OK” to proceed.
Step 3. Hit “Apply” as the screenshot shows to commit the pending operation.
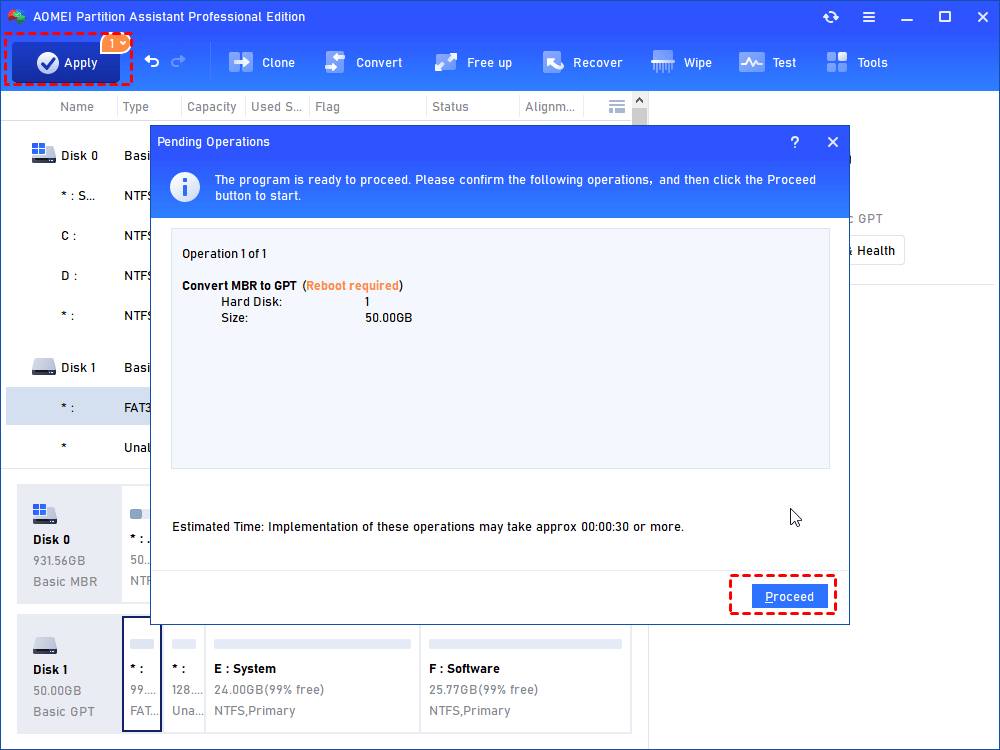
In only a few seconds, the MBR GPT conversion will be completed.
Case 2. Partition disappears after Windows upgrade
Why your partition is gone after upgrading from Windows 10 to Windows 11? The possible reasons are as follows:
1) Partition gets lost or deleted
2) Damaged system files
3) Driver issue of an external hard drive after being connected to your PC
4) The attack of the virus
How to deal with this issue? Don’t worry, in this part, 2 solutions will be given to solve the problem.
✦ Solution 1. Create partitions on the unallocated space
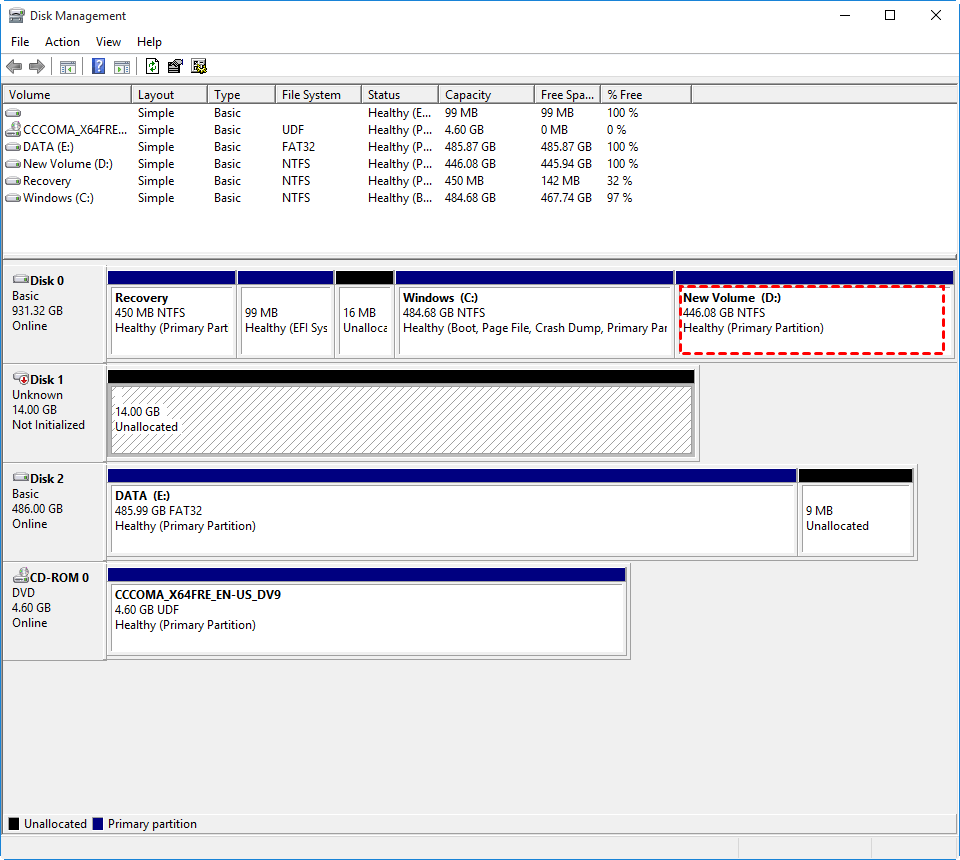
If you find one of your partitions is gone and only a piece of unallocated space is left, don’t worry, because there’s no difficulty creating a new partition from the piece of unallocated space. Here, you can use Windows built in Disk Management to get it done easily if there're no important files on the partitions that are missing.
1. Right-click on “This PC” on the desktop and select “Manage”.
2. Under the “Storage” tab, select “Disk Management”.
3. Right-click on the unallocated space and select “New Simple Volume”.
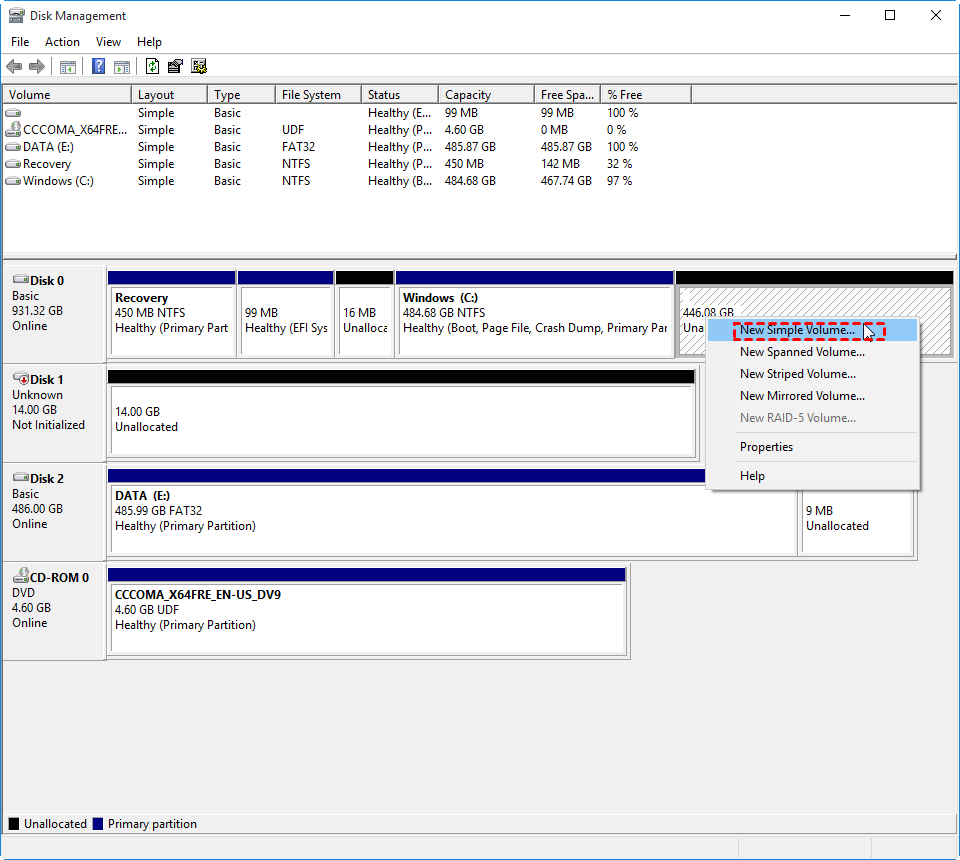
4. Follow the New Simple Volume wizard that walk you through several settings including size settings, drive letter assignment and partition formatting.
✦ Solution 2. Use partition recovery program
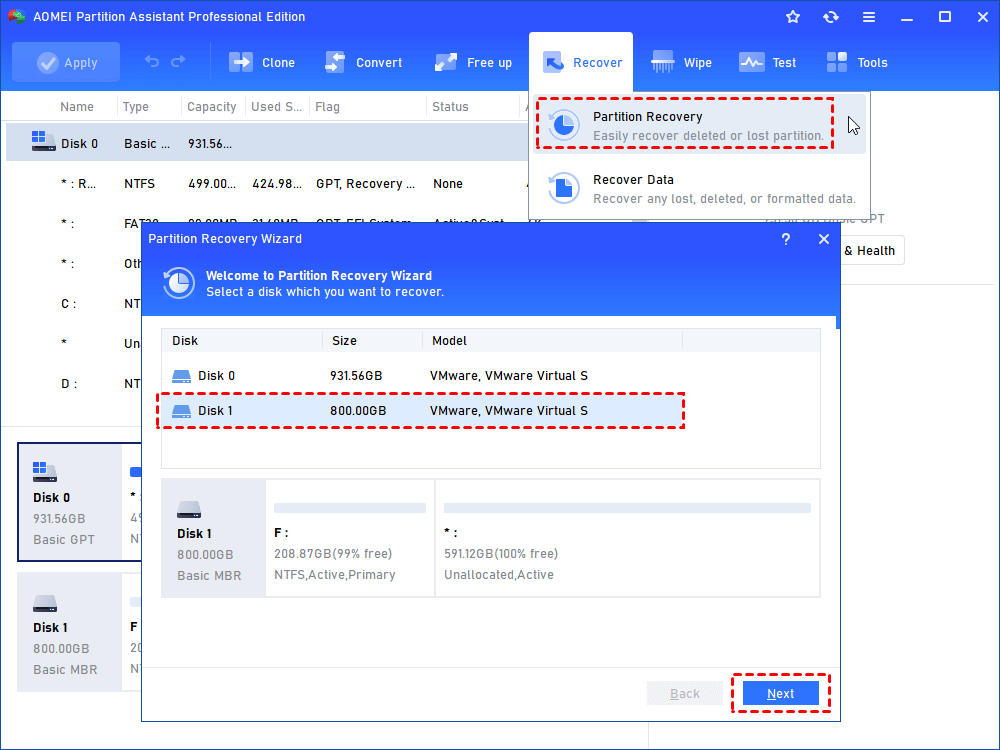
Besides recreating a partition, there’s another more straightforward solution when a disk partition is missing – partition recovery. But which is the most reliable tool for it? Luckily, you can still use versatile AOMEI Partition Assistant Professional to get it done easily and securely!
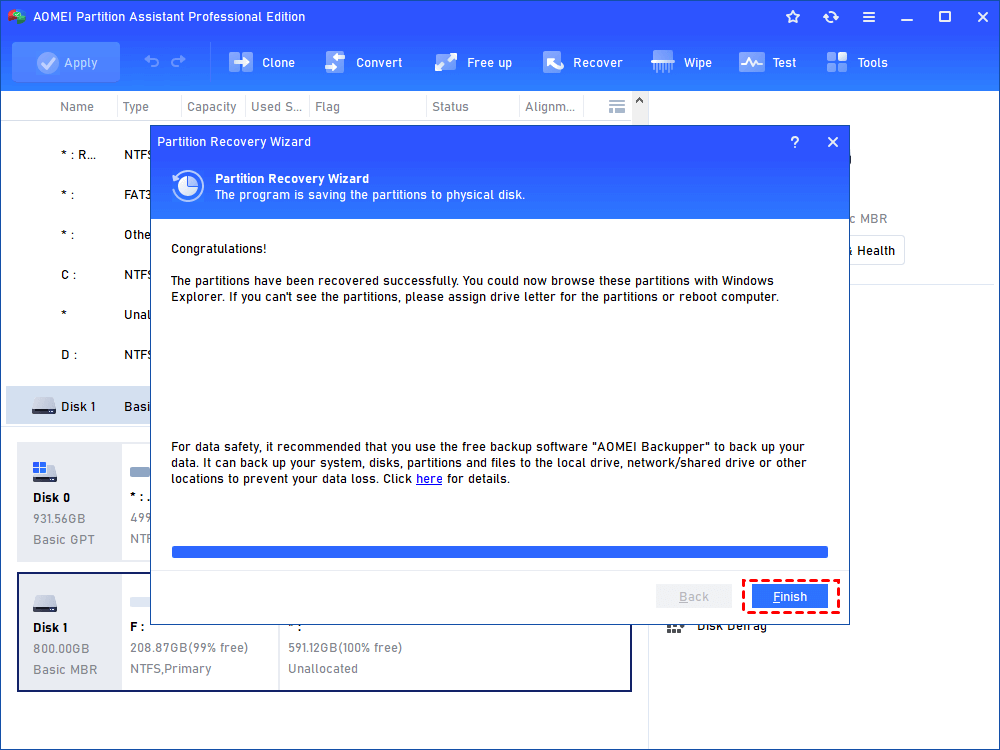
Step 1. On the home interface, select "Recover" > "Partition Recovery", select the disk where the partition is missing and then, hit “Next”.
Step 2. Choose a search method. This time, I recommend “Fast Search” for its high speed. Nevertheless, if you are unable to recover the lost partition in this way, then, you should try “Full Search”.

Step 3. Select the lost partition and hit “Proceed”.

Step 4. Click on “Finish” to quit when you get the congratulation message.
✦ Solution 3. Repair damaged system files
If the partition cannot be recognized due to the corrupted system files, you can check and repair them. On CMD, you can use the sfc /scannow command to repair the system files.
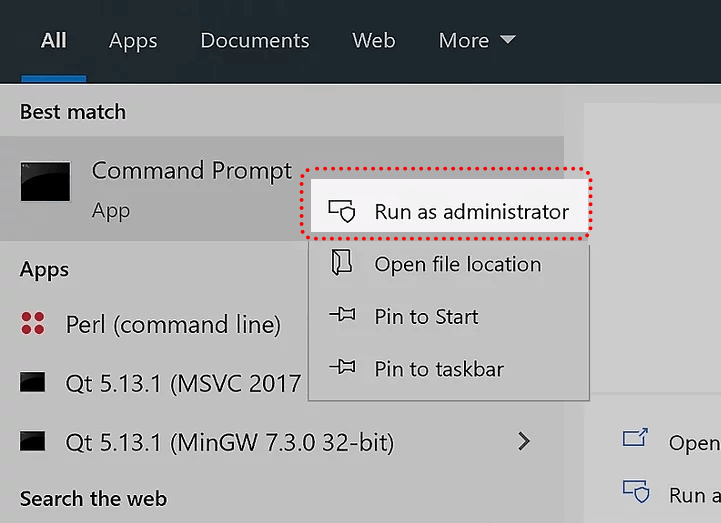
Step 1. Press "Windows" and input "cmd" in the task bar, click "Run as administrator".
Step 2. In CMD window, input "sfc /scannow" and press "Enter", then this tool will check your system files.

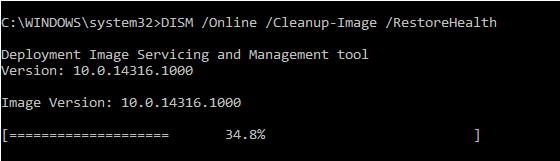
Note: When the sfc /scannow command is useless, you can try DISM command to repair the system files. It may take 10~15 minutes for the whole process to be completed and so, please wait patiently.
✦ Solution 4. Update or reinstall the hard disk driver
Sometimes, all or only one partition on your hard disk will not be shown anymore after connecting an external hard disk to your computer. In this case, the most reliable way is to update or reinstall the external device.
1. Open the "Run" box and type "devmgmt.msc“ and hit "ENTER" to launch "Device Manager".
2. Select "Disk drivers", right-click on the external drive and select "Update driver".
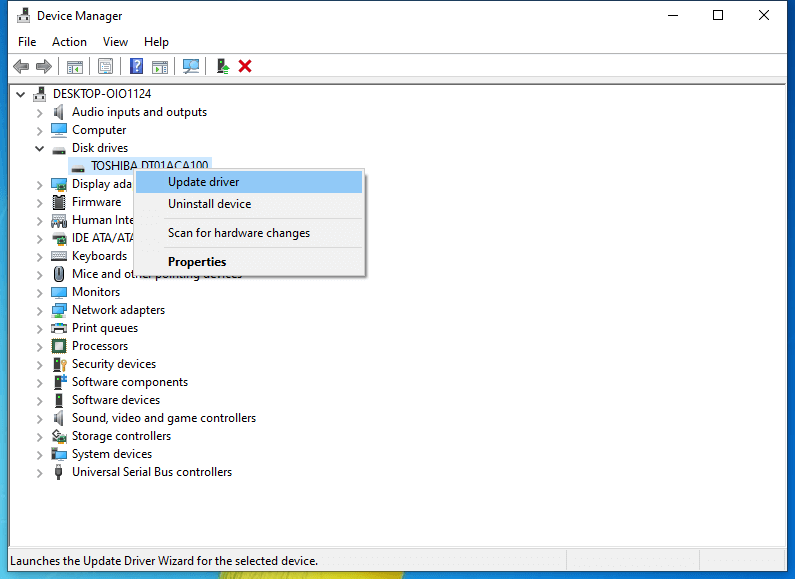
3. Then, select "Search automatically for updated driver software".
Wait until the process is finished and recheck whether those missing partitions have come back.
To reinstall the hard disk is even easier. Still go to Device Manager and find the problematic external device, right-click on it and select "Uninstall device". Once it's done, restart your computer and the device will be automatically reinstalled.
✦ Solution 5. Check your PC for virus
When the virus hidden on your PC, you may also encounter the partitions missing problem. Therefore, you need to download and run some antivirus software.

Case 3. “GPT partition not recognized” in Windows 11
When the PC disk is GPT disk, the issue “partition not recognized” still occurs: You run into the issue when you reboot your computer but the machine cannot recognize and boot from it. There are the hidden reasons:
1) You fail to set the disk in GPT as the system disk. As a result, the OS can’t recognize it as a boot disk in BIOS and fail to boot from it.
2) You fail to enable UEFI boot mode in BIOS.
3) Your computer motherboard is unable to support UEFI boot mode while only Legacy BIOS is allowed.
Then you can try the methods shared below to handle this issue.
✌ Solution 1. Set the GPT disk as the boot drive in BIOS
If you haven’t set the GPT disk as the boot drive in BIOS, then, let’s do it.
1. Reboot your computer and continuously hit F2, F8, or Del to enter BIOS.
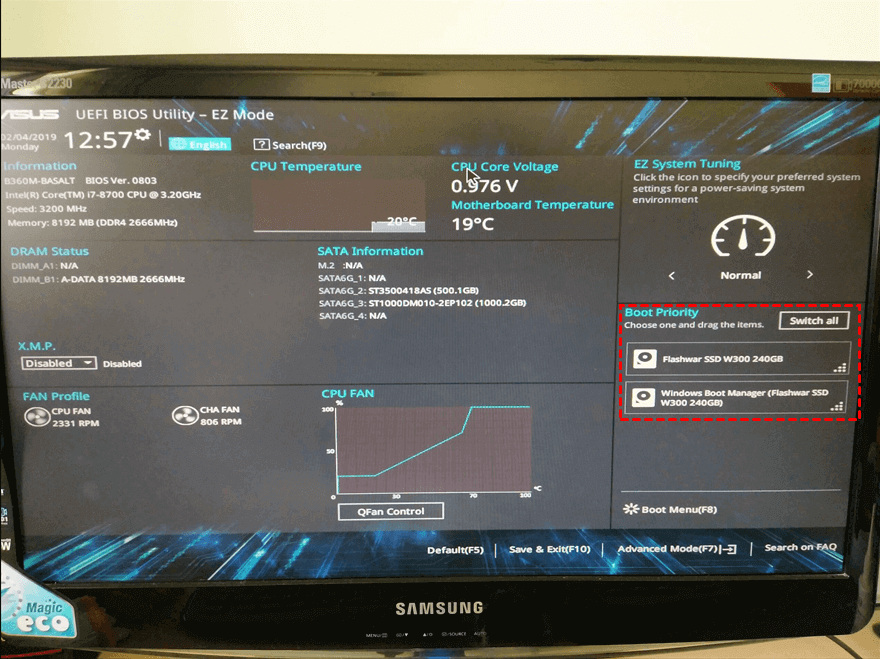
2. Go to the Boot Menu and locate the Boot Priority section.
3. Change the boot order and set the GPT disk as the first boot drive.
✌ Solution 2. Enable UEFI boot mode in Windows 11
If your computer supports both UEFI and Legacy BIOS boot mode but currently it’s Legacy BIOS, the GPT system partition can’t be recognized by the PC. In this case, the best way it to switch from Legacy to UEFI. Follow the steps below to get it done.
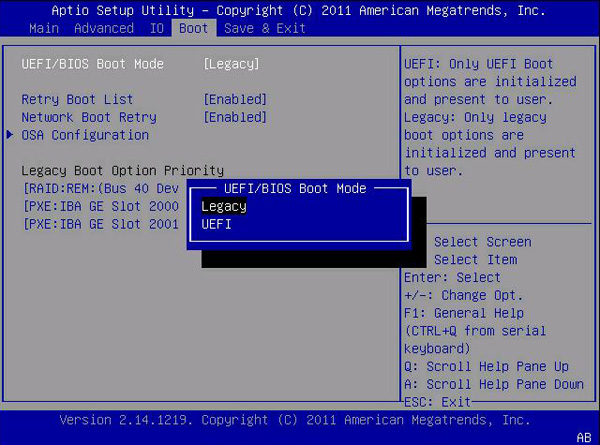
1. Reboot the computer and continuously hit F2, F8, or Del to enter BIOS.
2. Go to the Boot menu and find the boot mode option.
3. If it shows “Legacy” right now, use the arrow key “down” to switch it to UEFI.
4. Press “F10” to save all changes and quit BIOS.
✌ Solution 3. Convert the GPT disk to MBR
If it’s due to hardware limit that your PC only supports Legacy BIOS boot mode, then, a GPT system disk cannot be recognized by the computer. Thus, the best way is to convert GPT to MBR. Here, I still recommend AOMEI Partition Assistant Professional that’s proficient in partition style conversion and helps you do it without any data loss.
Conclusion
How to fix it when a disk partition is not recognized by Windows 11, 10, 8, 7? In the post above, you not only learned why the computer failed to recognize a disk partition, but also, you learned several good reliable ways to fix it, for example, converting the MBR system disk to GPT with a third-party software utility AOMEI Partition Assistant Professional, which is a better replacement for both Disk Management and DiskPart because with this tool, you no longer need to delete all existing partitions on the target disk for MBR GPT conversion. To use this powerful software on Servers, try the Server edition.

