How to Quickly Partition Hard Drive in Windows 10/11
Partitioning a hard drive in Windows 10/11 is necessary to install operating system and store data separately. You'll learn how to partition a disk traditionally and how to perform it via efficient tool.
By Lucas / Updated on March 5, 2026
Should you partition the hard disk in Windows 10?
Usually, there is only one partition on hard drive which is made by the computer manufacturers. A partition is a part of a hard drive and you have the choice to determine the number of partition on your hard drive. After partitioning a hard drive, there are more partitions. The computer will regard each partition as a separate disk and each of them will be showed under "Windows Explorer" (Local Disk C:, Local Disk D:, Local Disk E: and so on ).
Some partitions allows users to install operating system and save data on the different partitions. Separate partitions can help you classify your files since it is more convenient for you to manage your different data. What’s more important is that if one day your system is crashed, you just need to reinstall system; the programs or data stored in other partitions are still safe.
For example, your computer can be attacked by virus someday, if this disaster happens on your partition and you format the partition. What will happen? If there was only one partition on hard drive that means all of your data will be wiped after formatting. So, more partitions to store different things or used to backup are necessary.
Besides the two reasons mentioned above, some users partition hard drive due to they want to have multiple operating systems on the same computer or they worry too many things in the same partition will drop down the speed of computer. No matter which reason makes them partition hard drive in Windows 10/11, there is no doubt that this is a wise choice for them.
How to Partition a Hard Drive in Windows 10/11?
It sounds very difficult for users to partition hard drive, but don't worry, Windows 10/11 Disk Management tool and third-party free partition software like AOMEI Partition Assistant Standard will help you partition hard drive easily and safely.
Before we start, some things you need to check. If the hard drive of your system is an MBR disk, please make sure how many current partitions have been on hard drive. Due to MBR disk only supports maximum 3 primary partitions plus 1 extended partition or 4 primary partitions. If the number of partitions has reached the limitation, please learn how to convert MBR disk to GPT, because GPT partition style doesn't have limitations for the number of partitions. (MBR vs. GPT)
Method 1: Partition hard drive in Windows 10/11 with Disk Management
Disk Management is a tool built in all Windows versions to manage hard disk partitions, such as create, delete, and format partitions, change drive letter, shrink volume, extend volume, and perform other disk-related tasks. You can also solve how to partition the C drive on your large disk which doesn't have more partitions for your data classification.
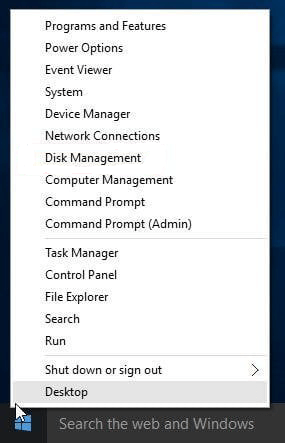
Step 1: To partition Windows 10/11 hard drive, let's get started from opening Disk Management Tool in Windows 10/11. The easiest way is to right click Start Menu and select "Disk Management".
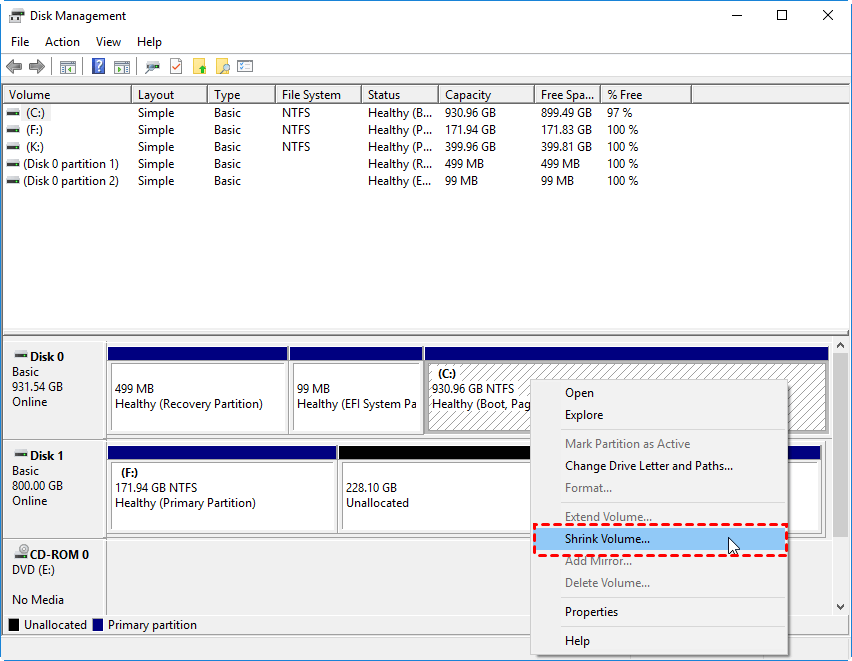
Step 2: Select the hard drive you want to partition. Right click a partition and select "Shrink Volume".
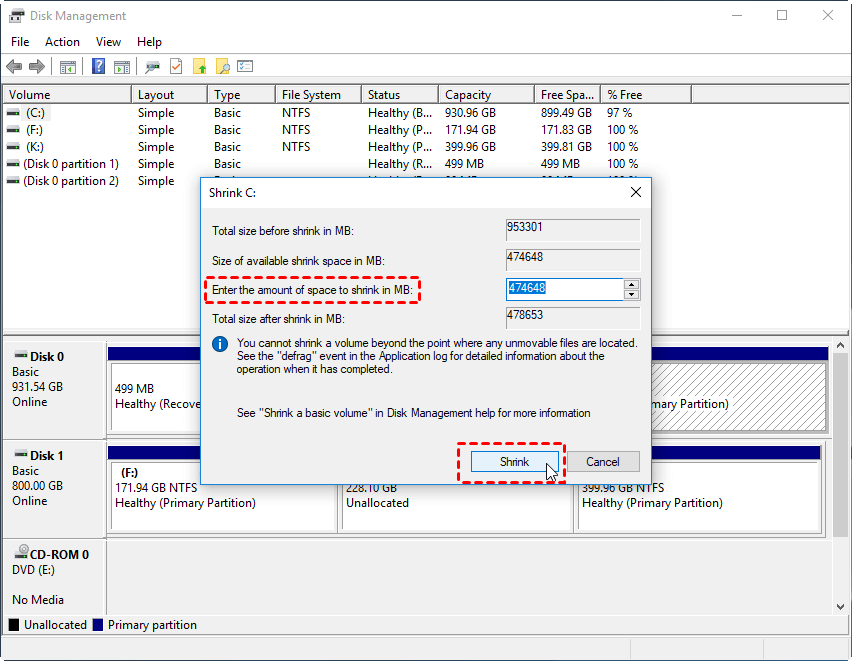
Step 3: In the pop-up window, you can modify the amount of space to shrink. And then click "Shrink".
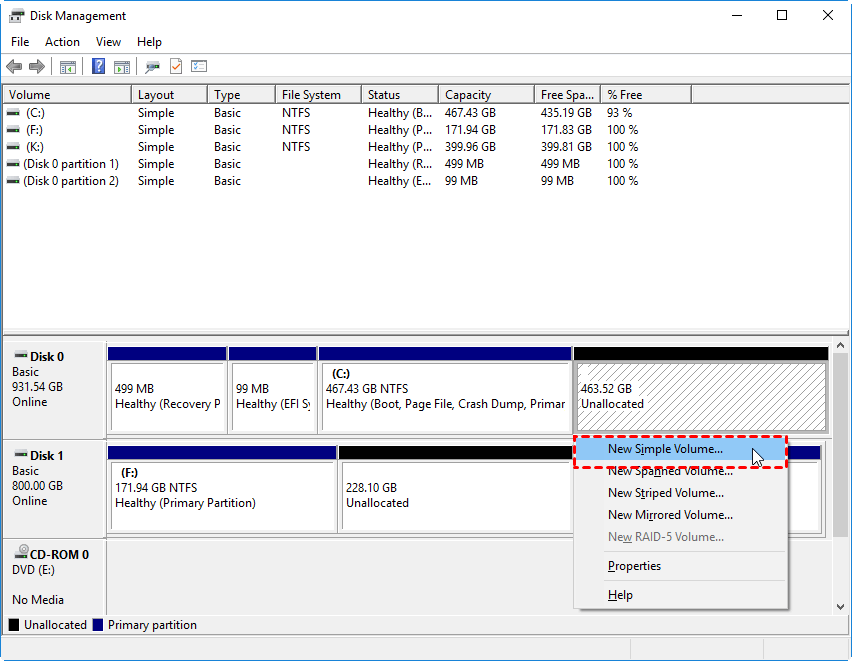
Step 4: After Step 3, you will find a unallocated space behind C drive. Then, right-click on it and select "New Simple Volume" and follow the wizard to format and create a new partition.
Method 2: Partition hard disk in Windows 10/11 with AOMEI Partition Assistant (Recommended)
AOMEI Partition Assistant Standard is a free, complete and easy-to-use partition manager and disk utility to optimize disk space usage, change disk partition type and perform other tasks based on disk partitions. It offers two ways to create a partition. One is to create partition with unallocated space; the other is to create partition via spliting a large partition. You can choose the way that is suitable for you.
The Best Windows Disk Partition Manager and PC Optimizer
Way 1. Create partition via unallocated space
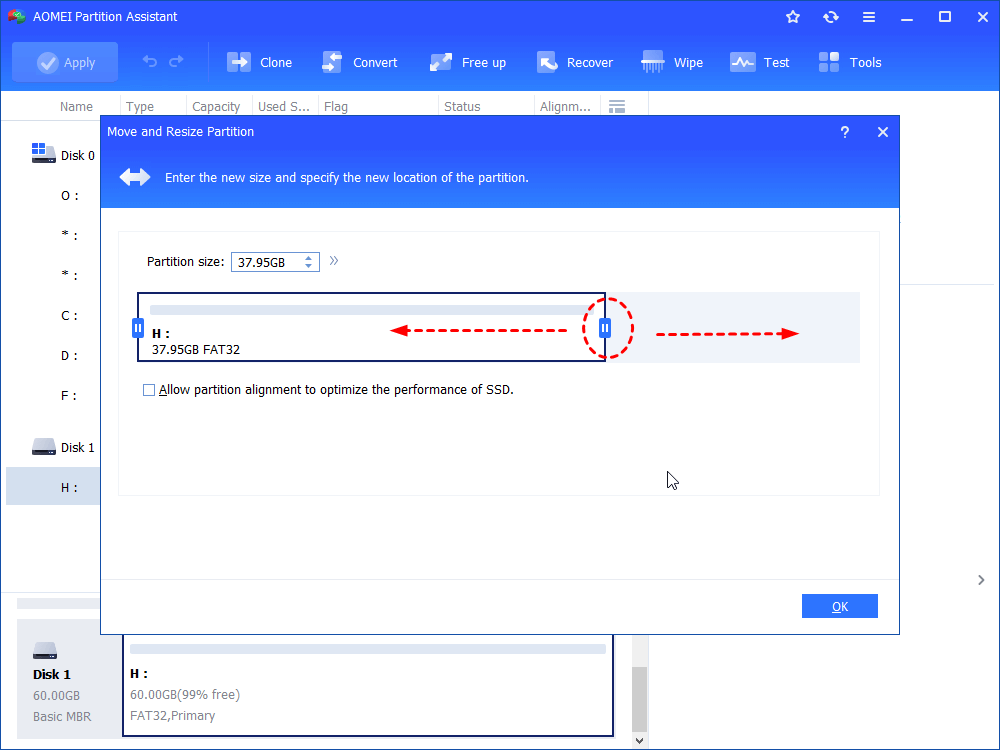
Step 1: Install and launch AOMEI Partition Assistant. Select the hard drive in your Windows 10/11 system that you want to partition (here is Disk 1). Right click on a drive (here is D: partition) and then choose "Resize/Move Partition" (If there is an unallocated disk space on hard drive, you can start from Step3).

Step 2: Drag the slider bar leftwards to decide the size of unallocated space, and then click "OK".
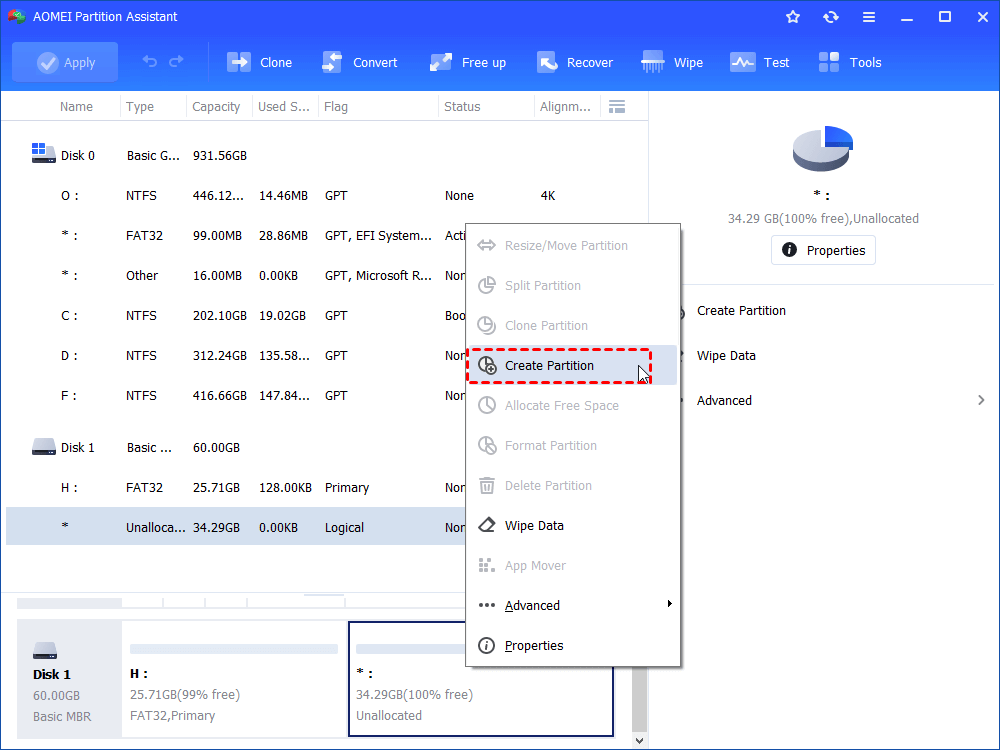
Step 3: After Step2, you will see there is an unallocated space behind D partition. Then, right click on the unallocated space and choose "Create Partition".
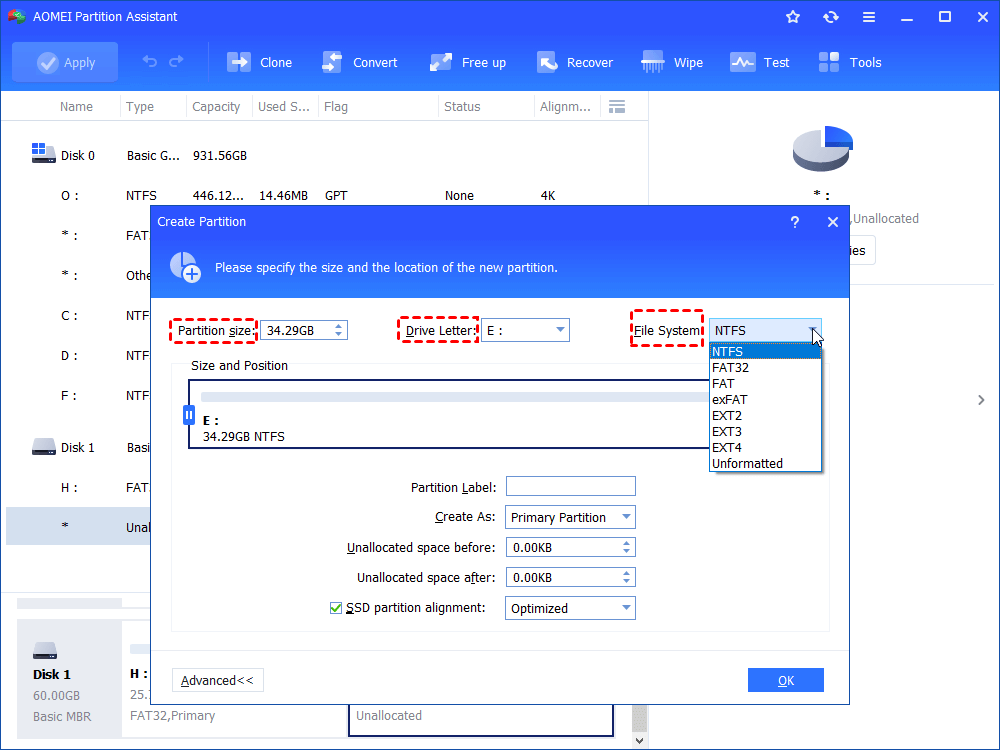
Step 4: You can drag the slider bar to decide the size, change drive letter and file system. Besides, you also can click "Advanced>>" to set other property. Click "OK" to continue.
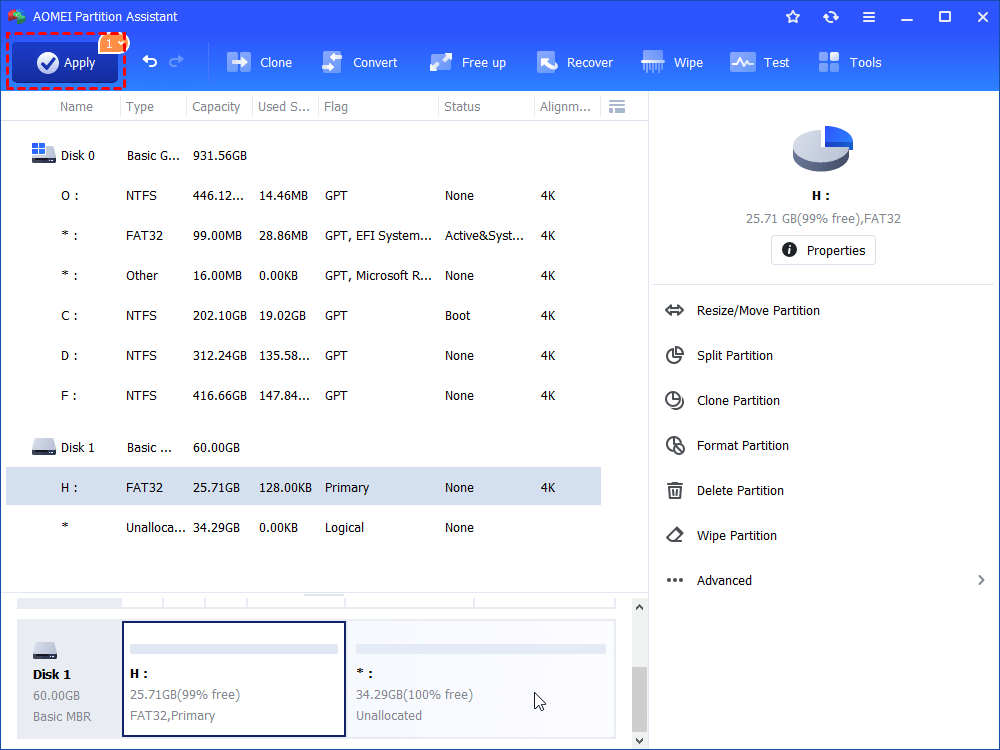
Step 5: You will preview there is a new drive (F: partition) on the hard drive. If you want to operate, please click "Apply".
Way 2. Create partition via splitting large partition
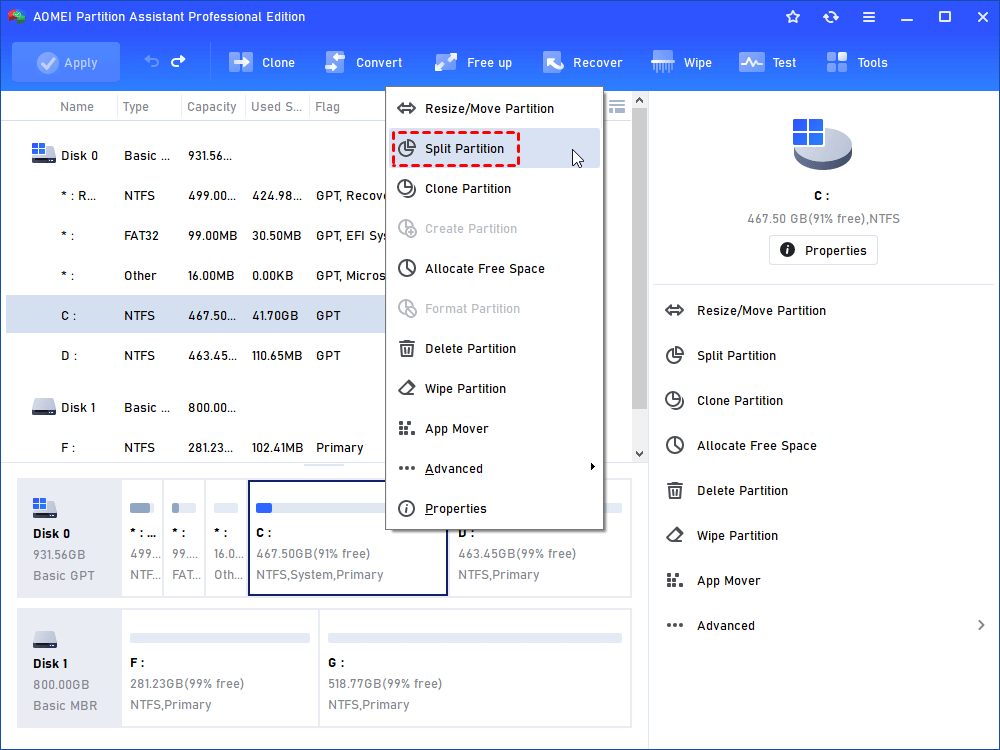
Step 1: Install and run AOMEI Partition Assistant Professional. Right-click the C partition and select “Split Partition”.
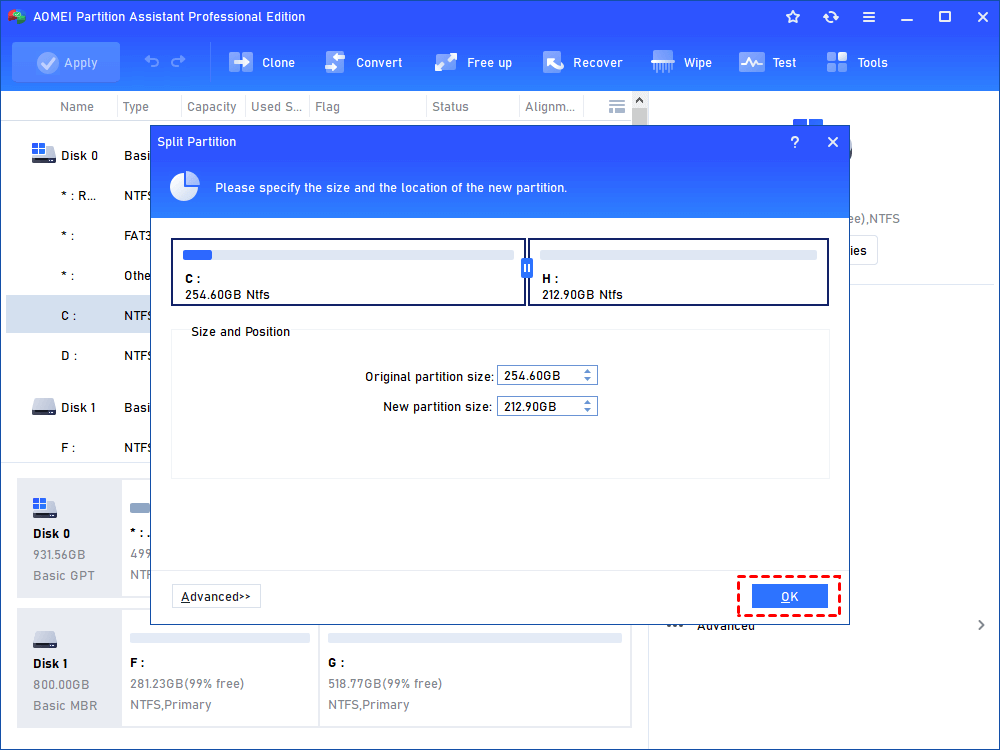
Step 2: In this window, you can specify the size and location of the new partition, and click “OK”.
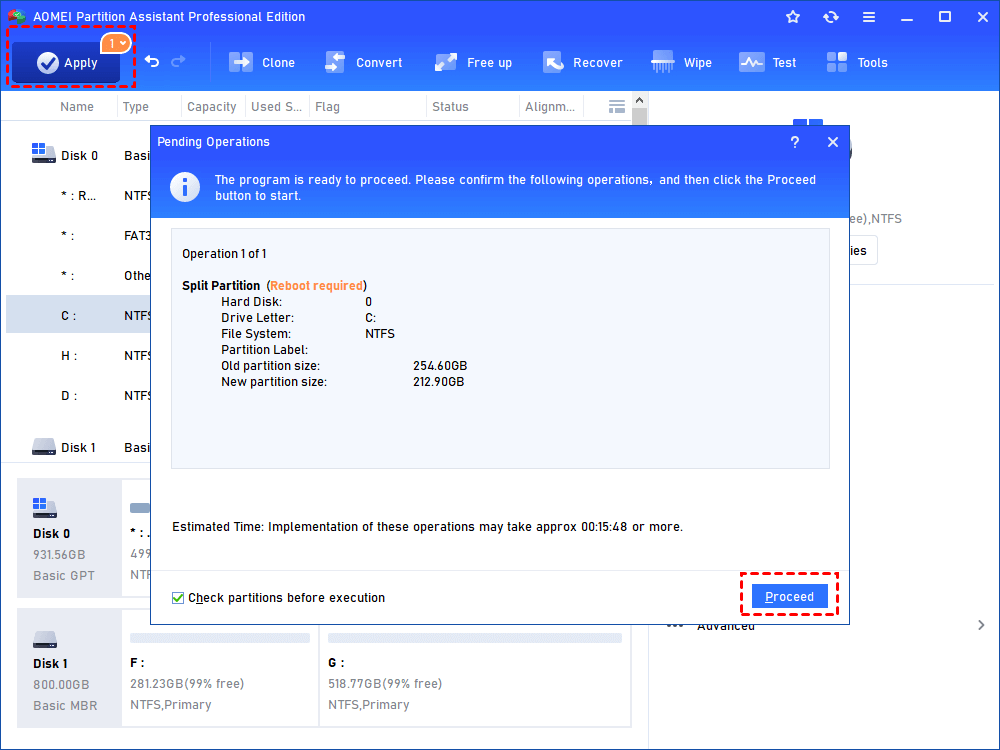
Step 3: Back to the main interface, click “Apply” and “Proceed” to commit the pending operation.
-
If you don't want to use the whole unallocated space to create a new partition, why not add some unallocated space into a partition?
-
If you partition on SSD disk, we suggest you tick "SSD partition alignment" to align the partition(s).
To sum up
With the help of AOMEI Partition Assistant Standard, you can partition hard drive in Windows 10/11 easily and safely. Moreover, the other features of this powerful software can help you manage partitions completely, such as extend partition (encrypted partition is supported), merge partitions, move partition and learn more features of AOMEI Partition Assistant.

