How to Delete Files from NTFS on Mac: SD Card/USB/External Hard Drives
This article helps when you can’t delete files from external hard drive on Mac. It details how to delete files from NTFS on mac and manage SD card files for free.
By Irene / Updated on January 16, 2026
When you use an external hard drive on a Mac, you may find that files cannot be deleted. By default, macOS mounts Windows formatted NTFS drives in read only mode. The system can access the Master File Table to view and copy data, but the kernel blocks all write actions. This means you cannot edit, rename, or delete files on the drive.
This restriction is intentional. NTFS is a proprietary file system developed by Microsoft. macOS does not fully support its journaling and access control structure. To prevent file system damage or data corruption, Apple disables native NTFS write support. As a result, attempts to move files to the Trash may fail, show permission errors, or remove the delete option entirely. The drive appears to work, but it does not allow changes.

To regain full control over an NTFS external drive on Mac, there are only two safe solutions. You can reformat the drive to a macOS compatible file system, which erases all existing data. Alternatively, you can install a reliable third-party NTFS driver that enables stable and secure write access. The following sections explain how to apply both methods to fix can't delete files from external hard drive on Mac.
How to delete files from NTFS on Mac?
If you want to delete files from NTFS external hard drive like SD card, USB, or other disks, you can follow the methods below.
Way 1. Use an NTFS for Mac tool to directly delete files on Mac
To delete files from an NTFS drive on a Mac, you need a professional disk mounter that overcomes the native read-only limitations of macOS. Since Apple systems do not allow writing or deleting data on Windows-formatted disks by default, PartitionAssistant NTFS for Mac serves as a reliable solution. It enables full read and write access, allowing you to manage files on external hard drives, USB sticks, and SD cards as if they were native Mac drives.
This software provides a secure and stable environment. It is specifically engineered to handle modern hardware, ensuring high performance on both Intel-based and Apple Silicon Macs. Once the software is installed, it automatically mounts your drives in writeable mode. This allows you to perform essential tasks such as deleting files and unwanted data, renaming folders, or moving large files between different operating systems without formatting your hardware.
Choosing a professional utility like PartitionAssistant NTFS for Mac ensures you maintain high transfer speeds and data safety. It eliminates the friction of cross-platform work by providing a straightforward interface suitable for both beginners and experienced users.You can gain complete control over your storage devices while avoiding the hidden costs or trial limits like requiring NTFS for Mac serial number, license, or product keys which often found in other tools. This makes it an essential solution for anyone seeking a free and efficient way to handle NTFS files on macOS.
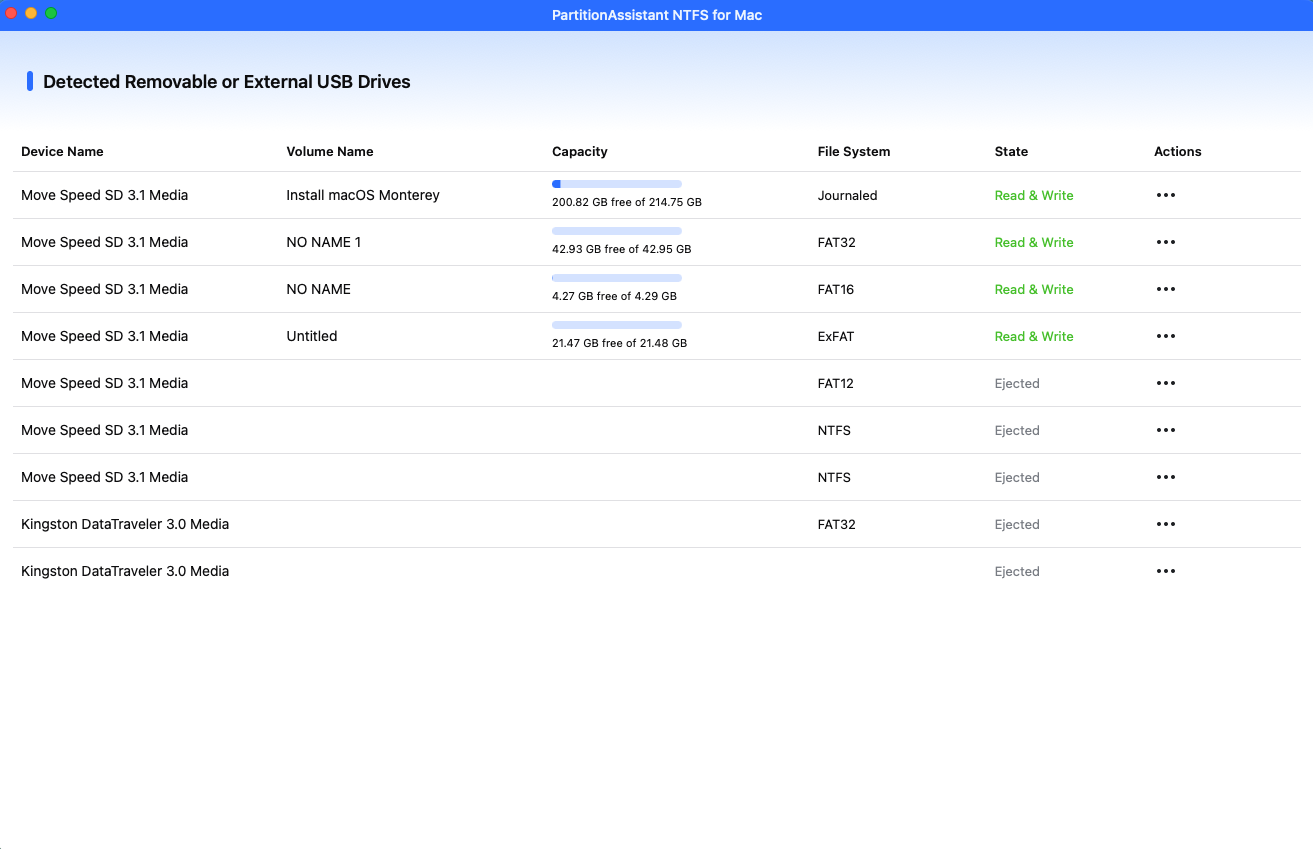
Step 1. Open the installed PartitionAssistant NTFS for Mac, then connect your NTFS drive like SD card, USB, HDD, or SSD, and the software will automatically mount and display all connected external hard drives on your Mac.
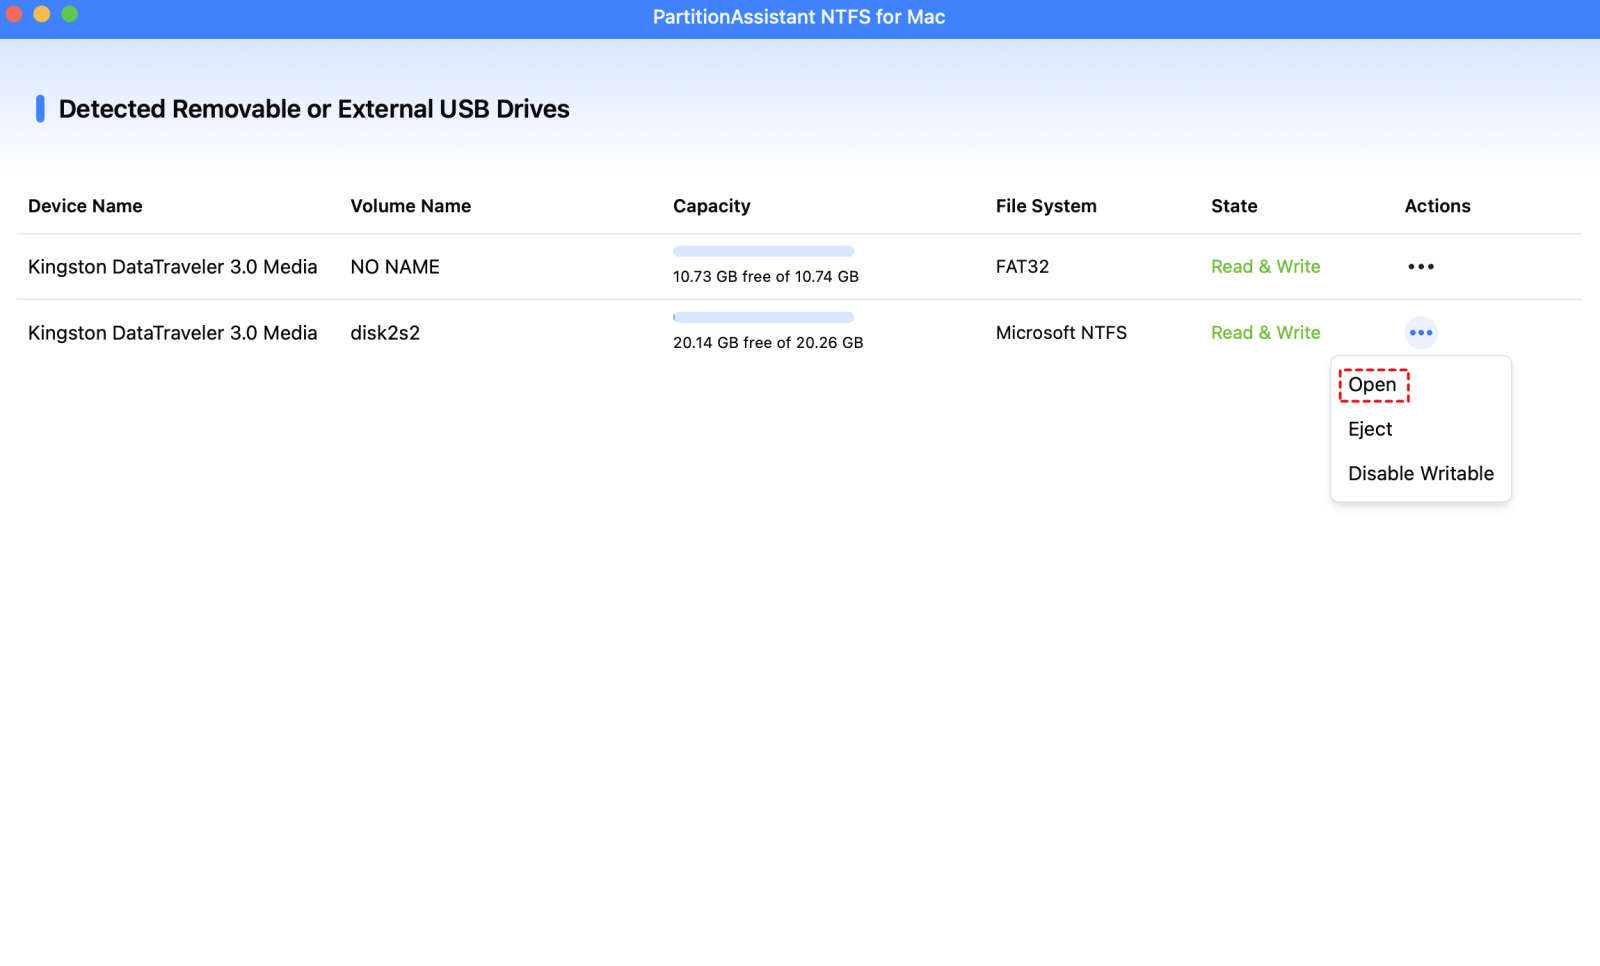
Step 2. Find the NTFS drive you want to write data, and click "Enable Writable". If the status is already Read & Write, simply click “Open” to start using the NTFS external hard drive on your MacBook.
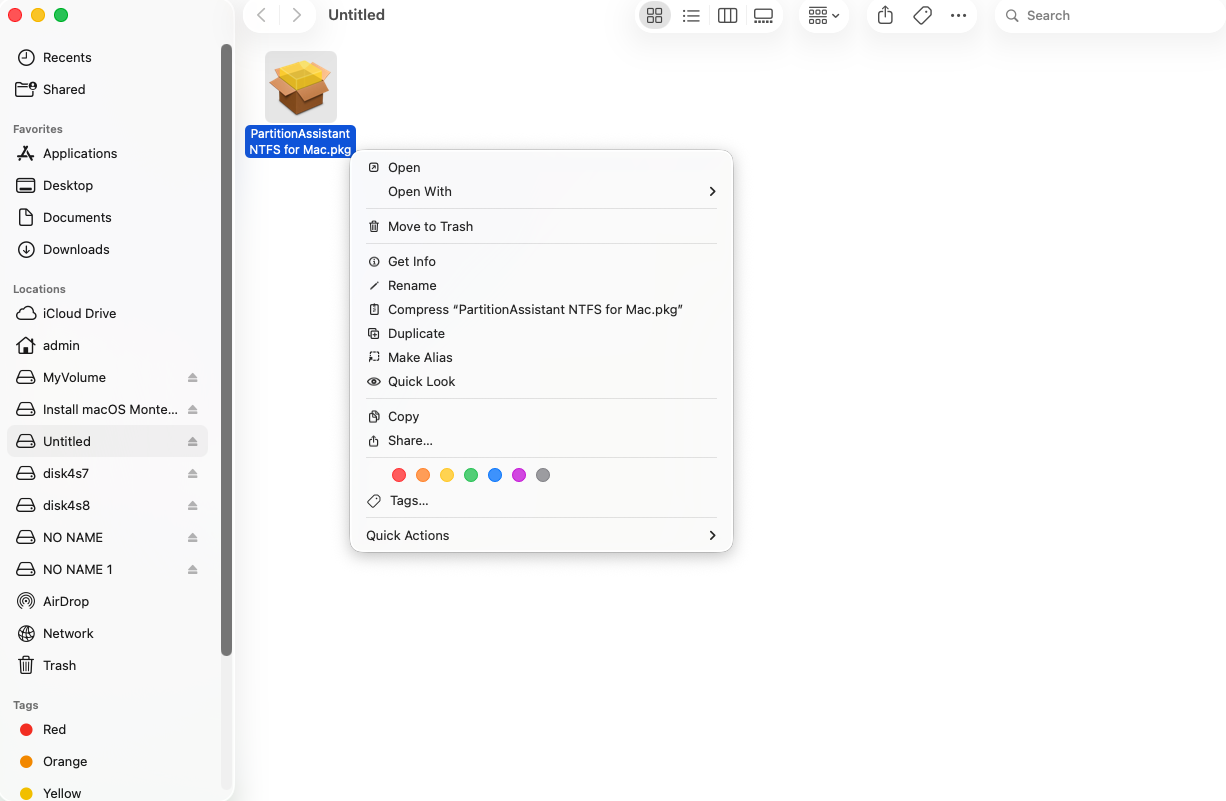
Step 3. You can now use the best disk mounter software for Mac to copy, move, delete files without formatting the NTFS drive.
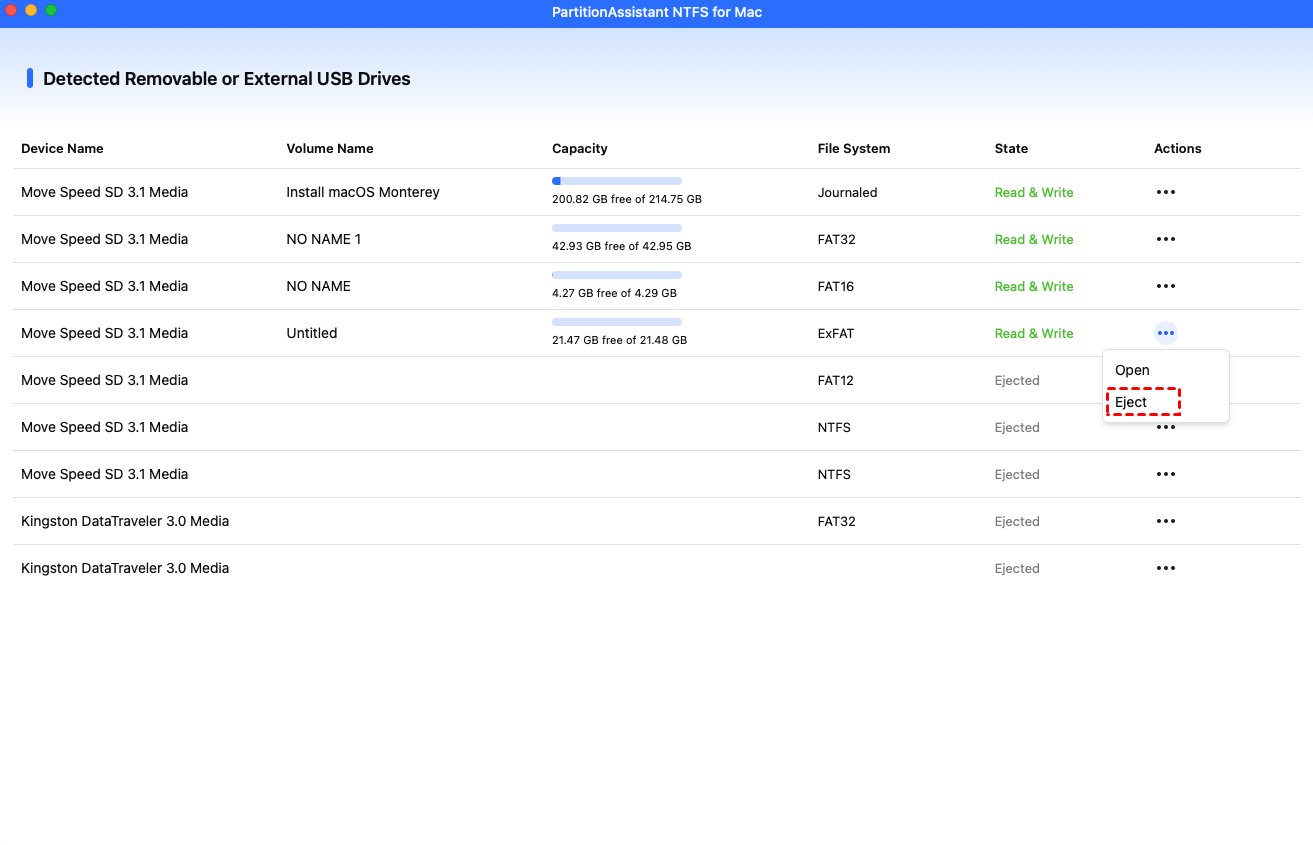
Step 4. After all operations are complete, please click "Eject" to disconnect the external hard drive from your Mac.
Way 2. Erase all data on NTFS drives with formatting
When total data removal is the primary objective, reformatting the NTFS drive to other file system that is compatible with Mac serves as the most efficient method to achieve full compatibility with macOS. This process involves erasing all existing files and transitioning the drive to a file system that supports native read and write operations, such as exFAT for cross-platform use or APFS for Mac-only environments. By selecting a compatible format, you eliminate the restrictive read-only barriers inherent to the NTFS system on Apple hardware.
Executing this change is a straightforward procedure performed through the built-in Disk Utility application. Once the reformatting is complete, the drive functions identically to a native Mac disk, granting you unrestricted permission to save, modify, and delete content.
Step 1. Connect your SD card, USB drive, or other external hard drive to your Mac. Open Finder, go to Applications > Utilities, and launch Disk Utility. (Or press Cmd + Space and type "Disk Utility").
Step 2. In the left sidebar, select your external hard drive. Note: Make sure you select the physical drive (usually at the top of the hierarchy), not just the volume under it.
Step 3. Click the Erase button in the top toolbar. Name your drive (e.g., "MY EXTERNAL HARD DRIVE").
Step 4. For Format, select MS-DOS (FAT). This is how macOS labels FAT32.
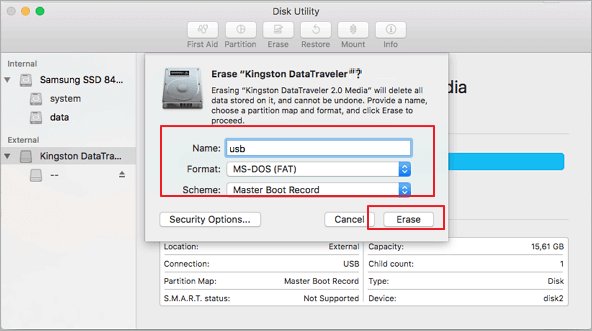
Step 5. For Scheme, choose Master Boot Record (MBR). This ensures maximum compatibility with Windows PCs and other devices.
Step 6. Click Erase and wait for the process to complete. Once finished, your drive is ready to use on almost any device.
Conclusion
In summary, how to delete files from NTFS on Mac depends on understanding macOS limitations and choosing the right solution. Because macOS mounts NTFS drives in read only mode, file deletion is blocked by default. To fix this, you can use a reliable NTFS for Mac tool to delete files without data loss, or you can format the drive if you no longer need the files. By selecting the appropriate method, you can safely regain full control of your NTFS external drive on macOS.
FAQs
🗨️ Why am I not allowed to delete files on Mac?
In most cases, this happens because the drive is formatted with NTFS. macOS mounts NTFS drives in read only mode, which allows you to view and copy files but blocks deleting, editing, or renaming them. It can also occur due to file permission restrictions or system protection settings.
🗨️ How to force delete everything on Mac?
If the files are on a Mac formatted drive, you can use Disk Utility to erase the disk, which removes all data at once. If the drive is NTFS, macOS cannot force delete individual files. You must either reformat the drive or enable write access with an NTFS for Mac tool.
🗨️ Is there a free NTFS for Mac?
macOS includes read only NTFS support for free, but it does not allow writing or deleting files. Some third party NTFS tools offer free versions with limited features or trials. For full and stable read and write access, a dedicated NTFS driver is usually required.
🗨️ What is the NTFS format on a Mac?
NTFS is a Windows file system developed by Microsoft. On a Mac, NTFS drives can be read but not written to by default. This means macOS can open and copy files from NTFS drives, but it cannot modify or delete them without additional software.
🗨️ What are the disadvantages of NTFS?
The main disadvantage is poor native support on macOS. NTFS also limits cross platform compatibility without extra drivers and can cause permission issues on non Windows systems.
🗨️ Can I convert NTFS to FAT32 on Mac?
Yes, but only by formatting the drive in Disk Utility. This process erases all existing data. FAT32 (In Disk Utility, macOS shows FAT32 as “MS-DOS (FAT)”. When you select this option, macOS formats the drive as FAT32, not an older FAT variant.) offers wide compatibility, but it has a file size limit of 4 GB, which may not be suitable for large files.

