How to Fix a Mac Toshiba External Hard Drive Not Mounting?
We explore why Toshiba hard drives may not mount on Mac and provide solutions to fix connection errors. You will also find instructions on setup and necessary software for optimal performance.
By Irene / Updated on January 19, 2026
When you connect a Toshiba Canvio or Slim external hard drive to your Mac through a USB-C or USB-A port, the LED light may blink, and the drive might appear in Disk Utility. However, it does not mount on the Desktop. Even if it mounts, the New Folder option is grayed out, and you cannot drag files to the drive.
This usually happens because the drive uses the Windows-only NTFS file system. macOS can detect NTFS drives but does not allow write access by default. In this section, you will learn why your Mac cannot mount the disk. By downloading NTFS software for Toshiba external hard drives on Mac, you can enable full read and write access and fix the not mounting issue.
How to fix Toshiba external hard drive not mounting on Mac?
Before fixing a Toshiba external hard drive not mounting on Mac, first check the USB cable and port. Try a different cable, switch to another USB port, or connect the drive to another Mac to see if it mounts, as the problem is often caused by a faulty cable or port.
🔥Solution 1. Download software for Toshiba external hard drive for Mac
If your Toshiba external hard drive does not mount or work correctly on a Mac, the file system is often the main reason. Many Toshiba drives use NTFS, which macOS can detect but does not fully support. As a result, the drive may appear in Finder or Disk Utility, but you cannot open files, copy data, or make any changes. In some cases, the drive may not show up at all, display as not mounted, or cause Finder to freeze when you try to access it.
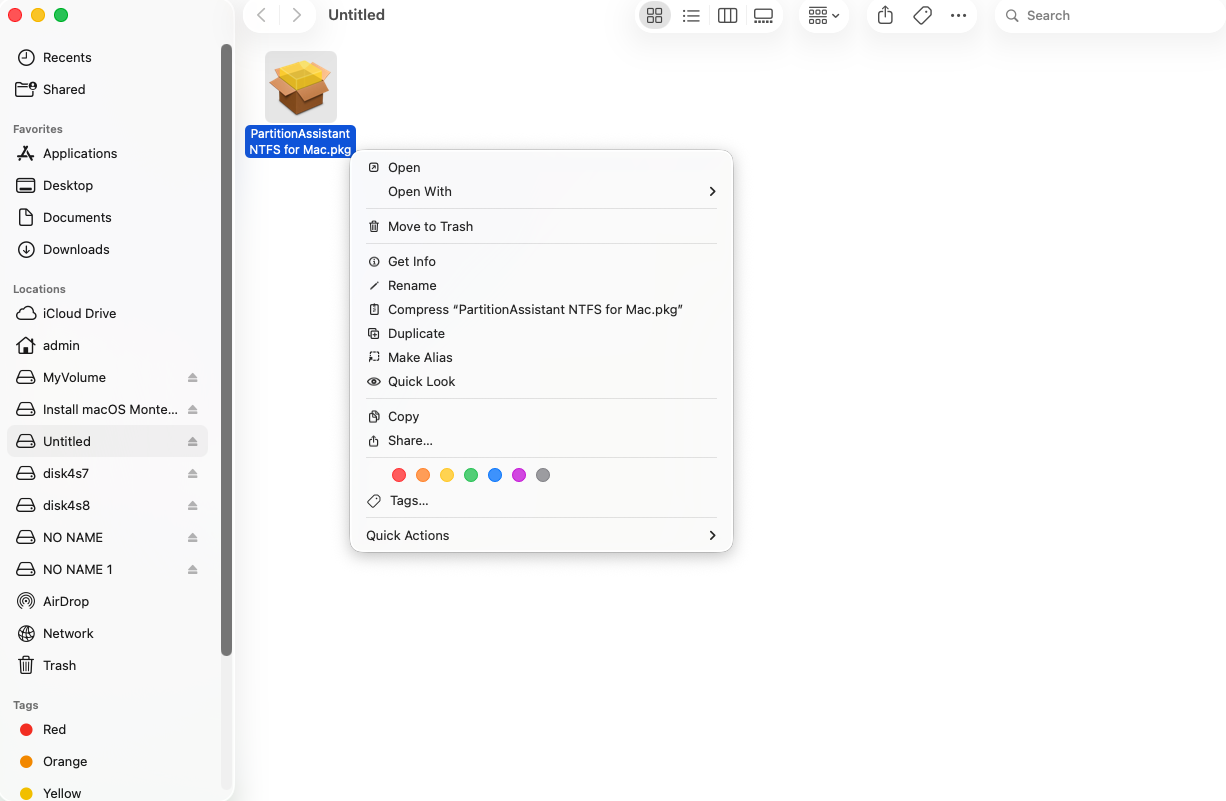
A practical solution is to download NTFS software designed for Mac like PartitionAssistant NTFS for Mac. This type of tool adds full read and write support, allowing macOS to handle the Toshiba drive like a normal Mac disk. After installing the software, the drive can mount properly and appear in Finder. You can then open, move, rename, and delete files without using Terminal or changing system settings. This method is simple to follow, works well with newer macOS versions, and helps avoid system instability or security risks.
🌟 Note: To smoothly run software, please configure Security Policy in iOS Recovery Mode before the process.
Step 1. Open the installed PartitionAssistant NTFS for Mac, then connect your NTFS drive, and the software will automatically mount and display all connected external hard drives on your Mac.
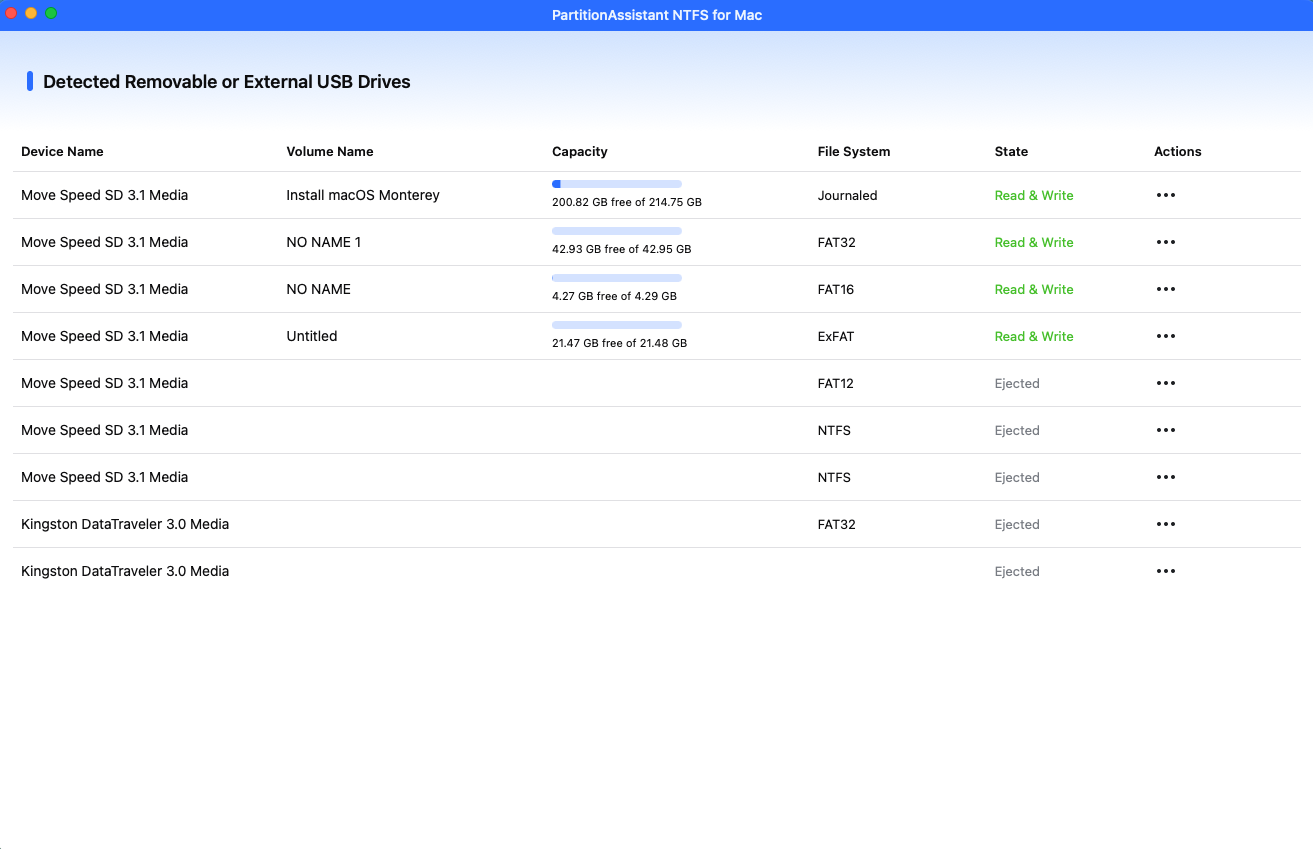
Step 2. Find the NTFS drive you want to write data, and click "Enable Writable". If the status is already Read & Write, simply click “Open” to start using the NTFS external hard drive.
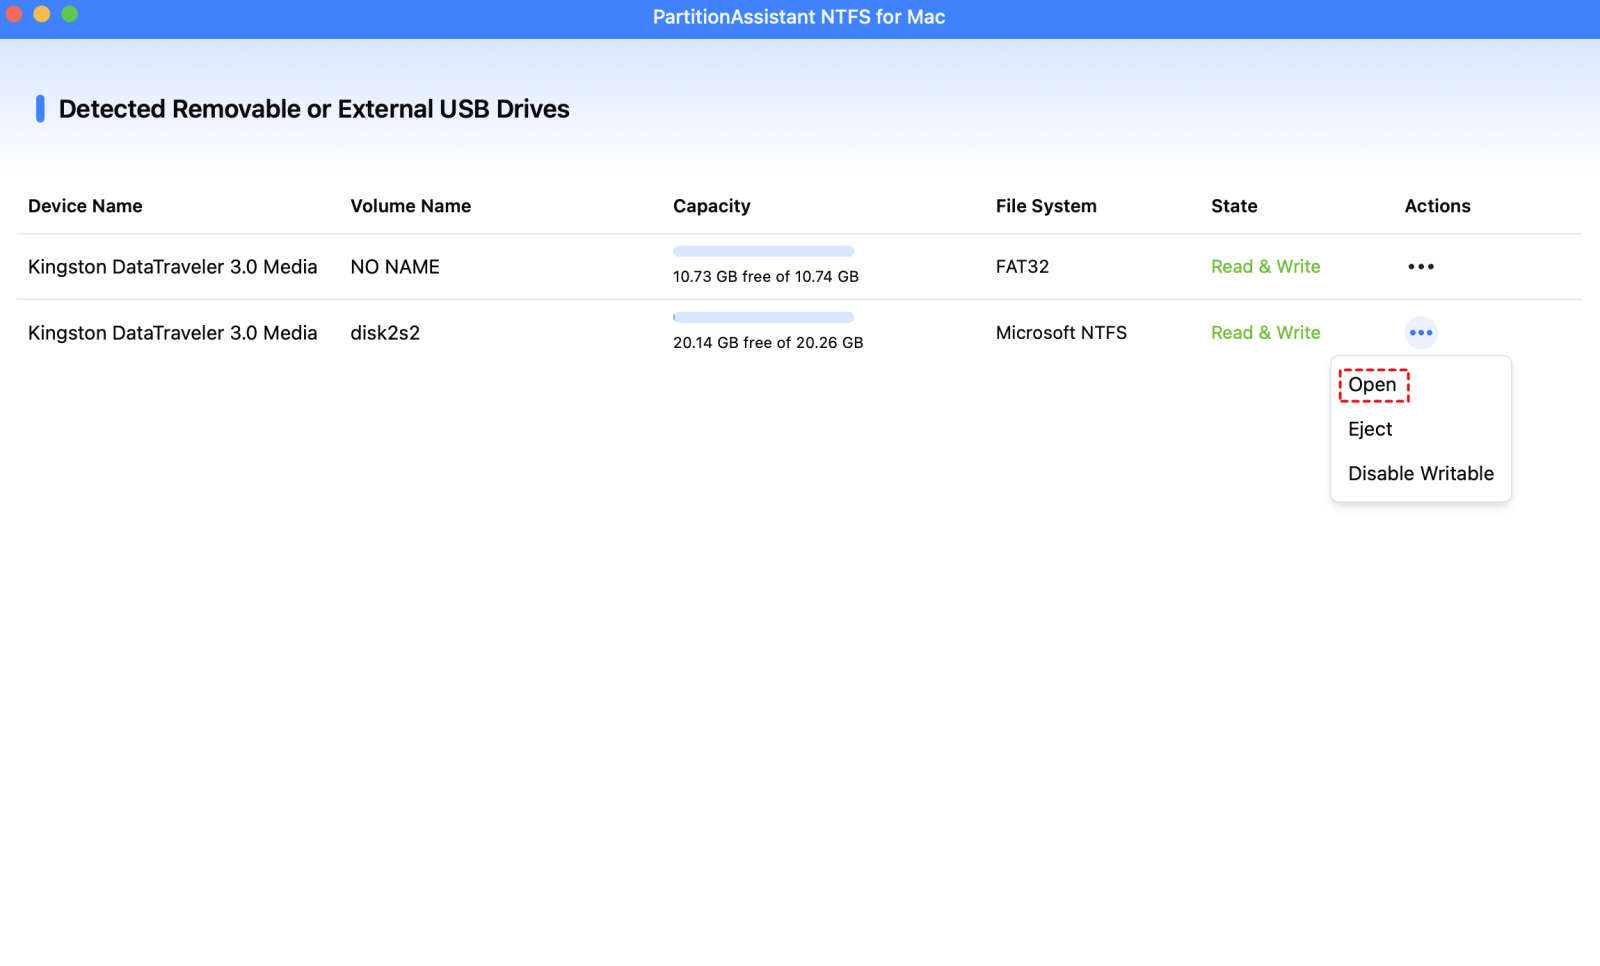
Step 3. After successfully mounting the Toshiba external hard drive, you can copy, move, and delete files on the drive.
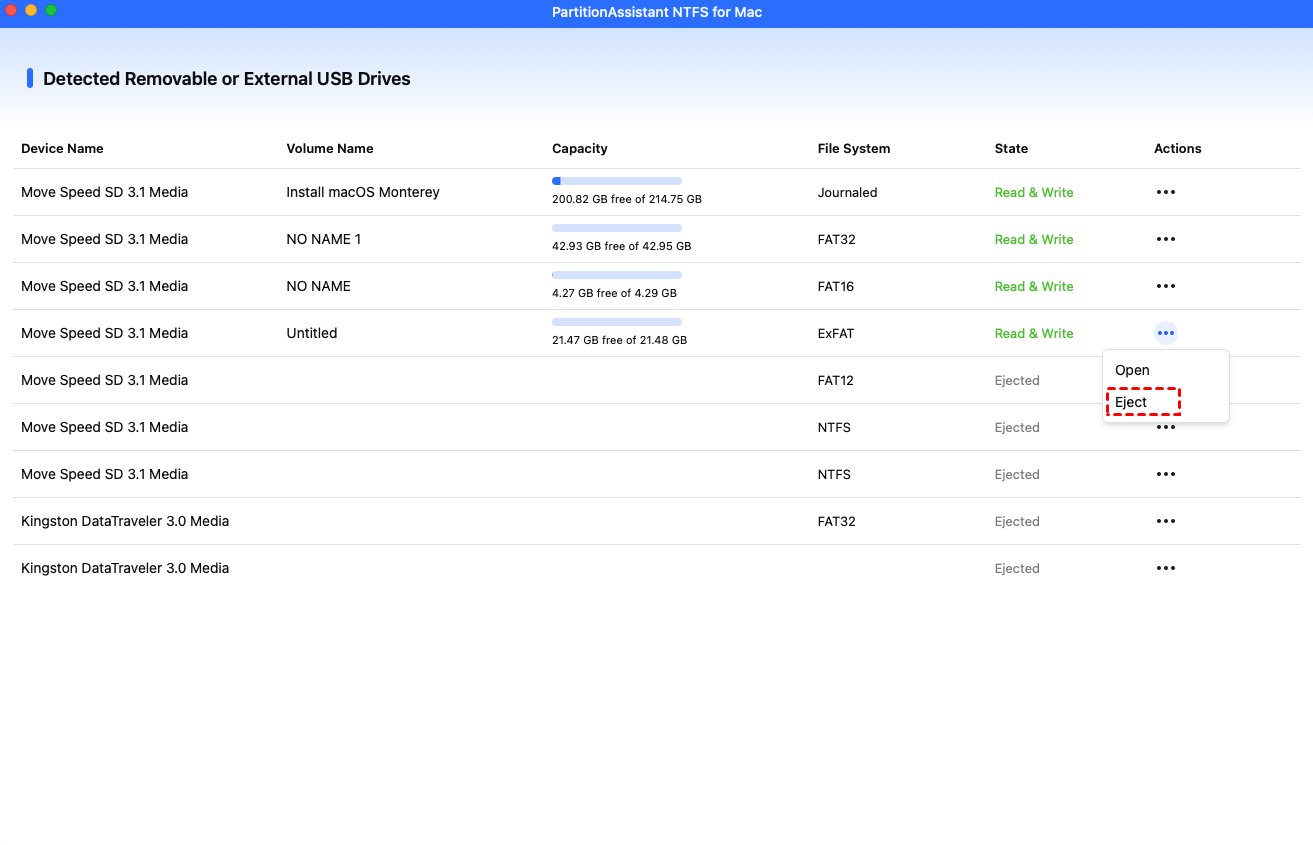
Step 4. After all operations are complete, please click "Eject" to disconnect the external hard drive from your Mac.
Solution 2. Reset NVRAM or PRAM
Resetting NVRAM or PRAM can help fix Toshiba external hard drive problems on a Mac because these memory areas store hardware-related settings, including those for connected devices. If these settings become incorrect, your Toshiba external hard drive may not mount properly. A reset can refresh the system and restore normal detection.
Step 1. Completely shut down your Mac and wait a few seconds to make sure it is fully powered off.
Step 2. Turn on your Mac and immediately press and hold the Option, Command, P, and R keys at the same time.
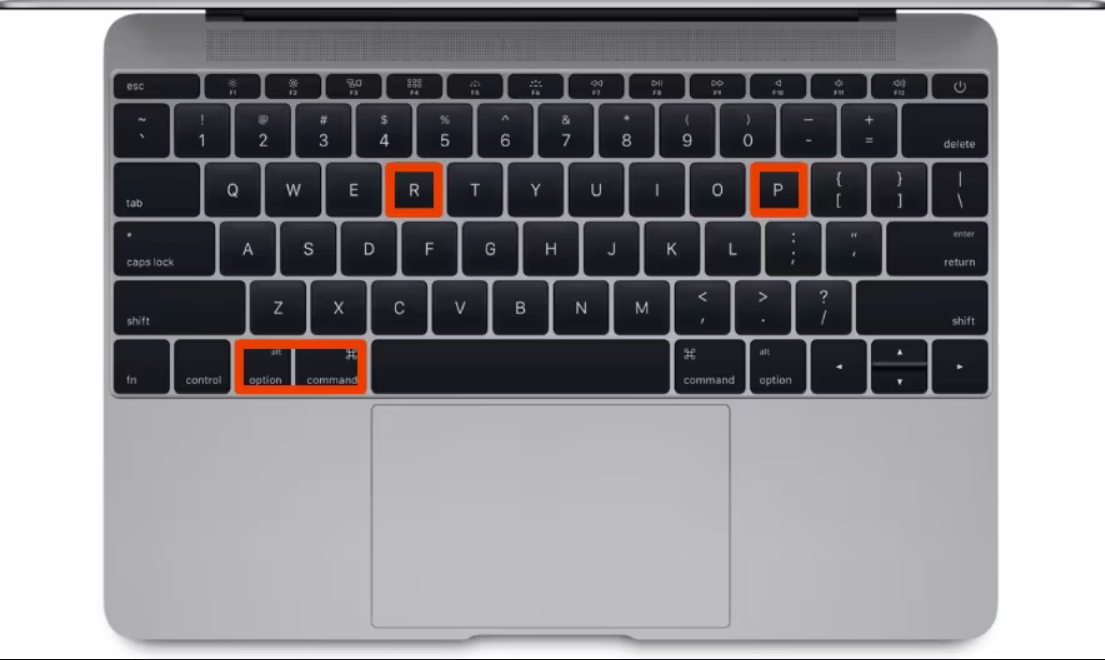
Step 3. Keep holding the keys for about 20 seconds, then release them and allow your Mac to continue starting up normally.
After the reset, macOS reloads default hardware settings. This process often helps the system recognize external drives again and can resolve mounting issues caused by incorrect system configurations.
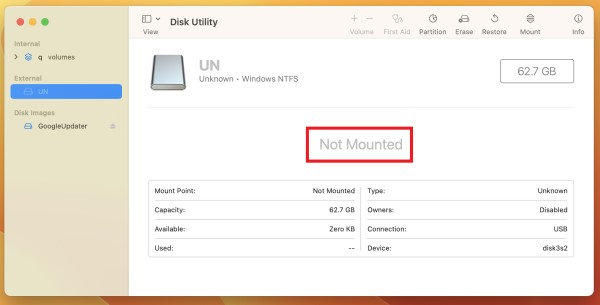
Solution 3. Check your Toshiba external hard drive on Mac
Disk Utility is a built-in macOS tool that lets you check whether your Toshiba external hard drive is detected by the system and try to mount it manually. It is often the first place to look when a drive does not show up on the desktop or in Finder.
Step 1. Plug the Toshiba external hard drive into your Mac and make sure the connection is secure.
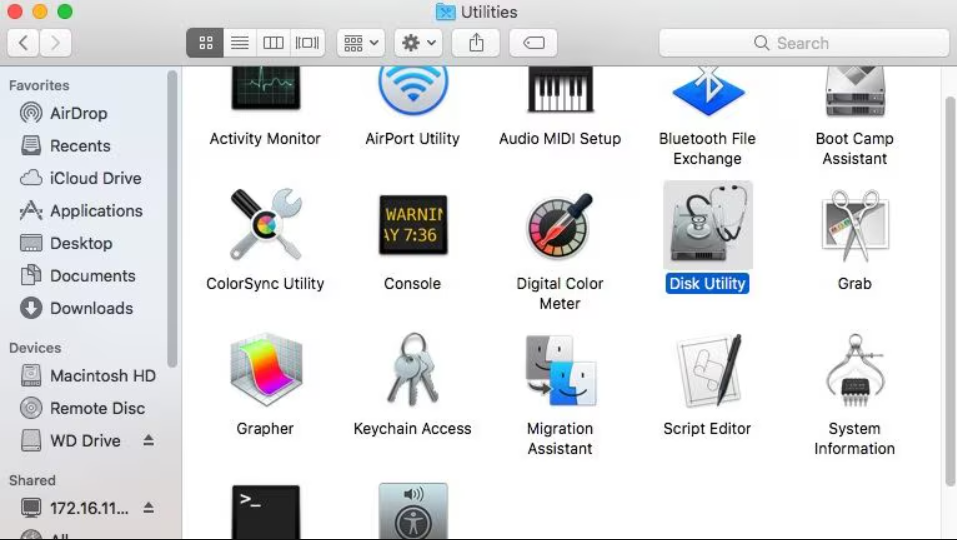
Step 2. Open Disk Utility by going to Applications, then Utilities, and selecting Disk Utility.
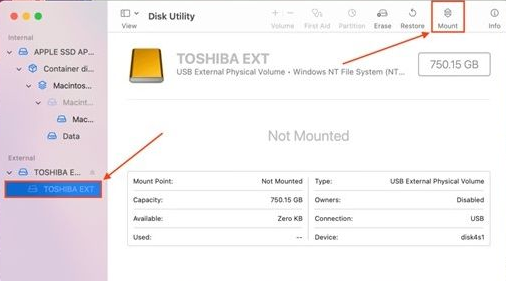
Step 3. Check the list of devices on the left side and look for your Toshiba drive.
Step 4. If the drive is listed but appears dimmed or shows as not mounted, select it and click the Mount button.
If the drive does not appear in Disk Utility at all, this usually points to a hardware, cable, or power issue. In this case, the problem may not be related to macOS settings, and further hardware checks are recommended.
Solution 4. Run First Aid
If your Toshiba external hard drive still will not open after trying to mount it, the problem may be caused by file system errors or minor disk damage. macOS includes a built-in repair tool called First Aid that can scan the drive and fix common issues. Running First Aid is a safe and simple step to restore access to the external drive.
Step 1. Connect the external hard drive to your Mac using a stable cable and make sure it is powered on if required.
Step 2. Open Finder, go to Applications, then Utilities, and double-click Disk Utility.
Step 3. In Disk Utility, choose the external hard drive from the list on the left. Click First Aid at the top, then select Run to start the repair process.
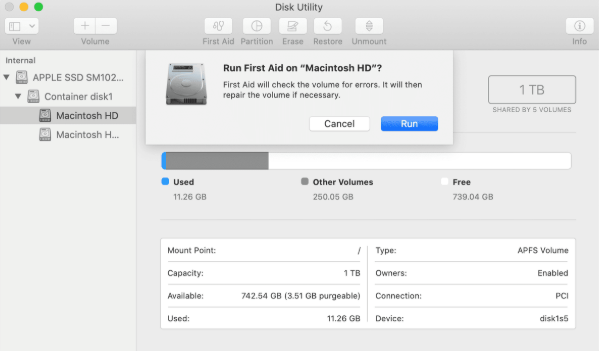
Step 4. Wait for the scan to finish and click Done when the process is complete.
After the repair, safely eject the external hard drive and restart your Mac. Then reconnect the drive and check whether it mounts and works normally. If the issue continues, you may need to try other methods to check hardware connections or system settings.
The signs that NTFS drive is not mounting on Mac
When an NTFS drive fails to mount on a Mac, the problem is usually easy to notice. The system may not recognize the drive correctly, or it may detect it but fail to provide access. Below are the most common signs that show your NTFS drive is not mounting properly on macOS.
⚠️ 1. NTFS drive not visible: After connecting the NTFS drive to your Mac, it should appear automatically on the Desktop or in Finder. If the drive does not showing up on Mac at all, this usually means macOS cannot recognize or mount the NTFS drive.
⚠️ 2. Files cannot be accessed: Although macOS has limited support for NTFS, it can normally read files on an NTFS drive. If the drive is mounted correctly, you should be able to open and view its contents. If files cannot be opened or accessed, the NTFS drive is not mounting as expected.
⚠️ 3. Mac crashes or becomes unresponsive: In some cases, your Mac may freeze, crash, or stop responding when you try to access the NTFS drive. This behavior often indicates a mounting or compatibility issue with the NTFS file system.
⚠️ 4. Disk Utility shows “Not Mounted”: You can also check the drive status in Disk Utility. If the NTFS drive is listed there but marked as “Not Mounted,” it confirms that macOS has detected the drive but failed to mount it.
These signs clearly indicate that the NTFS drive is not mounting on your Mac. In the next section, we will explain why this issue happens and what causes NTFS drives to fail to mount on macOS.
Why is Toshiba hard drive not mounting on Mac?
When an NTFS-formatted external drive is connected to a Mac and fails to function as expected, several technical indicators can help diagnose the issue. Recognizing these signs allows IT professionals to identify the underlying cause and implement an appropriate resolution efficiently.
| Indicator | Technical Implication |
|---|---|
| Drive does not appear on the desktop or in Finder | Potential physical connection failure, faulty USB cable, or hardware detection issue |
| Drive is visible in Disk Utility but remains unmounted | macOS recognizes the device at the hardware level but cannot parse the NTFS file system without appropriate drivers or software |
| Drive mounts as read-only | Native macOS support for NTFS is limited to read operations; write operations require third-party drivers or utilities |
| Previously functional drive fails after macOS update | System updates may introduce changes to kernel extensions or filesystem handling, causing NTFS mounting conflicts |
| Error messages during drive connection | Indicates possible driver incompatibility, corrupted filesystem metadata, or software conflicts preventing proper initialization |
These indicators typically arise from one or more of the following: physical connectivity issues, NTFS file system restrictions, driver or software conflicts, or macOS system updates. Understanding these signs provides a foundation for diagnosing and resolving NTFS mounting failures. The following section will outline professional strategies to restore full NTFS functionality on macOS.
Conclusion
Toshiba external hard drives often fail to mount on Mac due to NTFS file system limitations, connectivity problems, driver conflicts, or recent macOS updates. By identifying the signs of a mounting issue, such as the drive not appearing in Finder, being read-only, or showing as not mounted in Disk Utility, you can quickly determine the cause. Using professional solutions like installing NTFS software for Mac, running First Aid, checking connections, or resetting NVRAM/PRAM allows full read and write access and restores normal drive functionality. Following these steps ensures your Toshiba drive works seamlessly with macOS.
FAQs
🗨️ Why won’t my Mac recognize my Toshiba external hard drive?
Most Toshiba external hard drives use the Windows-only NTFS format. macOS can read NTFS drives but cannot write to them without extra software. Your Mac may also fail to recognize the drive if the USB cable is damaged, the port is faulty, or system settings block mounting. Installing NTFS software for Mac fixes this issue.
🗨️ Is a Toshiba external hard drive compatible with Mac?
Yes, Toshiba external hard drives work with Mac. However, NTFS-formatted drives are read-only on macOS. To get full access, reformat the drive to exFAT or use NTFS drivers for Mac.
🗨️ How do I force my Mac to mount an external hard drive in Terminal?
Open Terminal from Applications > Utilities. Type diskutil list to find your drive identifier. Then type sudo diskutil mount /dev/disk2s1 (replace disk2s1 with your identifier) and press Enter. This mounts the drive, but NTFS write access still requires additional software like PartitionAssistant NTFS for Mac.
🗨️ How to set up a Toshiba hard drive for Mac?
Connect your Toshiba drive to your Mac. Open Disk Utility from Applications > Utilities. Select the drive, click Erase, and choose a Mac-compatible format such as exFAT or Mac OS Extended (Journaled). Click Erase to format the drive. The drive is now ready to use on Mac.
🗨️ How to install a Toshiba driver on Mac?
Toshiba drives usually do not need official drivers. For NTFS drives, install third-party NTFS software. Once installed, the software allows full read and write access on your Toshiba drive.
Why is my Toshiba hard drive not showing up on Mac?
The drive may not appear due to NTFS formatting, a faulty USB cable or port, insufficient power, or macOS system conflicts. Check Disk Utility for detection. Installing NTFS software or trying another cable often resolves the problem.

