How to Use Disk Management on Windows 11 to Delete Volumes
It’s inconvenient to manage a disk when there are too many partitions. In this article, you can learn how to use Disk Management on Windows 11 to delete volumes and how to fix delete volume greyed out.
By AOMEI / Updated on May 12, 2023
Can I delete partitions with Windows 11 Disk Management?
"Hey, I recently used Disk Management on Windows 11 to delete the volume. But when I want to click delete, this option is grayed out. Why this situation happens? Who can answer this question? Thank you for your help."

Why need to delete partitions?
In the process of using the computer, users want to delete some partitions in the computer due to the following reasons:
▶ Make disk management more convenient. Deleting redundant partitions can make it more convenient for users to manage disks, because when there are too many partitions in the computer, it will cause certain difficulties for users to manage disks, especially some special data partitions.
▶ Extend another partition. When you want to extend another partition, but there is no unallocated space, you can delete unimportant partition to add unallocated space.
▶ Free up disk space. When there're many partitions on your computer, you may find that some partitions can be filled up quickly, which can cause insufficient free space on the partitions and even cause your computer to slow down.
Viewing the above advantages, in order to better use your computer, you can try to use Disk Management to delete partitions.
How to use Disk Management on Windows 11 to delete volumes
Disk Management is a practical tool specially generated for Windows system to manage disks, it can help you delete/shrink/extend/format partition. Keep reading, we will describe the steps of using Disk Management on Windows 11 to delete volume.
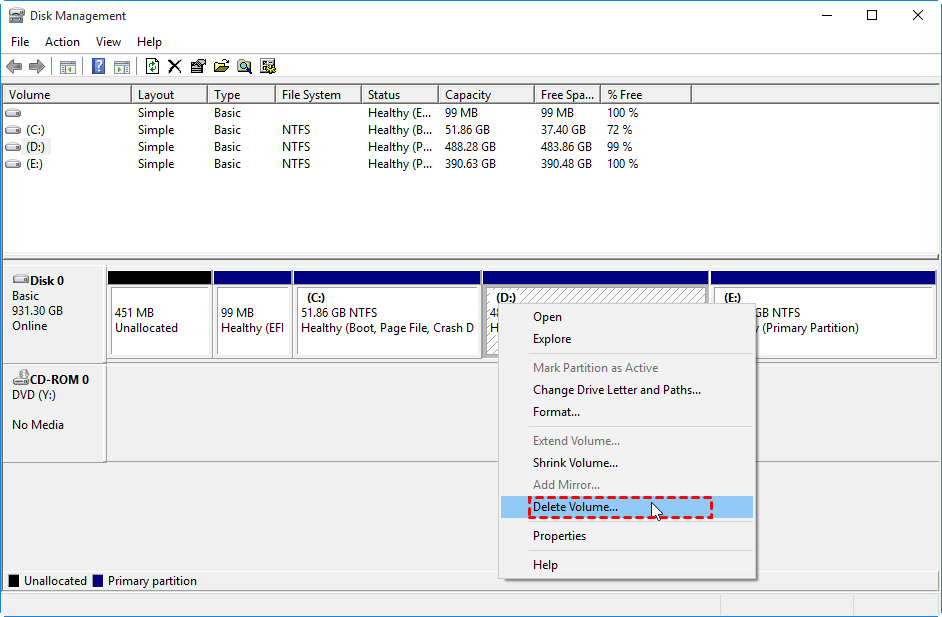
Press "Windows +R" and input "diskmgmt.msc" and hit "Enter" to open Disk Management. Then, right-click the partition you want to delete and click "Delete Volume" option in the menu.
Error: Windows 11 Disk Management delete volume greyed out
Although using Windows 11 Disk Management to delete unwanted partitions is a good way to manage your disk, you may discover Disk Management on Windows 11 cannot delete the volume in some situations:
★ When you want to delete the recovery partition, it is hidden and protected.
★ When deleting the system partition, "Delete Volume" may also be grayed out, because the C drive has the files to boot the operating system, which obviously cannot be deleted from the PC.
★ If you forget to delete all logical partitions before deleting the extended partition, it will also fail to delete the partition.
★ In Windows system lower than Windows 10, you cannot delete a partition or SD card on a USB flash drive with Disk Management, because a USB flash drive or SD card is considered a removable device.
How to fix Disk Management cannot delete volume
When Disk Management on Windows 11 cannot delete volumes, you can consider a professional disk managing freeware AOMEI Partition Assistant Standard. It can easily help you resize/create/delete/format partition and provide you with other ability to manage hard drive easily.
Whether it's a hidden recovery partition or a partition on a USB drive, you can directly delete it in a few steps. Even, this powerful tool also gives you the right idea if you want to delete the system partition: Create a bootable USB drive with USB >Boot the PC from the USB >Select "Delete Partition" to delete the system partition after opening this software .
Let's see how it can replace Disk Management to delete partition.
Step 1. Insert the prepared USB drive into the computer and open AOMEI Partition Assistant Standard. Click "Tools"> "Make Bootable Media" and follow the prompts to create a Windows bootable USB drive and boot your computer from it.

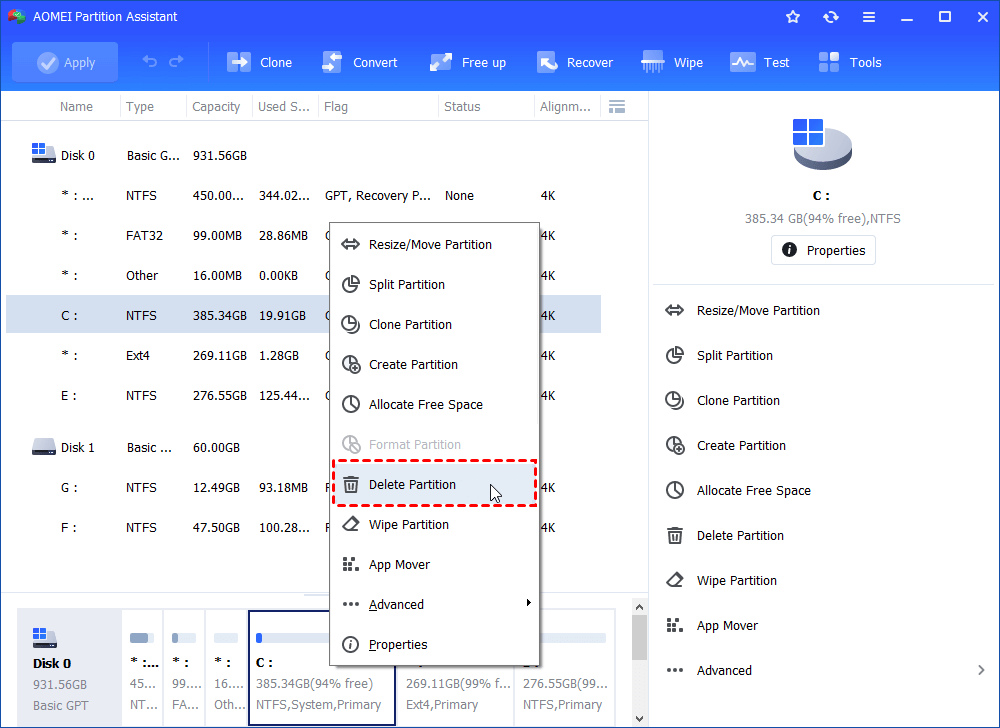
Step 2. After a while, you will enter the main interface of AOMEI Partition Assistant, right click on C drive and select "Delete Partition".
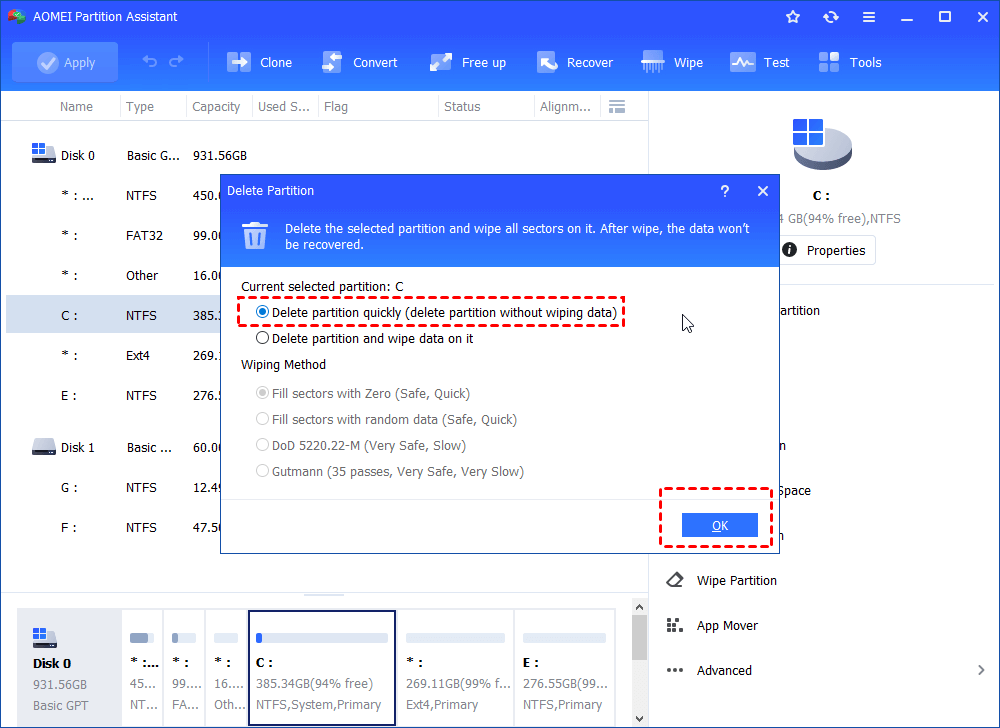
Step 3. In the pop-up window, select "Delete Partition Quickly", you will only delete the partition without erasing the data, and click "OK".
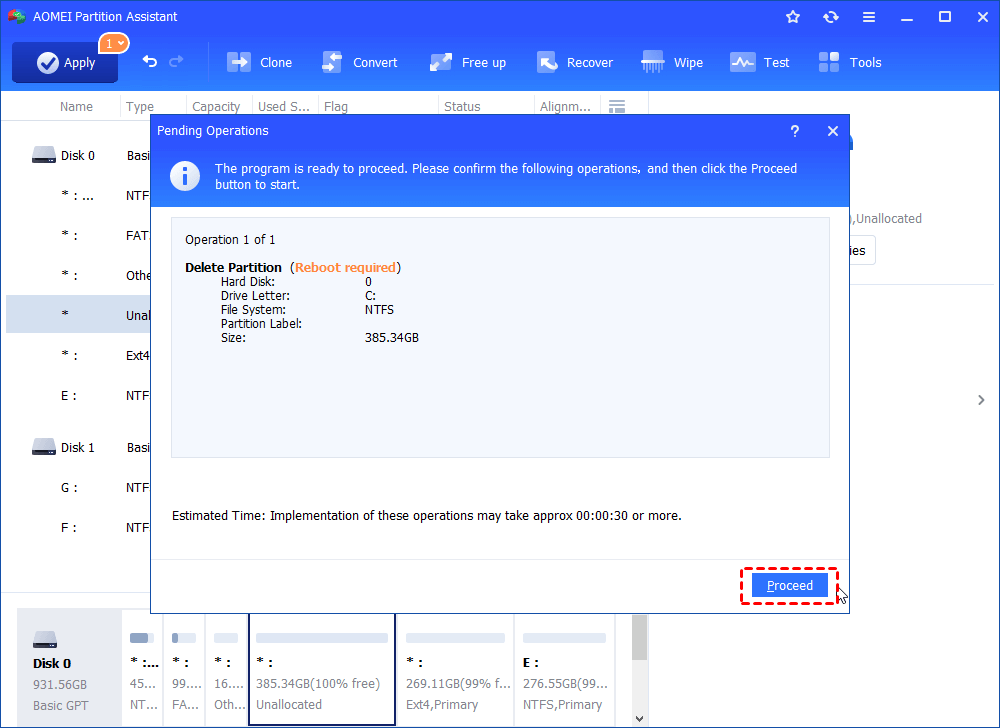
Step 4. In the main interface, click "Apply" and "Proceed" to perform the task of deleting the C drive.
To sum up
In this article, we explained why and how to use Disk Management on Windows 11 to delete volumes, and we also provide you with solutions when "Delete Volume" is grayed out.
If you want to learn more about AOMEI Partition Assistant and get more skills such as Allocate Free Space and Migrate OS to SSD, you can go to the Professional Version. In addition, we have specially designed the Server Edition for Windows Server users.

