Use Disk Management in Windows 11 to Shrink Volume
Using Disk Management in Windows 11 to shrink volume is easy. You can follow this tutorial to do so. If you cannot shrink the partition in Disk Management, you can also use the alternative.
By AOMEI / Updated on April 8, 2025
Why do you need to shrink volume on Windows 11?
On most new PCs, there’s usually only one partition—the C drive. This setup is not ideal, because all data, including system files and personal files, are stored together. If the C drive crashes, it is easy to suffer data loss.
To organize data better and reduce the risk of data loss, it’s recommended to shrink the C drive and create multiple partitions. This way, you can separate system files, personal files, and backups, making data management safer and more efficient.
Additionally, if one partition runs out of space, you can shrink another volume to create unallocated space, then use it to extend the full partition using Disk Management in Windows 11.
How to use Disk Management to shrink a volume in Windows 11
Windows 11 is a new Windows system launched by Microsoft in 2021. Providing a clean and simple interface, it is loved by the majority of Windows users. In order to better manage the partitions in the PC, Disk Management provided by Windows 11 can extend/shrink volumes, add mirror, mark partition as active, etc. If you can't access to Disk Management in Windows 11, please read this article as a reference. If you want to effectively and directly shrink a partition without any problem, you can use AOMEI Partition Assistant, which is the best alternative to Disk Mangament.
The Best Windows Disk Partition Manager and PC Optimizer
Here, we'll discuss the steps on how to shrink a volume in Disk Management.
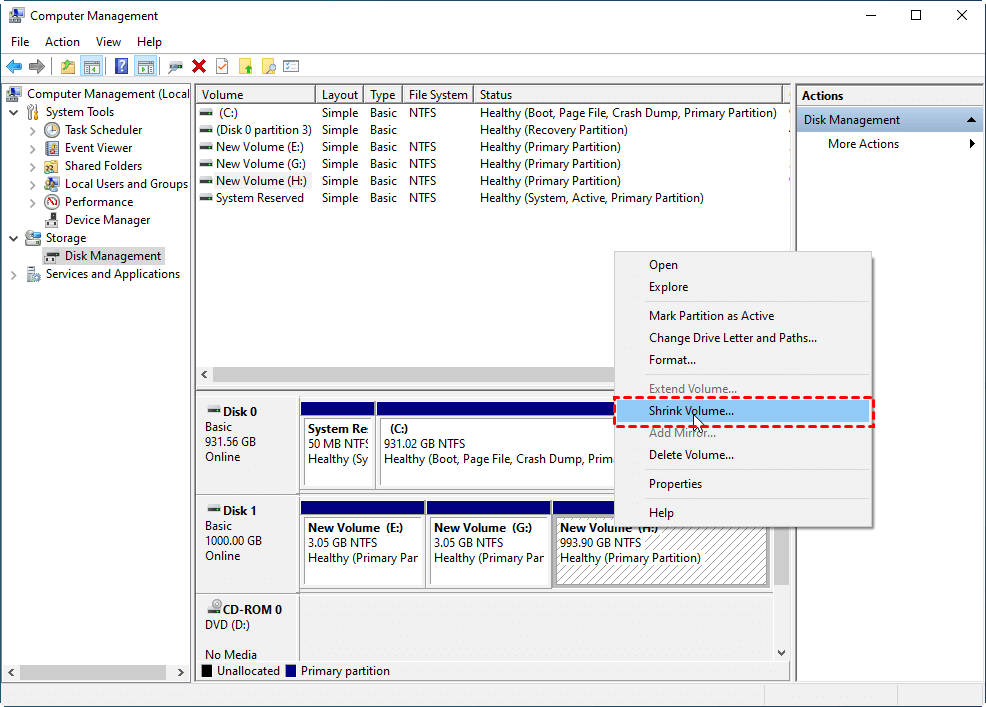
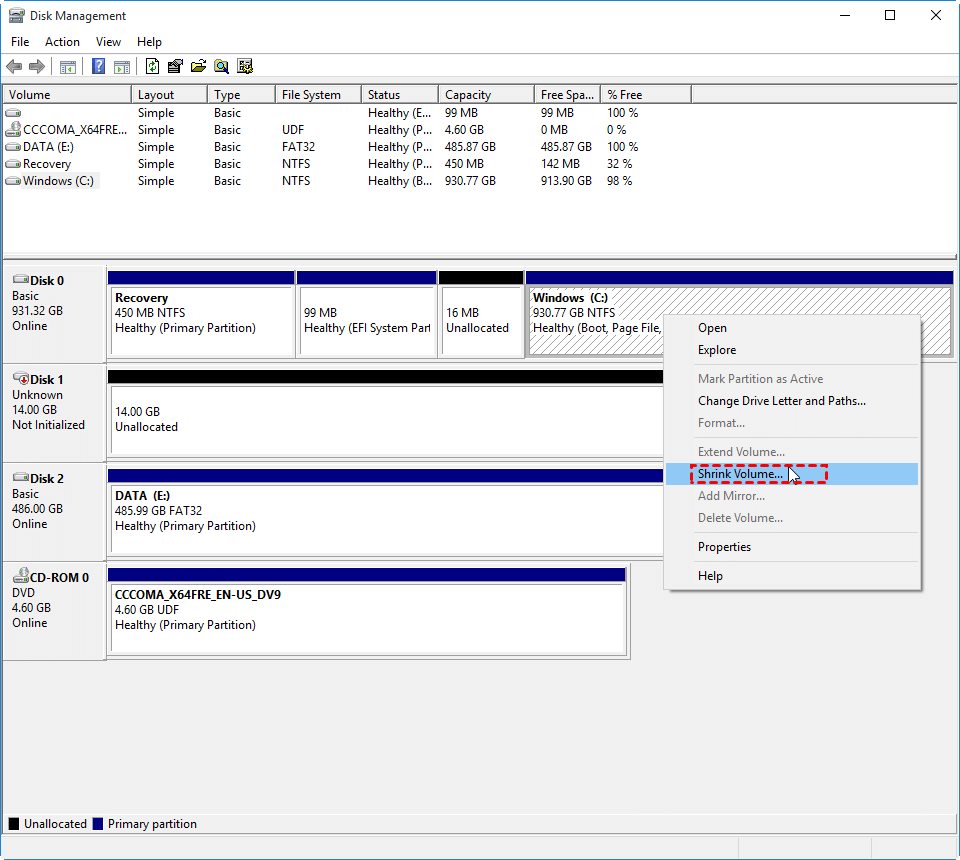
Step 1. Press "Windows" and "R" at the same time, then type "diskmgmt.msc" in the popped window and press "Enter". In the interface, right-click the C drive and select "Shrink Volume" .
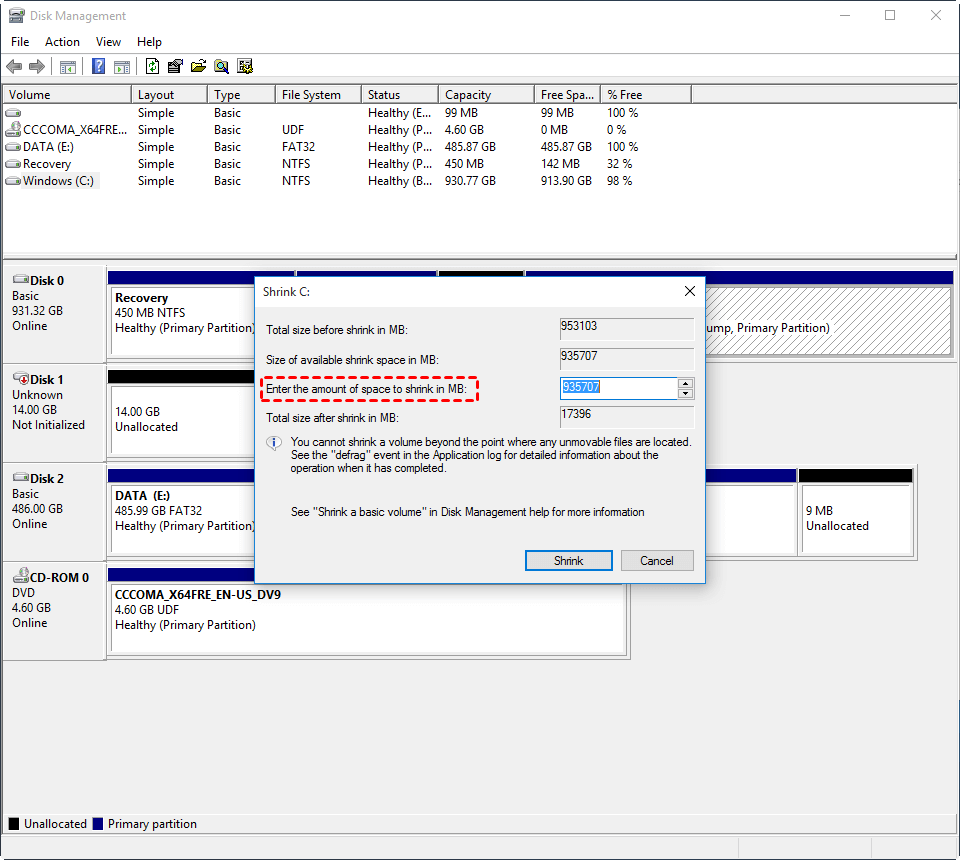
Step 2. In the following window, input the amount of space you want to shrink and click "Shrink".
User case: Why can't I shrink volume with Disk Management?
"In order to sort files on my computer, I used Windows 11 Disk Management to shrink the C drive and intend to create some new partitions, but why is "Shrink Volume" greyed out? Thanks for your help."
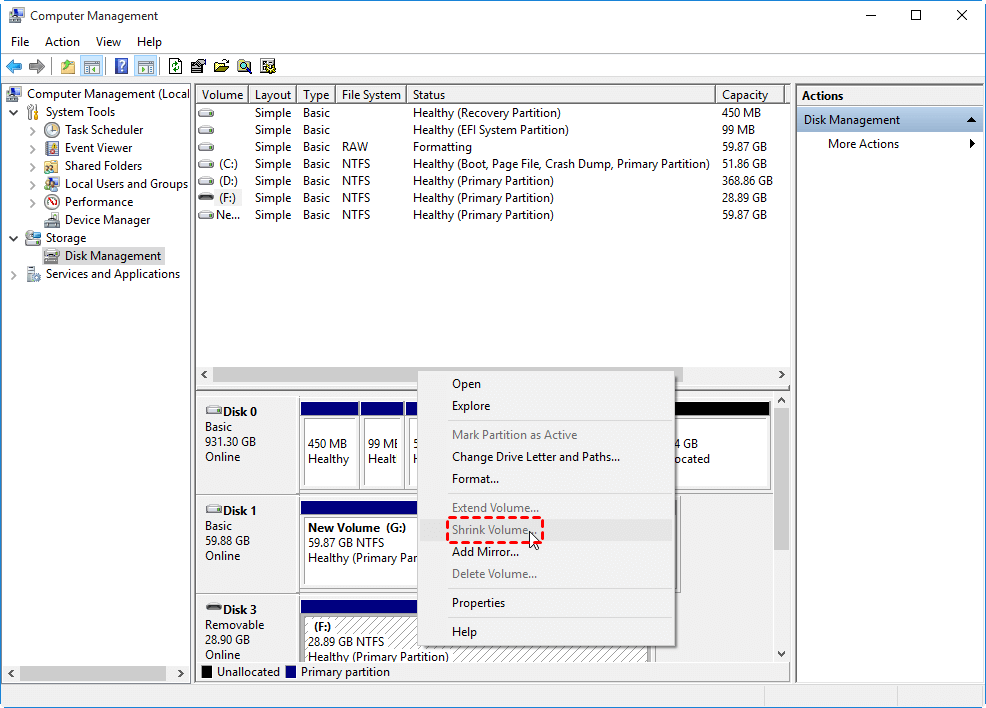
When we shrink volumes with Windows 11 Disk Management, Shrink Volume will be grayed out for the following reasons:
▶ When the partition file system is FAT32 or exFAT, we’ll not be able to shrink partitions because Disk Management only supports NTFS and RAW drives. At this time, you can convert FAT32 to NTFS to fix the issue.
▶ You may also be fail if there's disk fragmentation on the target partition.
▶ If there're irremovable files at the end of the C drive, you can’t shrink it.
The best alternative to shrink a volume on Windows 11
How to shrink a volume in Windows 11? We shared the steps above. When you cannot use Disk Management on Windows 11 to shrink volumes to do that for different reasons, like file system or file fragmentation. If that happens, you can use a third-party tool like AOMEI Partition Assistant. It works as a powerful alternative to Disk Management, helping you shrink volumes without those limitations. With it, you can manage your disks more easily and with greater flexibility.
With just a few clicks, you can successfully shrink partitions on your computer without losing any important data. In addition, it can also easily shrink or extend the encrypted partition.
The Best Windows Disk Partition Manager and PC Optimizer
If you think that this tool only shrinks partitions, you might be pleasantly surprised. This versatile utility is designed to help users address a wide range of disk-related issues, such as:
✔ When the disk space is low, you can merge partitions.
✔ When you want to categorize computer data, you can create multiple partitions.
✔ When you want to through away or sell out the disk, you can wipe hard drive to prevent the disclosure of personal information.
✔ You can also rebuild MBR when the system cannot be found in the computer.
Tip: During the process of shrinking a partition, you must keep the computer fully charged.
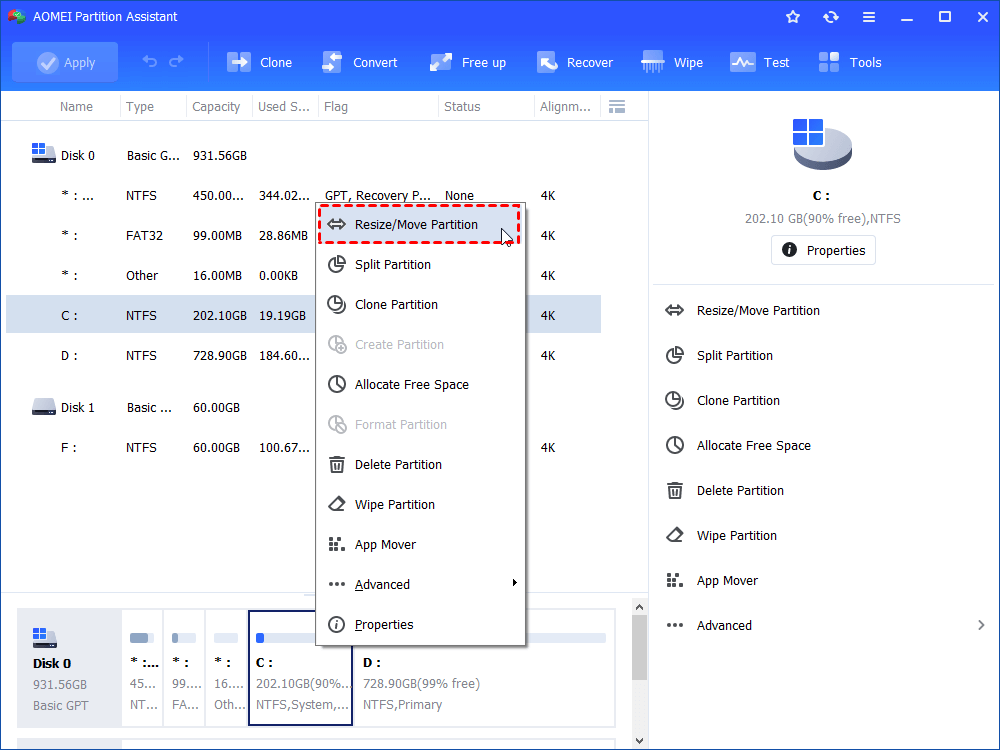
Step 1. Right-click C drive and click "Resize/Move Partition".
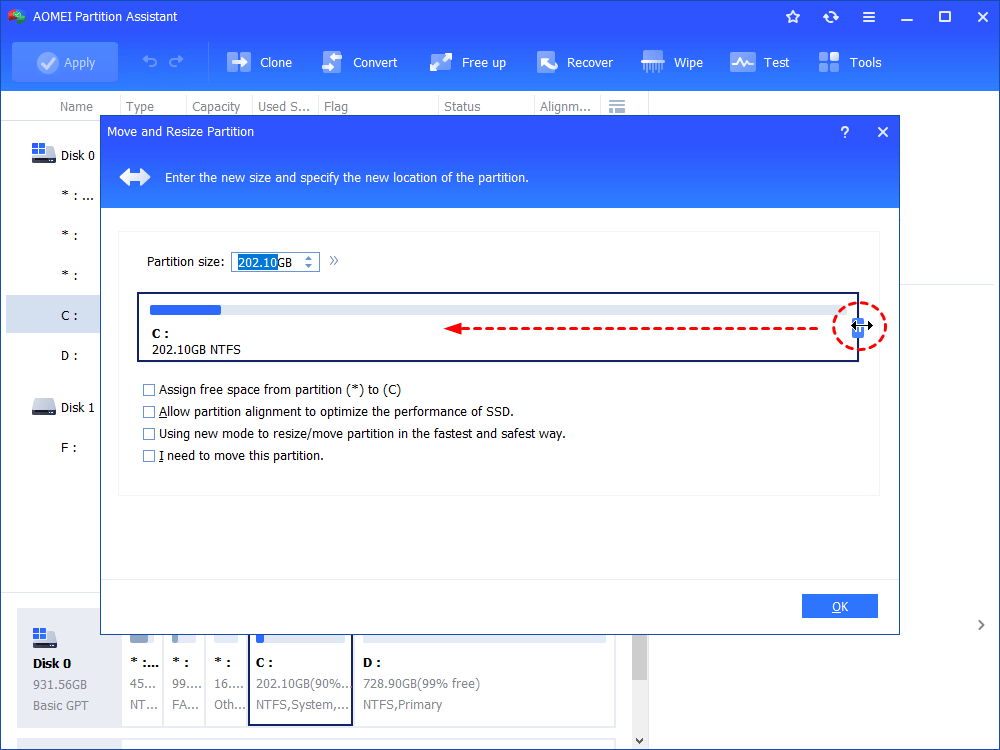
Step 2. Drag the little circle of the right border leftward to shrink the partition selected. Then, click "OK".
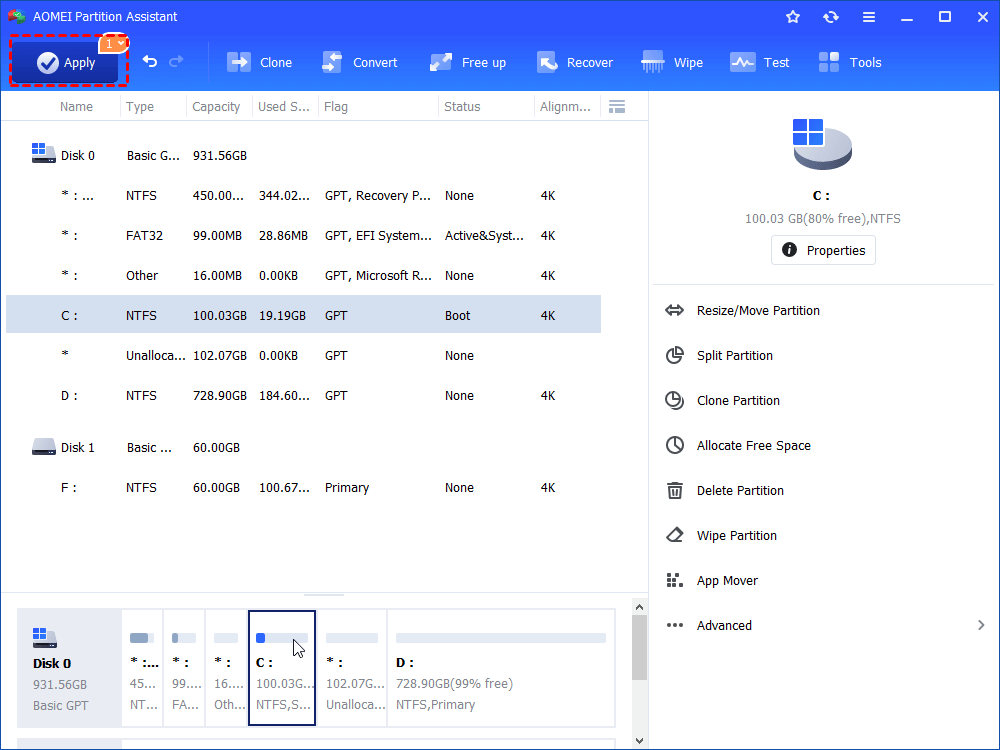
Step 3. Click "Apply" and "Proceed" to realize the pending partition shrinking task.
What can you do after shrinking a partition with AOMEI PA?
After shrinking a partition, you can use the unallocated space to create a new partition or extend another partition. AOMEI Partition Assistant offers various functions allows you easily manage your partitions on Windows 11, 10, 8/8.1, and 7.
The Best Windows Disk Partition Manager and PC Optimizer
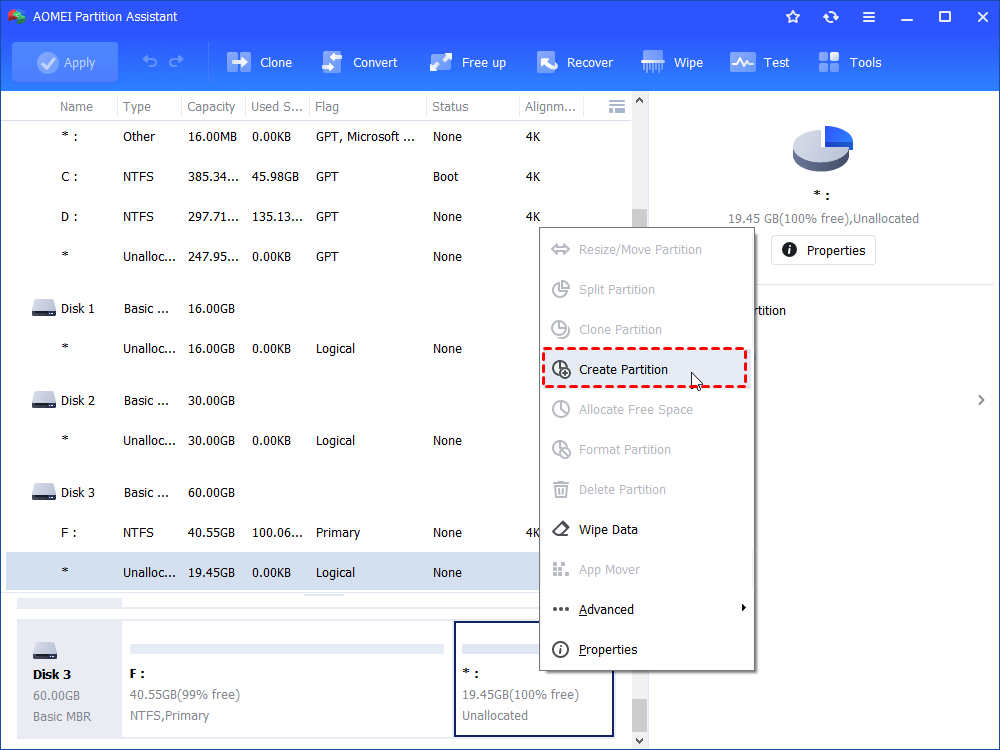
Case 1. Create a new partition
In the main interface, you should right click the unallocated space and select "Create Partition", then please follow the guidance to complete this operation.
Case 2. Extend another drive
In addition to creating new partitions, you can also use the unallocated space to extend other partitions after shrinking one. Detailed steps are as follows:
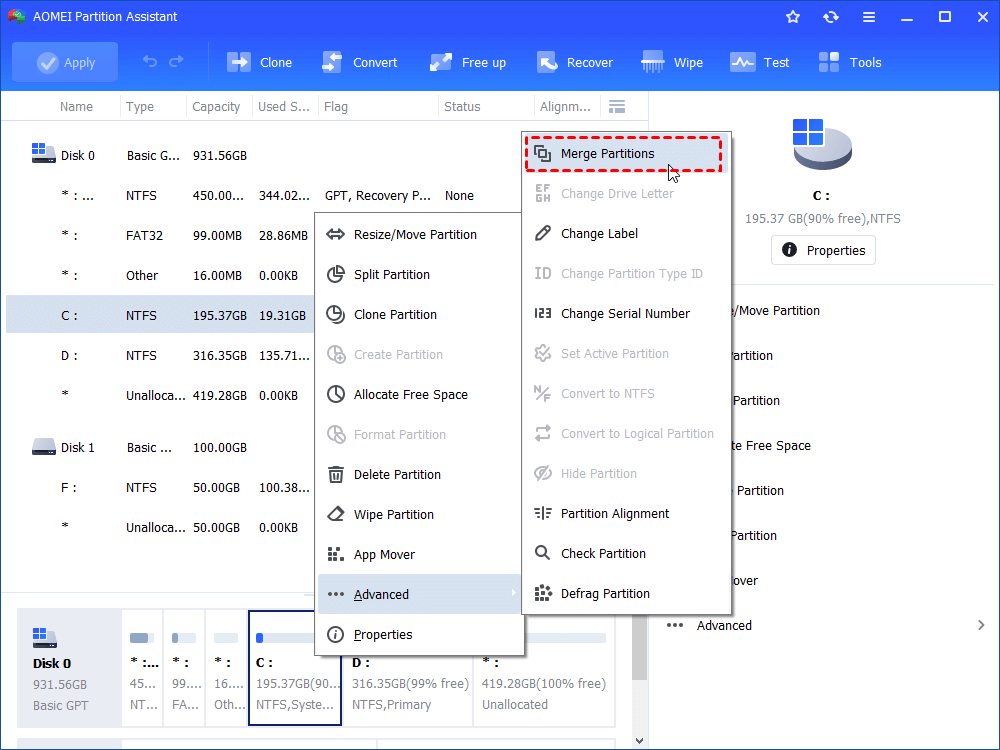
In the main interface, right-click on the target partition. Then click "Advanced">"Merge Partitions", you can follow the next instructions to merge the C drive with the unallocated space.
Verdict
In this article, you can learn the process to use Disk Management on Windows 11 to shrink volumes. Besides, when "Shrink Volume" is grayed out, there're two solutions to solve it.
By the way, if you want to use the unallocated space to extend another partition, you can allocate free space after upgrading to the Professional Edition. In addition, the split partition can directly generate a new partition after you shrink a partition.

