How to Change Windows 11 Boot Drive to SSD
If you plan to change Windows 11 boot drive to SSD, you can follow the elaborate guidance. In addition, we will share a tip for creating a portable boot drive Windows 11.
By Irene / Updated on September 22, 2023
Do you need to replace Windows 11 boot drive with SSD
Are you experiencing slow boot times, excessive heating during gaming sessions, loud noise when running resource-intensive programs, or, worst of all, a painfully sluggish system response in your newly upgraded Windows 11 operating system? If so, you may need to consider replacing your Windows 11 boot drive with an SSD from the traditional HDD.
What is a boot drive? In simple terms, a boot drive, also known as a system disk, is a drive that houses the operating system. If your system relies on an HDD to store the operating system, we refer to it as the boot drive. Likewise, if it's an SSD, the same designation applies.
In today, SSDs offer faster data access, lower latency, and several other advantages over HDDs. This has led more people to make the switch to this advanced storage technology, especially when it comes to setting up their Windows 11 boot drive as an SSD to get the best possible experience with the latest Windows OS.
How to change boot drive Windows 11
In this part, we will offer clear guidance to change Windows 11 boot drive as an SSD.
Option 1. Clean install Windows 11 on the new SSD
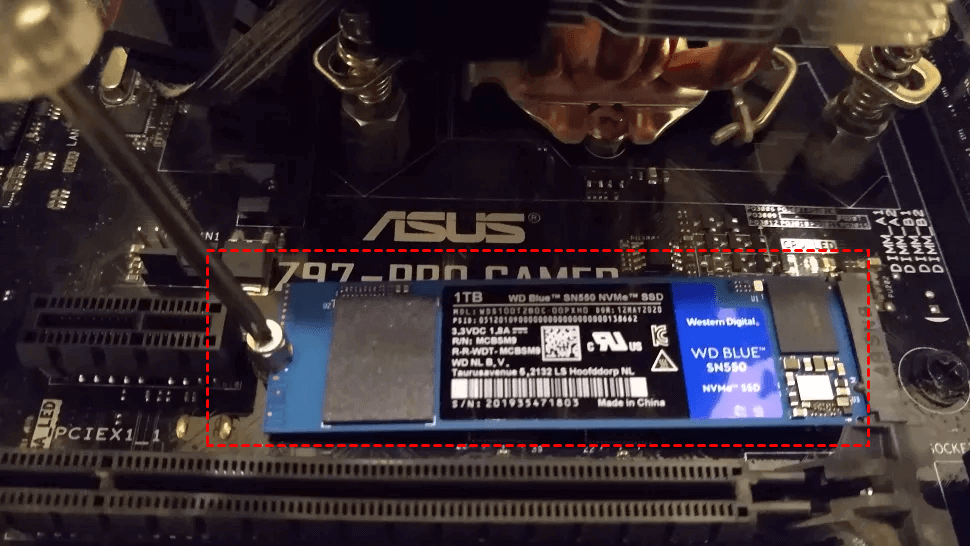
Section 1. Connect SSD to your computer
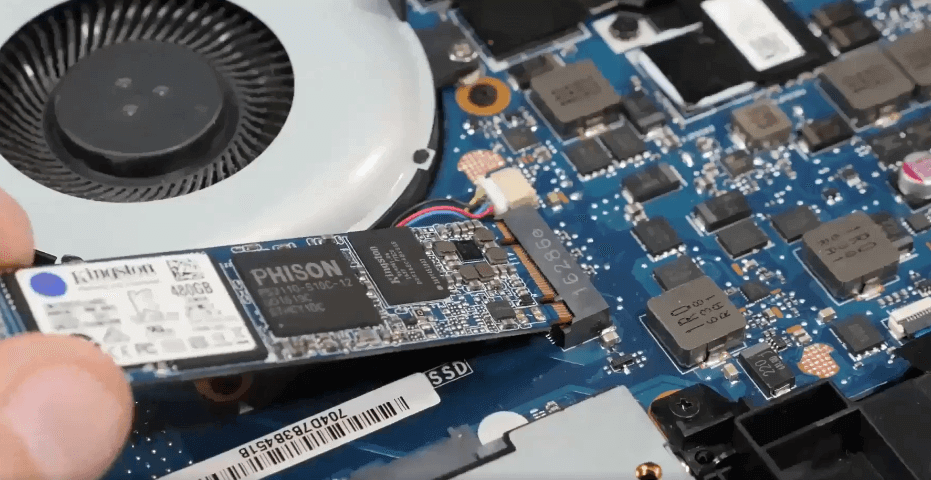
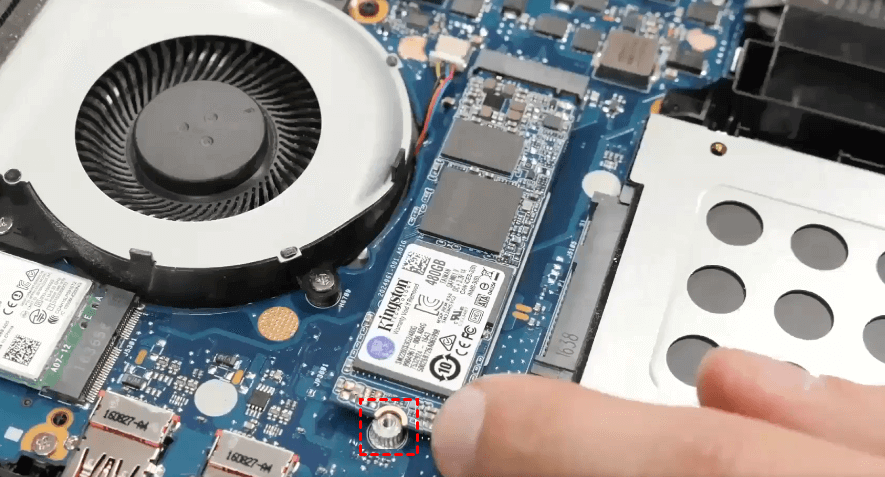
Step 1. For laptop users, you need to remove the back cover with a screwdriver. And then insert the SSD into the slot, and ensure it is tight enough for connecting to the motherboard interface.
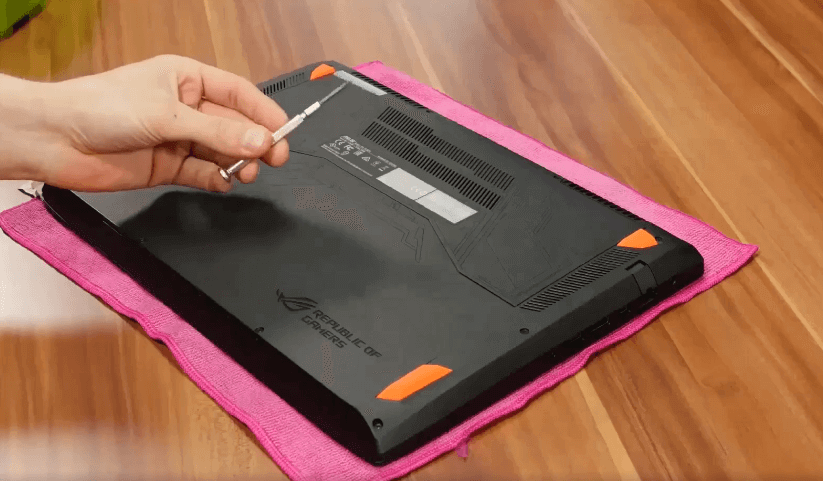
Step 2. Tighten the screws and reattach the back cover of the laptop.
For desktop users, please follow the steps below:
Step 1. Turn off your computer and unplug the power cord. Then open the case and find and insert the SSD into the slot.
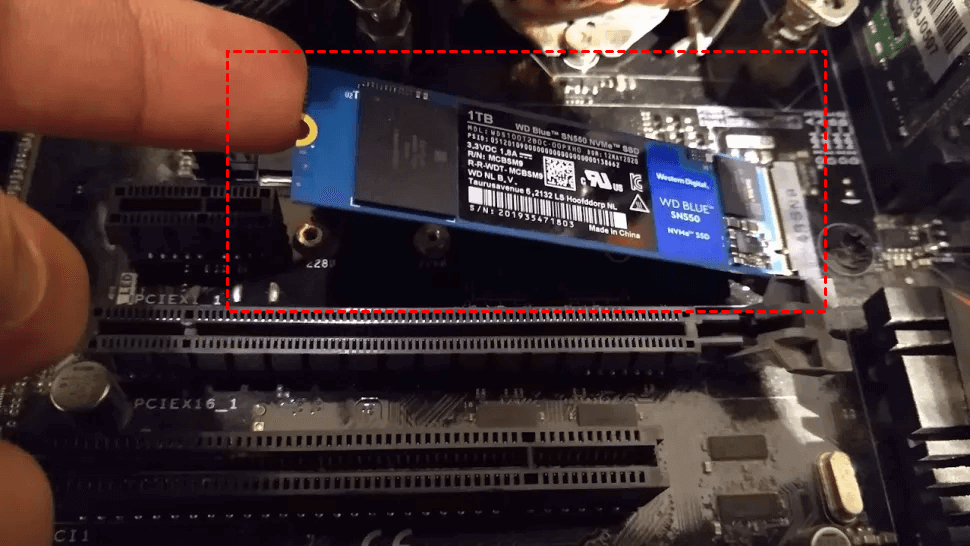
Step 2. Tighten the screw into the mounting hole and put the desktop back. Then start the computer.
Section 2. Create Windows 11 installation media
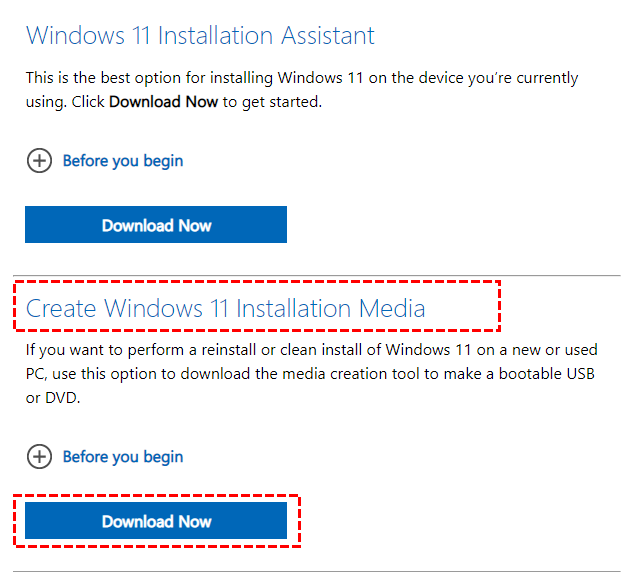
Step 1. Please go to the Microsoft official web to download the Media Creation Tool.
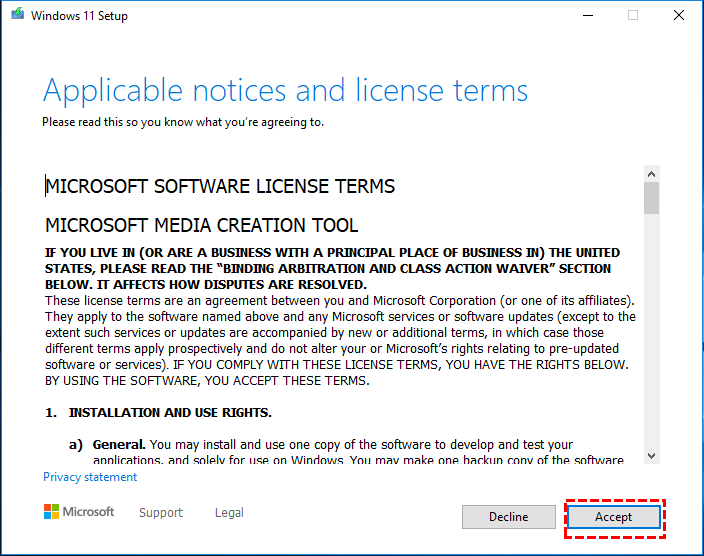
Step 2. Click on the installation files and choose “Accept” to move on to next step.
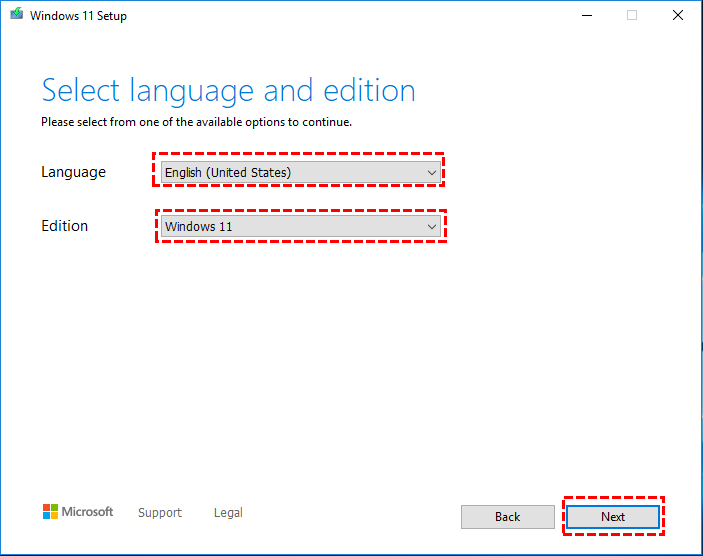
Step 3. Select “Create installation media for another PC” with hitting the “Next” button to enter the next interface. Here you can choose language according to your needs and the edition of Windows 11.
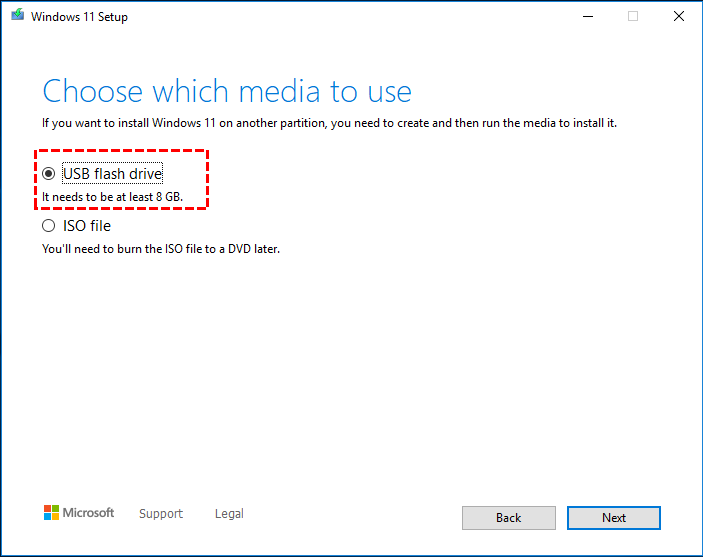
Step 4. There are two choices for you. We select “USB flash drive” and click “Next”.
Wait for the process to finish until the Windows 11 installation USB is created successfully. Then you can continue to install the system with that.
Section 3. Clean install Windows 11 with the installation media
Step 1. Power on your computer and hit the specific key to enter BIOS to change the boot drive.
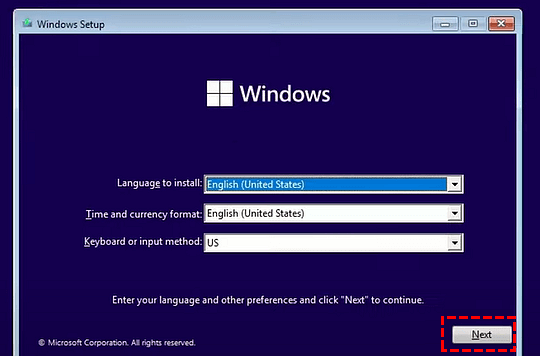
Step 2. Turn to the “Windows Setup” and configure the settings in light of your needs with selecting “Next”.
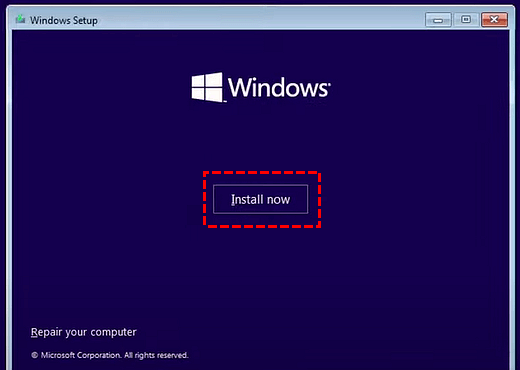
Step 3. Click the “Install now” button.
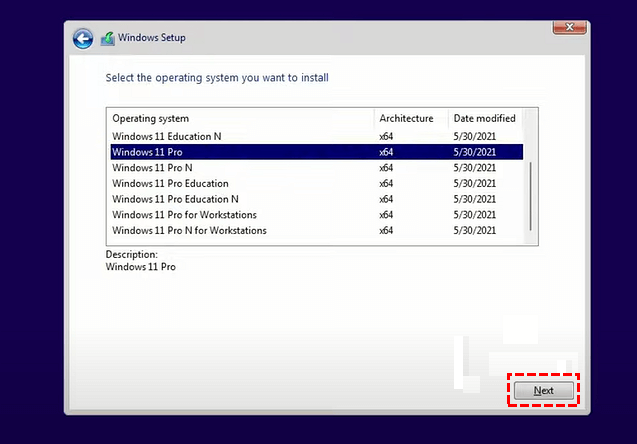
Step 4. After selecting “I don’t have a product key”, you can choose the OS version and click “Next”.
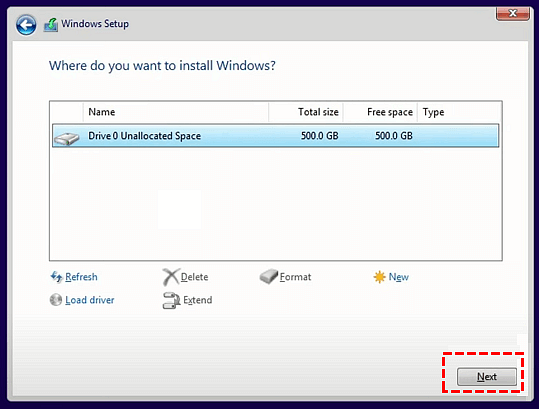
Step 5. Accept the License Terms and choose “Next” and select “Custom: Install Windows only (advanced)”.

Step 6. Click the hard drive to install Windows 11 and choose “Next”.
Step 7. Wait for the process and then reboot your computer.
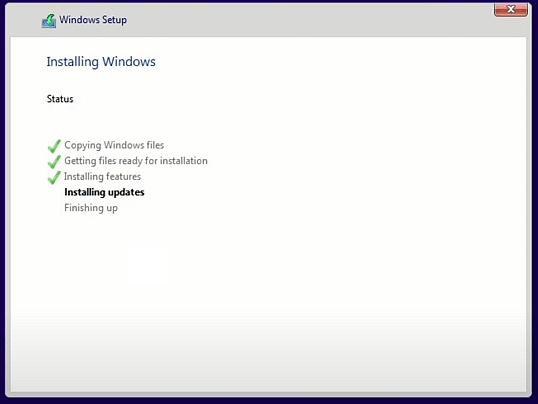
The computer may reboot several times if you successfully installed Windows 11. Afterward, you need to configure the SSD as Windows 11 boot drive in BIOS.
Option 2. Directly migrate OS to the new SSD
A clean install of Windows 11 onto a new SSD may disappoint those seeking an effective solution people. So, we prepare a better option: you can directly migrate the operating system from the old drive to the new SSD and set it as the boot drive, which can avoid the need for reinstallation and reconfiguration of settings.
Employing AOMEI Partition Assistant Professional can be the best choice. Its Migrate OS function is designed for users who want to quickly transfer their system to an HDD or SSD without reinstalling the OS, but don't mind reinstalling applications. Furthermore, its use of the Hot Clone technique offers a different experience for users compared to other migration software that utilizes the Cold Clone method.
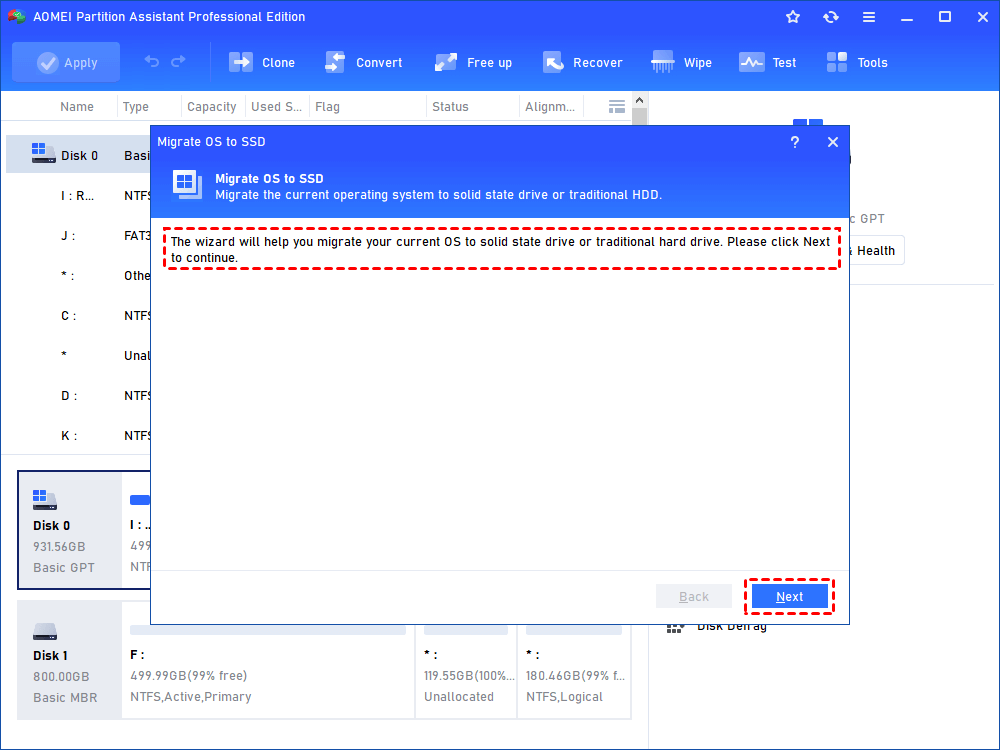
Step 1. Open the installed AOMEI Partition Assistant, select the "Clone" and “Migrate OS” option at the top task bar in order. Then you can see an introduction, read it, and choose “Next”.

Step 2. In the target disk, select an unallocated space as the target location and click “Next”. If the disk has no unallocated space, you can tick “I want to delete all partitions on disk 2 to migrate system to the disk" and click "Next".”

Step 3. Resize the system partition and change the drive. Click the “Finish” button.

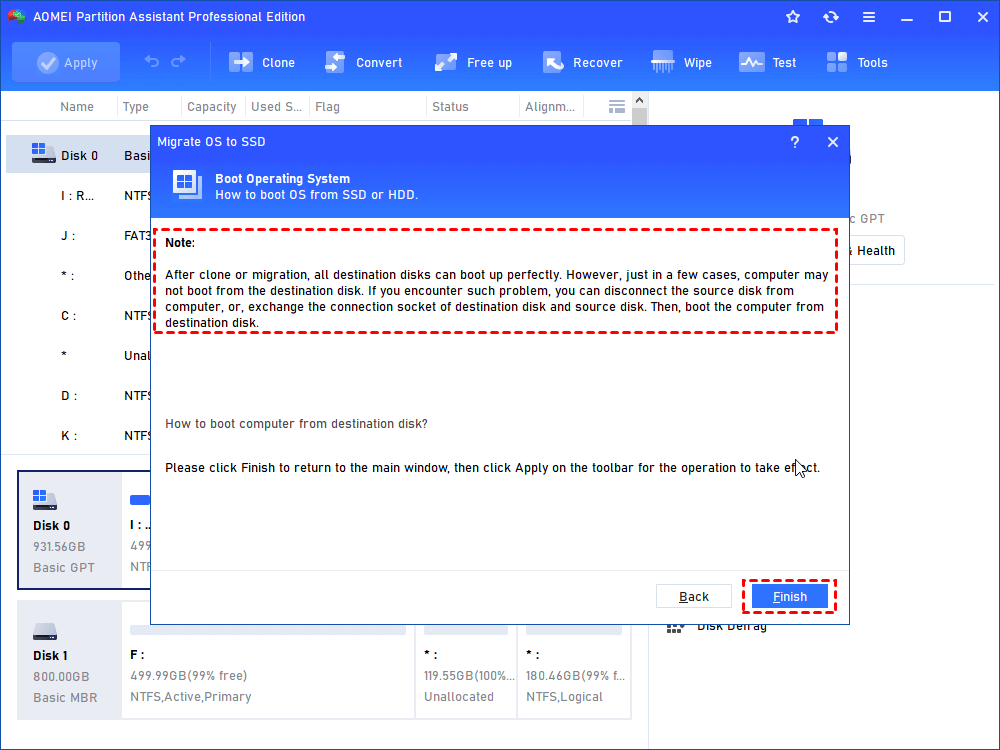
Step 4. Read the note and choose “Finish” to continue.
Step 5. In the main interface, select “Apply” to execute the operations.
Step 6. Install the SSD to the computer and enter the BIOS to change the boot settings. And then boot the PC from the SSD.
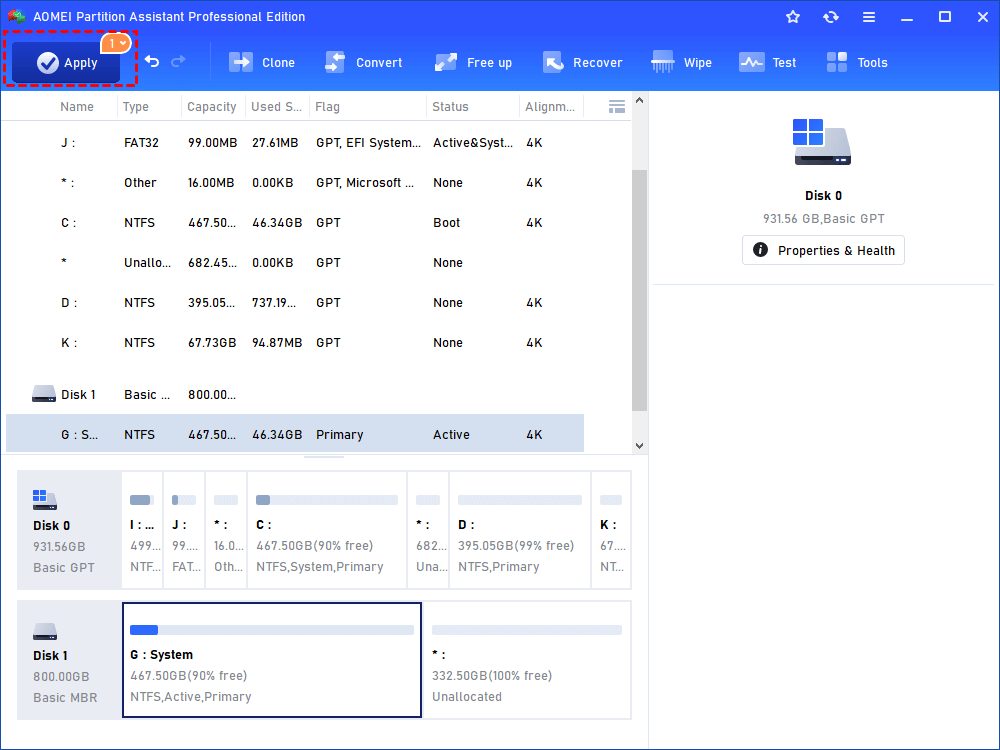
Option 3. Clone the whole disk to SSD
This versatile tool can broaden more channels for Windows 11 boot drive replacement. By using the feature of Clone Disk, you can quickly clone all the data from the old drive to the new disk, including the operating system, programs, and files. This user-friendly feature can even automatically carry out 4K alignment for SSD in the process of cloning to further improve SSD performance.
- Note:
- Please install the second hard drive to the computer and ensure the destination drive space is equal or larger than the used space on the original one.
- Please back up the important data in advance. All the data on the destination disk will be wiped when cloning.
- If there is a different disk type like MBR/GPT, it is better to configure the two disks as the same type. You can check how to convert MBR/GPT here.
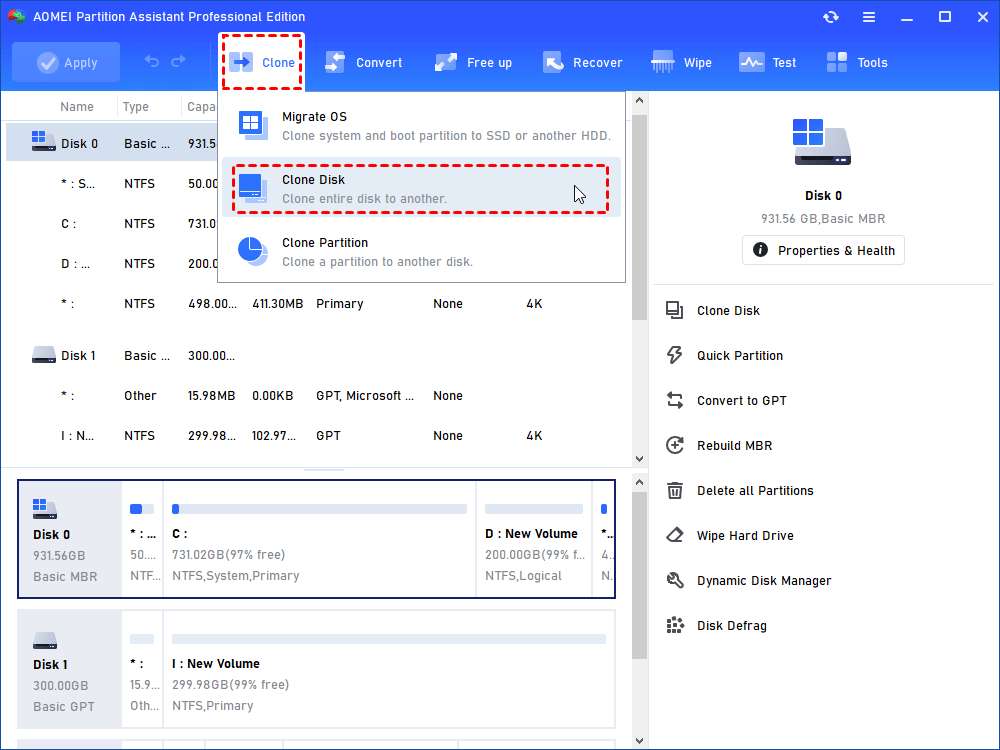
Step 1. Perform the AOMEI Partition Assistant, and choose “Clone” > “Clone Disk” in the top pane.
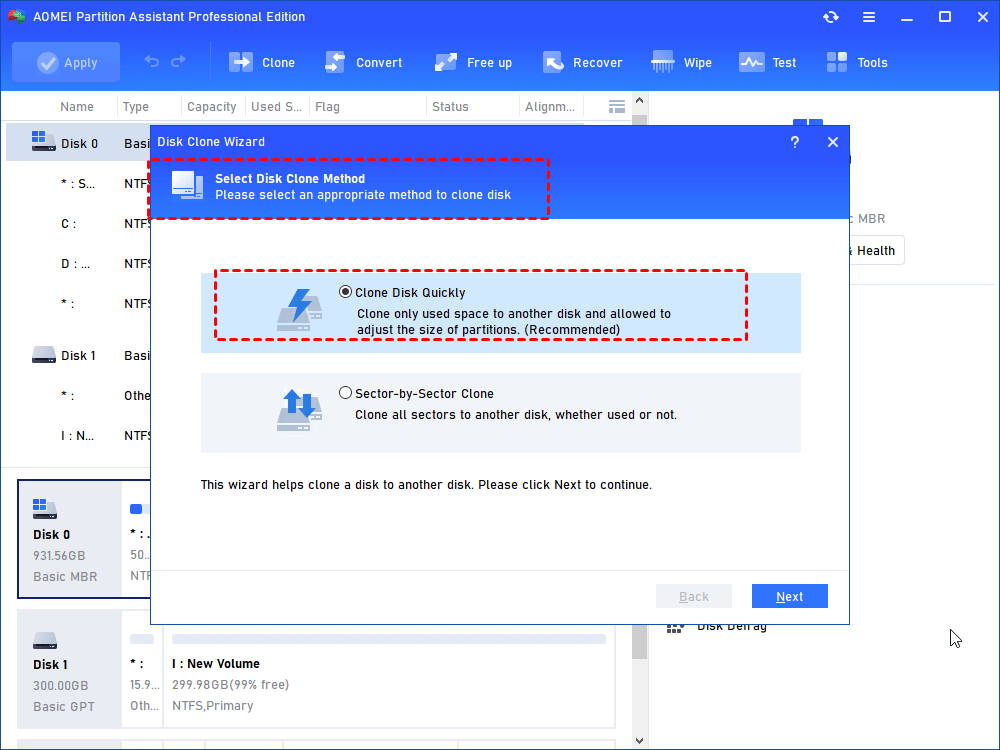
Step 2. You can choose “Clone Disk Quickly” to clone only used space. Or select “Sector-by-Sector Clone” if the cloned disk has bad sectors and the destination disk is larger than the source disk.
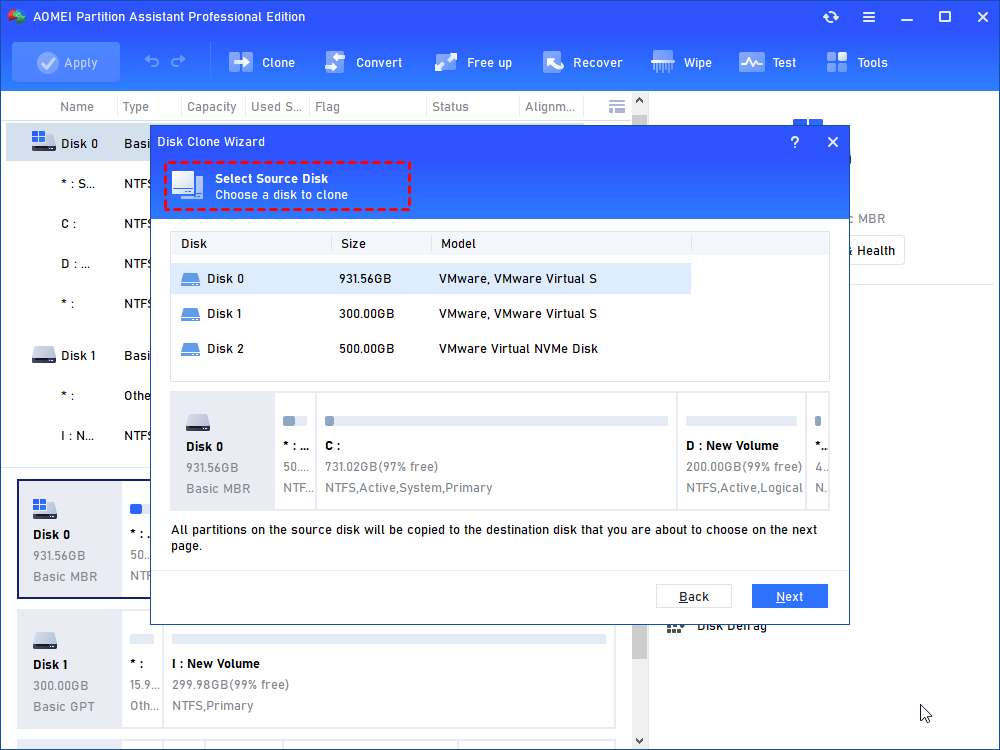
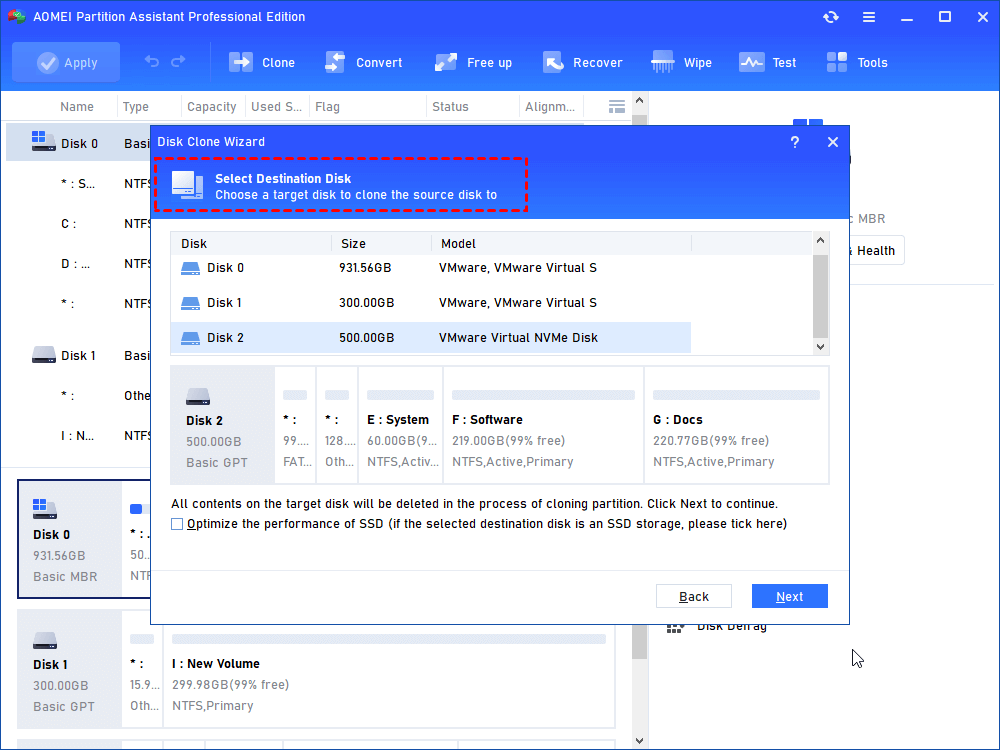
Step 3. Select the system disk as the source disk.
Step 4. Choose the SSD as the destination disk and tick “Optimize the performance of SSD” to make SSD partition alignment.
Note: It is advisable to delete all partitions and erase the data on the SSD if it stores any.
Step 5. Then adjust the destination SSD partition size. But please notice that the option “Clone without resizing partitions” will be greyed out if you clone a larger HDD to a smaller SSD.

Step 6. There will be a note in this step. Read it and choose the “Finish” button.
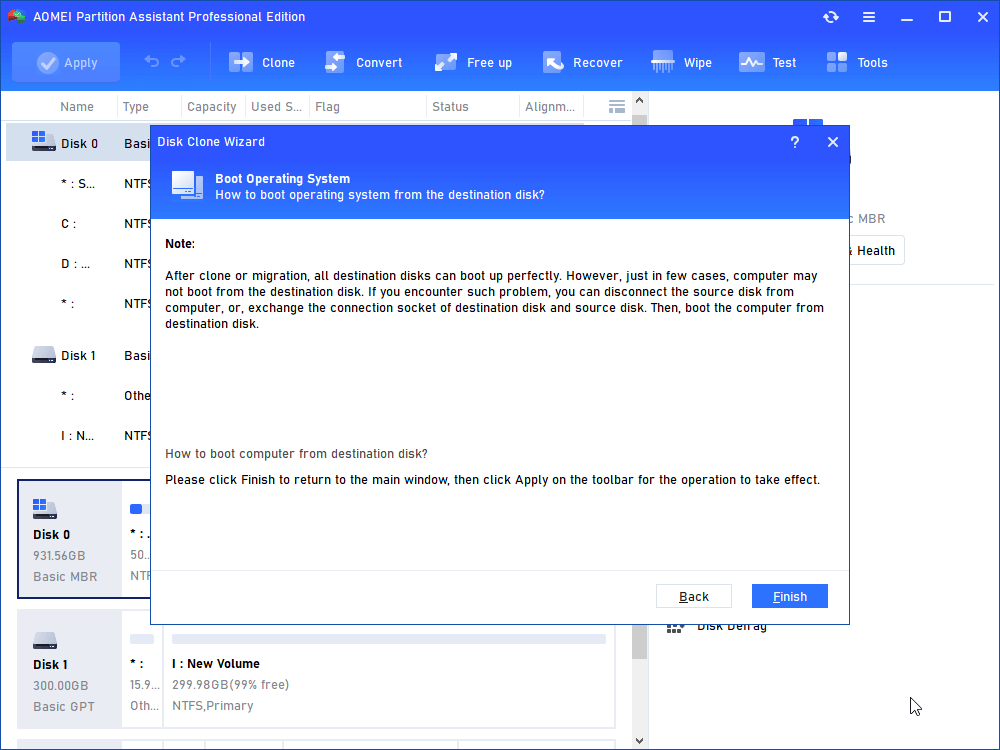
Step 7. Choose “Proceed” and “Apply” to execute the operations.

Tip: How to configure SSD as Windows boot drive in BIOS
After replacing Windows 11 boot drive as an SSD, we should change the boot order now, or the computer will still boot from the original disk if you have not removed it.
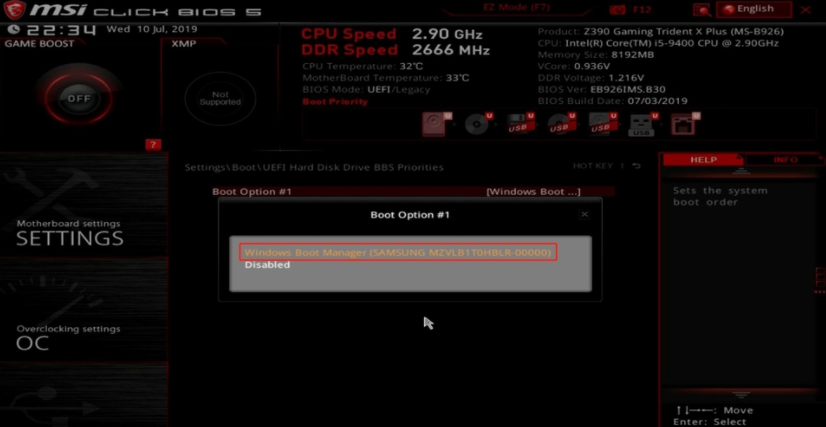
Step 1. Start your computer and continuously hit the specific key (usually F12, F2, F8, Esc, or Del key) to enter BIOS. Choose “SETTINGS” > “Boot” > “Set boot priority” in turn.
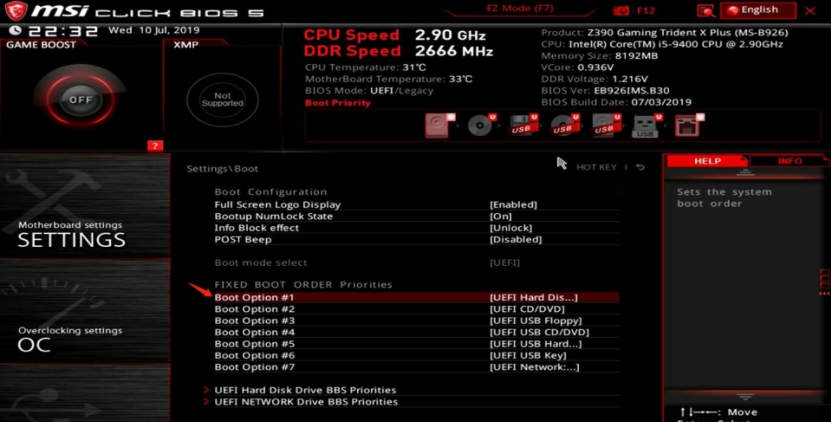
Step 2. Set “Boot Option #1” as the system disk.
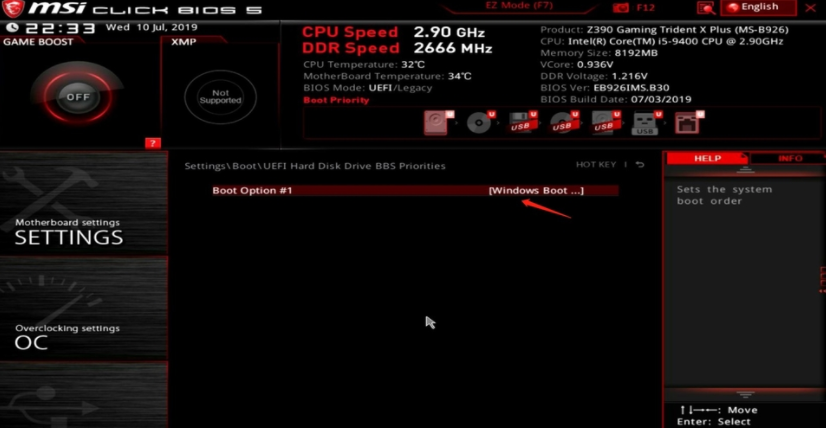
Here we put an example below picture shows: Acer SSD is the system disk. please choose [Windows Boot Manager (P0:Acer GT500M 256G)].
Further reading: How to create a portable Windows 11 boot drive
Here, we share a tip on creating a portable Windows 11 boot drive that allows you to bypass the Windows 11 updates requirements or helps you to enjoy Windows 11 wherever you go. What’s more, with the ISO files or the current system, you can also create a Windows OS bootable USB on Mac computers.
- We should pay attention to something important before creation:
- The USB should be larger than 13GB.
- Please back up the important data of your USB beforehand. The data will be wiped in the process of creation.
Step 1. Plug the USB into the computer and wait for it to be detected by your device. If it fails, you can refer to the solutions.
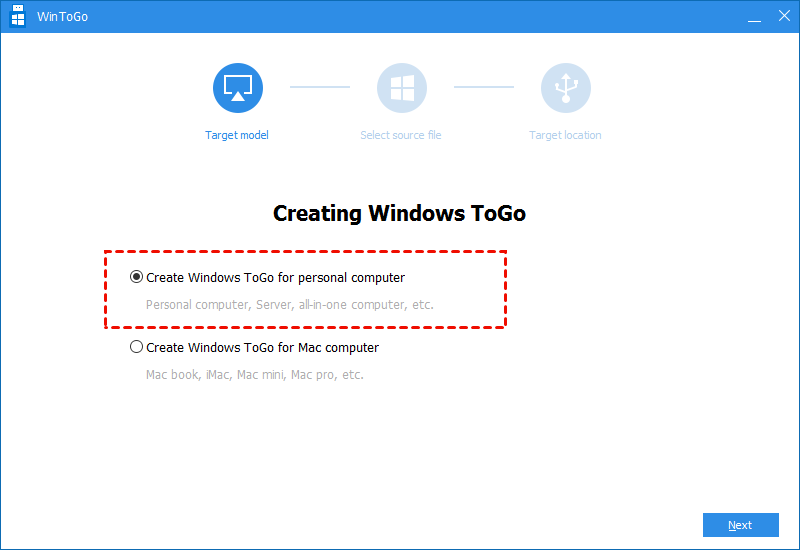
Step 2. Perform the installed software. Select “Tools” > “Windows To Go Creator” at the top interface.

Step 3. Select “Create Windows To Go for personal computer” and “Next”.
Note: Mac computer users can choose the option “Create Windows To Go for Mac computer”.
Step 4. Click the “Create Windows To Go with system disc/ISO” option.

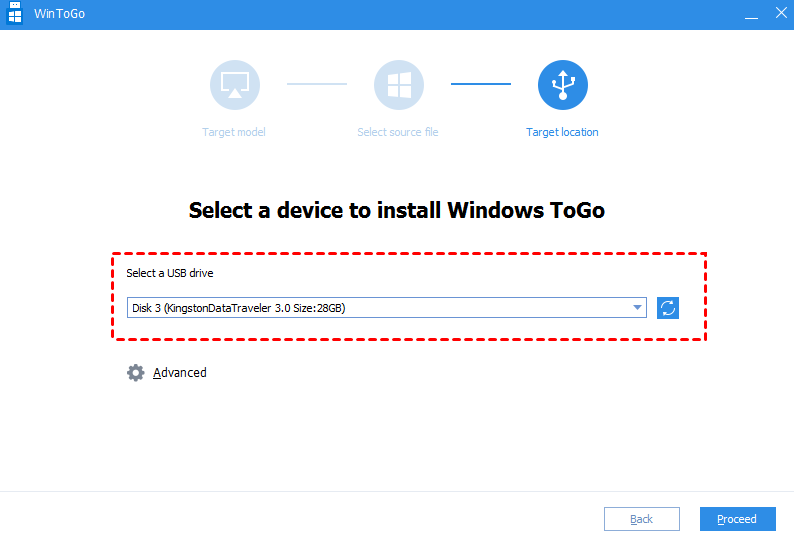
Step 5. Choose the USB drive as the target and select the “Proceed” option to move on.
Step 6. A notice will inform that all the data on the USB will be erased. Click “Yes”. Then unplug the USB and boot it on another computer.
Verdict
About changing Windows 11 boot drive to SSD, we provide the reason and detailed guidance. The 2 most recommended ways are to migrate OS to SSD and clone Windows 11 to SSD with AOMEI Partition Assistant for its efficiency and convenience.
Other advanced features of the multifunctional software are also shared by many computer users. For daily use, you can choose to move installed programs to another drive/disk and allocate free space to the C drive. For more professional use, there is secure erasing your SSD, defragging an external hard drive to make it perform faster, and fixing bad sectors on an external hard drive. What’s more, Windows 2022/2019/2016/2012(R2)/2008(R2)/2003 users can turn to the Server edition to achieve effective management of their devices.

