How to Create a Managed Disk from VHD File on Windows PCs?
This guide explains how to create a VHD in Windows 10 and 11, including how to attach, initialize, and understand the difference between VHD and VHDX.
By Irene / Updated on October 24, 2025
Need to Create a Managed Disk from a VHD File on Windows PCs?
Creating a managed disk from a VHD file on Windows allows you to migrate data, simplify backups, test virtual machines, and improve storage performance and security. You can use a PowerShell script to create a managed disk from a VHD in a storage account, either in the same or a different subscription. This works for importing a specialized (not generalized or sysprepped) VHD as a managed OS disk or importing a data VHD as a managed data disk.
Avoid creating multiple managed disks from the same VHD too quickly. Each disk uses a blob snapshot, and only one snapshot can be created per minute. To prevent throttling and disk creation failures, first create a managed snapshot from the VHD, then use it to create multiple managed disks efficiently. If you don’t have an Azure account, set up a free account before starting.
How to create a managed disk from VHD file on Windows PCs?
Step 1. Install Azure PowerShell
Make sure you have the latest version of Azure PowerShell installed.
Step 2. Prepare required information
Gather these details before running the script:
-
Subscription ID
-
Resource group name
-
Name for the Managed Disk
-
Disk size in GB (must be larger than the VHD file size)
-
VHD file URI (e.g., https://contosostorageaccount.blob.core.windows.net/vhds/yourvhd.vhd)
-
Storage account resource ID
-
Storage type: Premium_LRS or Standard_LRS
-
Azure location (same as storage account location)
Step 3. Set the subscription context
Set-AzContext -Subscription $subscriptionId
Step 4. Configure the Managed Disk
For a data or OS disk:
$diskConfig = New-AzDiskConfig -SkuName $sku -Location $location -DiskSizeGB $diskSize -StorageAccountId $storageAccountId -SourceUri $vhdUri -CreateOption Import
-
For OS disks, you can also specify $OSType (Windows/Linux) and $HyperVGeneration (V1/V2).
Step 5. Create the Managed Disk
New-AzDisk -DiskName $diskName -Disk $diskConfig -ResourceGroupName $resourceGroupName
Step 6. Avoid throttling when creating multiple disks
-
Each managed disk creation uses a blob snapshot of the VHD.
-
Only one snapshot can be created per minute.
-
To create multiple disks quickly, first create a managed snapshot from the VHD, then use it to create several managed disks.
Step 7. Use the Managed Disk
-
Attach as an OS disk to create a new virtual machine.
-
Attach as a data disk to an existing VM or a new VM.
Further reading: Use a powerful tool to easily manage VHD
AOMEI Partition Assistant’s Virtual Disk tool lets you easily manage virtual hard disks (VHDs and VHDXs) on Windows. These virtual disks function like physical drives, enabling file storage, data backup, virtual machine use, or OS installation without affecting your main system.
You can create a virtual disk by setting its location, size, format, and type. Dynamically expanding disks grow with data, while fixed disks reserve full space upfront. Created VHDs are automatically attached and can be initialized, partitioned, and assigned a drive letter.
Existing VHDs can be attached for immediate access or detached when no longer needed, keeping files intact. This feature makes virtual storage management simple and efficient.
The Best Windows Disk Partition Manager and PC Optimizer
1. How to Create VHD
If you want to create a VHD, you can follow the steps below:
Step 1. Click the tab "Virtual Disk", you will see 3 options available for VHDs: create VHD, attach VHD, and detach VHD. Select the "Create VHD" option after clicking the "Virtual Disk" tab.
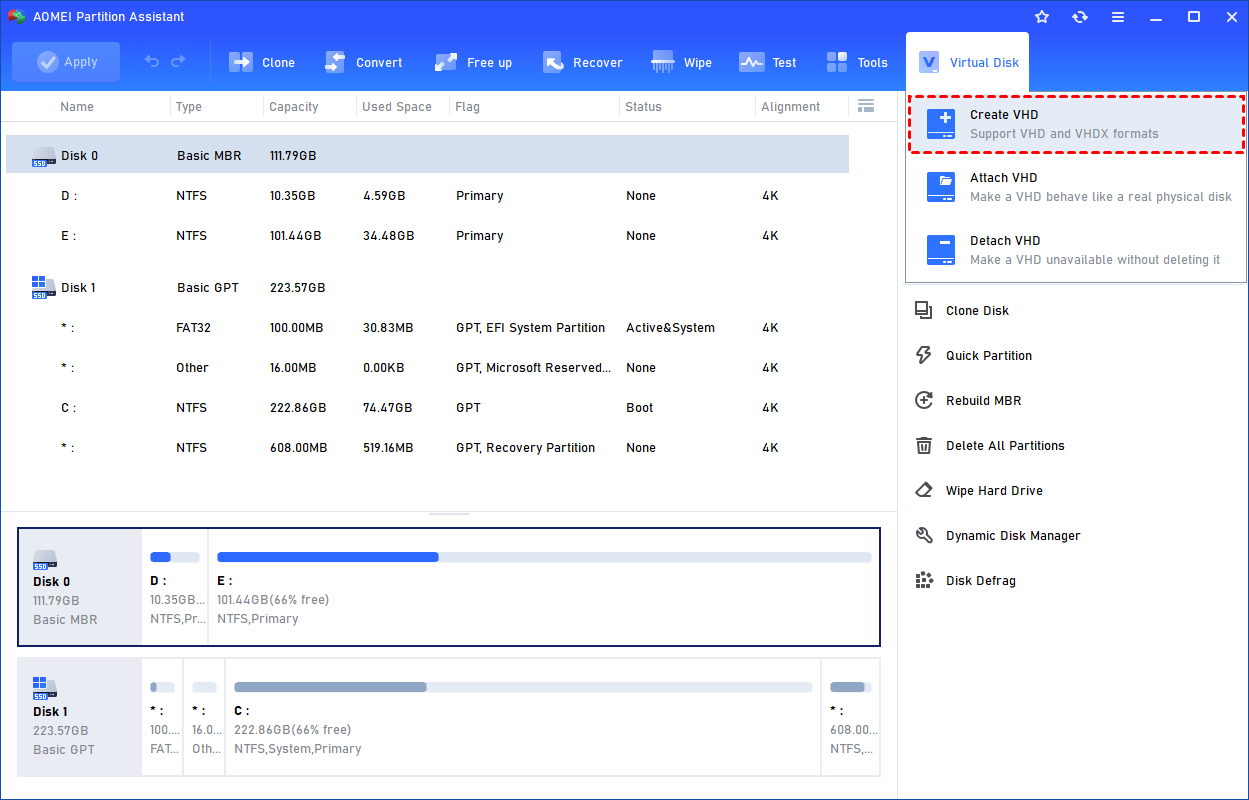
Step 2. You can specify the virtual disk location and size.
Optionally, you can click the "Advanced" option to set the virtual hard disk format and type. (By default, the VHDX format and the Dynamically expanding type are checked.)
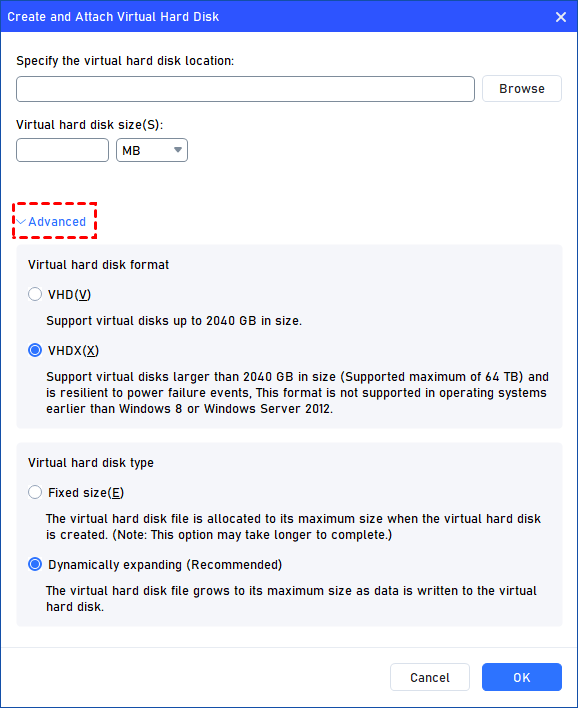
Virtual hard disk format: VHD and VHDX are supported.
For VHD, it supports virtual disks up to 2040GB in size.
For VHDX, it supports virtual disks larger than 2040GB in size. (Up to 64TB) This format is not supported in operating systems earlier than Windows 8 or Windows Server 2012.
Virtual hard disk format: Fixed size and Dynamically expanding are supported.
For fixed size, the virtual hard disk file will be allocated its maximum size when it is created. So it will take much longer to create.
For Dynamically expanding, the virtual hard disk file will grow to its maximum size as data is written to it. (Recommended)
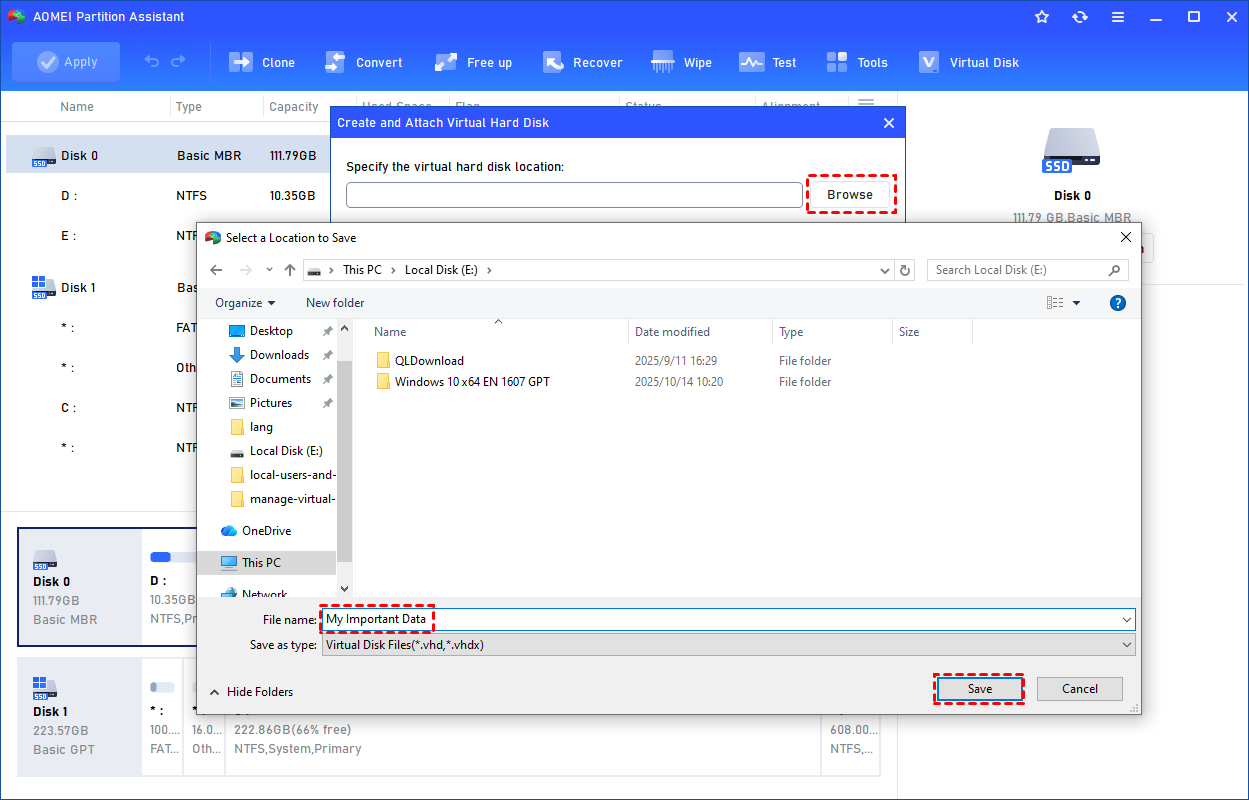
Click "Browse" to select a location to create the VHD. Please enter a file name for the virtual disk and click "Save".
Step 3. Once the virtual disk location and size are set up, you can click "OK" to start creating the VHD.

Step 4. After the reload process is finished, you will see that the VHD has been created successfully. It will be attached automatically.
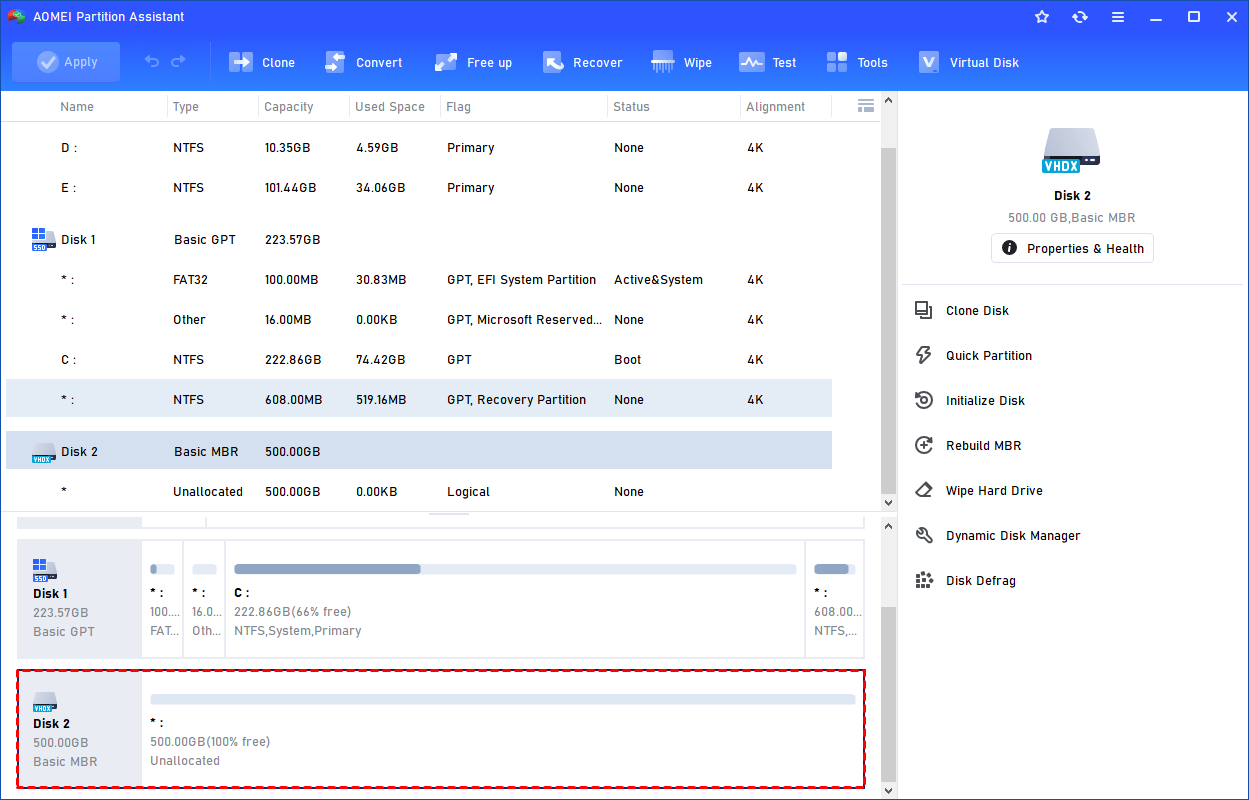
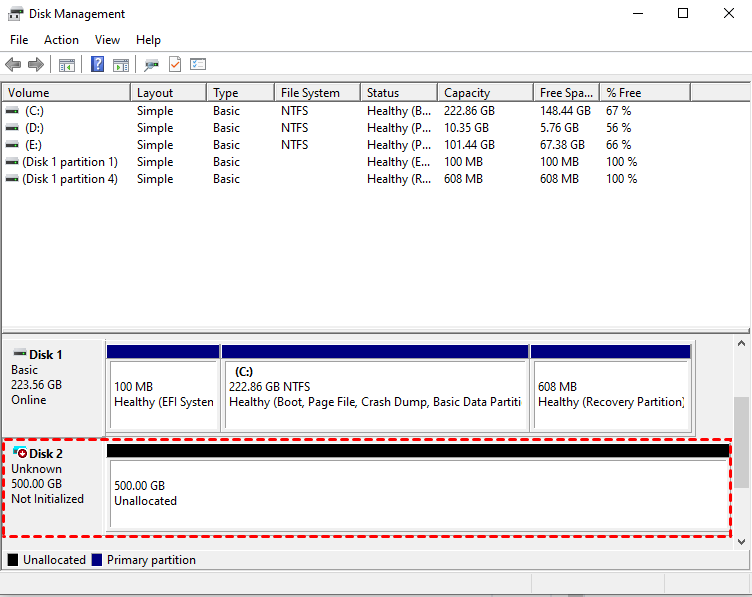
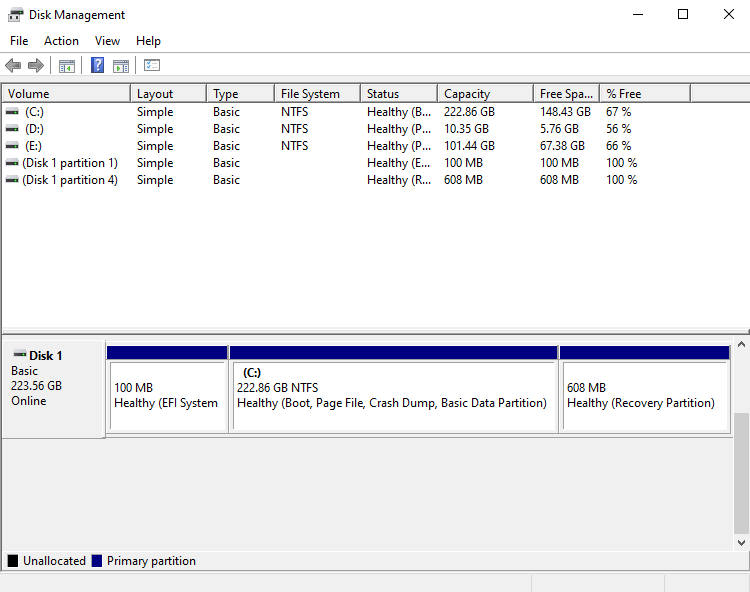
You can also view the VHD in Windows Disk Management.
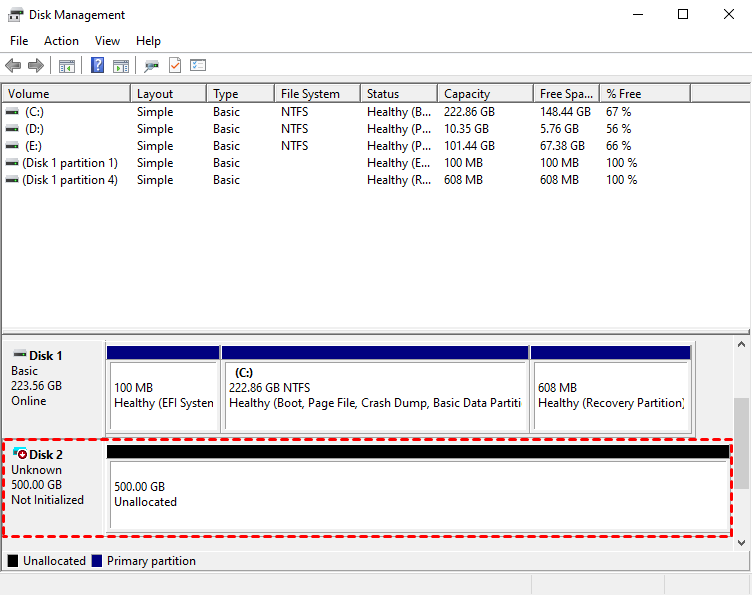
The created VHD will be uninitialized so it is empty without any data or file system. To make it useful, you need to initialize the disk, create a partition, and assign a drive letter.
You can initialize the drive in Partition Assistant.
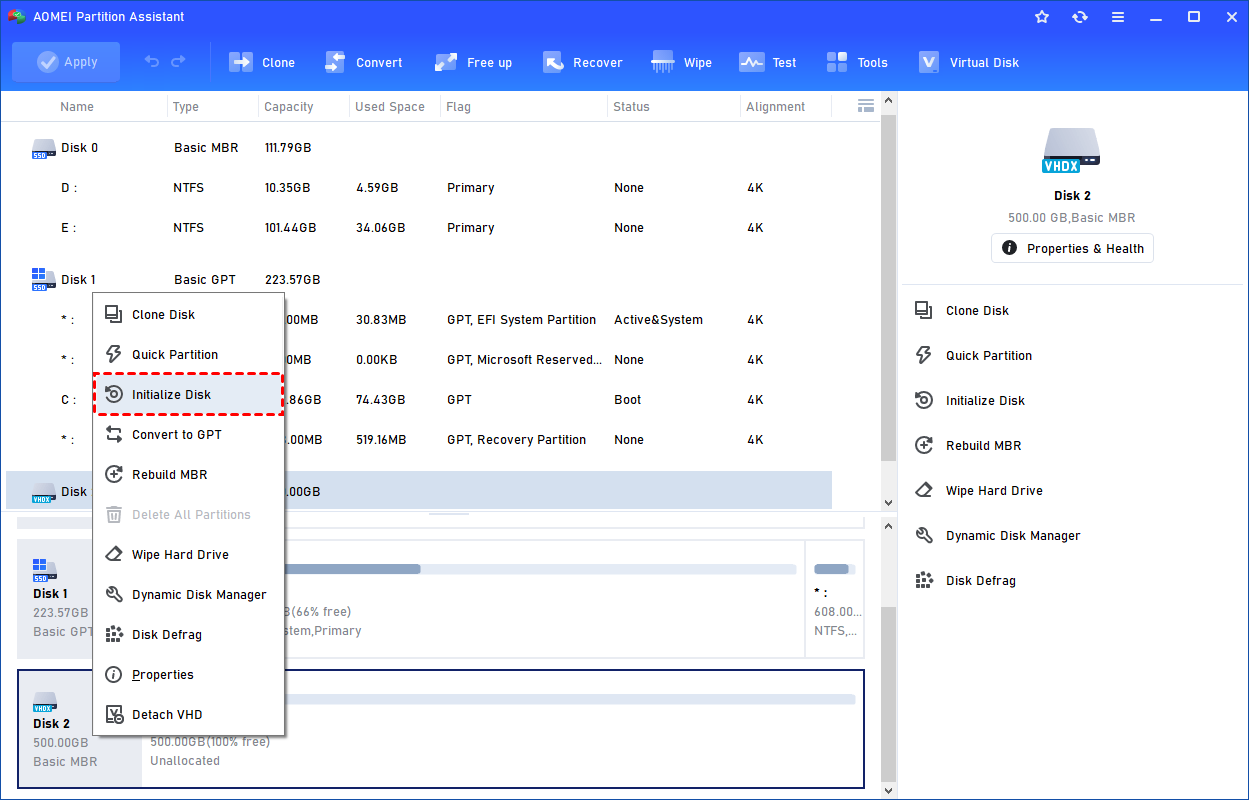
Or, initialize it in Windows Disk Management.

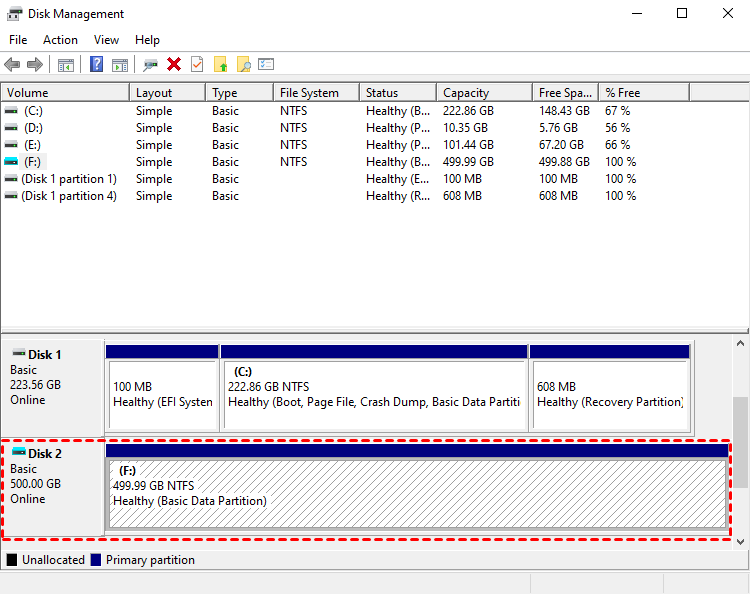
Then, you can create a partition and assign a drive letter for the partition. Finally, you can use the VHD normally.
2. How to Attach VHD
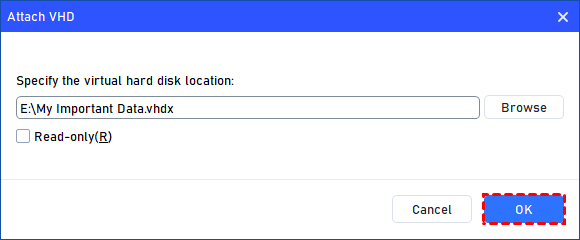
If you have a .vhd or .vhdx file but the virtual disk is not displayed, you can attach the VHD to make it behave like a real physical disk.
Step 1. Select the "Attach VHD" option after clicking the"Virtual Disk" tab.

Step 2. Click "Browse" to locate the location where the .vhd or .vhdx file is saved. Select the .vhd or .vhdx file you want to attach and click "Open" to attach it.

Step 3. Once the virtual file is selected, you can click "OK" to start attaching the VHD.
How to Detach VHD
If the VHD is not necessary, you can remove it by detaching the VHD.
Step 1. You can right-click the attached VHD in Partition Assistant and select the "Detach VHD" option to detach it.
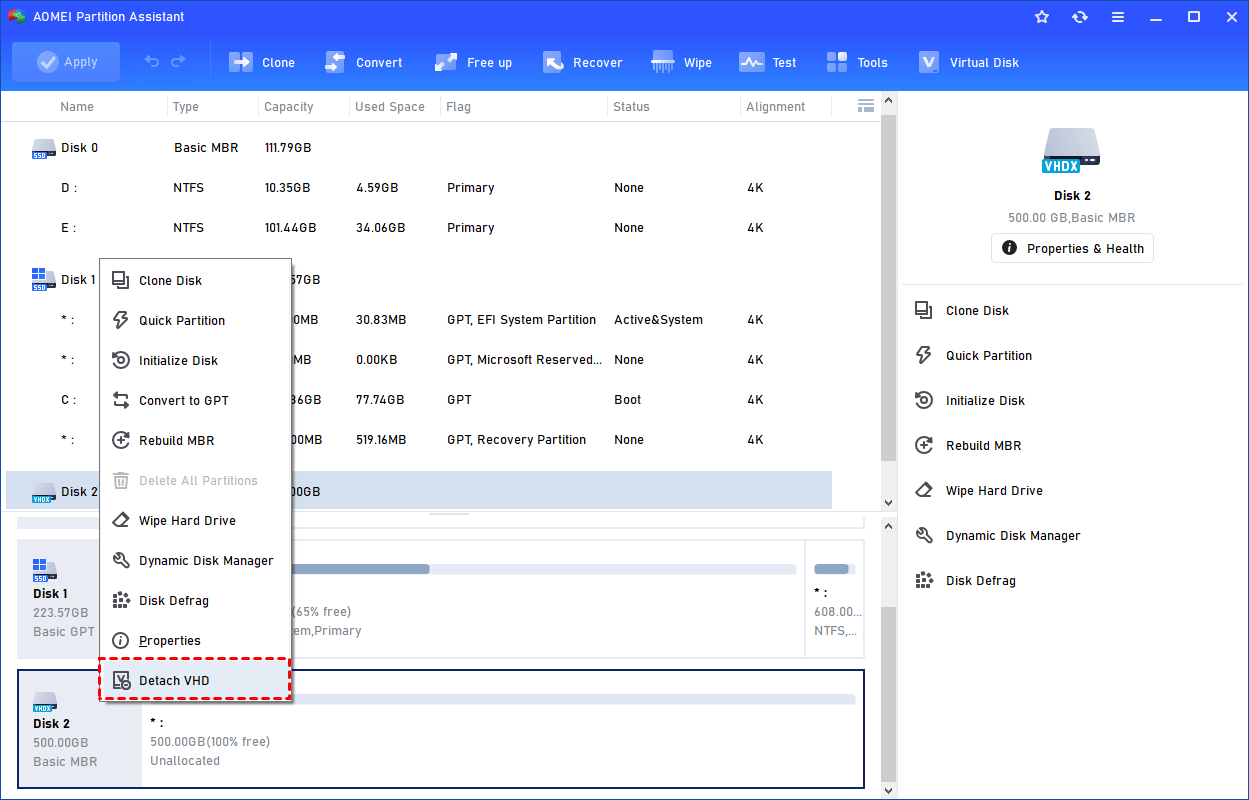
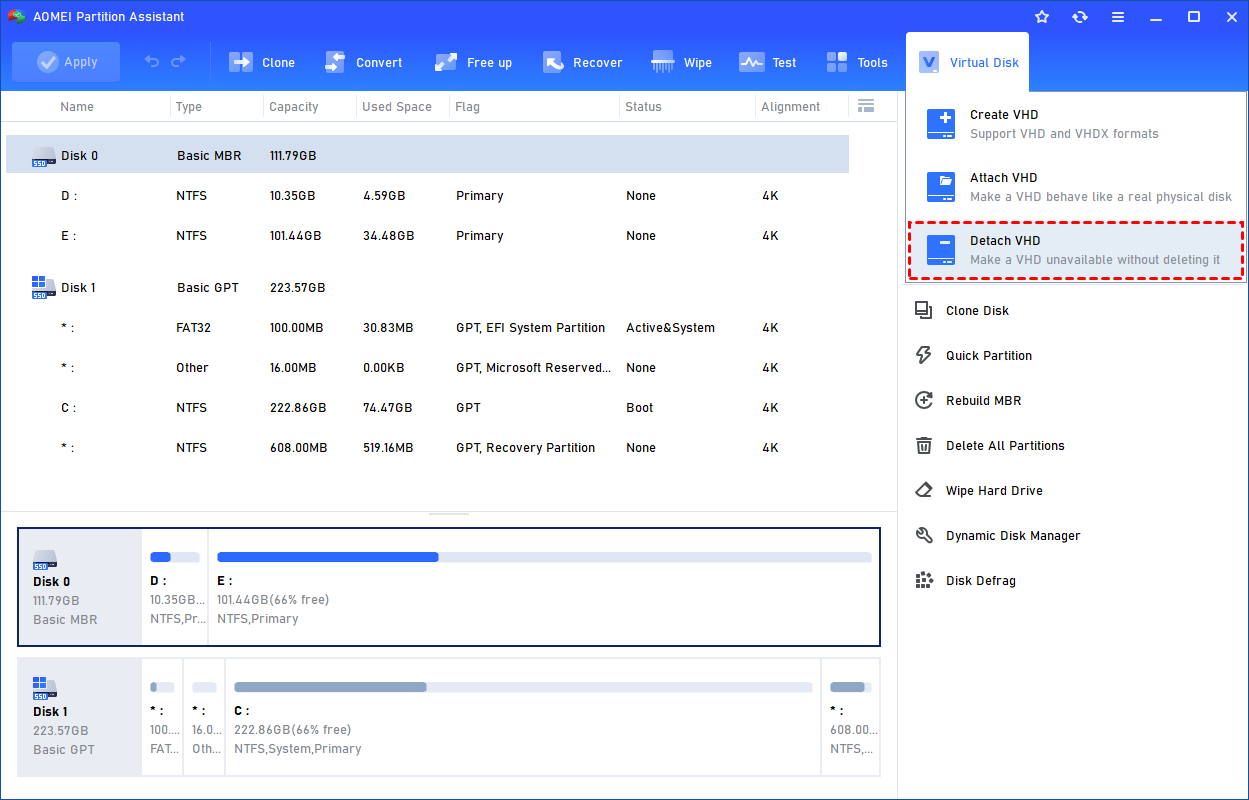
Or, you can select the "Detach VHD" option after clicking the"Virtual Disk" tab.
Step 2. You can select and deselect the virtual disk(s) and click the "Detach" button to start detaching the VHD(s).
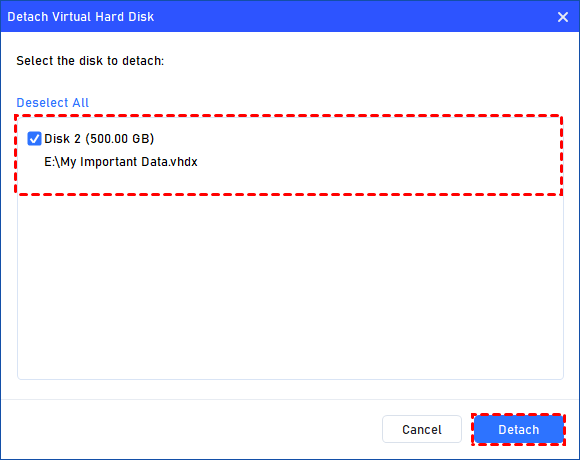
Step 3. Once the process is finished, you will see that the VHD(s) has been removed successfully.
Conclusion
Creating a managed disk from a VHD file on Windows is a simple and efficient way to migrate data, improve storage performance, and manage virtual machines. By following the steps to create, attach, and use VHDs, you can safely handle virtual storage and streamline disk management on your PC. Tools like AOMEI Partition Assistant make managing VHDs easy, letting you create, attach, detach, and initialize virtual disks without affecting your main system. This approach ensures flexible, secure, and convenient virtual storage for both personal and professional use.
The Best Windows Disk Partition Manager and PC Optimizer

