What is VHD format? What Is the Difference of VHD and VHDX?
This guide explains the VHD file format, its uses in Windows, and how it differs from VHDX. Understand each format’s advantages and how to manage them easily.
By Irene / Updated on November 3, 2025
What is VHD file format?
A VHD (Virtual Hard Disk) is a disk image file format that stores all the contents of a computer’s hard drive inside one single file. It behaves just like a physical hard disk — it can contain files, folders, partitions, and even an entire operating system.
Originally developed by Connectix and later adopted by Microsoft, the VHD format is widely used in virtualization environments, such as Microsoft Hyper-V. When a VHD is attached to a system, Windows treats it as a real drive. You can open it, install programs, and save data on it. When detached, it becomes just another portable file that you can move or back up easily.
VHDs are mainly used to:
✔️ Test software in isolated environments
✔️ Back up or restore entire systems
✔️ Run multiple operating systems on one computer
Here’s a table that explains the different types of VHD and their features.
| Type | Description | Advantages | Disadvantages |
|---|---|---|---|
| Fixed VHD | Uses a fixed amount of space on the host computer. | Fast performance; low fragmentation risk. | Takes up full space even when not used. |
| Dynamic VHD | Grows as more data is added, up to a set limit. | Saves disk space; quick to create and back up. | Can become fragmented; slightly slower performance. |
| Differencing VHD | Records changes made to a parent disk without altering it. | Easy to restore or clone systems. | Depends on the parent disk; can get complex to manage. |
| Pass-through VHD | Directly linked to a physical hard drive. | High speed and minimal overhead. | Limited flexibility; needs constant physical drive access. |
A VHD acts as a bridge between physical and virtual storage. It allows you to use, manage, and protect your data just like a real hard disk—without extra hardware. The newer VHDX format, used in modern Windows systems, expands on this by offering larger storage capacity and stronger protection against data corruption.
How to create and manage VHD and VHDX?
AOMEI Partition Assistant provides a Virtual Disk tool that helps you easily manage VHD and VHDX files in Windows. These virtual disks work like physical hard drives. You can use them to store files, back up data, run virtual machines, or install another operating system without changing your main system.
You can create a new virtual disk by selecting its save location, size, format, and type. A dynamically expanding disk grows as you add data, while a fixed-size disk reserves all space at once. Once created, the virtual disk is automatically attached and can be initialized, partitioned, and given a drive letter.
You can also attach an existing VHD file for quick access or detach it when it is no longer needed. The files inside remain safe and unchanged. With these clear and simple functions, AOMEI Partition Assistant makes virtual disk management easy and efficient.
The Best Windows Disk Partition Manager and PC Optimizer
1. How to Create VHD
If you want to create a VHD, you can follow the steps below:
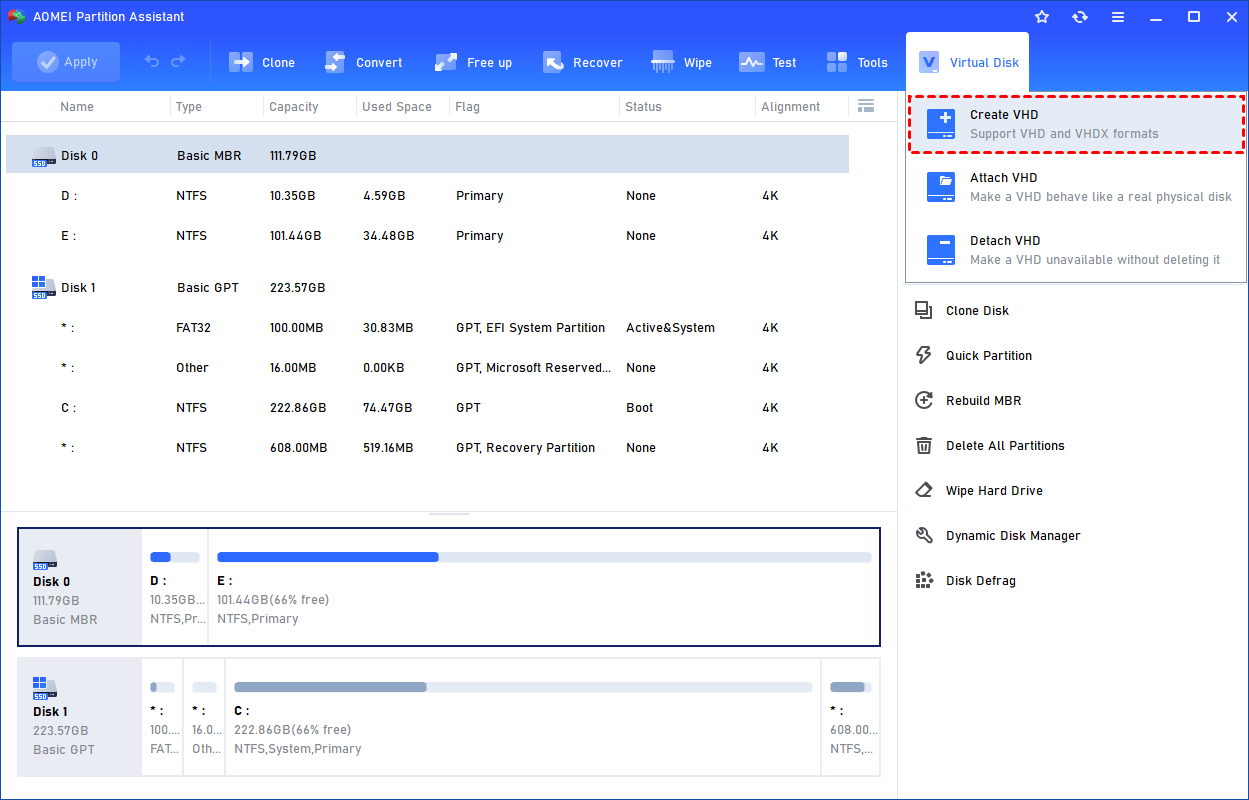
Step 1. Click the tab "Virtual Disk", you will see 3 options available for VHDs: create VHD, attach VHD, and detach VHD. Select the "Create VHD" option after clicking the "Virtual Disk" tab.
Step 2. You can specify the virtual disk location and size.
Optionally, you can click the "Advanced" option to set the virtual hard disk format and type. (By default, the VHDX format and the Dynamically expanding type are checked.)
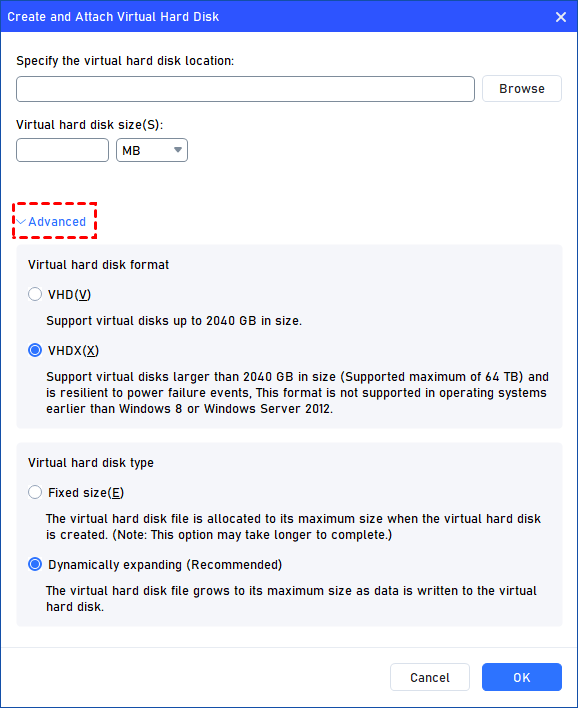
Virtual hard disk format: VHD and VHDX are supported.
For VHD, it supports virtual disks up to 2040GB in size.
For VHDX, it supports virtual disks larger than 2040GB in size. (Up to 64TB) This format is not supported in operating systems earlier than Windows 8 or Windows Server 2012.
Virtual hard disk format: Fixed size and Dynamically expanding are supported.
For fixed size, the virtual hard disk file will be allocated its maximum size when it is created. So it will take much longer to create.
For Dynamically expanding, the virtual hard disk file will grow to its maximum size as data is written to it. (Recommended)
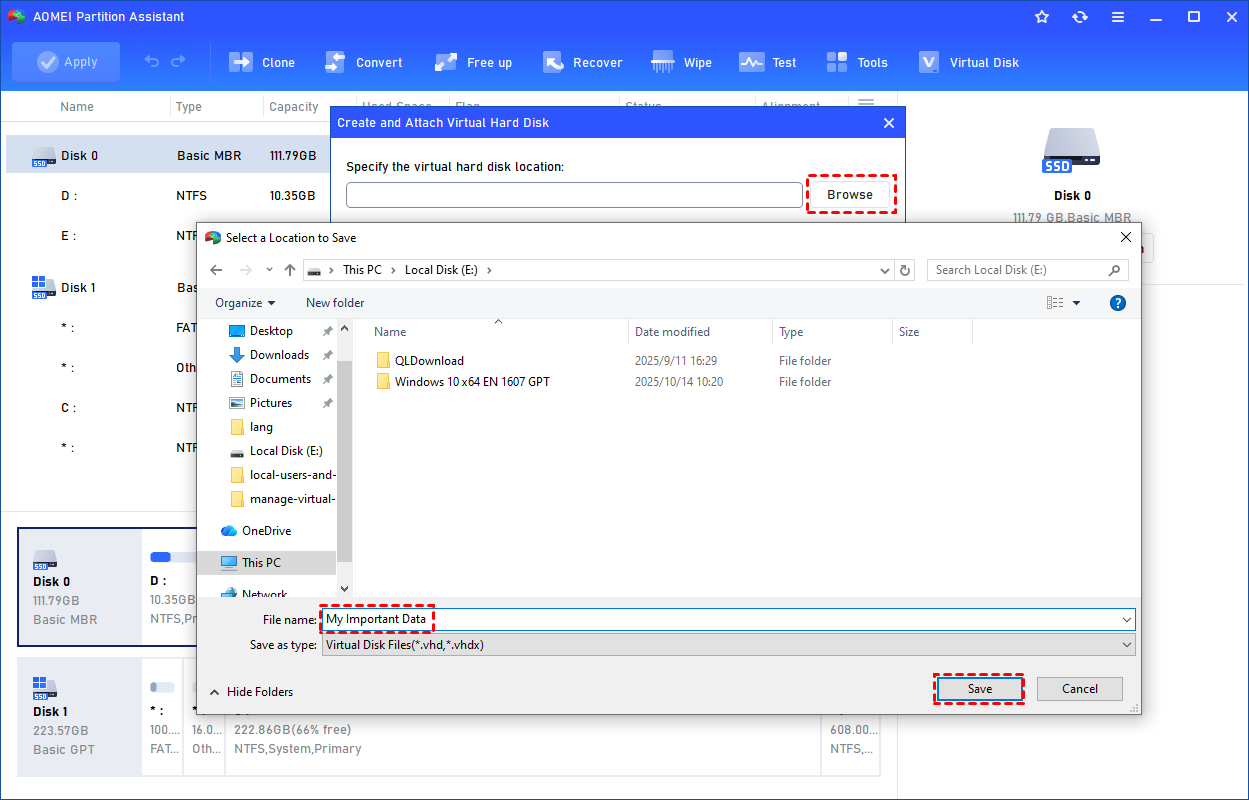
Click "Browse" to select a location to create the VHD. Please enter a file name for the virtual disk and click "Save".
Step 3. Once the virtual disk location and size are set up, you can click "OK" to start creating the VHD.

Step 4. After the reload process is finished, you will see that the VHD has been created successfully. It will be attached automatically.
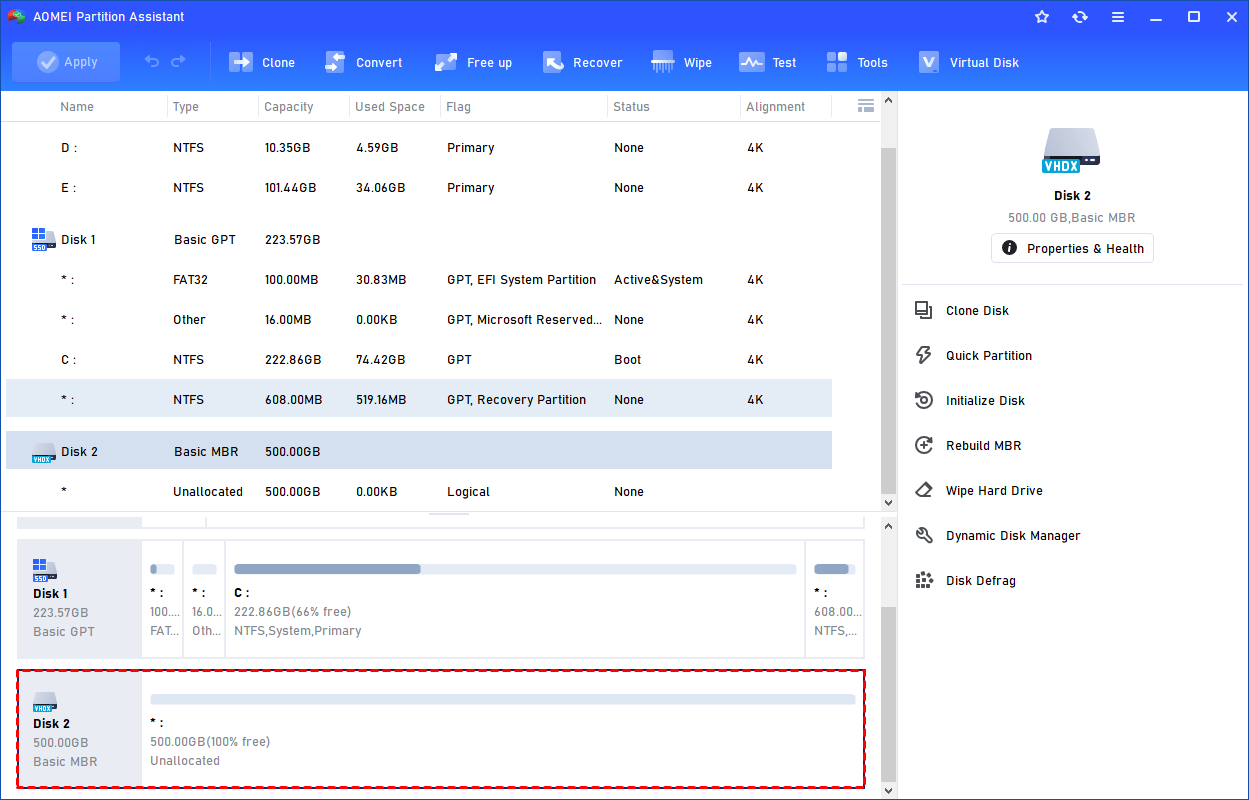
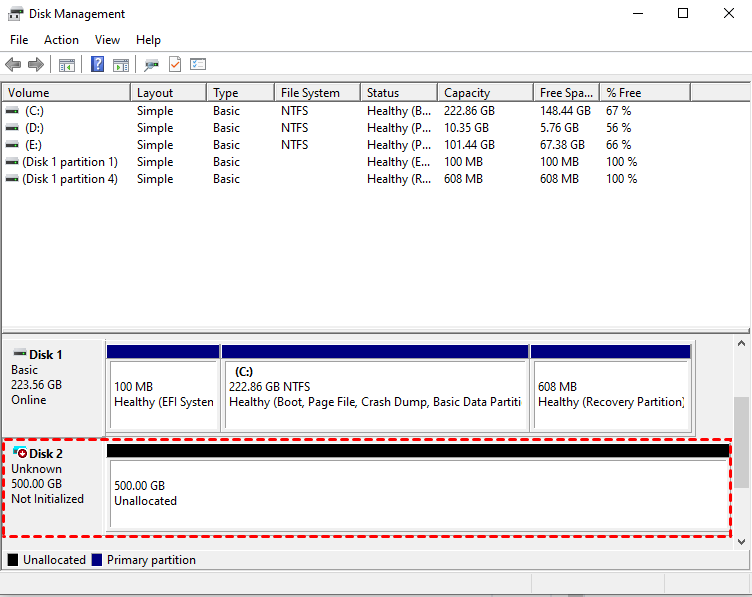
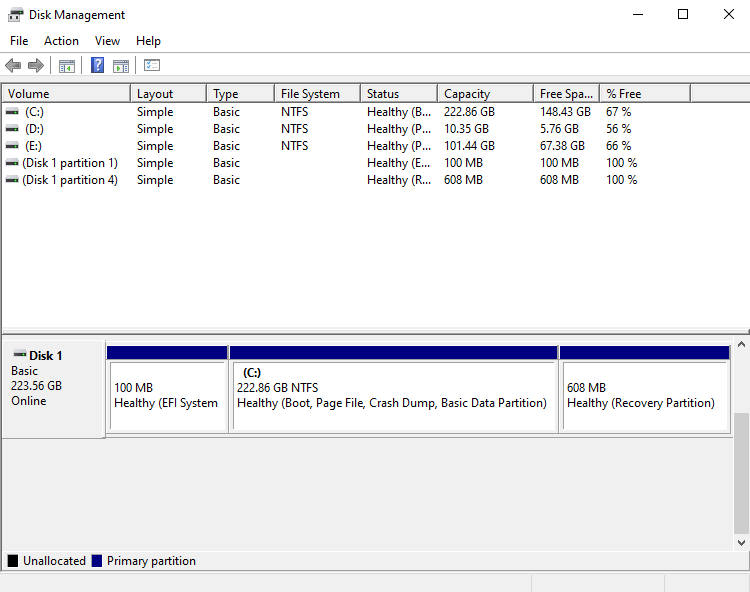
You can also view the VHD in Windows Disk Management.
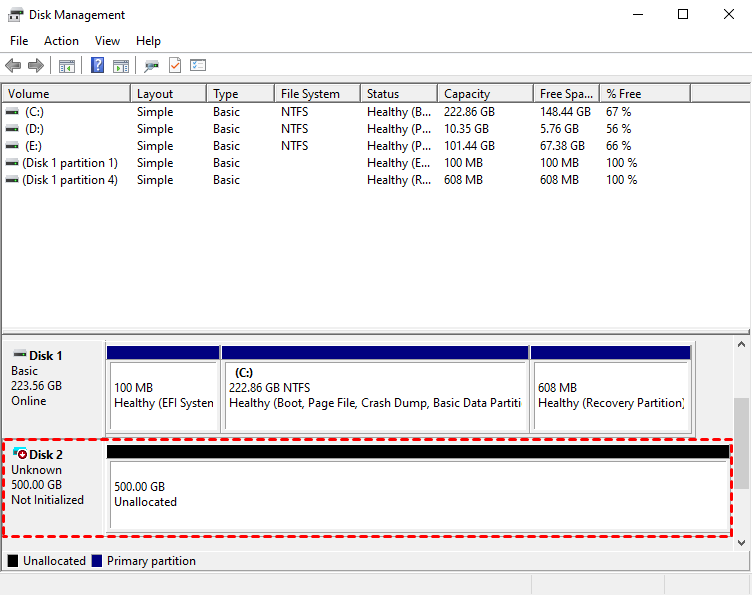
The created VHD will be uninitialized so it is empty without any data or file system. To make it useful, you need to initialize the disk, create a partition, and assign a drive letter.
You can initialize the drive in Partition Assistant.
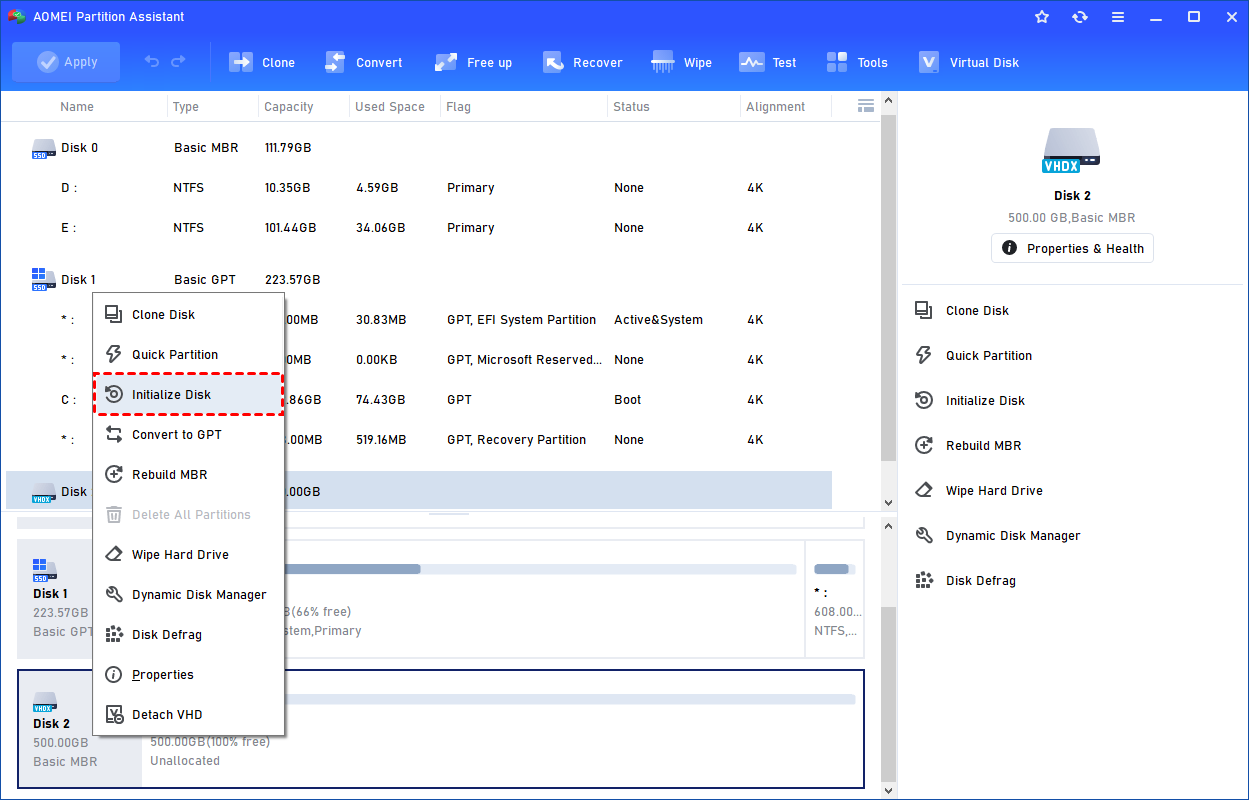
Or, initialize it in Windows Disk Management.

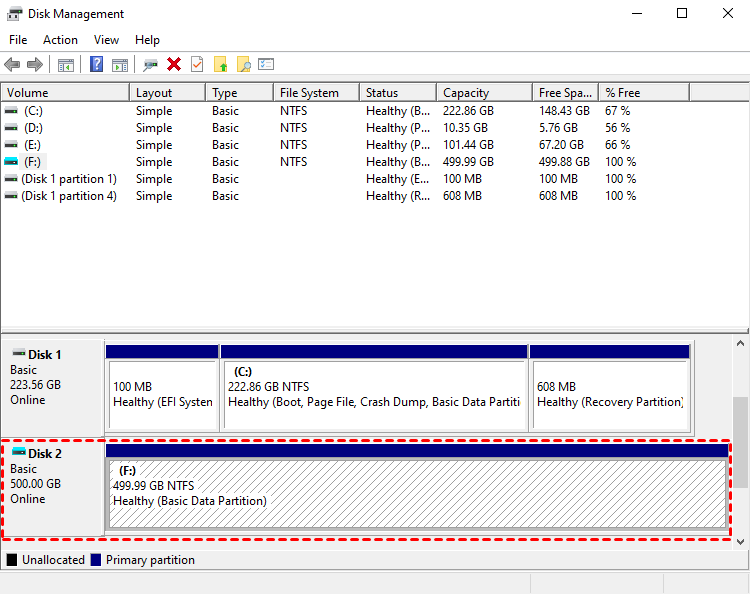
Then, you can create a partition and assign a drive letter for the partition. Finally, you can use the VHD normally.
2. How to Attach VHD
A VHD is a container file that holds a virtual disk image. Until it is attached, Windows sees it only as a regular file. Once attached, Windows mounts it as a virtual disk, assigns a drive letter, and allows access to its file system. You can only perform disk operations, such as cloning VHD to HDD, checking for corruption or errors, or resizing partitions, after attaching it. Detaching the VHD safely removes it from the system without deleting the file.
The Best Windows Disk Partition Manager and PC Optimizer
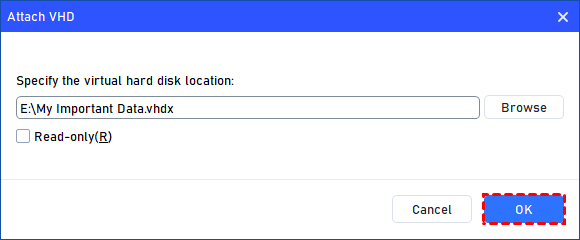
Step 1. Select the "Attach VHD" option after clicking the"Virtual Disk" tab.

Step 2. Click "Browse" to locate the location where the .vhd or .vhdx file is saved. Select the .vhd or .vhdx file you want to attach and click "Open" to attach it.

Step 3. Once the virtual file is selected, you can click "OK" to start attaching the VHD.
Step 4. Once the process is finished, you will see that the VHD is attached successfully.
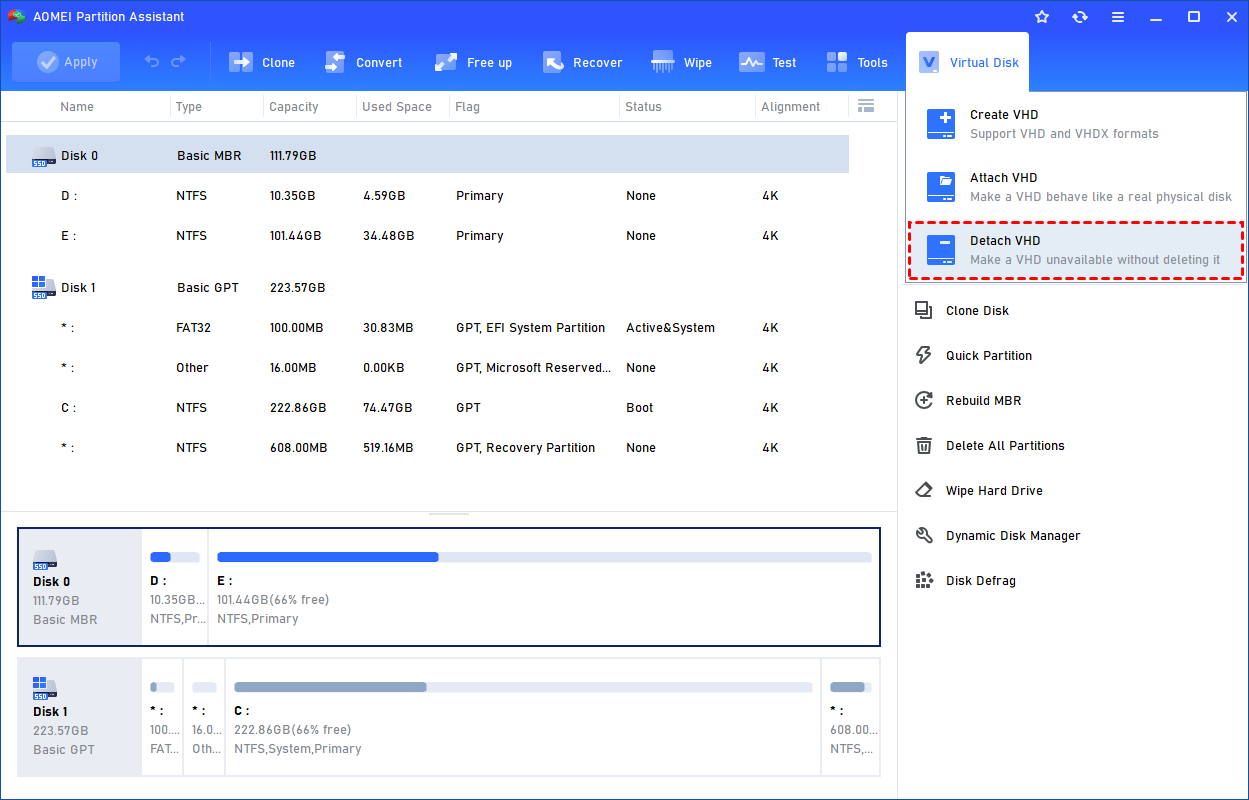
3. How to Detach VHD
If the VHD is not necessary, you can remove it by detaching the VHD.
Step 1. You can right-click the attached VHD in Partition Assistant and select the "Detach VHD" option to detach it.
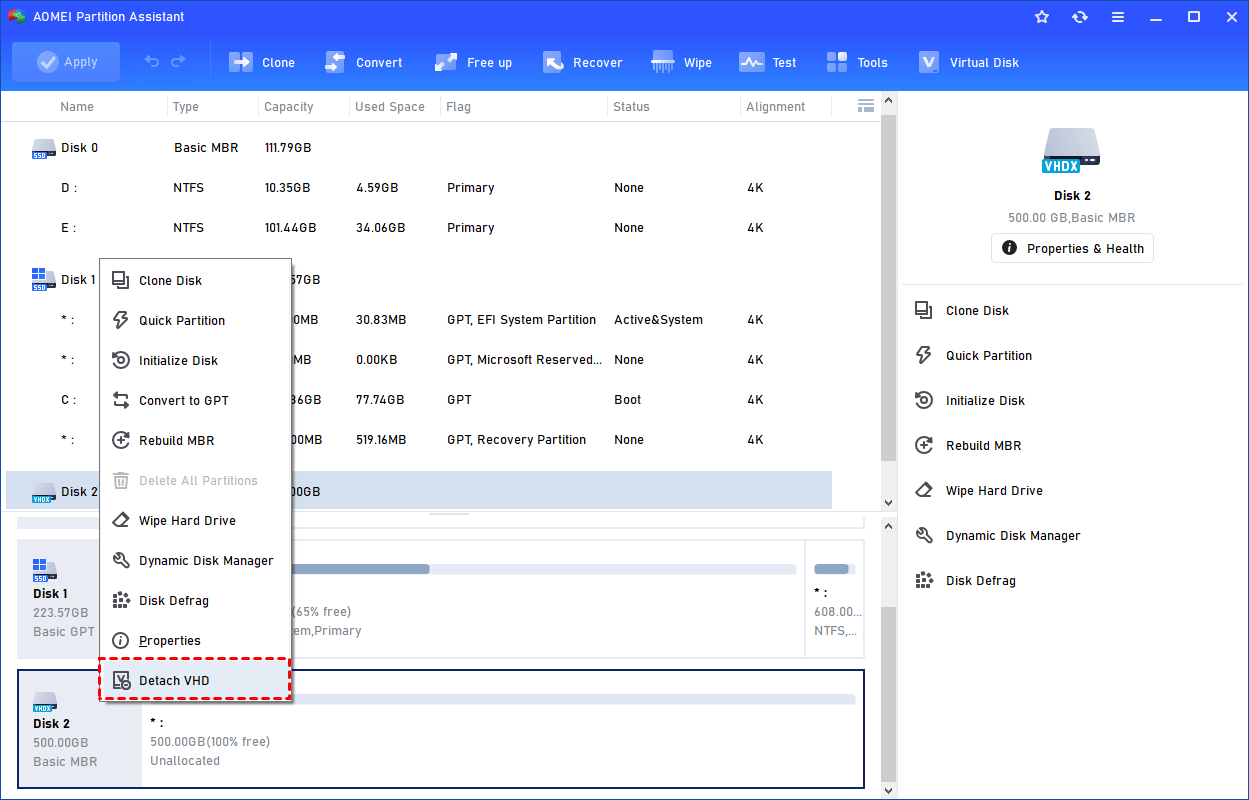
Or, you can select the "Detach VHD" option after clicking the"Virtual Disk" tab.
Step 2. You can select and deselect the virtual disk(s) and click the "Detach" button to start detaching the VHD(s).
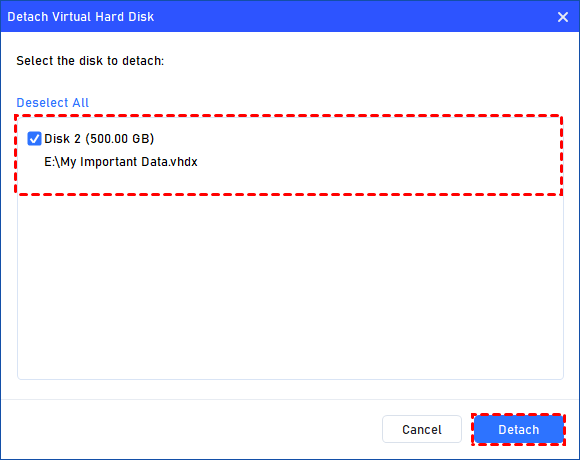
Step 3. Once the process is finished, you will see that the VHD(s) has been removed successfully.
Conclusion
A VHD file offers a simple and flexible way to manage virtual storage just like a real hard drive. With it, you can run multiple systems, test software, or back up data safely. Using tools such as AOMEI Partition Assistant makes it even easier to create, attach, and manage VHD or VHDX files in Windows. Whether for personal use or professional testing, VHD technology provides an efficient solution for data management and virtualization.
The Best Windows Disk Partition Manager and PC Optimizer

