Stepwise Guide on VHD to VMDK Conversion
How to perform VHD to VMDK conversion? In this guide, three effective methods are presented step by step. A professional VHD disk manager is also covered.
By Hedy / Updated on February 27, 2026
Ever tried moving a virtual machine from Hyper-V to VMware and suddenly realized… they speak different languages?
That’s exactly what happens with VHD and VMDK files.
It’s like trying to play a PlayStation disc inside an Xbox. The system exists. The data exists. But compatibility? Nope.
The solution is conversion — turning a VHD disk into a VMDK disk so VMware can understand it perfectly.
Let’s walk through everything, step-by-step, without the confusing jargon.
Why you need to convert VHD to VMDK?
Converting VHD to VMDK is often necessary when you want better compatibility, performance, or flexibility in virtualized environments. Here are the main reasons why this conversion makes sense:
1. Compatibility with VMware platforms: VHD is mainly used by Microsoft Hyper-V, while VMDK is the native disk format for VMware products such as VMware Workstation, ESXi, and vSphere. Converting ensures the virtual disk runs smoothly on VMware without errors or limitations.
2. Easier virtual machine migration: If you’re moving a virtual machine from Hyper-V to VMware, converting VHD to VMDK allows you to reuse the same OS, applications, and data without rebuilding the VM from scratch.
3. Improved performance and stability: VMDK is optimized for VMware’s virtualization stack. Using the native disk format can result in better disk I/O performance, fewer compatibility issues, and more stable VM operation.
4. Access to advanced VMware features: Many VMware features—such as snapshots, thin provisioning, and storage policies—work best or only with VMDK files. Conversion unlocks these capabilities.
5. Better integration with VMware tools: VMDK integrates seamlessly with VMware Tools, enabling improved device drivers, smoother VM management, and enhanced system responsiveness.
6. Cross-platform virtualization flexibility: Converting VHD to VMDK gives you the freedom to run the same virtual disk across different VMware environments, making testing, backup, and disaster recovery more flexible.
7. Simplified VM management: Managing storage, backups, and snapshots is easier when all virtual disks follow the same format within a VMware-based infrastructure.
How to perform VHDto VMDKconversion
Below are the most practical ways to convert a VHD (Hyper-V) disk into a VMDK (VMware) disk. Choose the method based on what tools you have and whether the VM must stay bootable.
Method 1. Using StarWind V2V converter (easiest & free GUI)
If you prefer a graphical interface instead of command lines, StarWind V2V Converter is the most beginner-friendly solution. It’s free, lightweight, and specifically designed for virtual disk migration between platforms like Hyper-V and VMware, making cross-hypervisor migration smooth and safe.
Step 1. Download and install StarWind V2V Converter on Windows.
Step 2. Launch the program → select Local file.
Step 3. Choose your .vhd / .vhdx file.
Step 4. Select VMware growable image (VMDK) as the output format.
Step 5. Choose the destination location.
Step 6. Start conversion and wait until completed.
Step 7. Create a new VM in VMware → select Use an existing virtual disk → attach the converted VMDK.
Method 2. Using qemu-img (fast & professional CLI)
Advanced users and administrators often prefer command-line tools because they are faster, scriptable, and highly reliable. qemu-img is widely used in enterprise virtualization environments and supports dozens of disk formats, making it ideal for bulk or automated conversions.
Step 1. Download qemu-img (included in QEMU tools).
Step 2. Input the command: qemu-img convert -f vpc -O vmdk source.vhd destination.vmdk
If the disk is VHDX, type this command:
qemu-img convert -f vhdx -O vmdk source.vhdx destination.vmdk
✍ Notes:
◈ Very fast conversion
◈ No OS repair included
◈ You may need to fix boot loader afterward
Method 3. Using VMware vCenter Converter (official VMware tool)
For enterprise or production environments, VMware’s official converter provides the highest compatibility and reliability. It doesn’t just convert disks — it can rebuild drivers, adjust boot configuration, and prevent boot failures after migration between Hyper-V and VMware platforms.
Step 1. Install VMware vCenter Converter Standalone.
Step 2. Choose Convert Machine.
Step 3. Click Source type → Hyper-V Virtual Machine or powered-off image.
Step 4. Select Destination → VMware Workstation / ESXi.
Step 5. Start migration. This converts and adjusts drivers automatically.
A professional tool to manage VHD disks easily
Managing VHD (Virtual Hard Disk) files in Windows can quickly become complicated. Native Windows tools like Disk Management or DiskPart only offer basic attach/detach functions, and anything more advanced — resizing, repairing boot issues, cloning, or converting — usually requires command-line knowledge.
AOMEI Partition Assistant is a professional disk management utility that greatly simplifies VHD operations by turning complex tasks into a visual, step-by-step workflow.
1. How to Create VHD
If you want to create a VHD, you can follow the steps below:
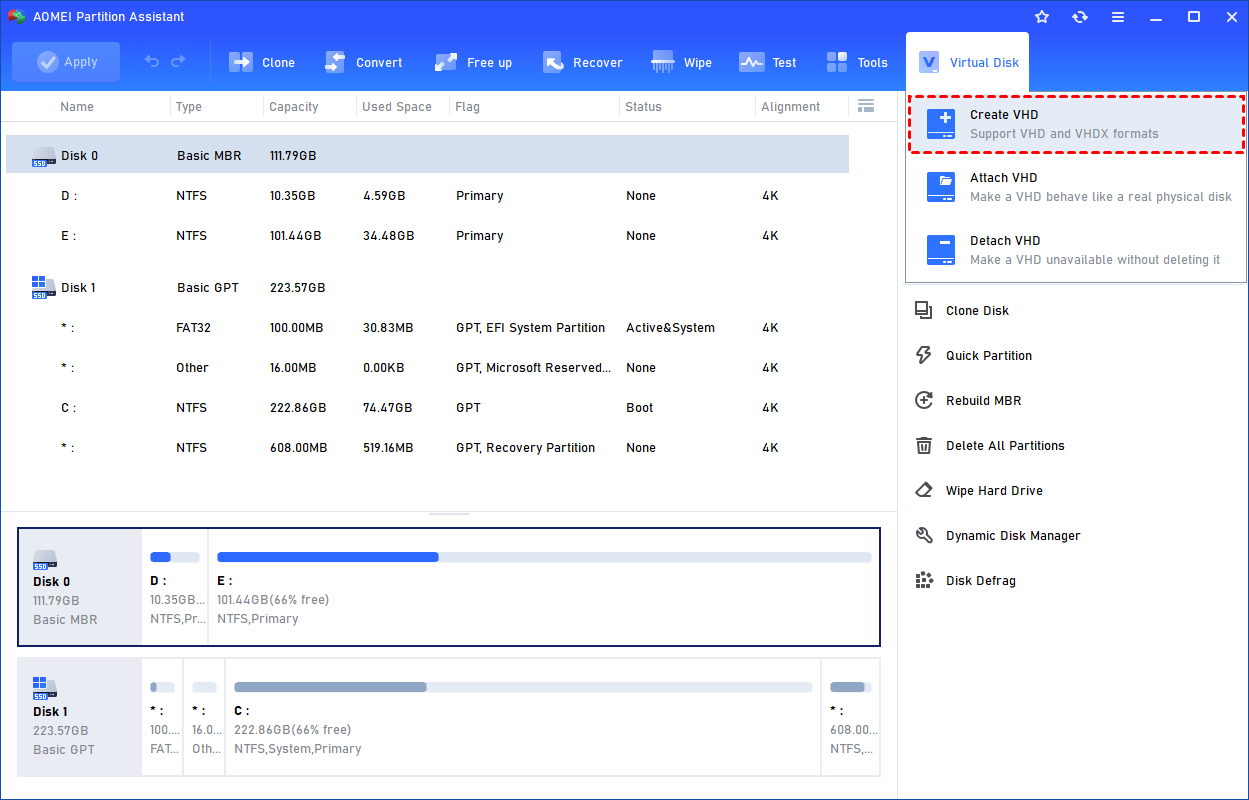
Step 1. Click the tab "Virtual Disk", you will see 3 options available for VHDs: create VHD, attach VHD, and detach VHD. Select the "Create VHD" option after clicking the "Virtual Disk" tab.
Step 2. You can specify the virtual disk location and size.
Optionally, you can click the "Advanced" option to set the virtual hard disk format and type. (By default, the VHDX format and the Dynamically expanding type are checked.)
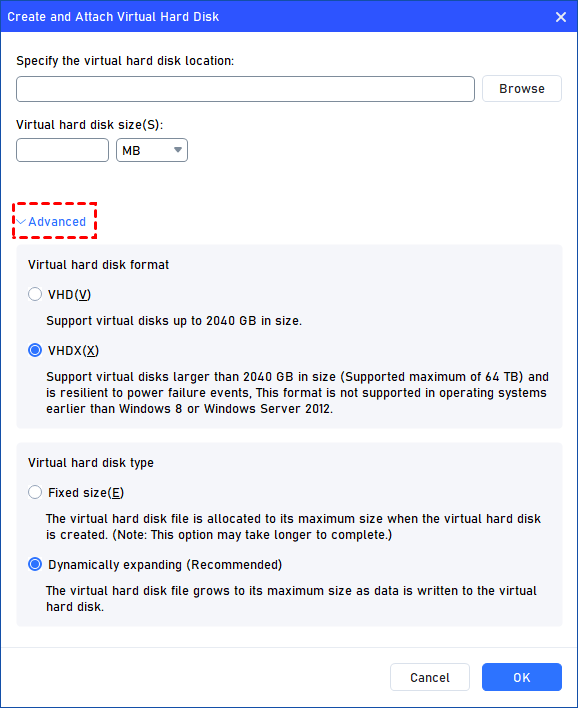
Virtual hard disk format: VHD and VHDX are supported.
For VHD, it supports virtual disks up to 2040GB in size.
For VHDX, it supports virtual disks larger than 2040GB in size. (Up to 64TB) This format is not supported in operating systems earlier than Windows 8 or Windows Server 2012.
Virtual hard disk format: Fixed size and Dynamically expanding are supported.
For fixed size, the virtual hard disk file will be allocated its maximum size when it is created. So it will take much longer to create.
For Dynamically expanding, the virtual hard disk file will grow to its maximum size as data is written to it. (Recommended)
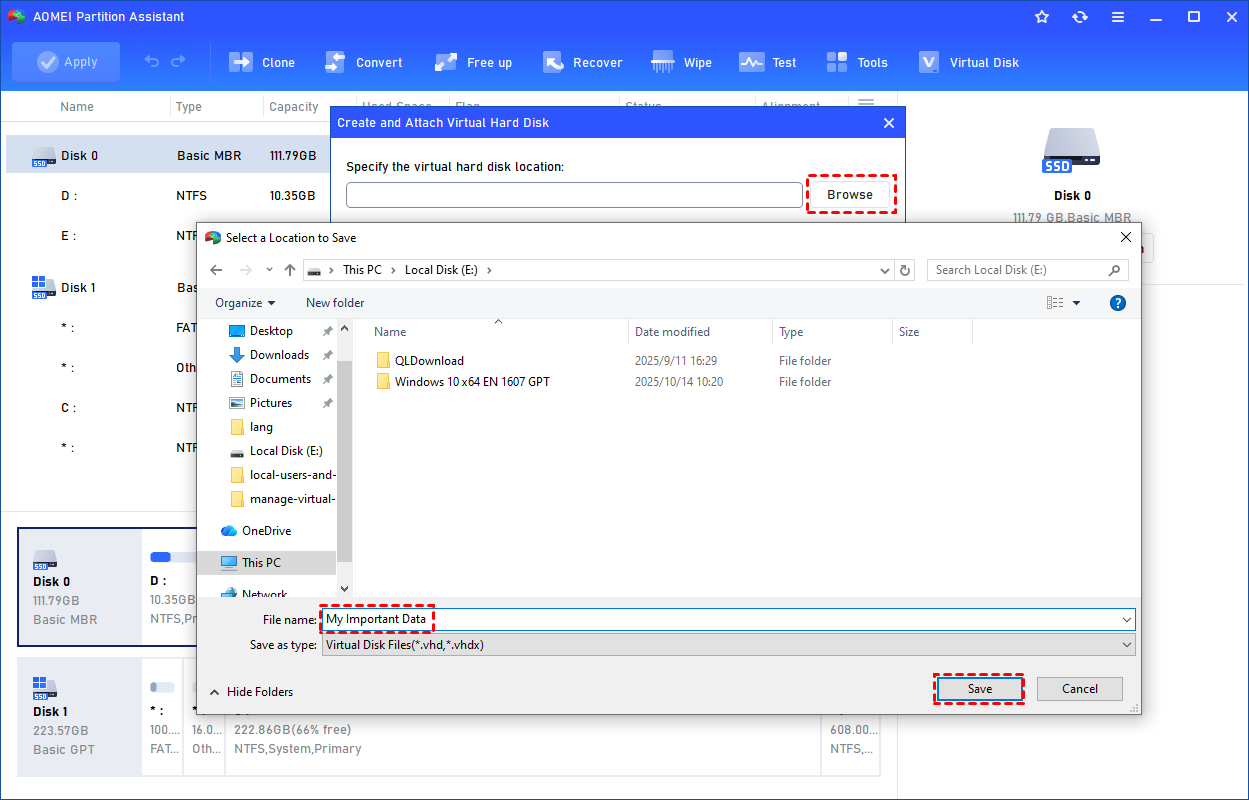
Click "Browse" to select a location to create the VHD. Please enter a file name for the virtual disk and click "Save".
Step 3. Once the virtual disk location and size are set up, you can click "OK" to start creating the VHD.

Step 4. After the reload process is finished, you will see that the VHD has been created successfully. It will be attached automatically.
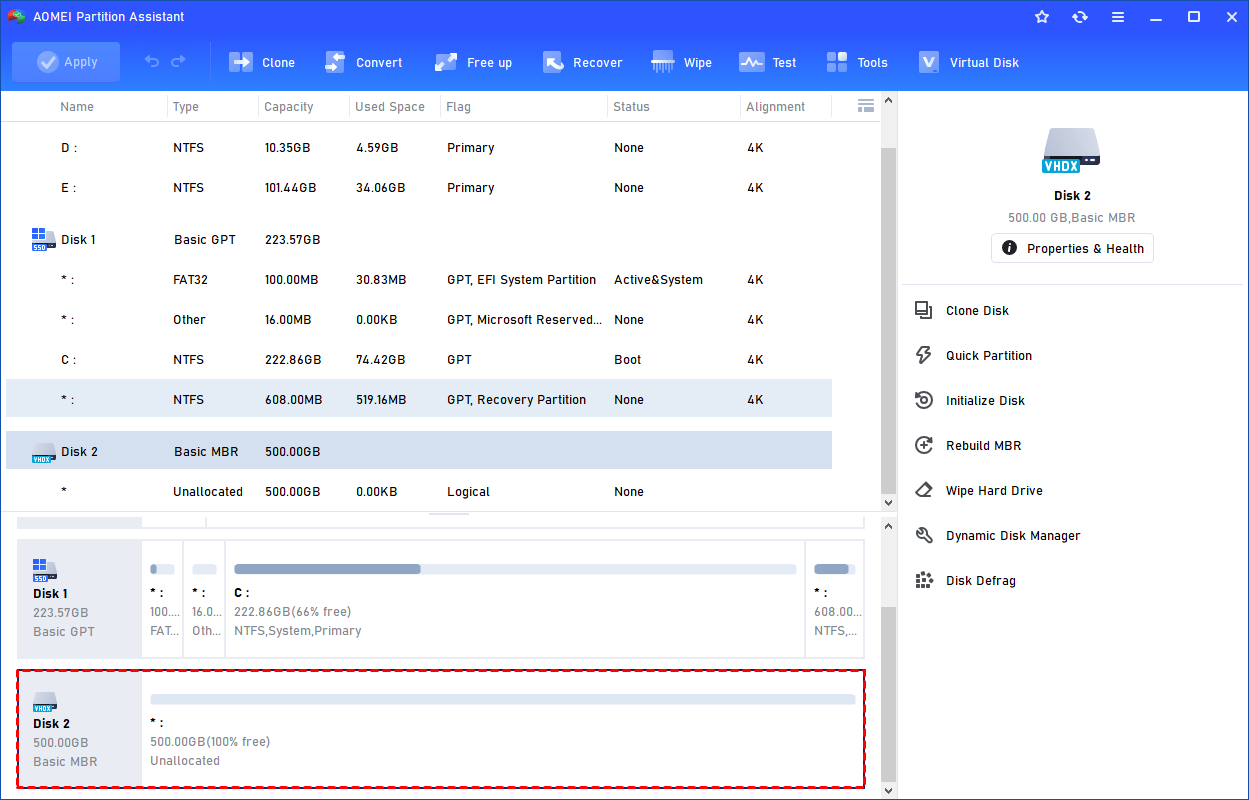
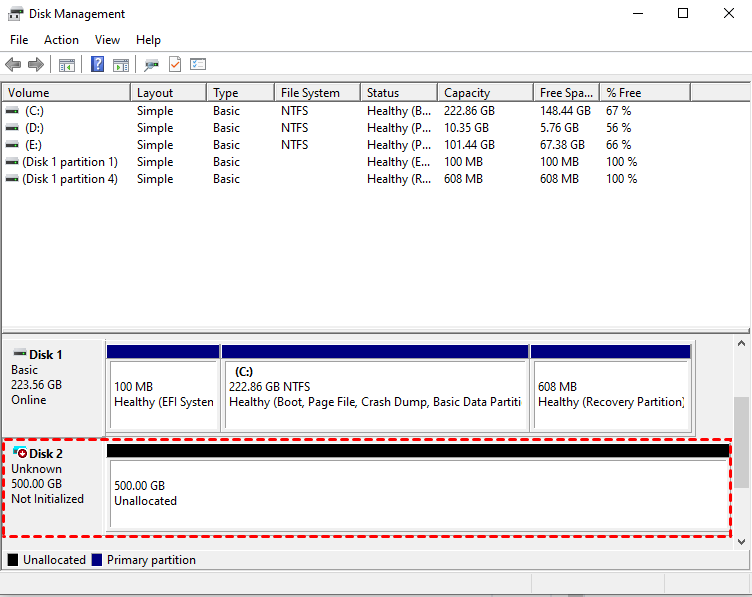
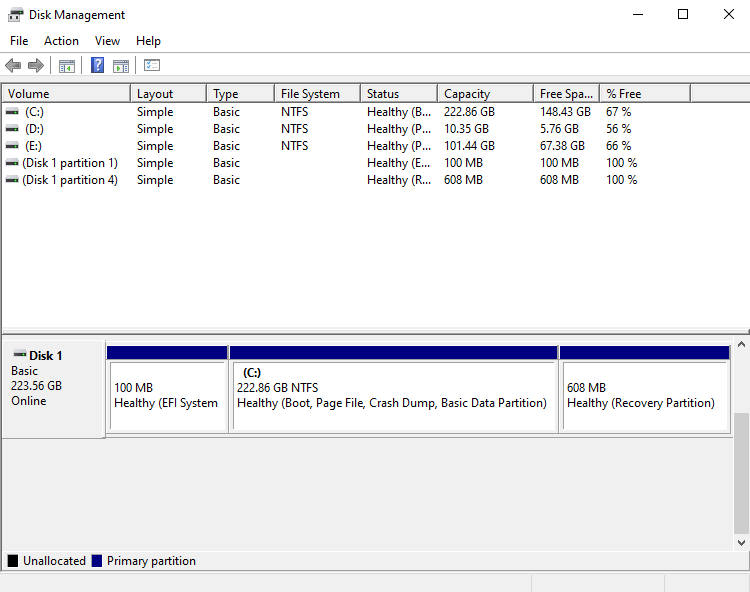
You can also view the VHD in Windows Disk Management.
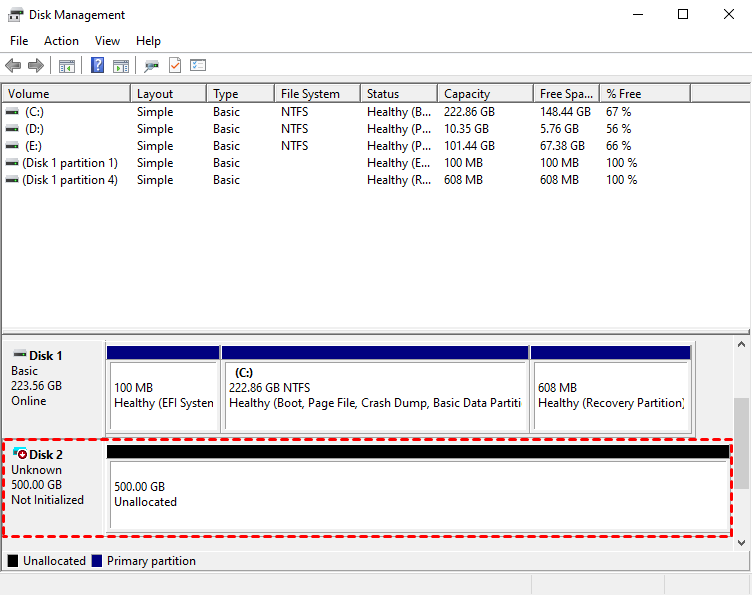
The created VHD will be uninitialized so it is empty without any data or file system. To make it useful, you need to initialize the disk, create a partition, and assign a drive letter.
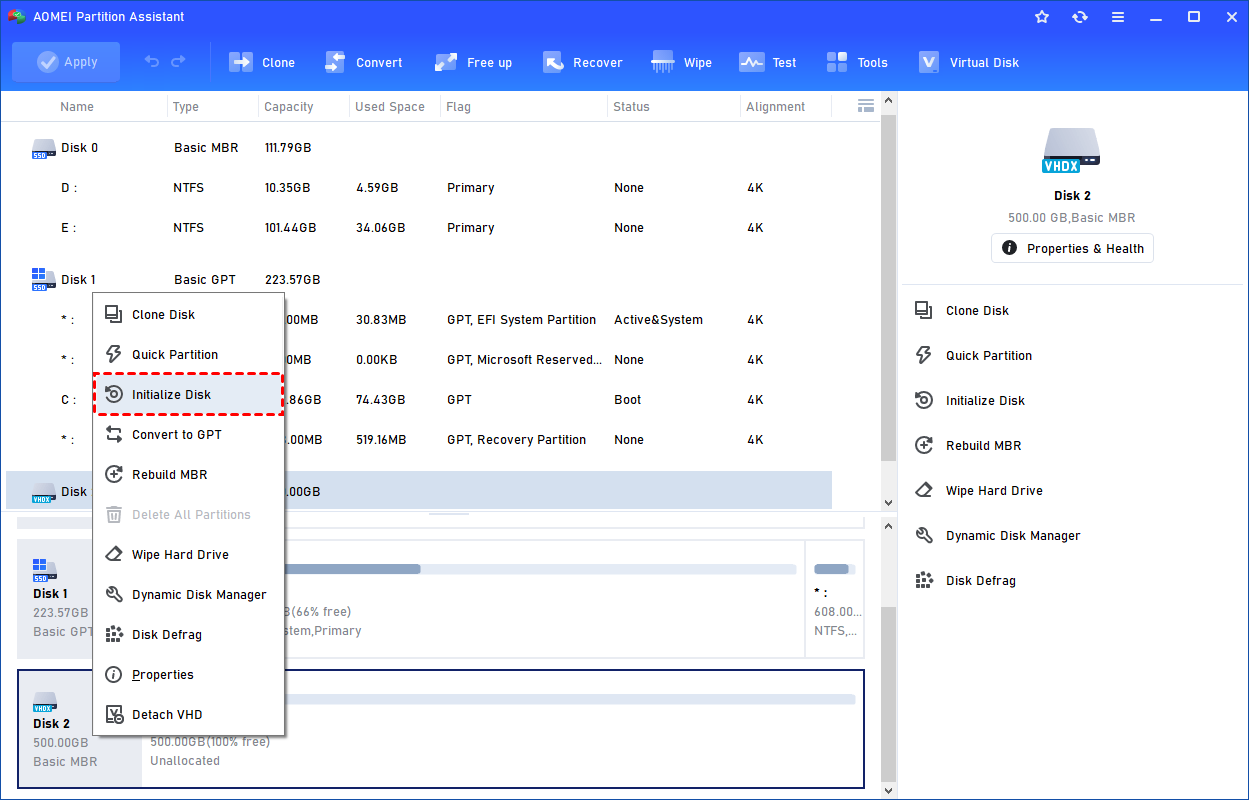
You can initialize the drive in Partition Assistant.
Or, initialize it in Windows Disk Management.

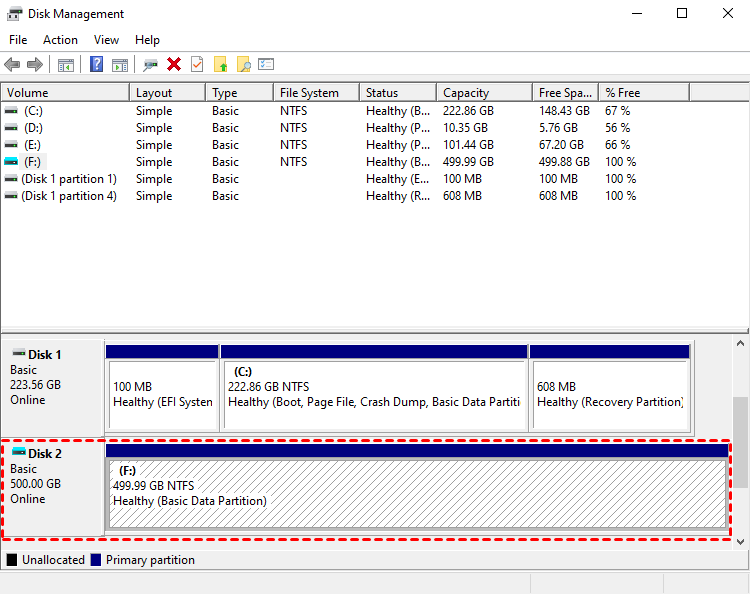
Then, you can create a partition and assign a drive letter for the partition. Finally, you can use the VHD normally.
2. How to Attach VHD
A VHD is a container file that holds a virtual disk image. Until it is attached, Windows sees it only as a regular file. Once attached, Windows mounts it as a virtual disk, assigns a drive letter, and allows access to its file system. You can only perform disk operations, such as cloning VHD to HDD, checking for corruption or errors, or resizing partitions, after attaching it. Detaching the VHD safely removes it from the system without deleting the file.
Step 1. Select the "Attach VHD" option after clicking the"Virtual Disk" tab.

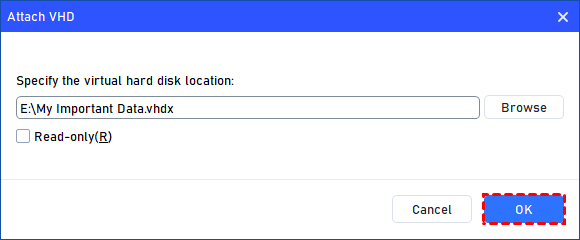
Step 2. Click "Browse" to locate the location where the .vhd or .vhdx file is saved. Select the .vhd or .vhdx file you want to attach and click "Open" to attach it.

Step 3. Once the virtual file is selected, you can click "OK" to start attaching the VHD.
Step 4. Once the process is finished, you will see that the VHD is attached successfully.
3. How to Detach VHD
If the VHD is not necessary, you can remove it by detaching the VHD.
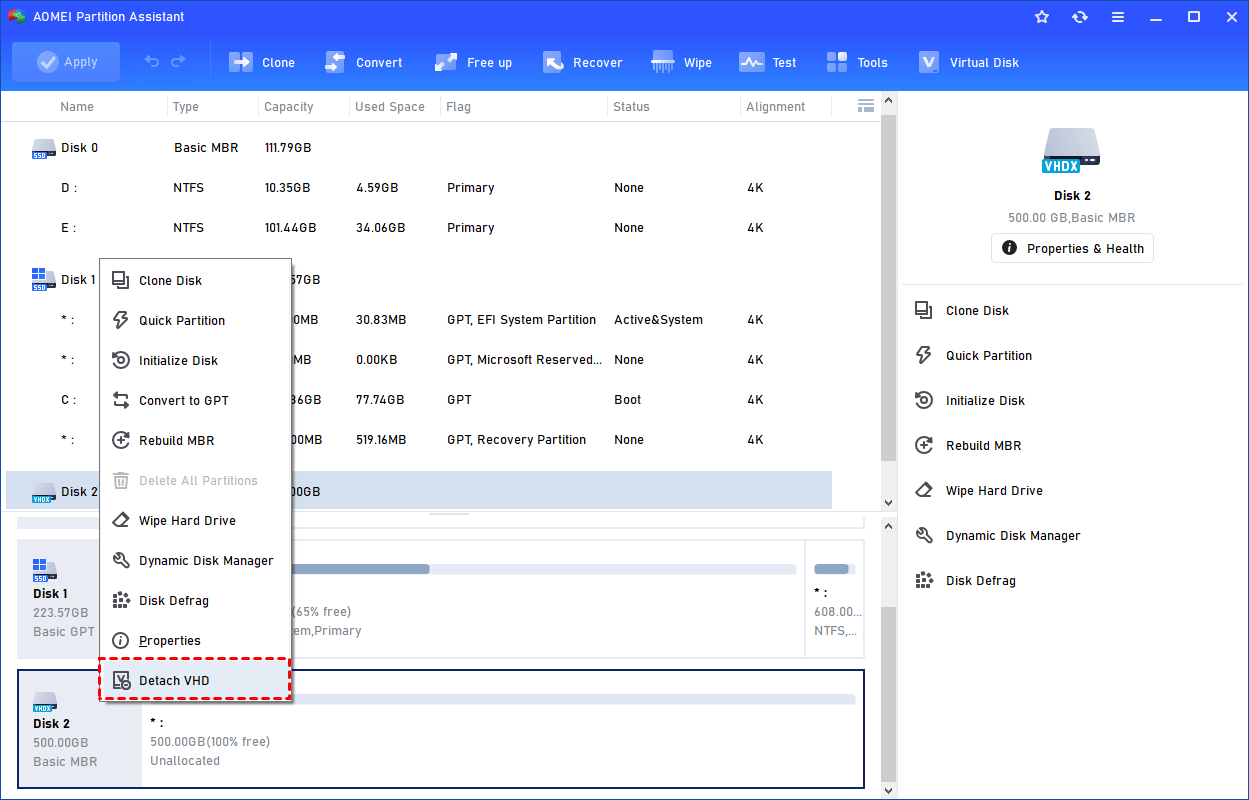
Step 1. You can right-click the attached VHD in Partition Assistant and select the "Detach VHD" option to detach it.
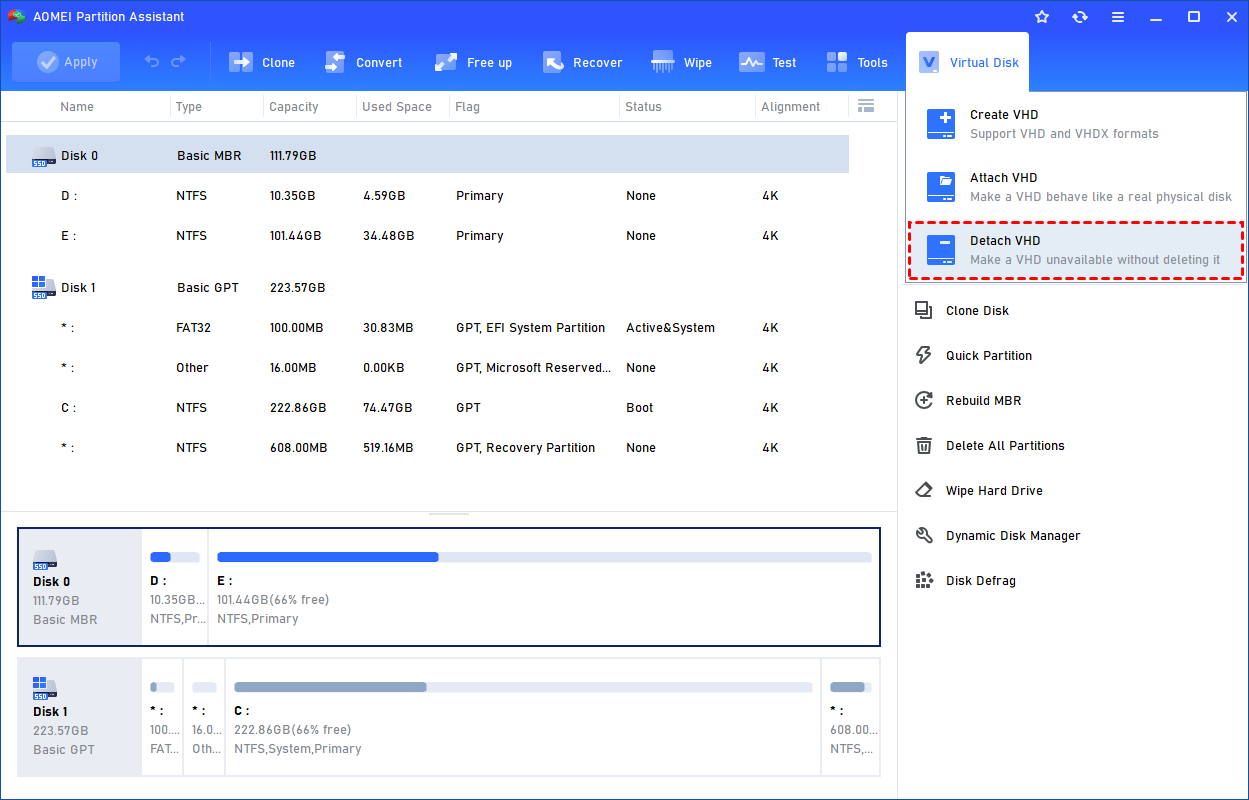
Or, you can select the "Detach VHD" option after clicking the"Virtual Disk" tab.
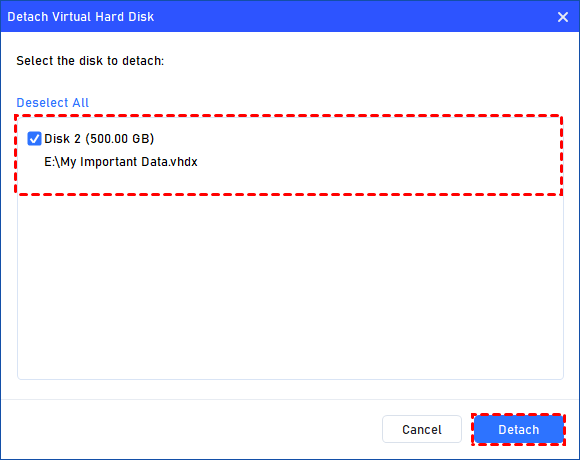
Step 2. You can select and deselect the virtual disk(s) and click the "Detach" button to start detaching the VHD(s).
Step 3. Once the process is finished, you will see that the VHD(s) has been removed successfully.
FAQs
1. Can VMware open a VHD file directly?
No. VMware primarily uses the VMDK format. A VHD must be converted to VMDK first, otherwise the virtual machine won’t recognize or boot from the disk properly.
2. Will converting VHD to VMDK delete my data?
No, conversion normally keeps all data intact because it changes the disk format, not the contents. However, corruption or interruption during conversion can cause loss, so backing up the VHD is recommended.
3. Do I need to recreate the virtual machine after conversion?
Usually no. You can attach the converted VMDK to an existing VM by editing its disk settings. Only create a new VM if the old configuration becomes incompatible.
4. Is the conversion process fast?
It depends on disk size, storage speed, and tool used. Small disks convert in minutes, while large multi-hundred-GB VHDs can take significantly longer.
5. Can I convert multiple VHD files at once?
Some tools support batch conversion, but many only process one disk at a time. Command-line utilities and enterprise converters typically provide multi-disk or scripted conversion options.
Conclusion
In short, converting VHD to VMDK bridges the gap between Hyper-V and VMware, allowing seamless migration without rebuilding virtual machines. Whether you choose a beginner-friendly GUI tool, a powerful command-line utility, or an enterprise-grade converter, the process ensures compatibility, stability, and performance—making your virtualization environment more flexible, efficient, and future-ready.

