Change Partition Label
Partition label is an optional name assigned to a partition to easily recognize your partitions. For example, one could be called WinXP which represents your system partition, and Games which represents a partition with games stored.
Overview of partition label
In order to better recognize your partitions, adding or changing a partition label is the most effective way. For instance, you could label a partition as “Entertainment” if it is mainly stored with games and films or you could also label a partition which is full of business information and application softwares as “Work”, say, D: Entertainment or E: Work. For this purpose AOMEI Partition Assistant provides a powerful feature – Change Label. This function is specialized in facilitating desired files and documents, and in this way, user will enjoy a considerably convenient files searching experience.
How to change partition label
Before you do
Users could download AOMEI Partition Assistant at the AOMEI Partition Assistant Download Center.
Step 1: Select a partition to change partition label
After installing Aomei Partition Assistant on your pc, run it, and you will find there are 2 solutions to change the partition label.
Situation 1: Right-click one partition you want to change its label, click "Advanced"> "Change Label" feature.
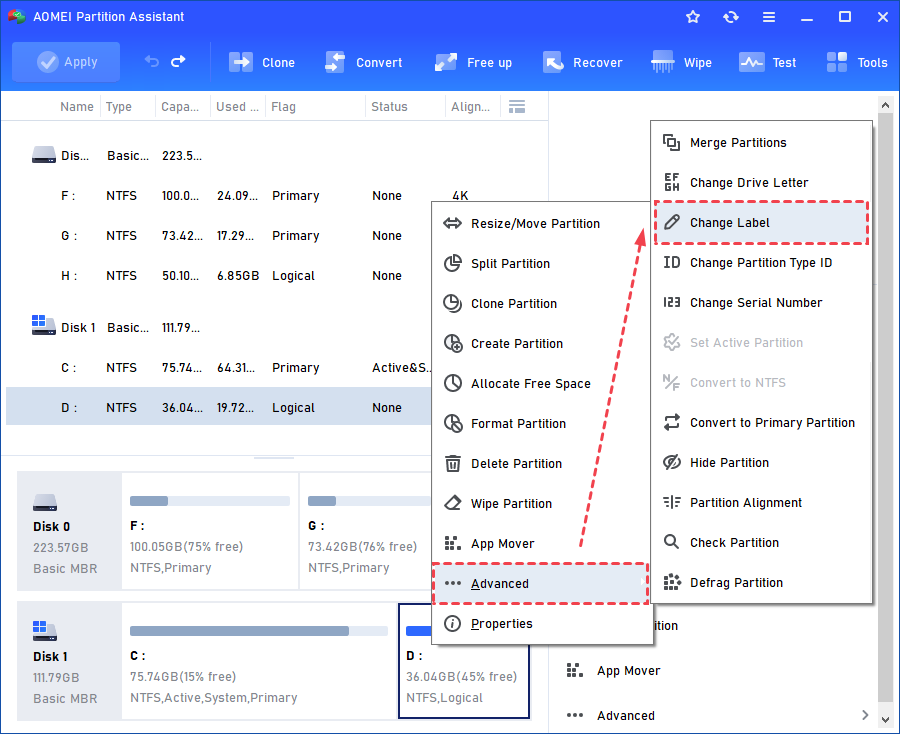
Solution 2: Highlight the partition you want to change its label. On the right side of the Aomei Partition Assistant interface, you can click the "Change Label".

No matter which solution you use, click "Advanced"> "Change Label" and you can change its label. Let's take D: partition as an example.
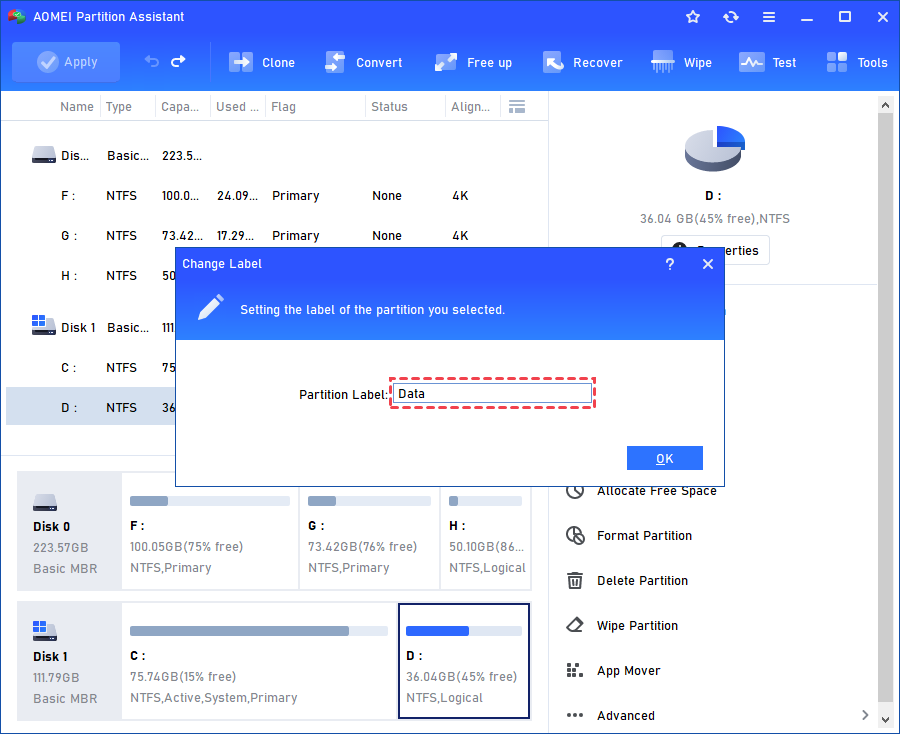
Step 2: Set label for partition
1. Click "Change Label" and then set the label for the partition.
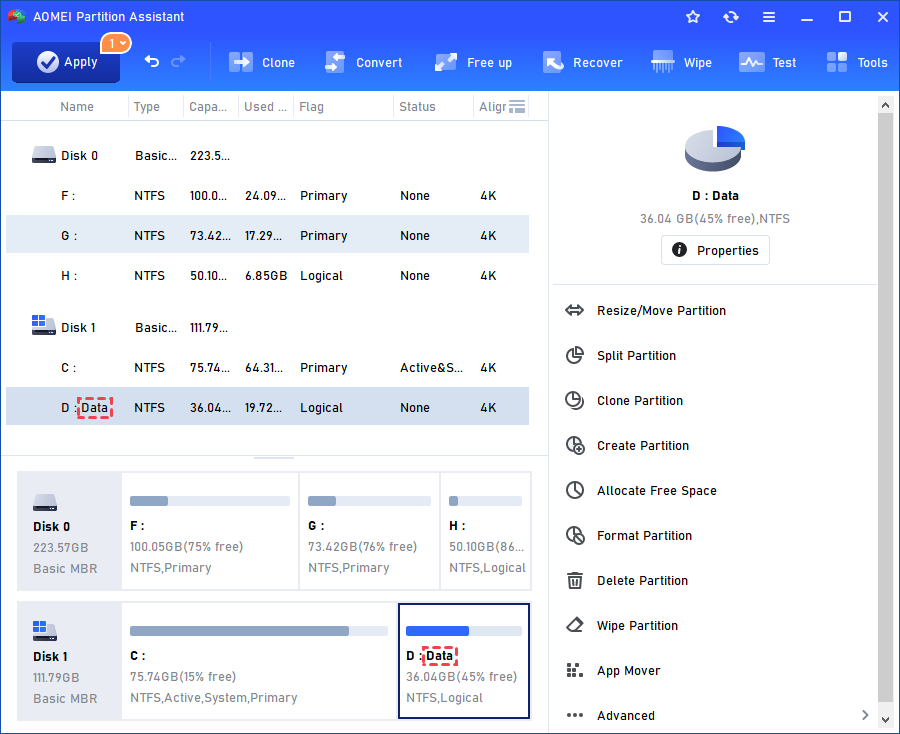
2. Click "OK" and you will see new partition label has been added to C partition.
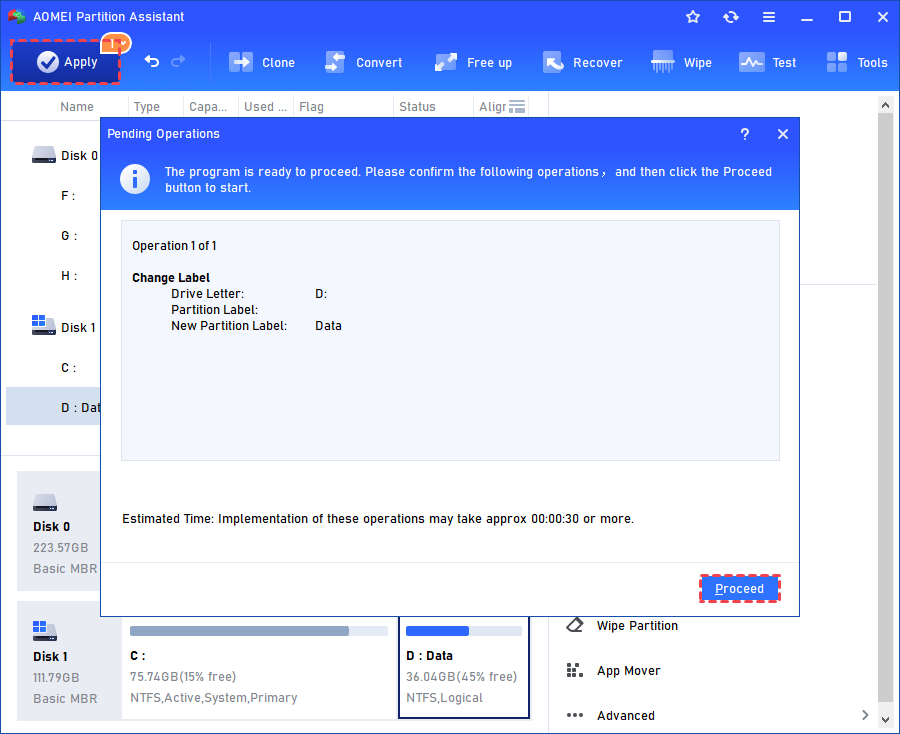
Step 3: Apply to proceed
Click "Apply" in the upper left corner of the interface to commit the operation and click "Proceed" to start the operation.
Notes:
-
The partition label can be at most 11 characters long for the FAT/FAT32 file system. But for NTFS, it enjoys a maximum length of 32 characters.
-
When you change the label for the system partition (Usually it is C: drive), operations need to enter reboot mode to complete.