How to Manage Virtual Disks on Windows PC?
With the "Virtual Disk" feature in Partition Assistant, you can easily create, attach, and detach virtual hard disks (VHDs) in Windows.
Introduction
VHDs (Virtual Hard Disks) are usually used to store and run virtual machines, back up data in a way that mimics a physical hard drive, and so on. They are disk image file formats that have similar functionalities to a physical hard drive. The common VHD file type is .vhd or .vhdx (recommended). On virtual disks, you can store any files, including songs, videos, documents, pictures, boot files, entire OS installation, and so on.
With the feature "Virtual Disk" in Partition Assistant, you can easily create, attach, and detach your virtual disks on your computer.
How to Manage Virtual Disks with AOMEI Partition Assistant
Before you do
- Download and install AOMEI Partition Assistant on a Windows computer on which you need to create and manage virtual disks.
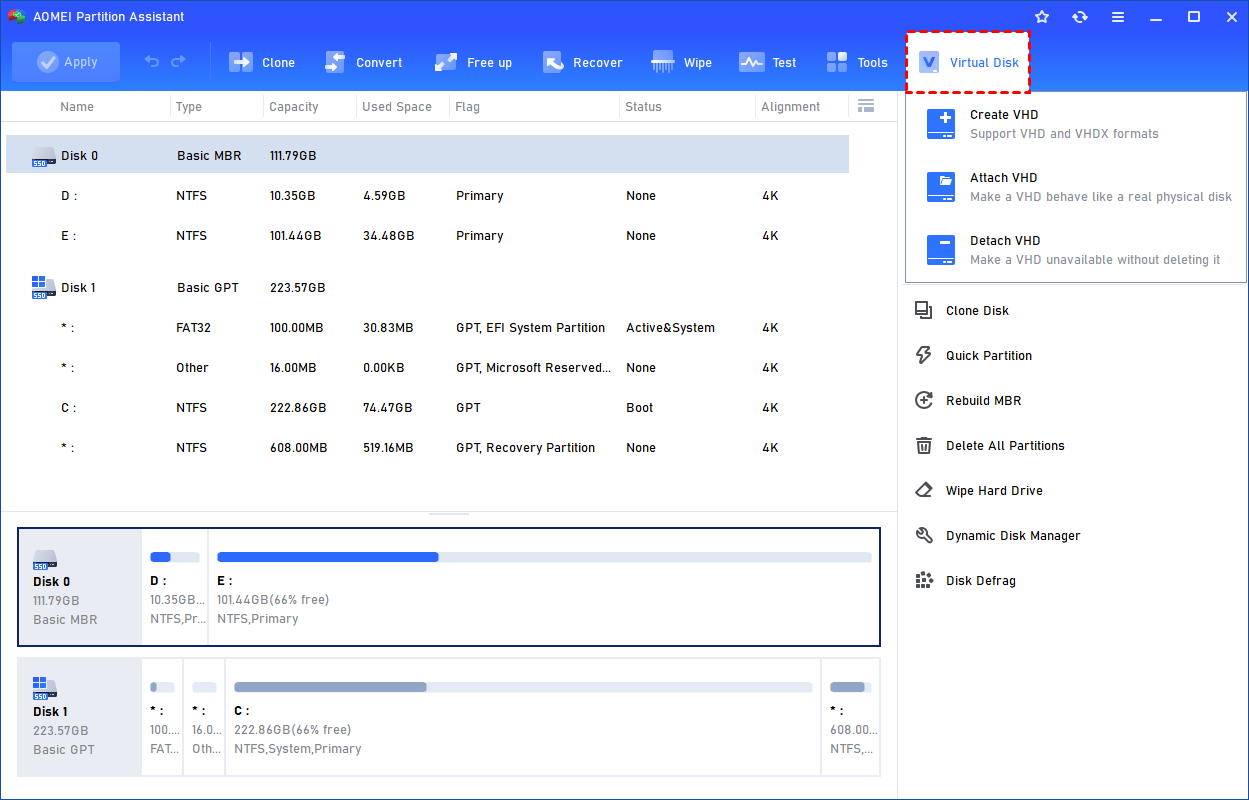
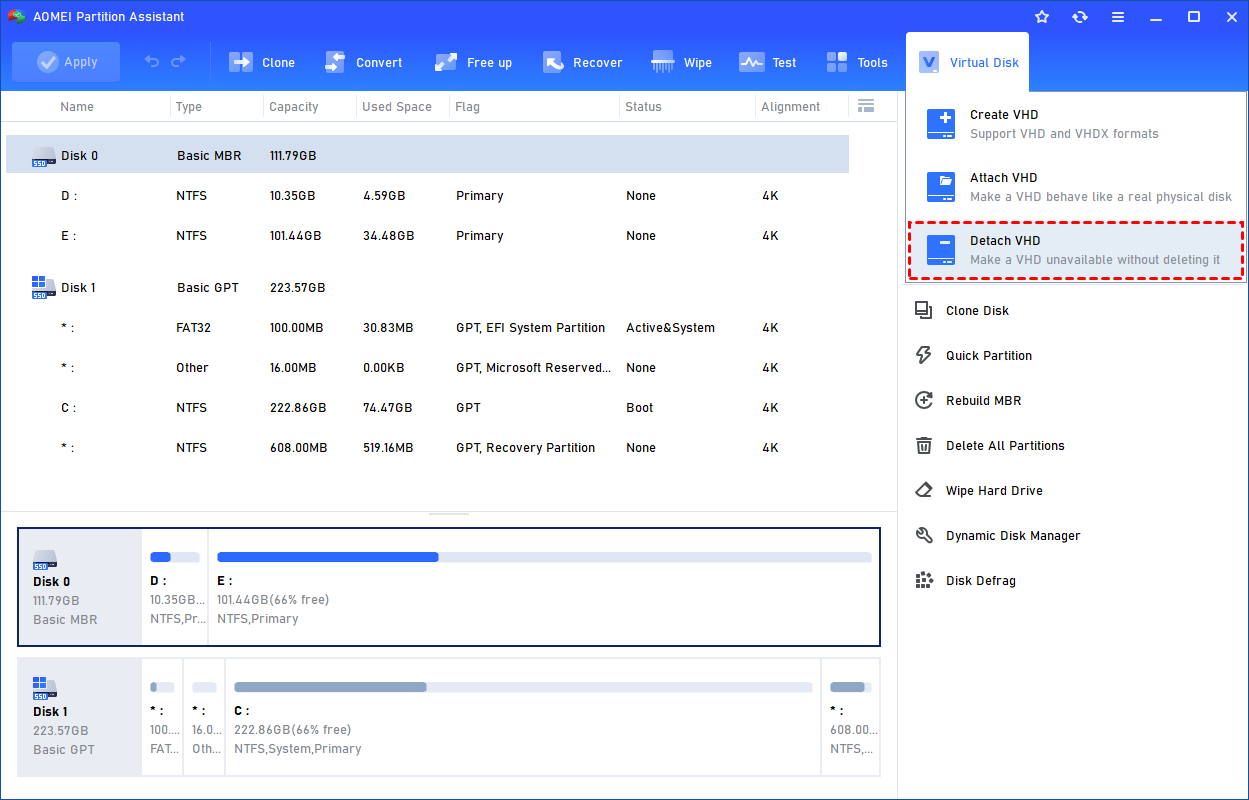
Click the tab "Virtual Disk", you will see 3 options available for VHDs: create VHD, attach VHD, and detach VHD.
How to Create VHD
If you want to create a VHD, you can follow the steps below:
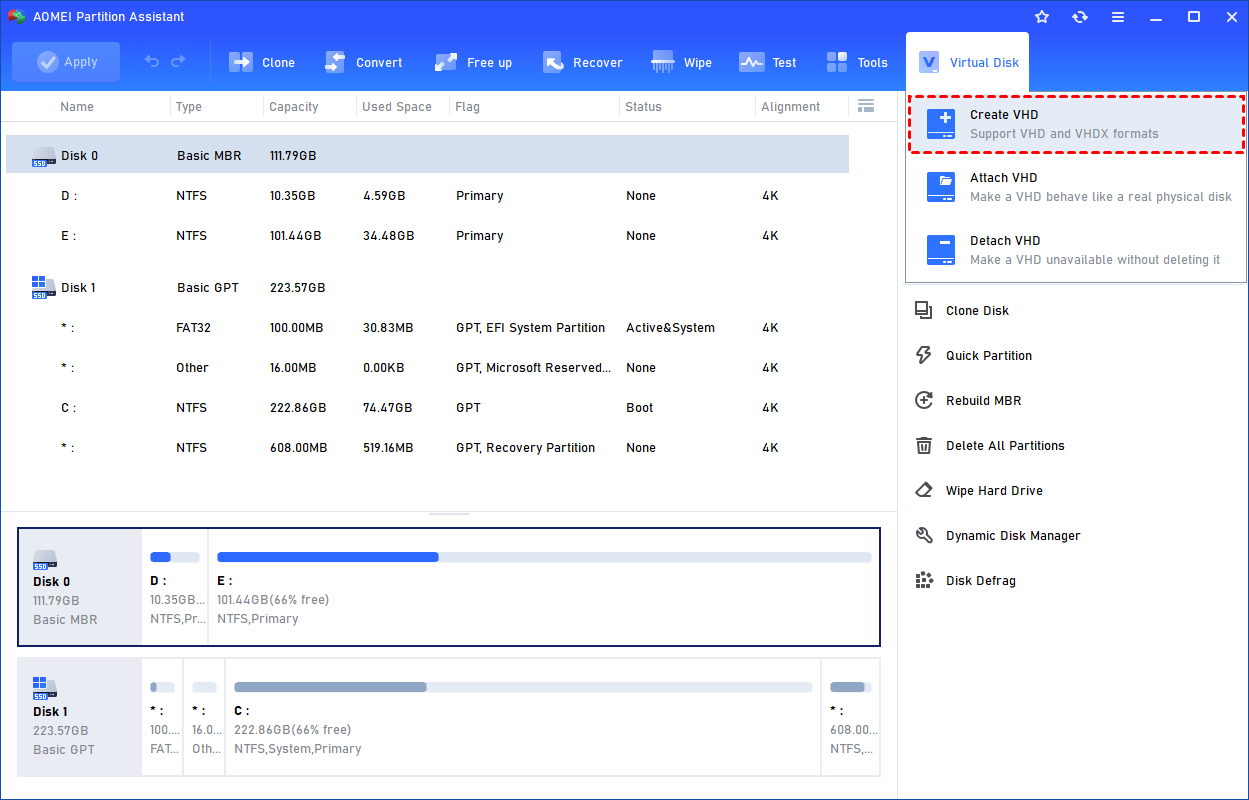
Step 1: Click "Create VHD" to Create VHD or VHDX.
Select the "Create VHD" option after clicking the "Virtual Disk" tab.
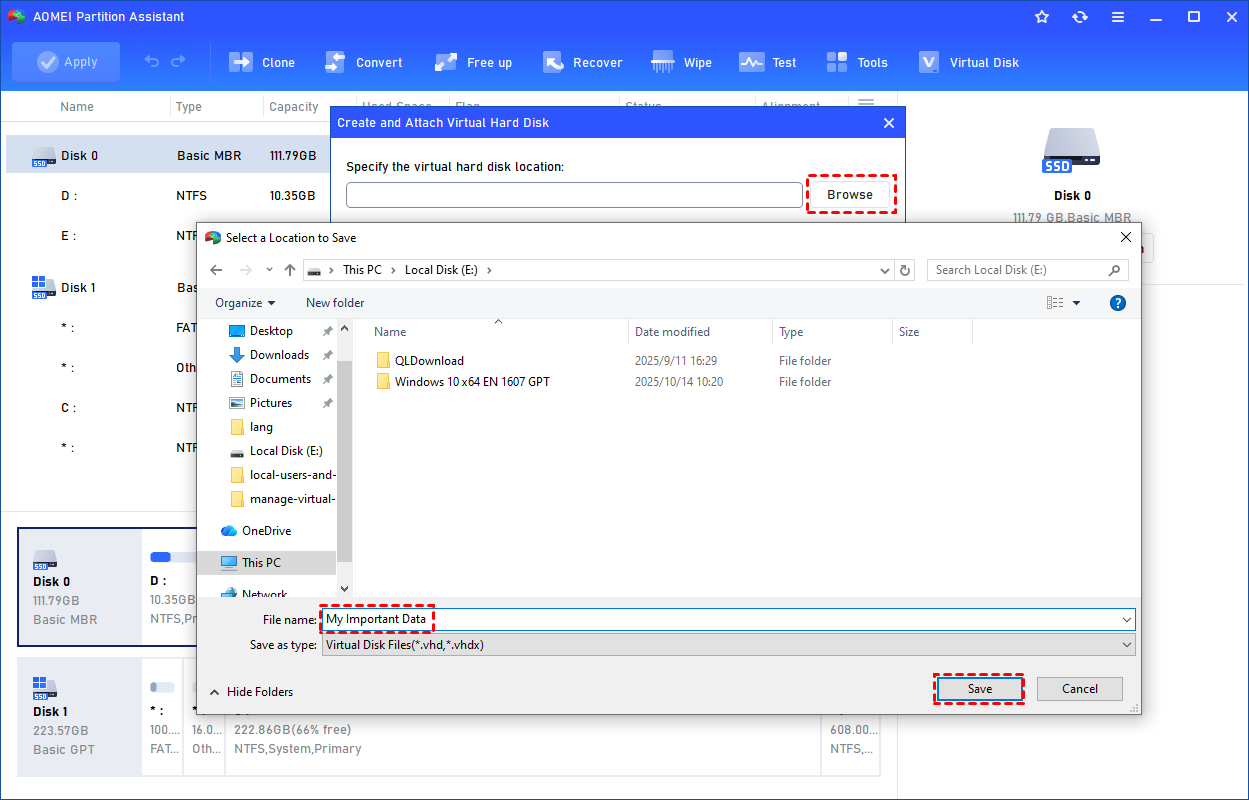
Step 2: Specify VHD Location and Size(s).
You can specify the virtual disk location and size.
Optionally, you can click the "Advanced" option to set the virtual hard disk format and type. (By default, the VHDX format and the Dynamically expanding type are checked.)
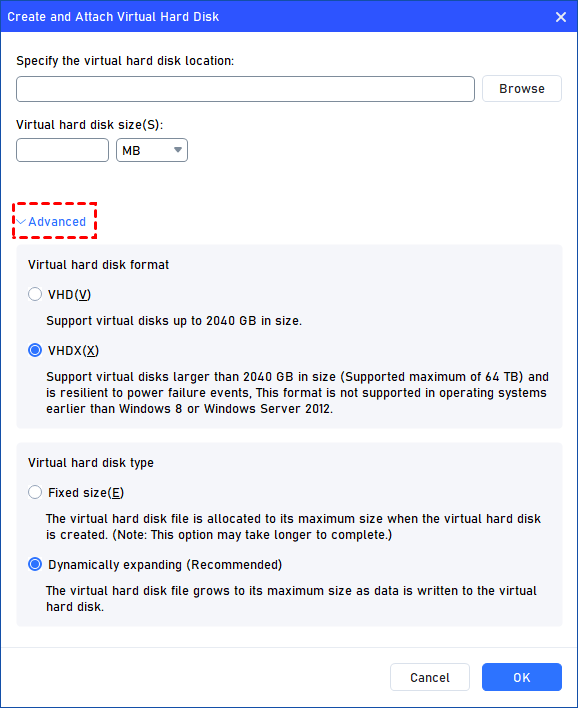
Virtual hard disk format: VHD and VHDX are supported.
For VHD, it supports virtual disks up to 2040GB in size.
For VHDX, it supports virtual disks larger than 2040GB in size. (Up to 64TB) This format is not supported in operating systems earlier than Windows 8 or Windows Server 2012.
Virtual hard disk format: Fixed size and Dynamically expanding are supported.
For fixed size, the virtual hard disk file will be allocated its maximum size when it is created. So it will take much longer to create.
For Dynamically expanding, the virtual hard disk file will grow to its maximum size as data is written to it. (Recommended)
Click "Browse" to select a location to create the VHD. Please enter a file name for the virtual disk and click "Save".
Step 3: Start Creation VHD.
Once the virtual disk location and size are set up, you can click "OK" to start creating the VHD.

Step 4: Create the VHD Successfully.
After the reload process is finished, you will see that the VHD has been created successfully. It will be attached automatically.
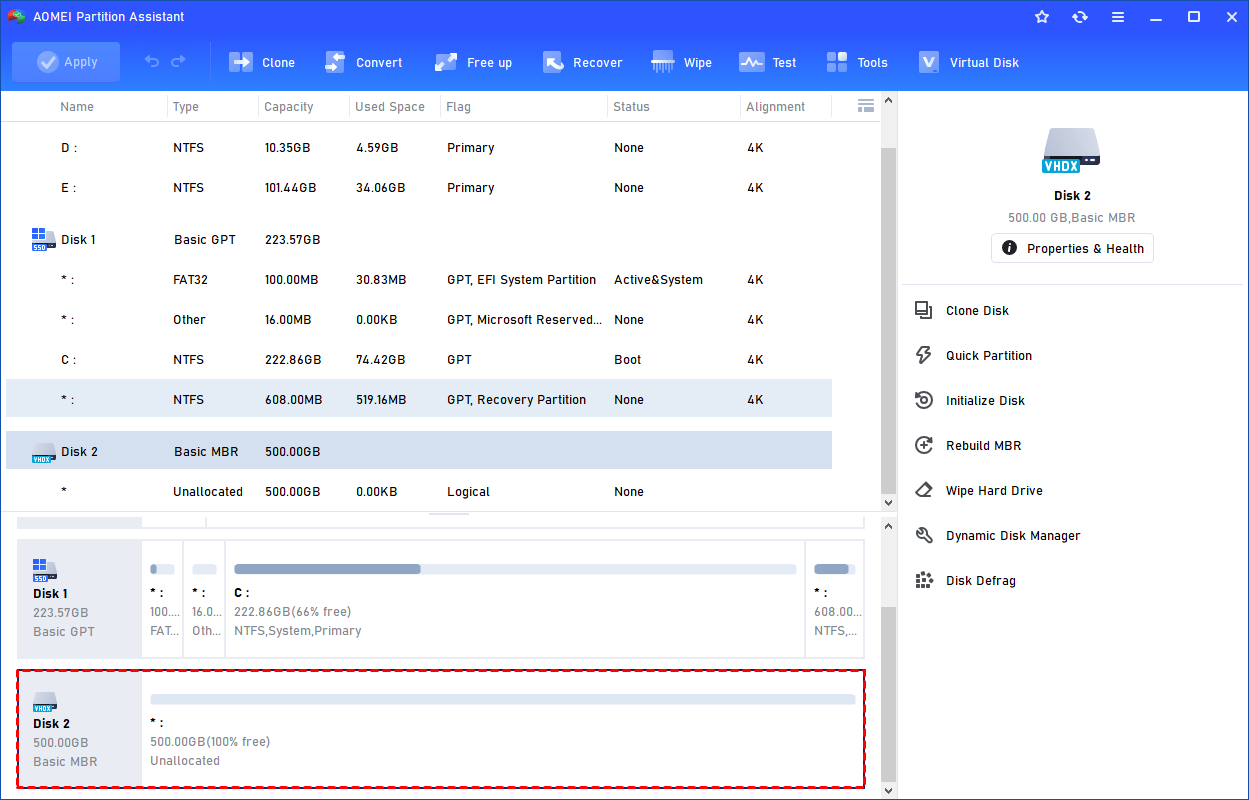
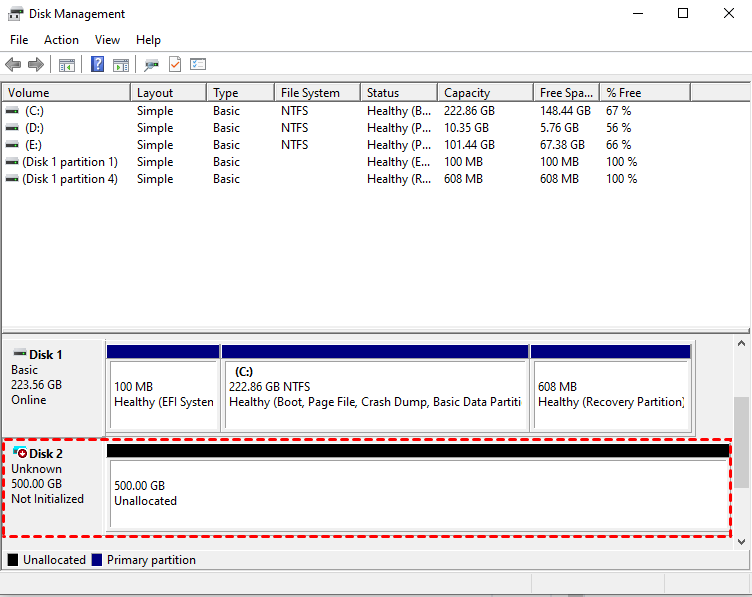
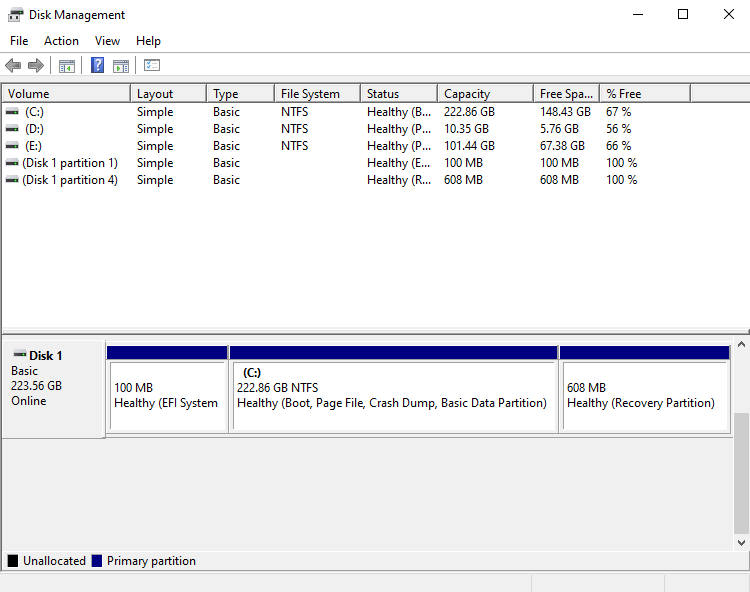
You can also view the VHD in Windows Disk Management.
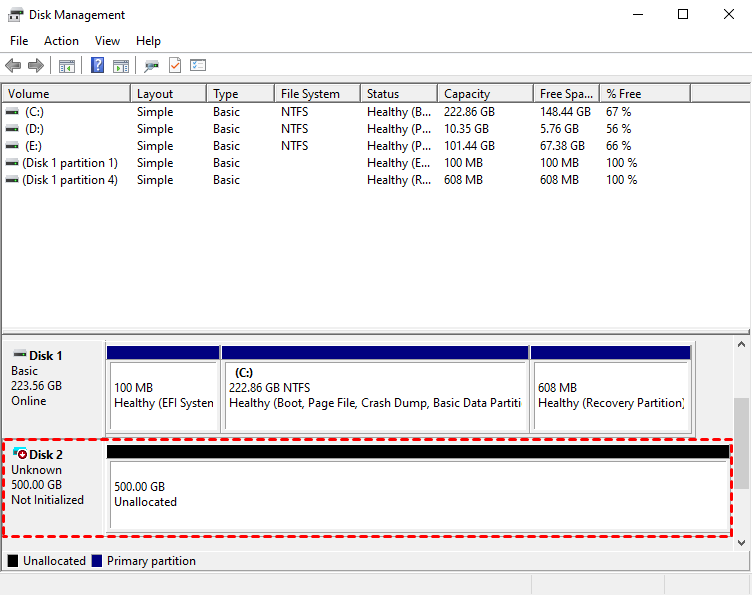
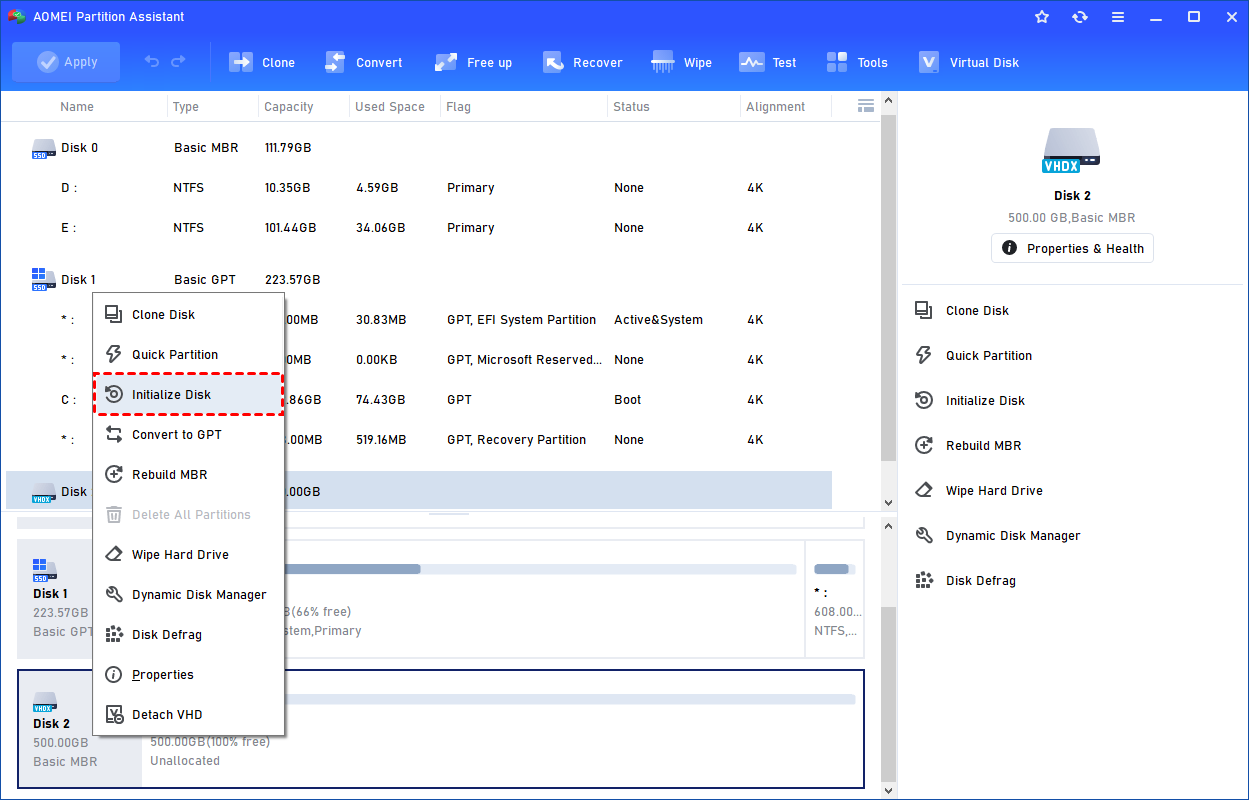
The created VHD will be uninitialized so it is empty without any data or file system. To make it useful, you need to initialize the disk, create a partition, and assign a drive letter.
You can initialize the drive in Partition Assistant.
Or, initialize it in Windows Disk Management.

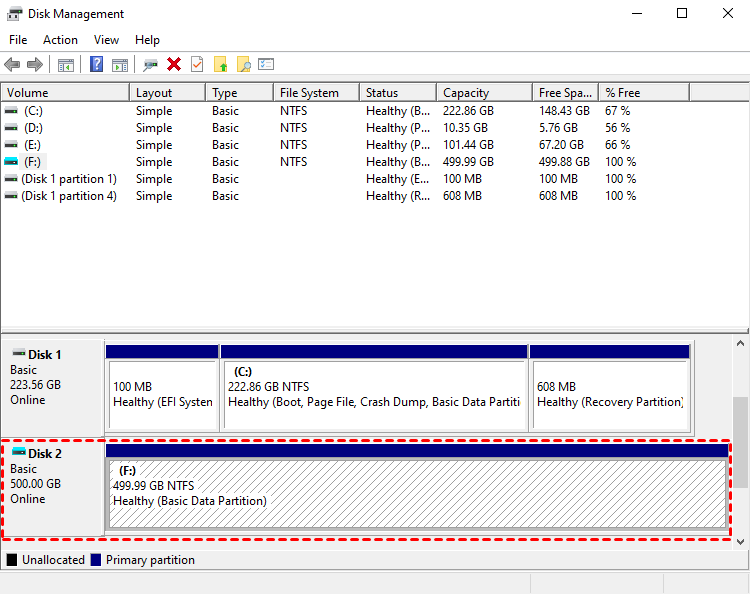
Then, you can create a partition and assign a drive letter for the partition. Finally, you can use the VHD normally.
How to Attach VHD
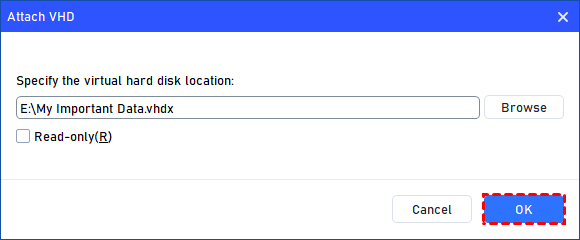
If you have a .vhd or .vhdx file but the virtual disk is not displayed, you can attach the VHD to make it behave like a real physical disk.
Step 1: Click "Attach VHD".
Select the "Attach VHD" option after clicking the"Virtual Disk" tab.

Step 2: Browse and Select VHD File.
Click "Browse" to locate the location where the .vhd or .vhdx file is saved. Select the .vhd or .vhdx file you want to attach and click "Open" to attach it.

Step 3: Start Attach VHD.
Once the virtual file is selected, you can click "OK" to start attaching the VHD.
Step 4: Attach VHD Successfully.
Once the process is finished, you will see that the VHD is attached successfully.
How to Detach VHD
If the VHD is not necessary, you can remove it by detaching the VHD.
Step 1: Click "Detach VHD".
You can right-click the attached VHD in Partition Assistant and select the "Detach VHD" option to detach it.
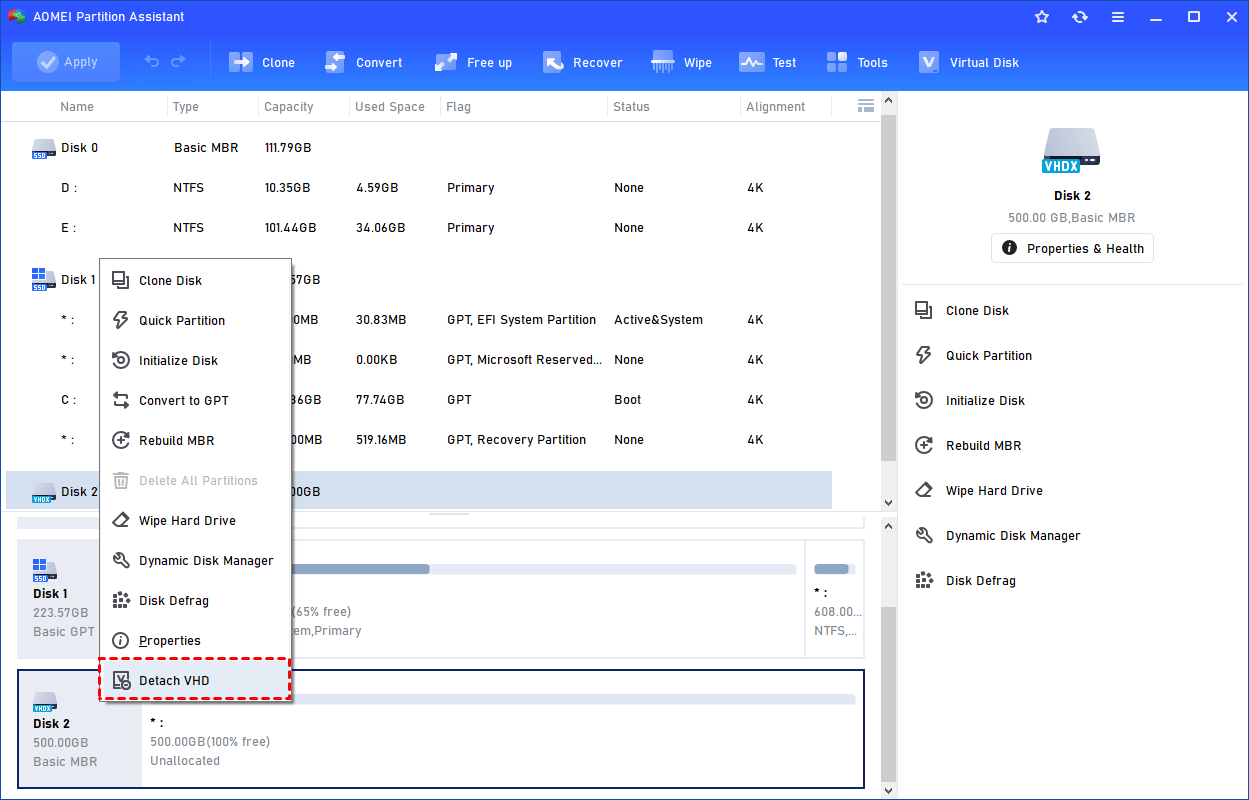
Or, you can select the "Detach VHD" option after clicking the"Virtual Disk" tab.
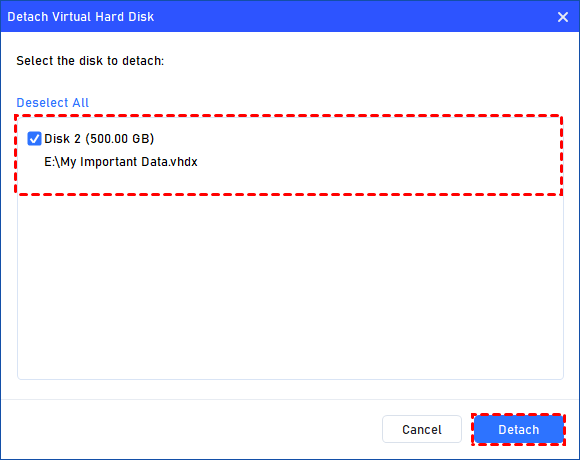
Step 2: Select the Virtual Disk(s) to Detach.
You can select and deselect the virtual disk(s) and click the "Detach" button to start detaching the VHD(s).
Step 3: Detach VHD Successfully.
Once the process is finished, you will see that the VHD(s) has been removed successfully.
Conclusion
Following the above steps, you can easily create and manage VHDs on your computer with the help of the new "Virtual Disk" feature in AOMEI Partition Assistant.
It is very useful for you to manage systems, test software, back up data, and so on.
There are many other useful features available in AOMEI Partition Assistant. For example, if you want to manage your Windows user accounts and groups, you can use the "Users and Groups" feature to create and manage Windows users and groups. If you want to fix the boot issue of the computer, you can use the "Boot Repair" feature.